
This blog is the second in the FlexDeploy Loves OIC blog series:
- FlexDeploy Loves OIC: Series Overview
- FlexDeploy Loves OIC: Manage Integrations with Connections
- FlexDeploy Loves OIC: Manage Connection Property Replacement
- FlexDeploy Loves OIC: Continuous Integration
- FlexDeploy Loves OIC: Automated Testing
- FlexDeploy Loves OIC: Continuous Delivery with Pipelines and Releases
- FlexDeploy Loves OIC: Manage Connections, Lookups and Libraries
Oracle Integration Cloud (OIC) provides the ability to develop an integration in the cloud. The integration can connect cloud and/or on-premise applications, however, these integrations are maintained directly in the cloud and not in any Source Code Management (SCM) system. Deploying an integration from one OIC instance to another is a manual process. It requires exporting the integration from one instance and importing the integration into the next instance. In addition, the associated connections must be sync’d between instances.
As the deployments occur across environments, there can be a need to alter the connection properties before the deployment occurs. Using a concept that is similar to a configuration plan in SOA Suite, we have created a connection plan that can be utilized for cross environment property management. Utilizing the connection plan file and FlexDeploy property replacement, we can adjust the connection plan with property values that are appropriate for each deployment.
Using the configurations set in the previous post in this series, we will execute a build/deploy to show the use of a connection plan with OIC integrations.
FlexDeploy Configuration
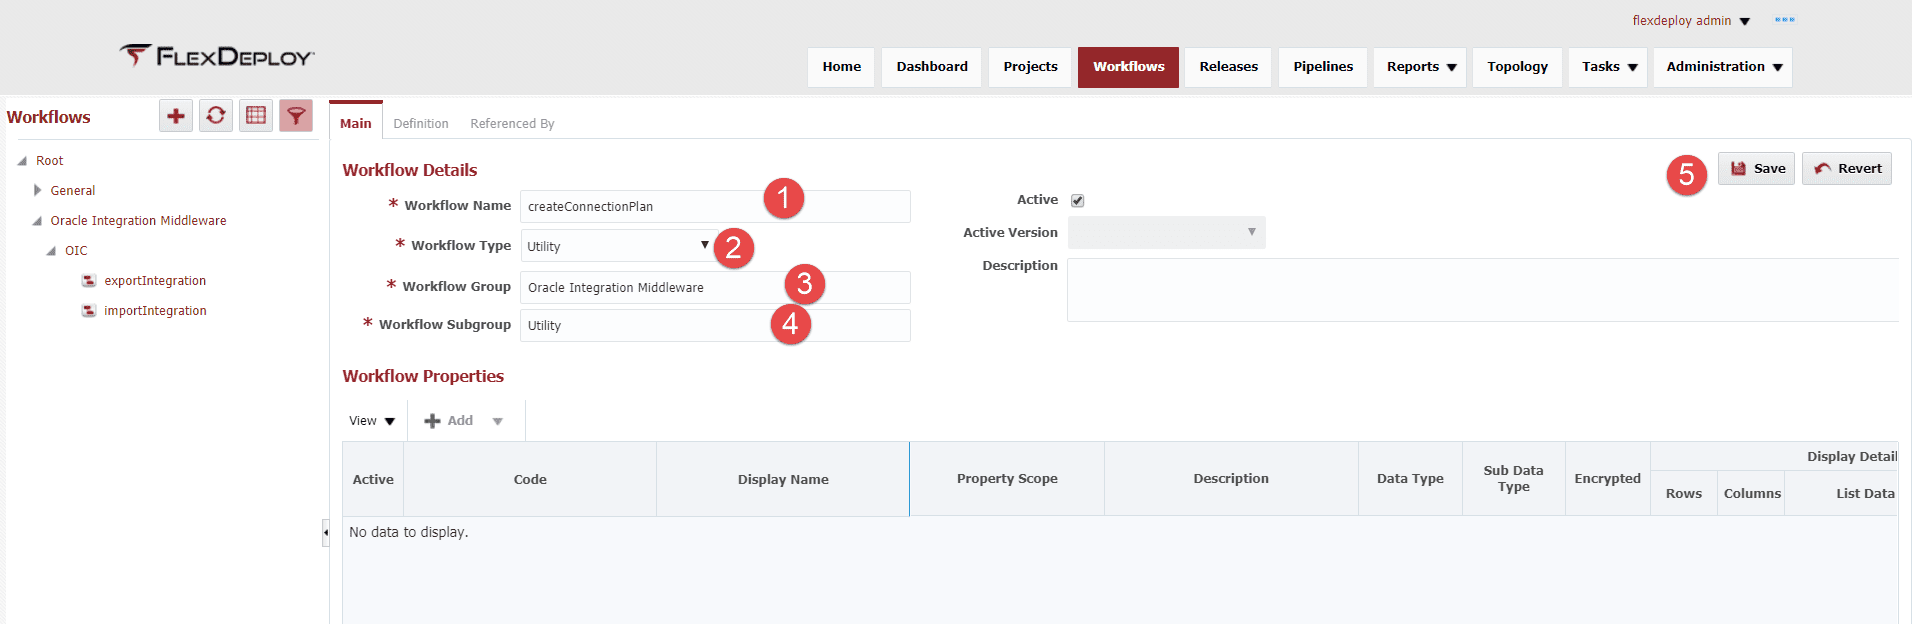
To assist in the creation of the connection plan, we will create a utility workflow and utility project that can be used to create a connection plan for the given service call. Let’s start with the utility workflow by clicking on the Workflows page, click on the plus sign and configure as follows:
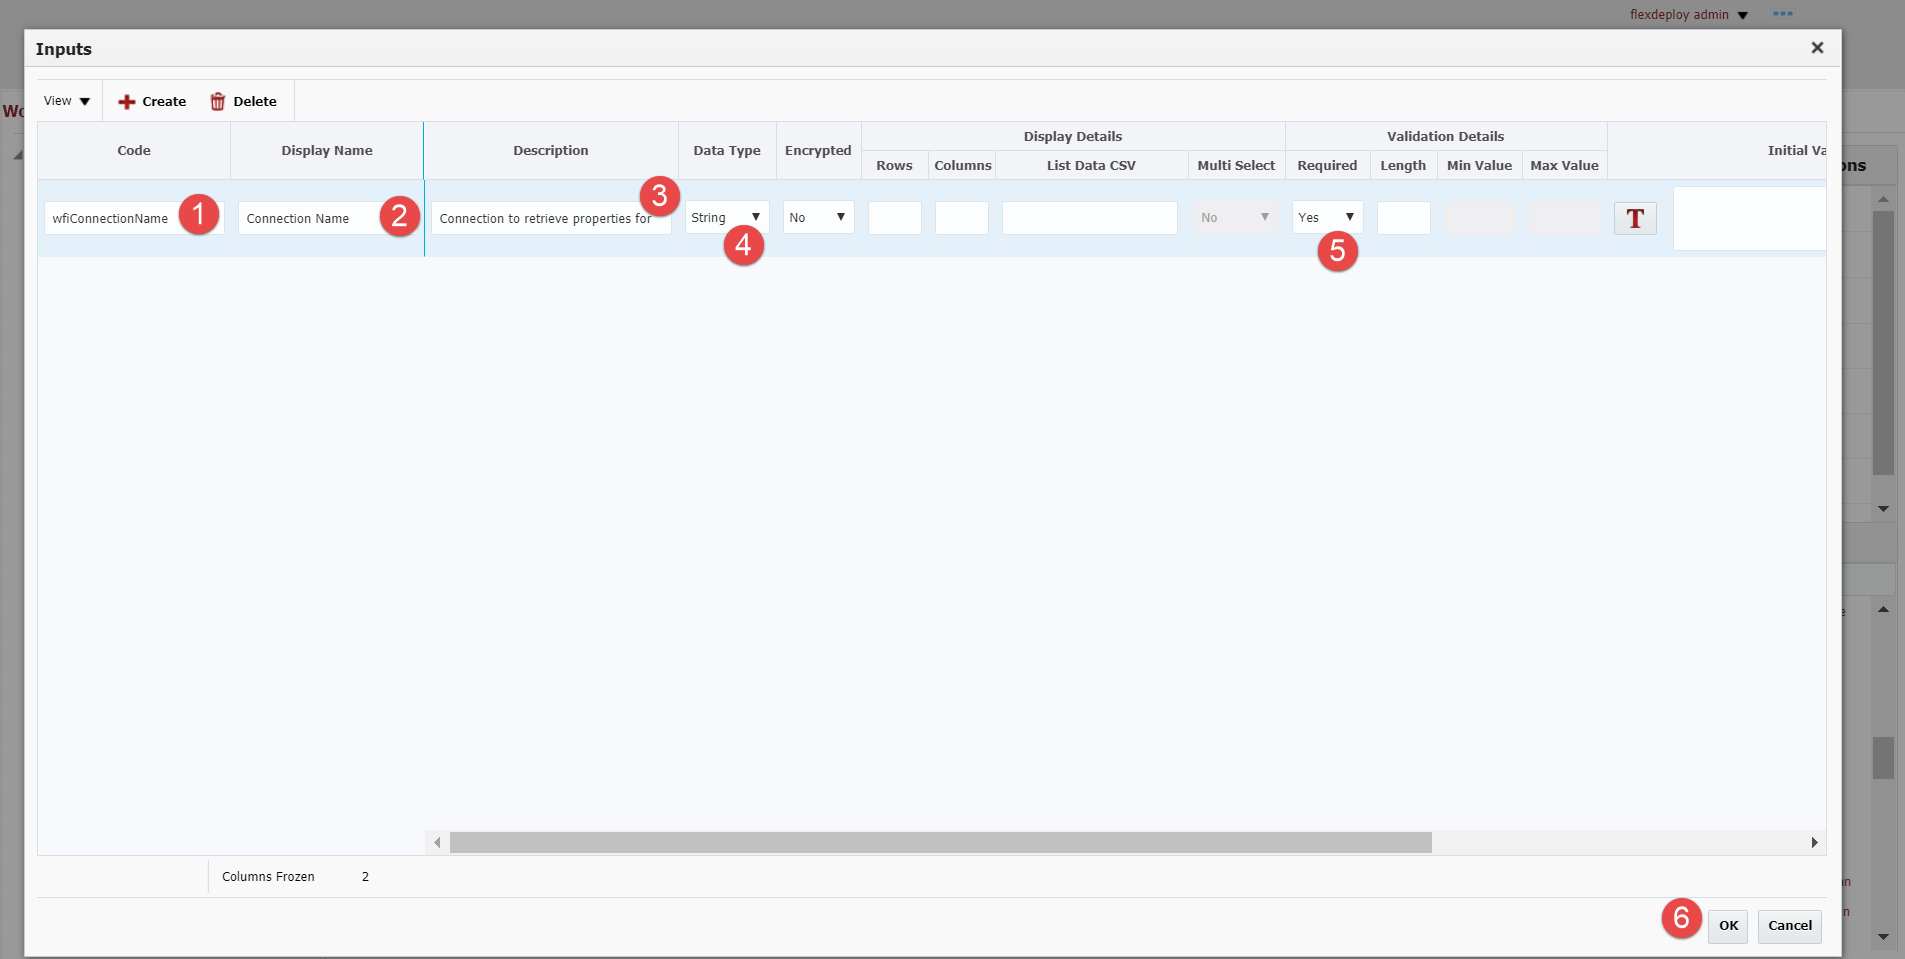
Now that we have the Main tab configured, we can configure the workflow, add the createConnectionPlan and copy operations. Click on the Definition tab and configure a workflow input so this workflow can be used for any connections. The workflow inputs will appear on the execution form for the project and will allow the user to enter the connection name. Click on the Inputs icon to create the workflow input.

The following configuration will be needed to create the input:
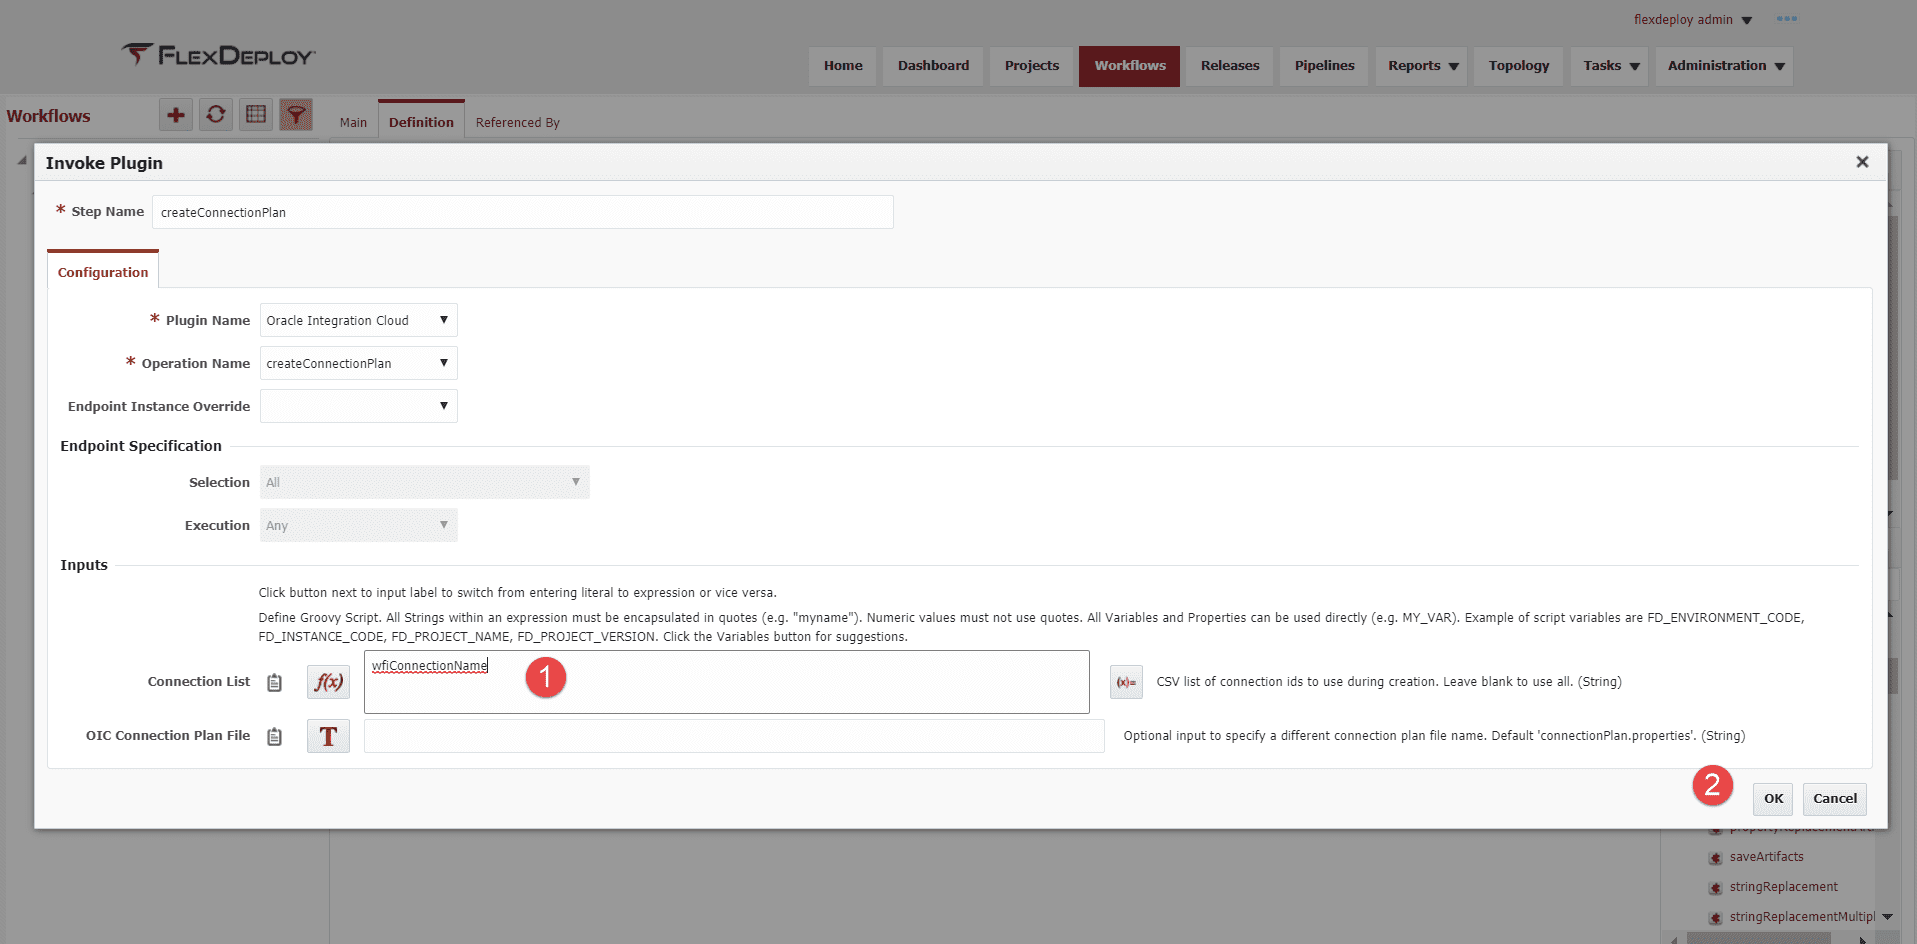
Now we can add the createConnectionPlan operation to the workflow palette and configure as follows:
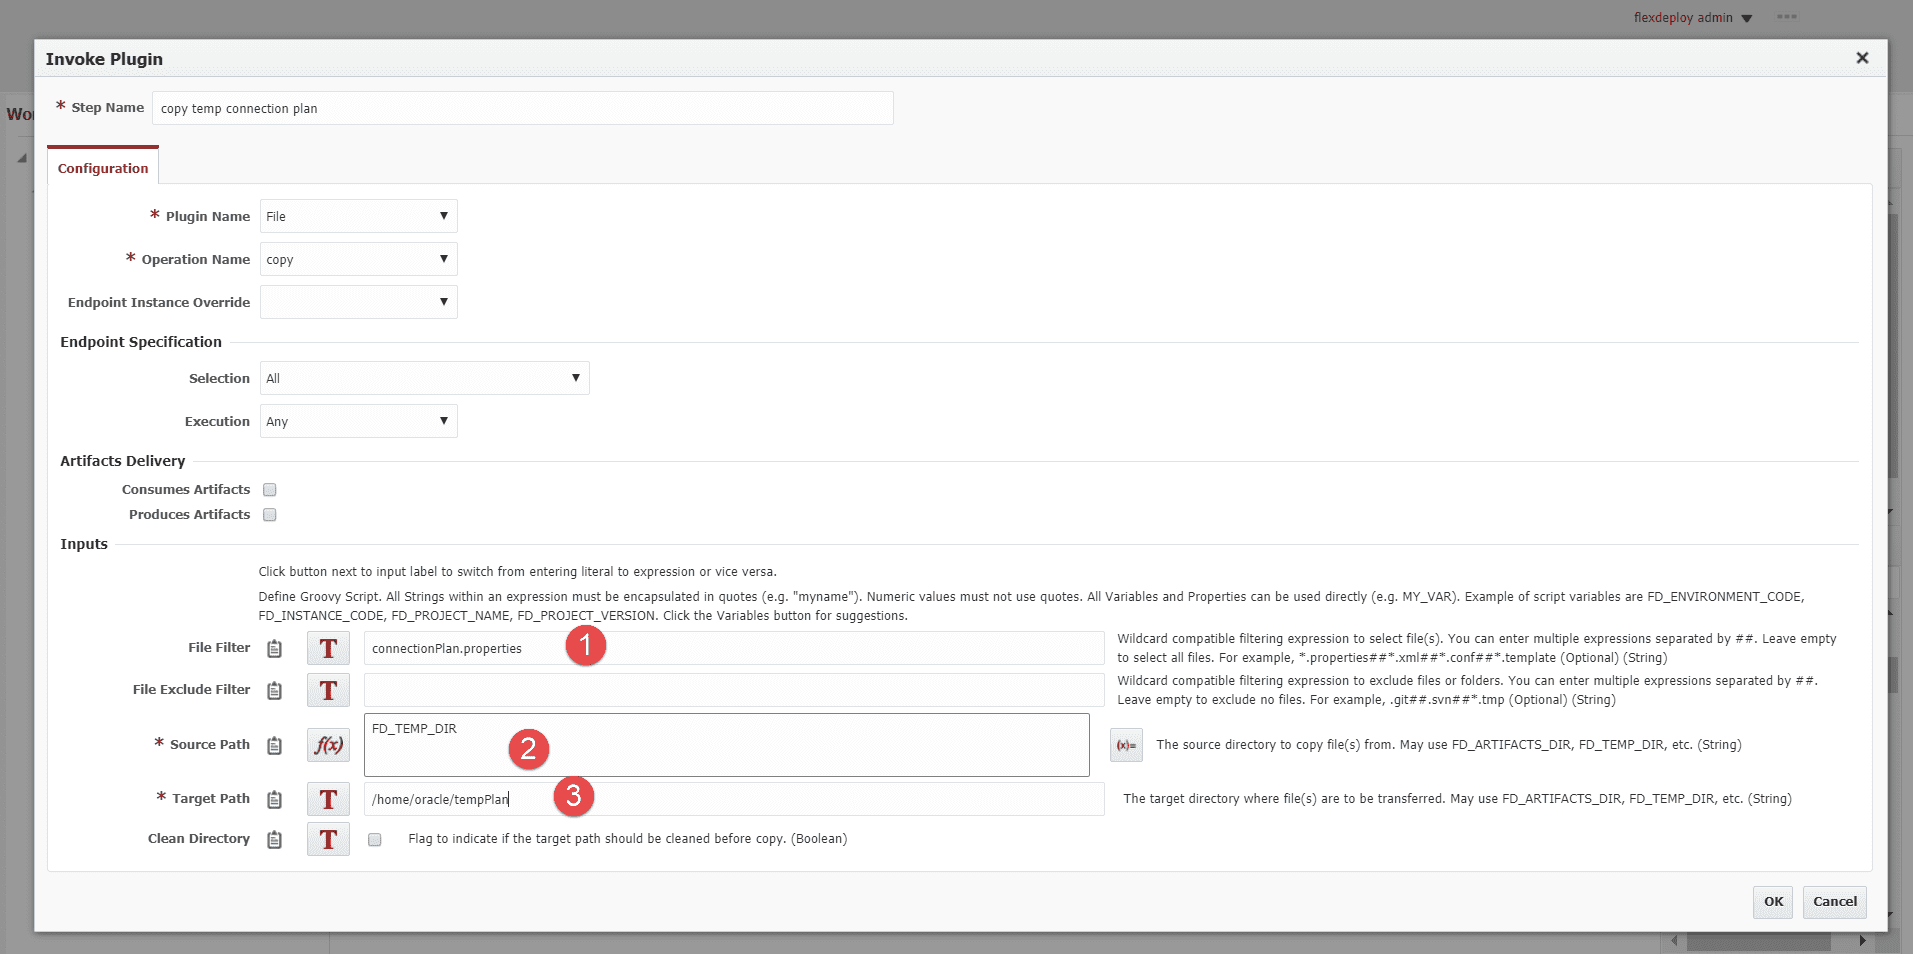
To help with retrieving the connection plan, lets add a copy operation from the File plugin after the createConnectionPlan operation to move the connection plan to a common location.
Click on Activate to save and activate this workflow for execution. Now we can create the utility project and associate this workflow to the project and prepare for execution. Click on the projects page and create a new utility project.
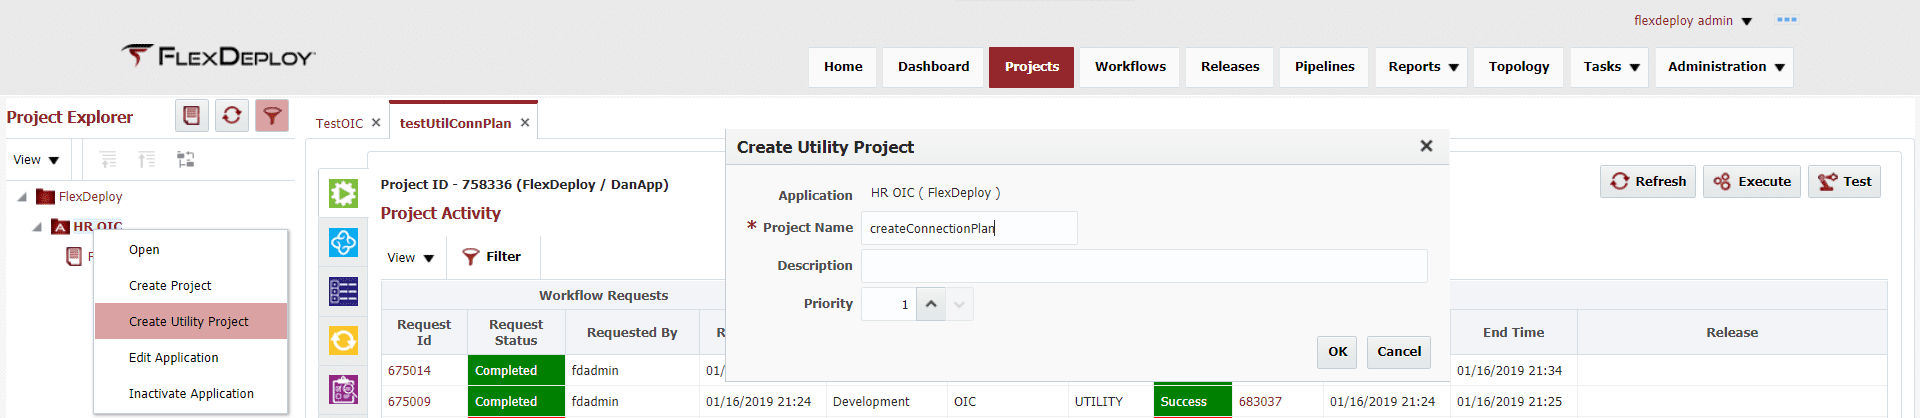
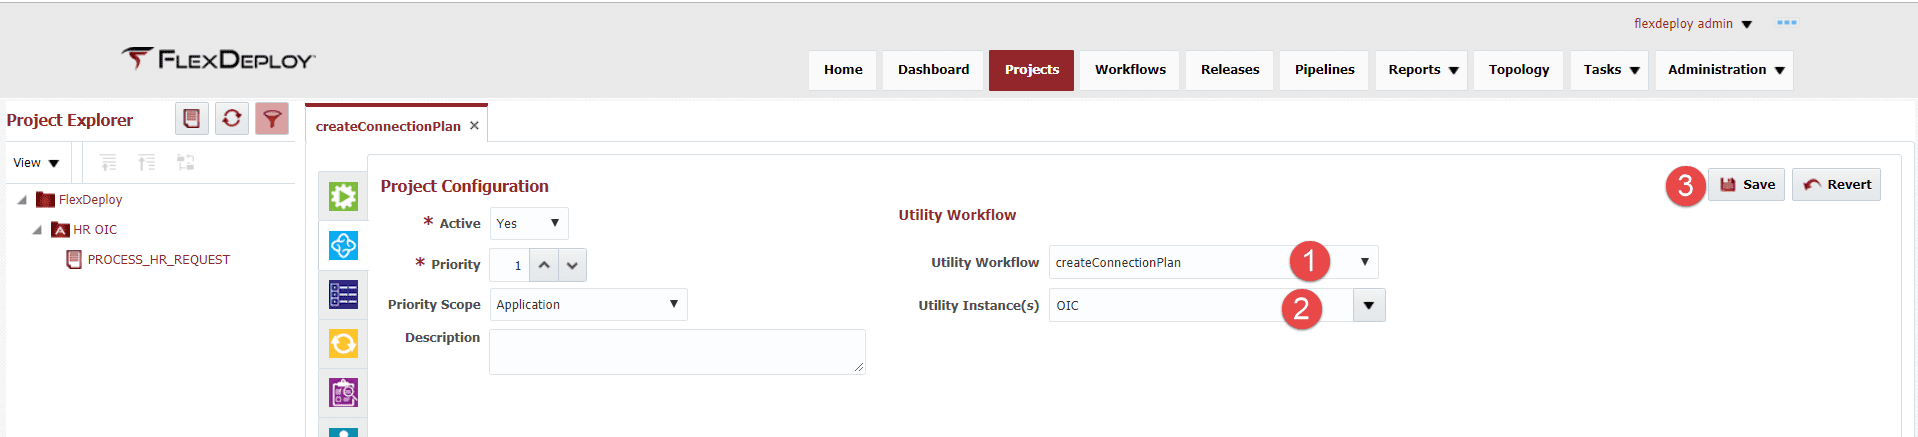
Click on the second tab (Configuration – Blue) and configure as follows:
Execution
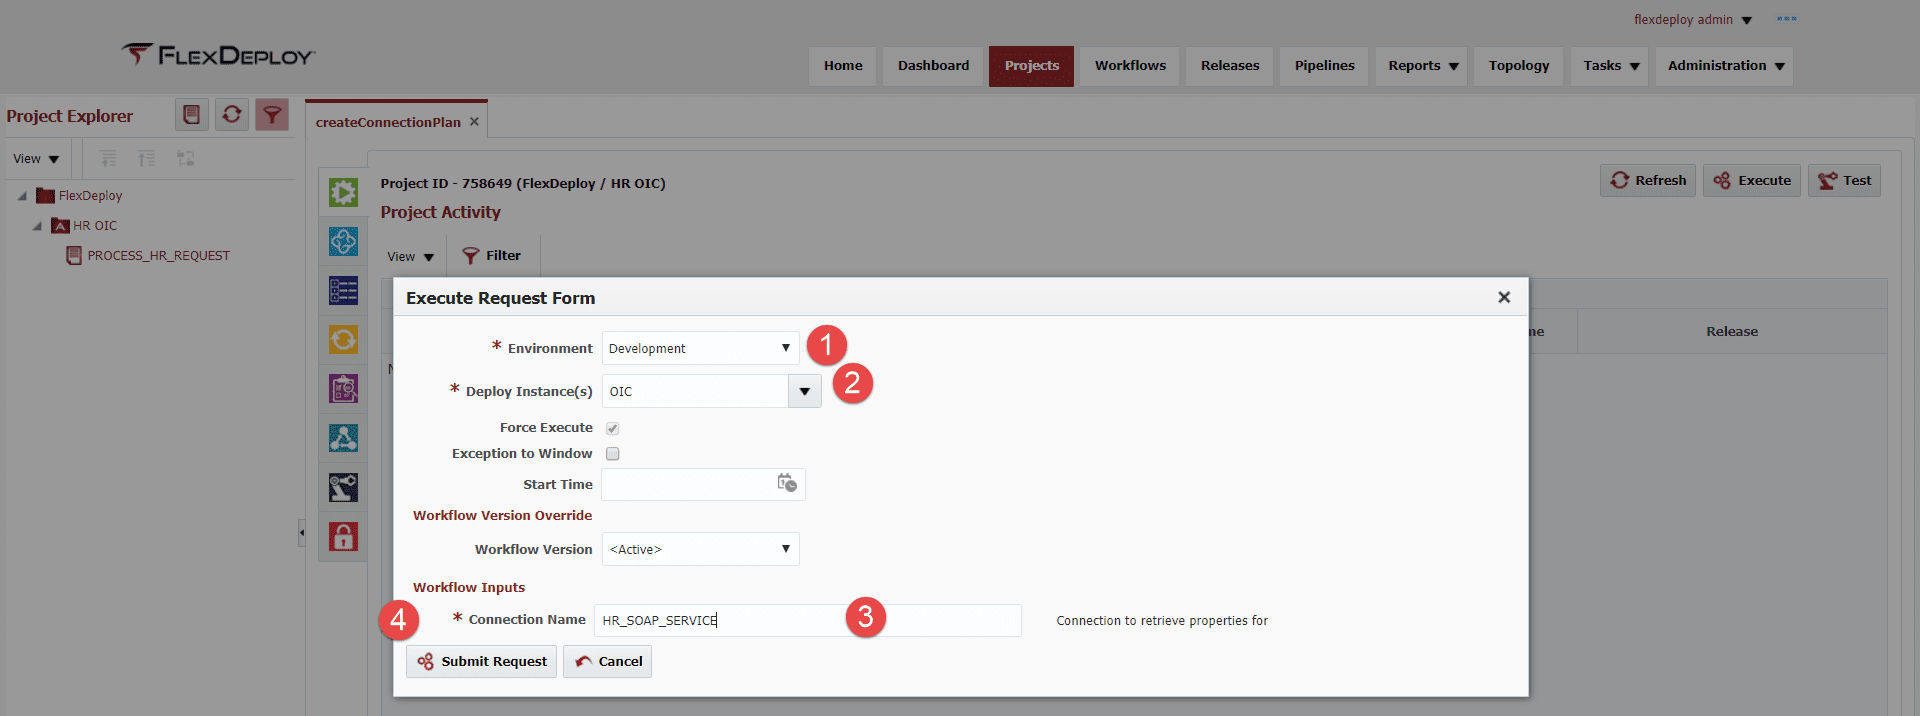
Now that we have the project and workflow configured, we can execute the project to create the connection plan. Open the createConnectionPlan project and click on the Execute button. Fill out the Execute Request Form with the following information and click Submit to execute.
- Environment – select the appropriate environment to retrieve connection information
- Deploy Instances – select the OIC instance
- Connection Name – this the workflow input that was created in prior steps and allows re-use of the flow for many connections
- Submit Request
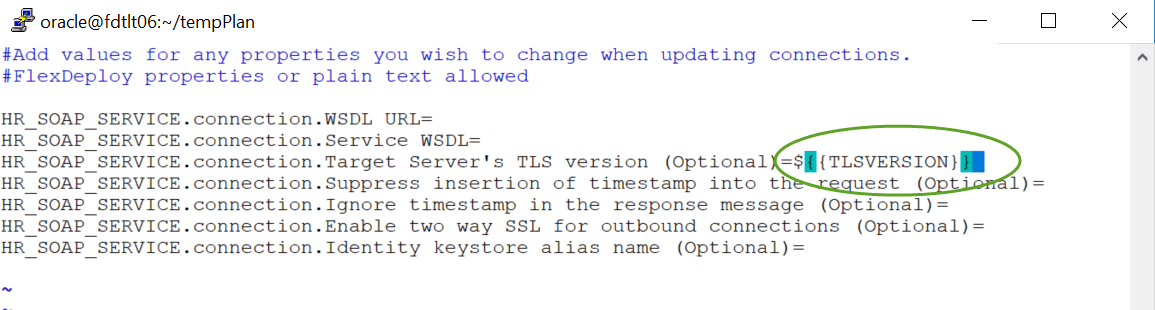
Now we need to perform the only manual step in the process by adjusting the connection plan that was just created. Edit the connectionPlan.properties that can be found in /home/oracle/tempPlan on the FlexDeploy server. Remember that we used the LOCALHOST endpoint for the REST calls to communicate with OIC. Change the file to look like the image below, we need to add the property replacement syntax for the TLS version, which matches the user defined property that we added to the workflow. The connection plan file can be in a common location on the server or can be added to SCM with the associated integration project.
Once updated, save the file to the /home/oracle directory.
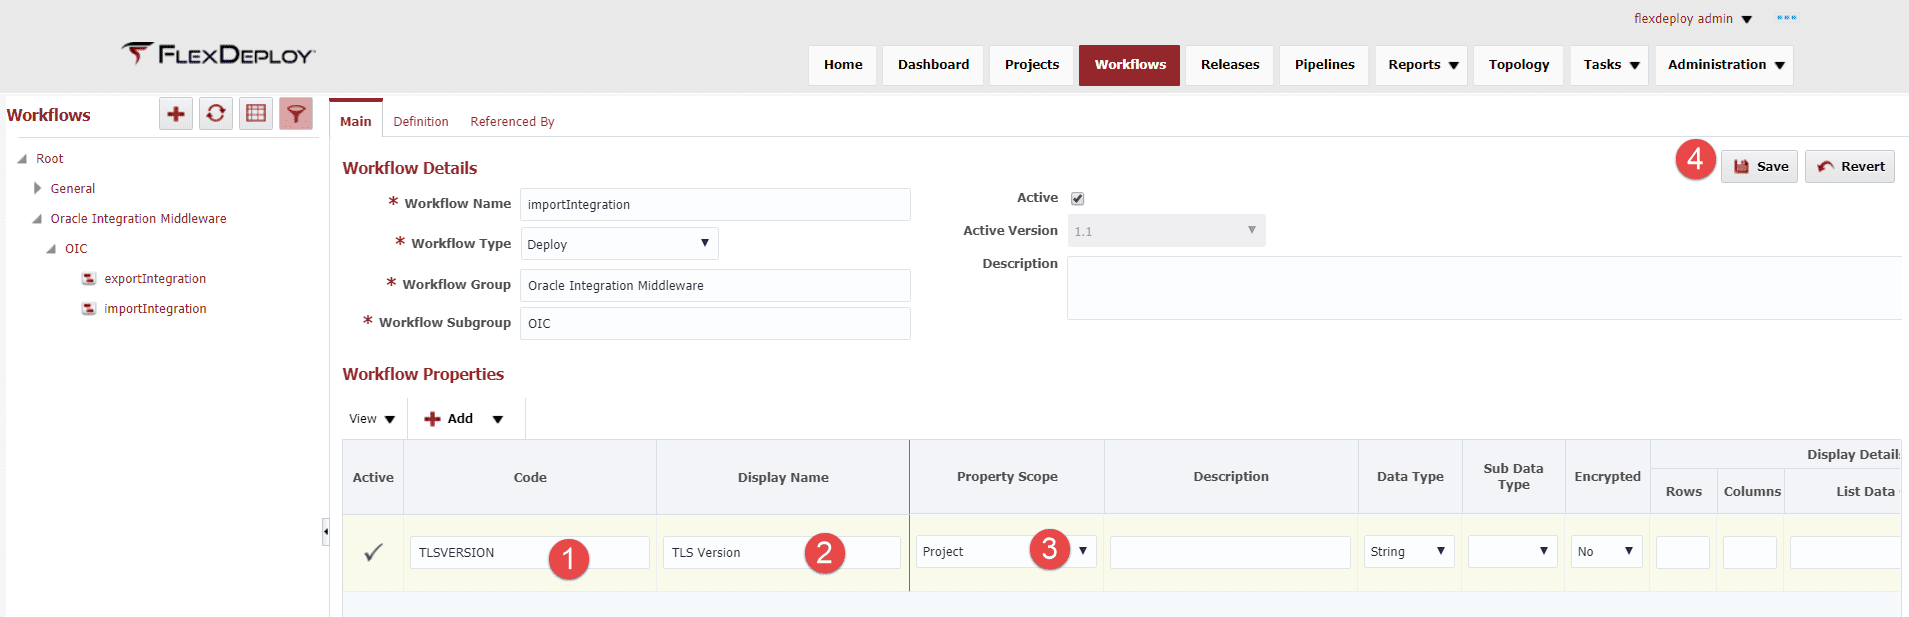
Now that we have an updated connection plan, we need to adjust the integration project and workflow from the previous blog to configure the TLS Version property that was added. The first thing we have to do is add the user defined project property to the importIntegration workflow so we can use that property. Go to the Workflows page and open importIntegration under Oracle Integration Middleware/OIC. On the Main tab, add a new Workflow property as follows:
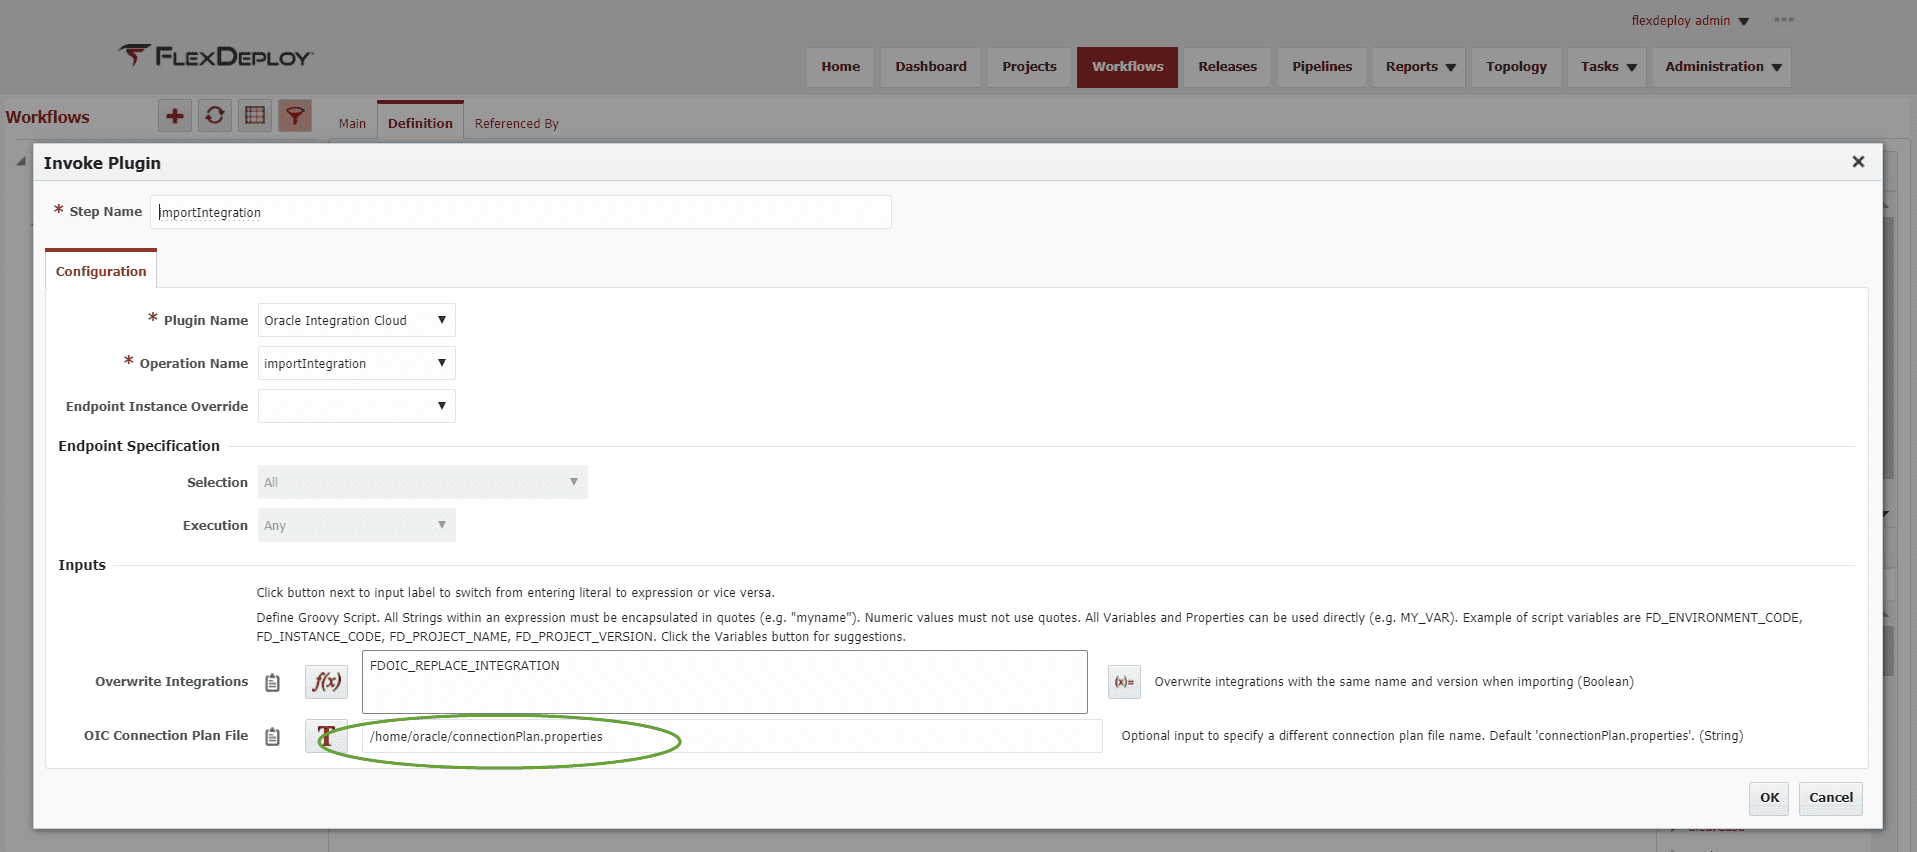
We need to change an input on the importIntegration workflow to utilize the connection plan created. Open the importIntegration workflow and create a copy so we can change it. Click on the operation and change the input as follows. Make sure to activate the changes.
We need to add this workflow to the OIC instance to associate the new property to either the project or environment/instance. Select Topology, then Instances, then OIC. Open the instance and select the workflow tab and drag the importIntegration onto the palette and save.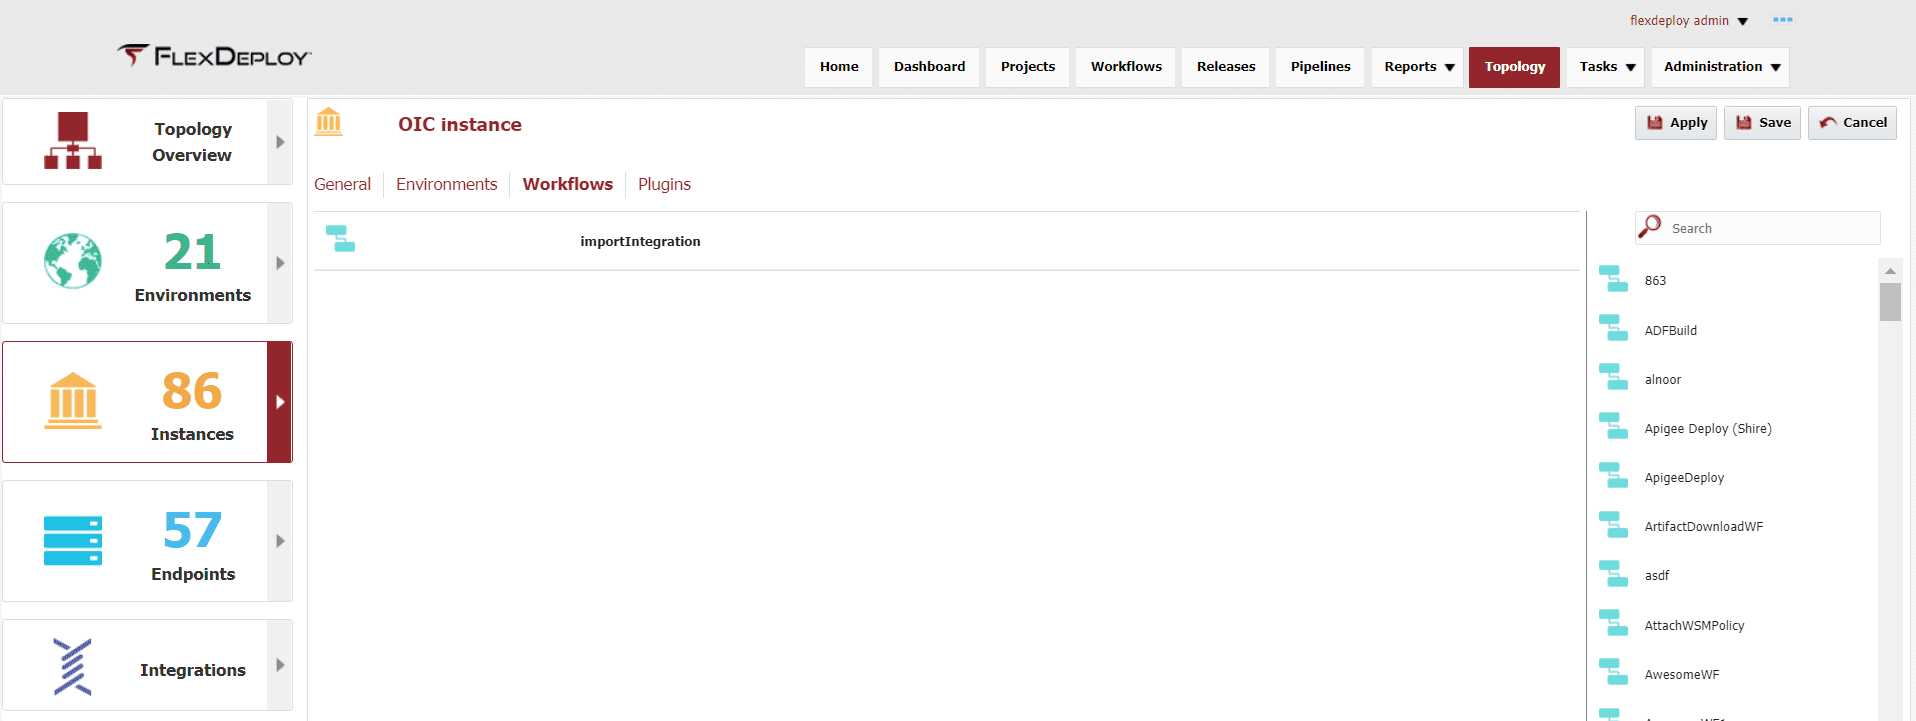
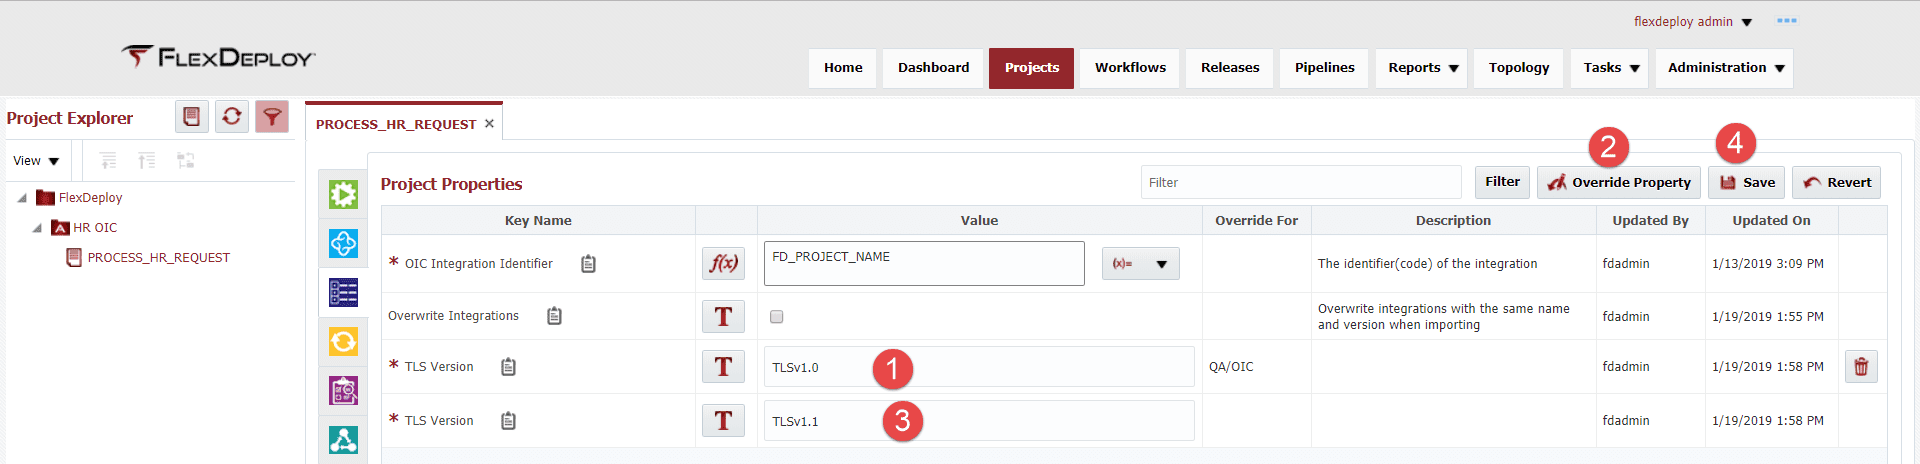
Go to the project page and open the PROCESS_HR_REQUEST under /FlexDeploy/HR OIC. Select the third tab (Dark Blue – Properties) and configure the TLS Version property that was added. We will set a default value of TLSv1.1 but for the QA environment we need to have the value be TLSv1.0. Using the Override Property capability, we can handle this easily. If there is an environment override, that value will be used. When no environment is found, the default will be used.
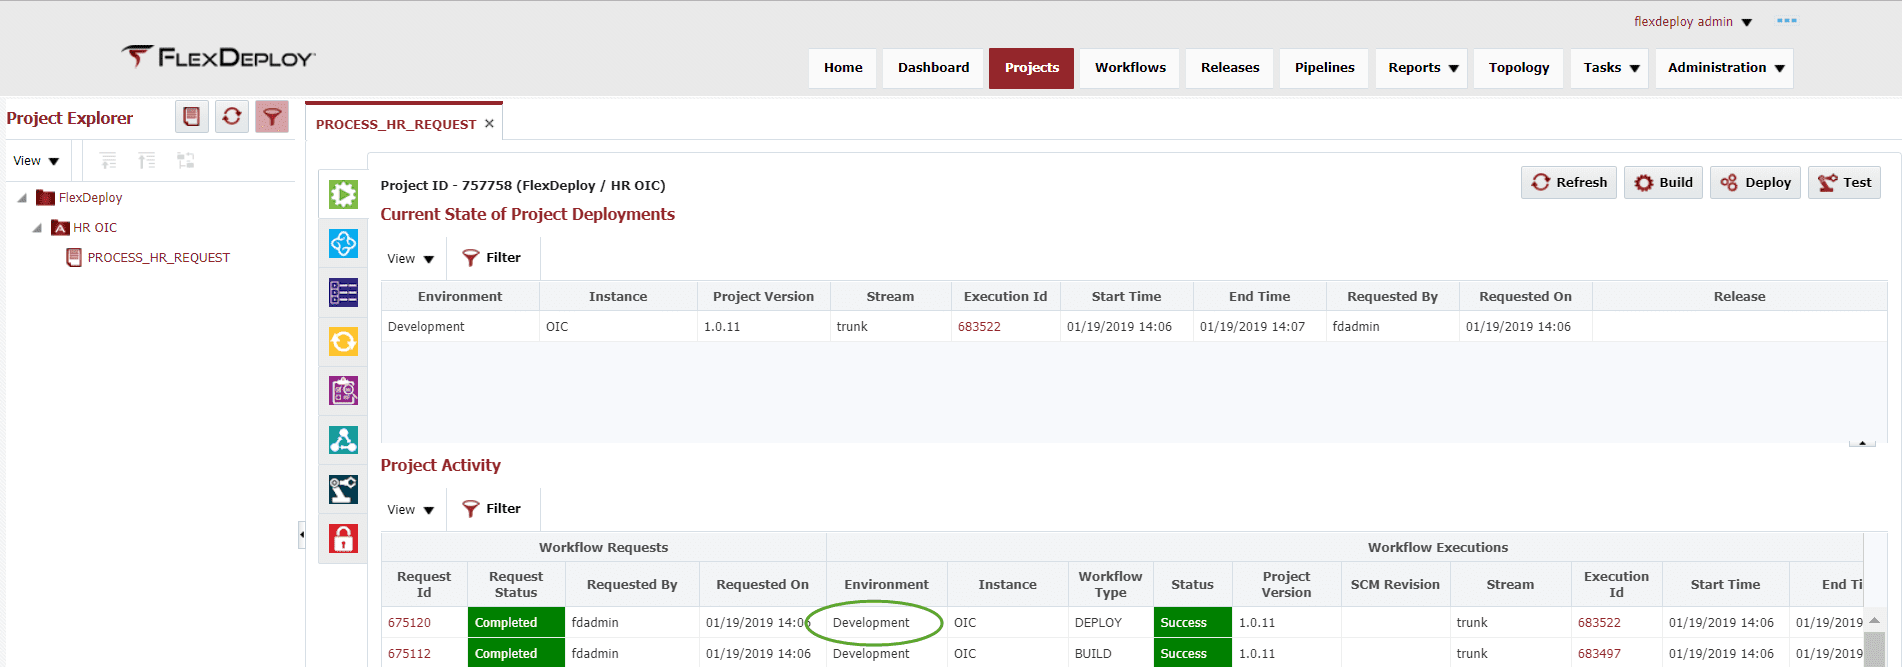
To show how this will affect the import, we will do a deployment to Development and QA. We will build a new project version and then execute the deployments.
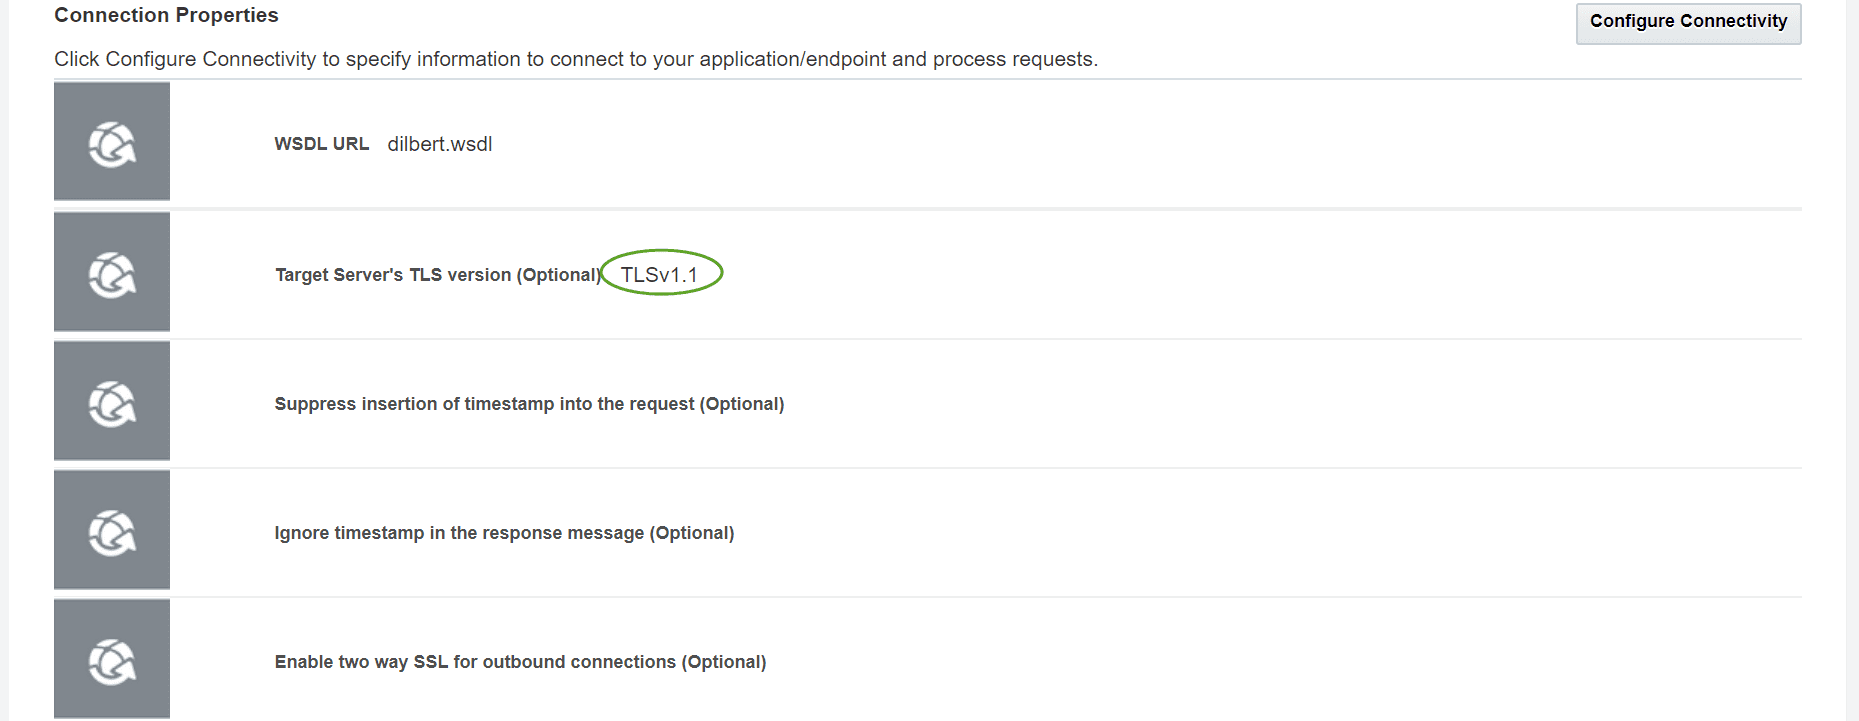
This is an image of the connection properties in the Development OIC instance that shows the TLS Version of TLSv1.1.
Now we will deploy the same integration to QA.
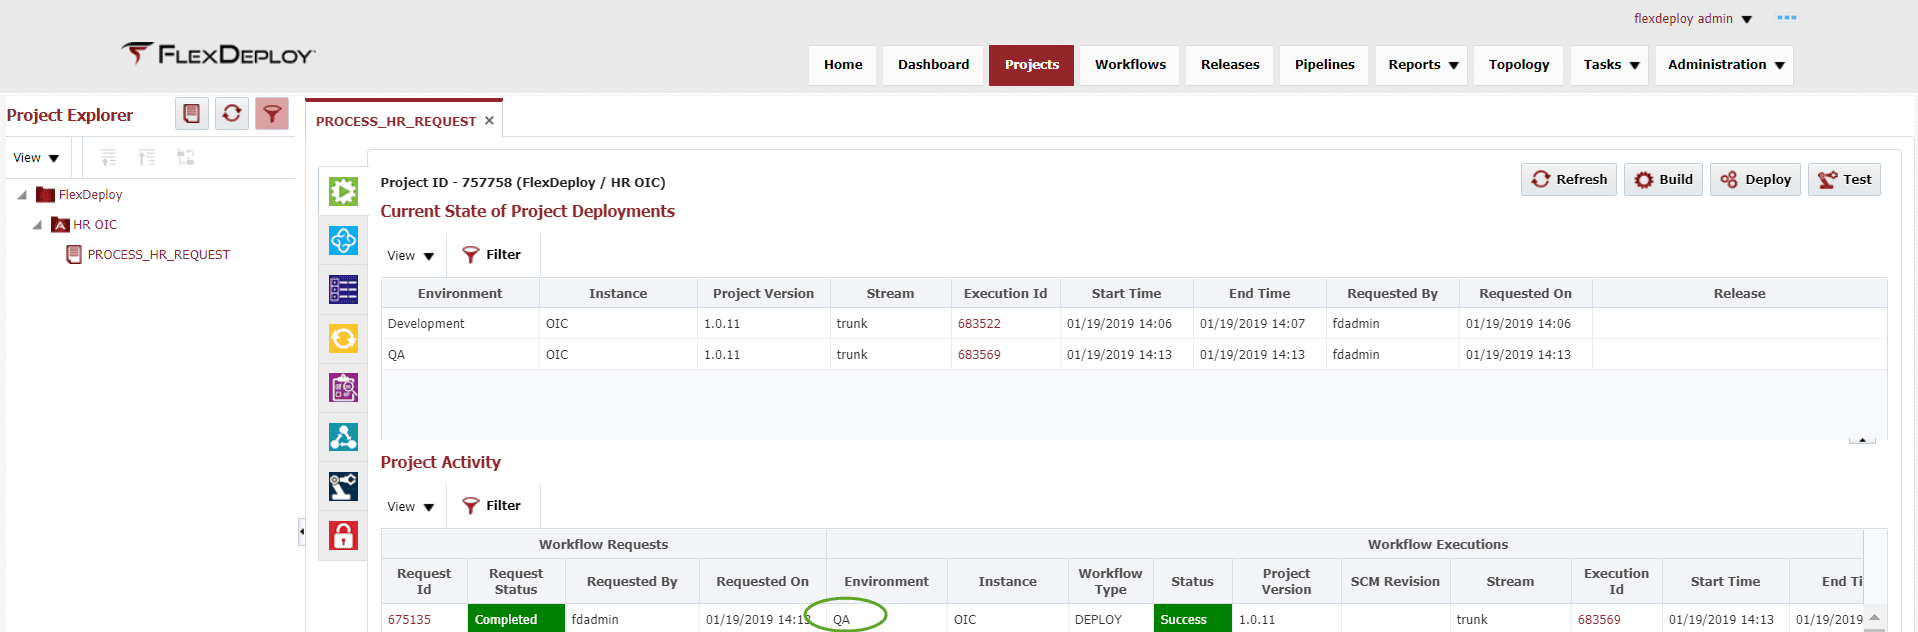
This is an image of the connection properties in the QA OIC instance that shows the TLS Version of TLSv1.0.
Conclusion
This was the second blog for the FlexDeploy Loves OIC series and covered how to manage connection properties that need to be changed based on the deployment environment. In the next blog, we will build on the work that we have completed and add Continuous Integration/Continuous Delivery to automate the build/deploy process through the Release Automation capabilities of FlexDeploy.
Previous Post: FlexDeploy Loves OIC: Manage Integrations with Connections
Next Post: FlexDeploy Loves OIC: Continuous Integration