
In this blog article I will show how the deployment of Oracle Data Integrator scenarios can be made easy with FlexDeploy. Prior to ODI 11g it was a very complex undertaking to create an automated deployment solution. The solution was to use ODI interfaces, packages, and procedures to read from the underlying repositories and generate and execute export and import commands (ODI tools). The concepts were provided by Oracle, but the implementation was left entirely as an exercise for each customer. With ODI 11g came the introduction of the Java SDK, which exposes most of the functionality of ODI Studio through an API. While the implementation of an automation solution is now much more achievable, the implementation is still left up to the customer in both 11g and 12c.
There is also much more to managing the lifecycle of build and deployments across an enterprise topology than simply creating scripts. Sure, automation itself drives simplification and increases the speed at which software can be delivered. However, a comprehensive solution provides full visibility into what is deployed where and by who. It supports a lifecycle which incorporates approvals and scheduling. It provides a platform for build and deployment of diverse technologies which are used across large enterprises. FlexDeploy provides a platform for doing just that. And with comprehensive support for Oracle Fusion Middleware and applications, customers can avoid writing any scripts at all.
The FlexDeploy Oracle Data Integrator plugin provides two operations: An odiBuild operation for identifying and exporting scenarios from an ODI Development repository, and a corresponding odiDeploy operation to import those scenarios into one or more ODI Execution repositories.
The ODI plugin surfaces properties for each environment instance which tells FlexDeploy how to connect to the repositories. These properties include:
- ODI Home directory (required)
- JDBC Driver path (required)
- JDBC URL (required)
- Master Repository user and password (required)
- ODI user and password (required)
- Work Repository name (required)
- Marker Group Code (optional – used by build operation only)
The build operation provides a number of options used for assembling scenarios into a unit of work. These properties are configured for each FlexDeploy project.
- ODI Project Code (required)
- Include/Exclude patterns (optional)
- ODI Markers (optional)
- List of scenario version numbers (optional)
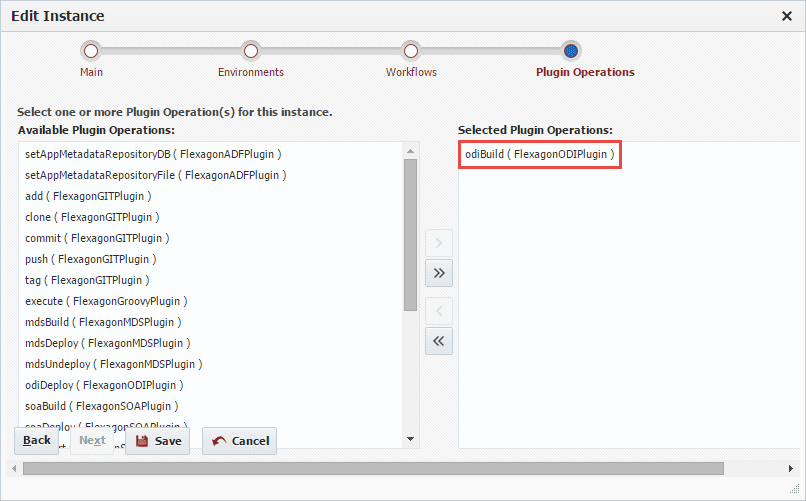
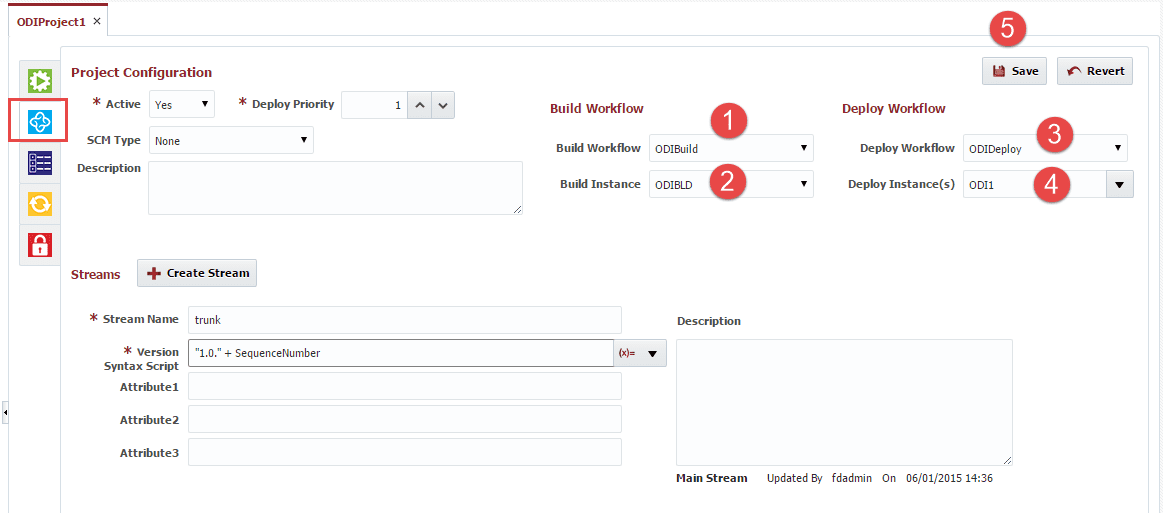
The first step within FlexDeploy is to associate ODI plugin’s operations to the build and deploy instances which we will use. For this example we will associate the odiBuild operation to the ODIBLD instance.
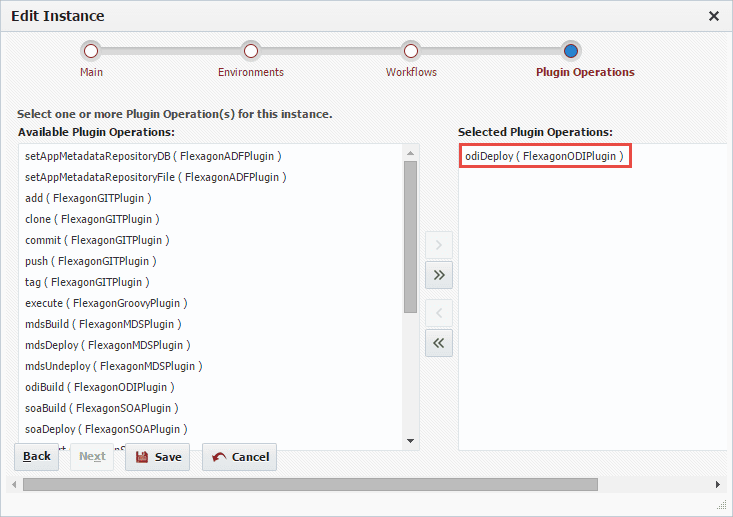
And associate the odiDeploy operation to the ODI1 instance.
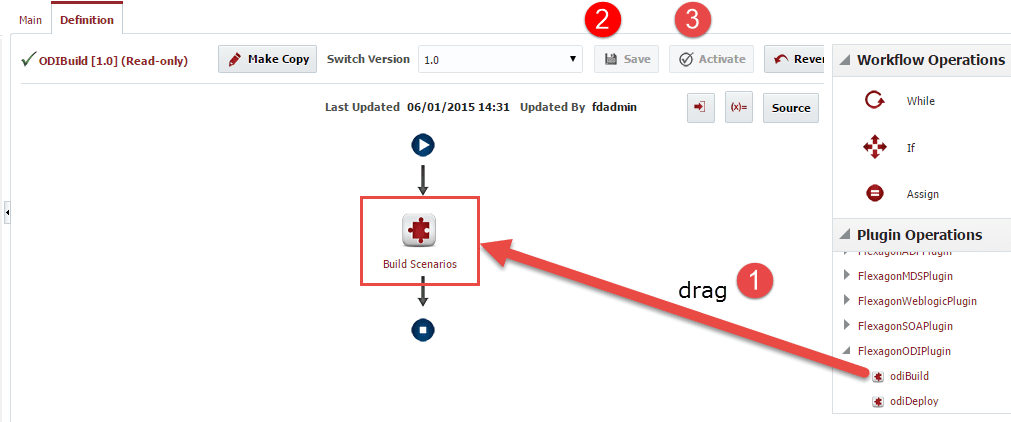
The next step is to build simple build and deploy workflows which invoke these plugin operations. First, we will create a workflow called ODIBuild, and using the graphical editor drag in the odiBuild operation from the FlexagonODIPlugin plugin. Next click Save and then Activate.
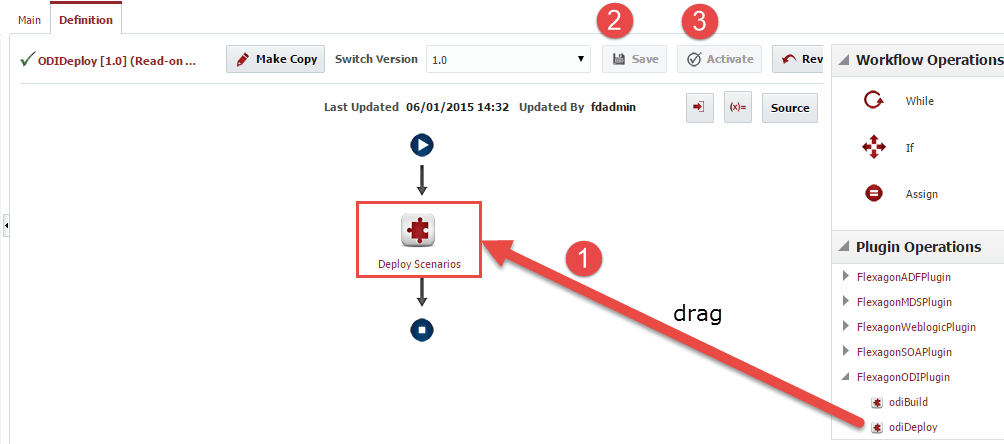
We will then repeat these steps for the ODIDeploy workflow.
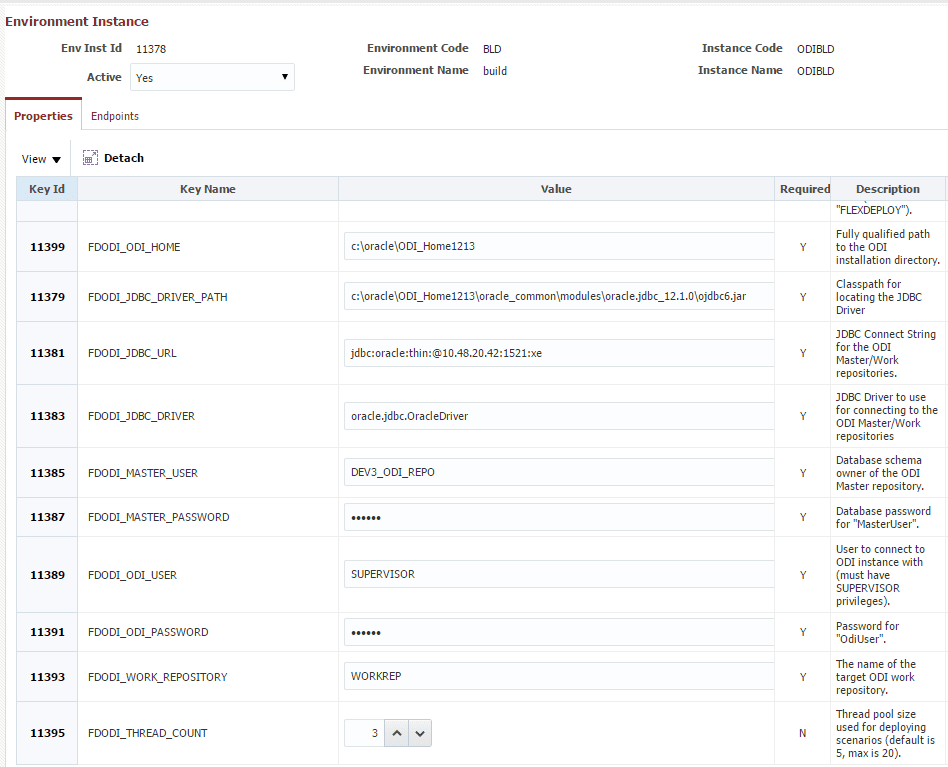
The next step is to configure the necessary plugin properties on the instances for each environment they are mapped to. In our case the ODIBLD instance is mapped to the Build environment, and the ODI1 instance is mapped to the Development environment. So the build operation properties are defined on the ODIBLD/Build environment instance. The keys are provided automatically, and we enter values which correspond to our ODI Development repository.
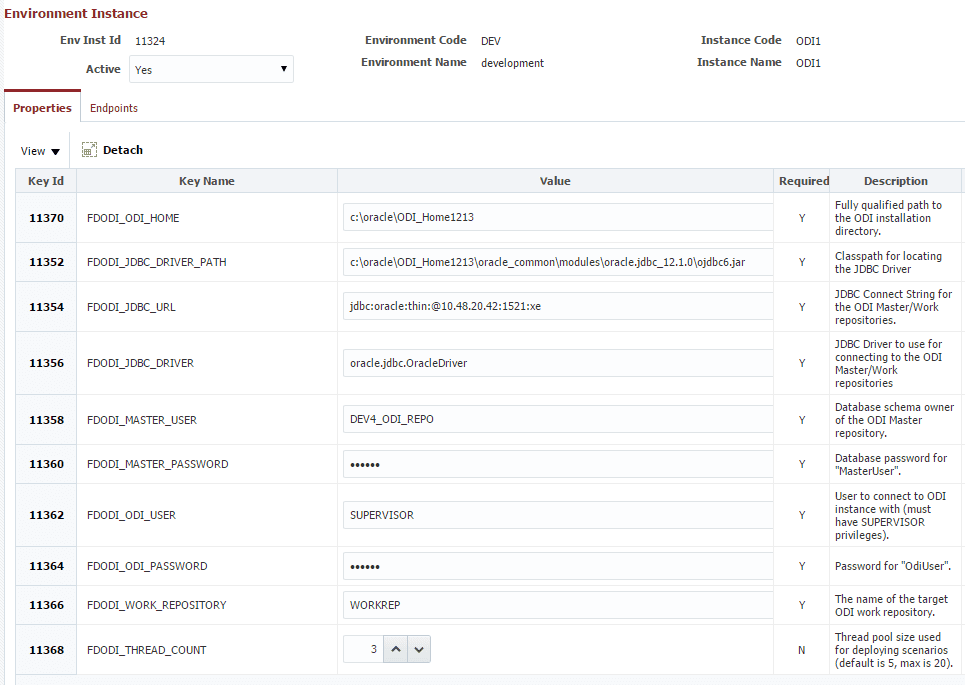
The deploy operation properties are defined on the ODI1/Development environment instance. Again, the keys are provided automatically, and we enter values which correspond to our ODI Execution repository in the Development environment.
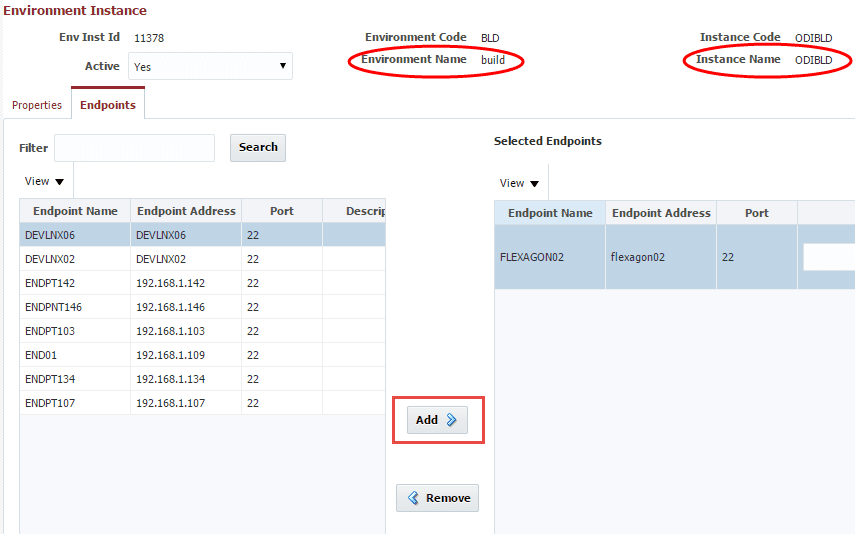
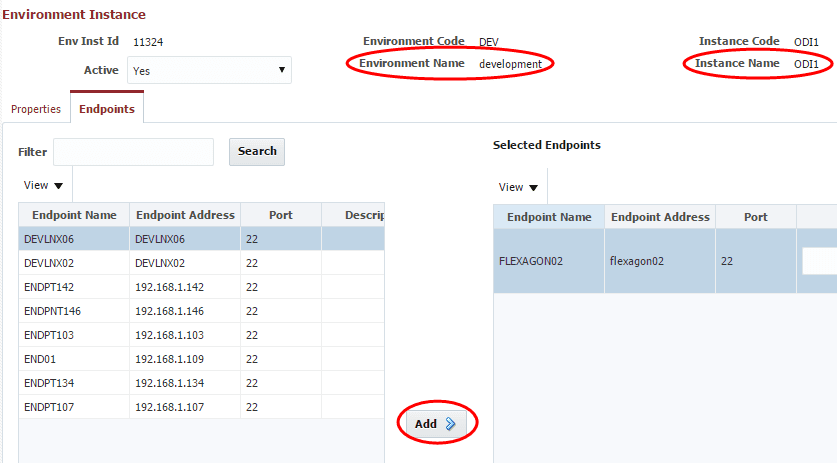
We must also map each environment/instance combination to an endpoint which defines the physical server hosting the ODI Software.
We can now create and configure a FlexDeploy project to point to the workflows and instances created above.
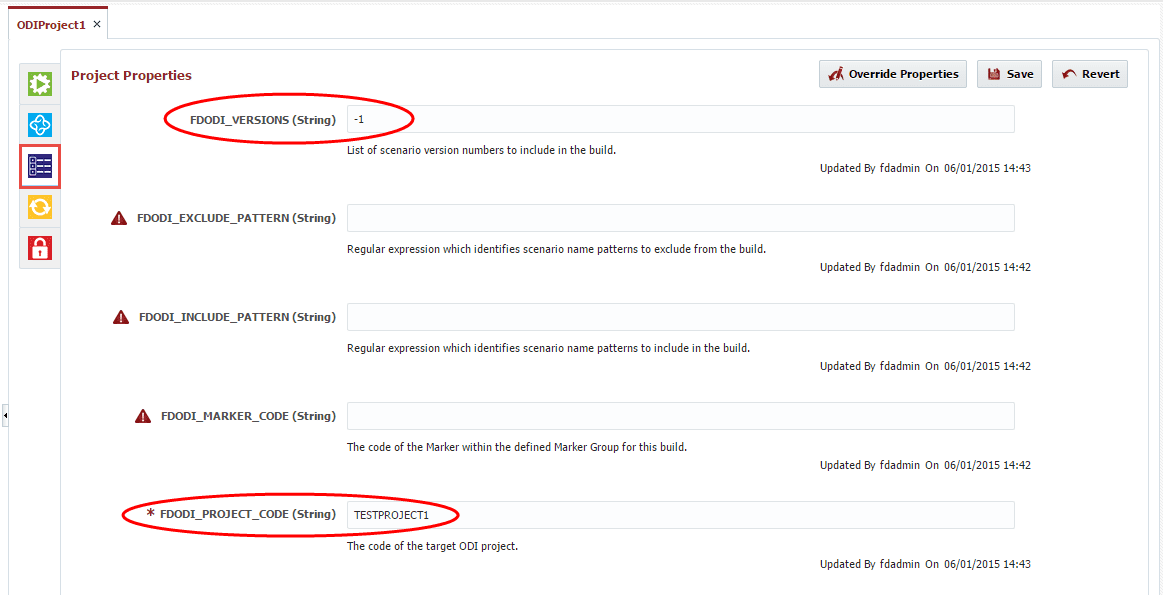
The last configuration step is to provide values for the project-scoped properties required by the build plugin operation. In this example, we will indicate that we only want to export the latest version of each scenario (e.g. minus 1). We will also provide the required code of the project containing the scenarios.
It should be noted that the environment, instance, endpoint, and workflow configuration is a one-time setup. Many projects can be created which utilize the same workflows created above.
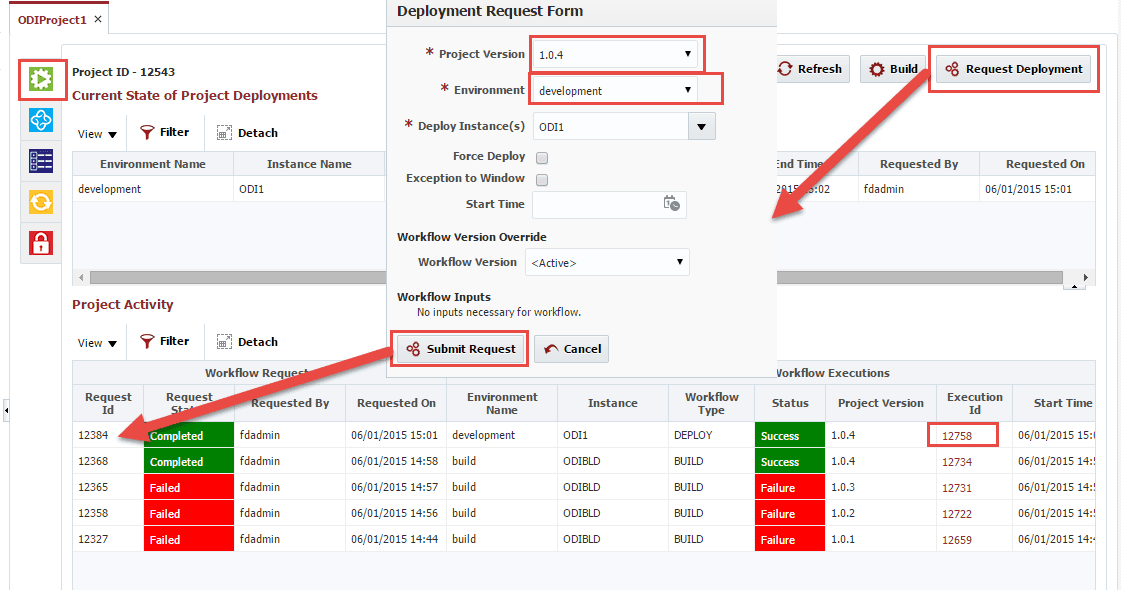
Now that we have a project configured we can begin executing build and deployments. Click the Build button, select the build environment, and click Submit Request. A new request will be created with a status of submitted. Once complete the status will change to Completed.
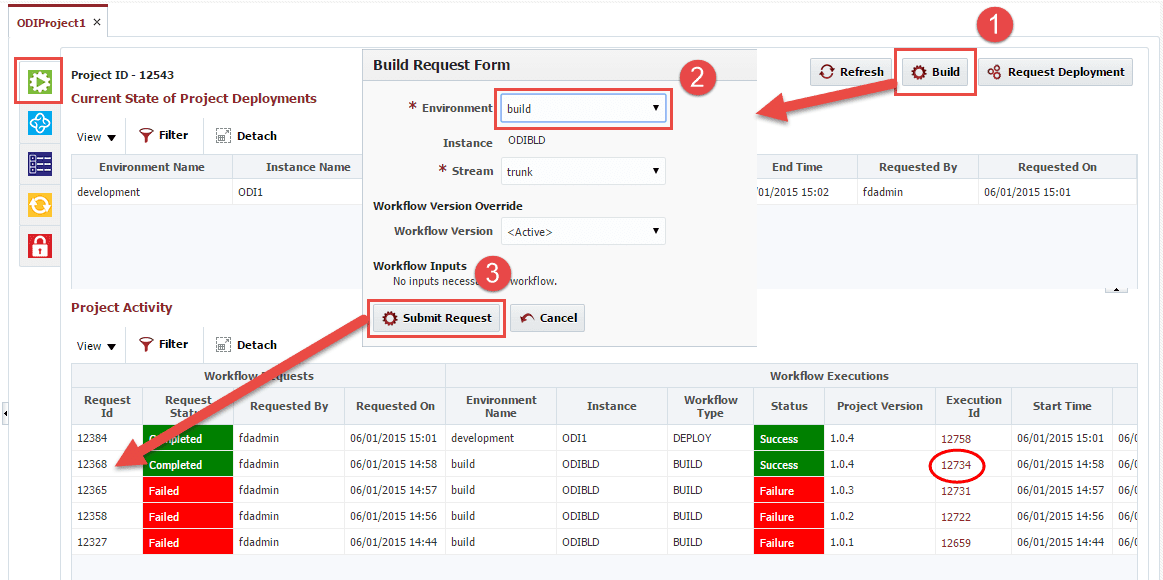
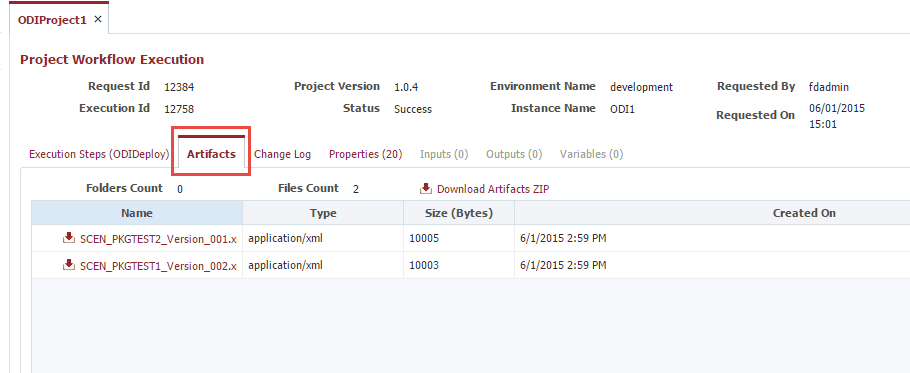
Click on the Execution Id of the column to see details of the request.
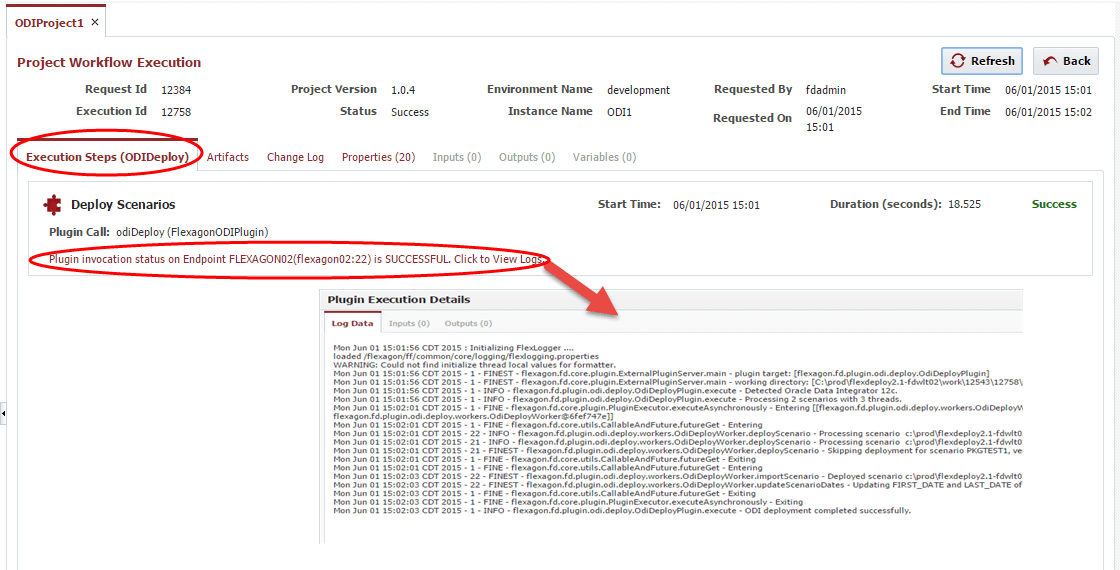
The Artifacts tab shows the scenarios that were exported during the build.
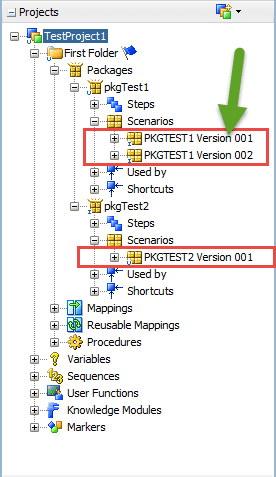
As a verification that the correct scenarios were exported, here is what TestProject1 looks like. Note that PKGTEST1 Version 001 was not exported because we chose to only export the latest version of the scenarios.
Now that we have a successful build we can request to deploy it to the Development environment. On the deployment request form select the project version (produced by the build) to deploy, and the environment to deploy it to. Just like for the build you can click on the Execution Id to view execution details.
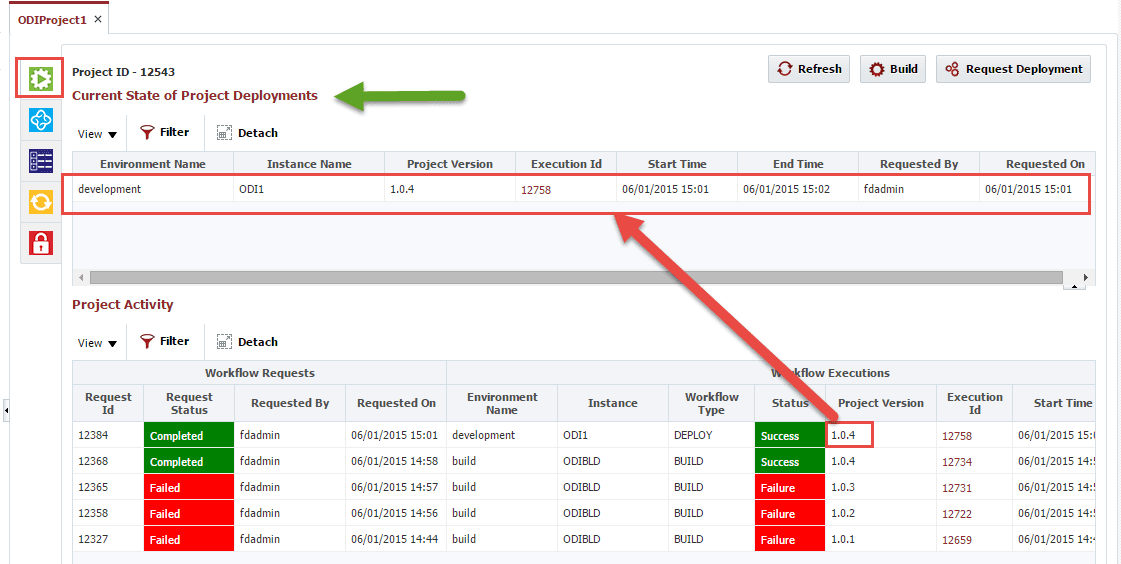
Note that only scenarios in the build which are different than those in the target environment are actually deployed. The plugin has the intelligence to skip the import when no changes are detected, therefore, greatly enhancing the performance when deploying projects with large numbers of scenarios.
Finally we can now easily identify which project versions are deploy to what environments by looking at the current state.
For more information on FlexDeploy please visit https://flexagon.com/flexdeploy