Migration packages are a handy feature on the Oracle CPQ Cloud to move administrative data and metadata between environments. At the core, migration packages allows administrators to:
- Bundle up various components to be downloaded and uploaded to another CPQ Cloud site.
- Distribute collections of components to customers to implement certain functionality on a CPQ Cloud site.
Migration packages saves administrators time and reduces user errors, by eliminating the need to manually replicate setup details across multiple sites. Having said that, CPQ user will still need to follow the same manual, repetitive steps to deploy to all of your sites.
Why not just make changes in one environment and deploy to subsequent environments with a touch of a button?
That is exactly what the FlexDeploy Oracle CPQ Plugin has set out to do. FlexDeploy’s Oracle CPQ Plugin provides functionality to export and import migration packages from to different environments with ease. The plugin also supports sourcing migration packages from SCM, but we will run through environment to environment migration.
In this blog we will showcase the setup and process to automate deployments of CPQ migration packages with FlexDeploy.
Let’s begin.
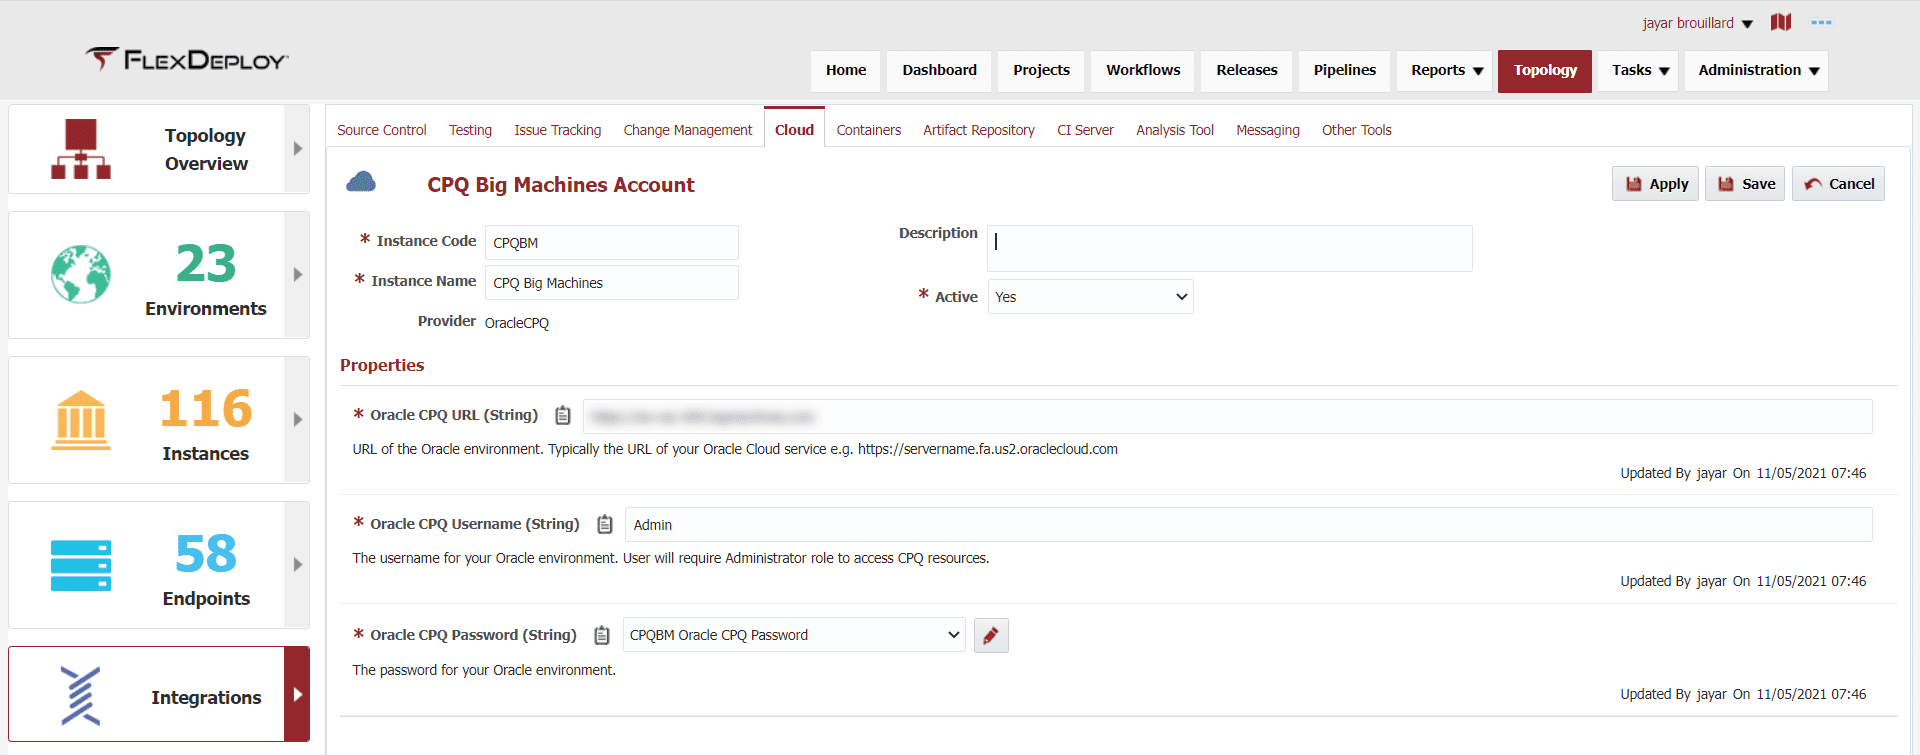
Oracle CPQ Cloud Account
FlexDeploy has an integration section where we can securely store external information and credentials. Data in integration accounts can be conveniently reused throughout FlexDeploy. We will need account(s) to connect to your CPQ cloud environment(s). Let’s assume this account is pointing to your DEV environment.
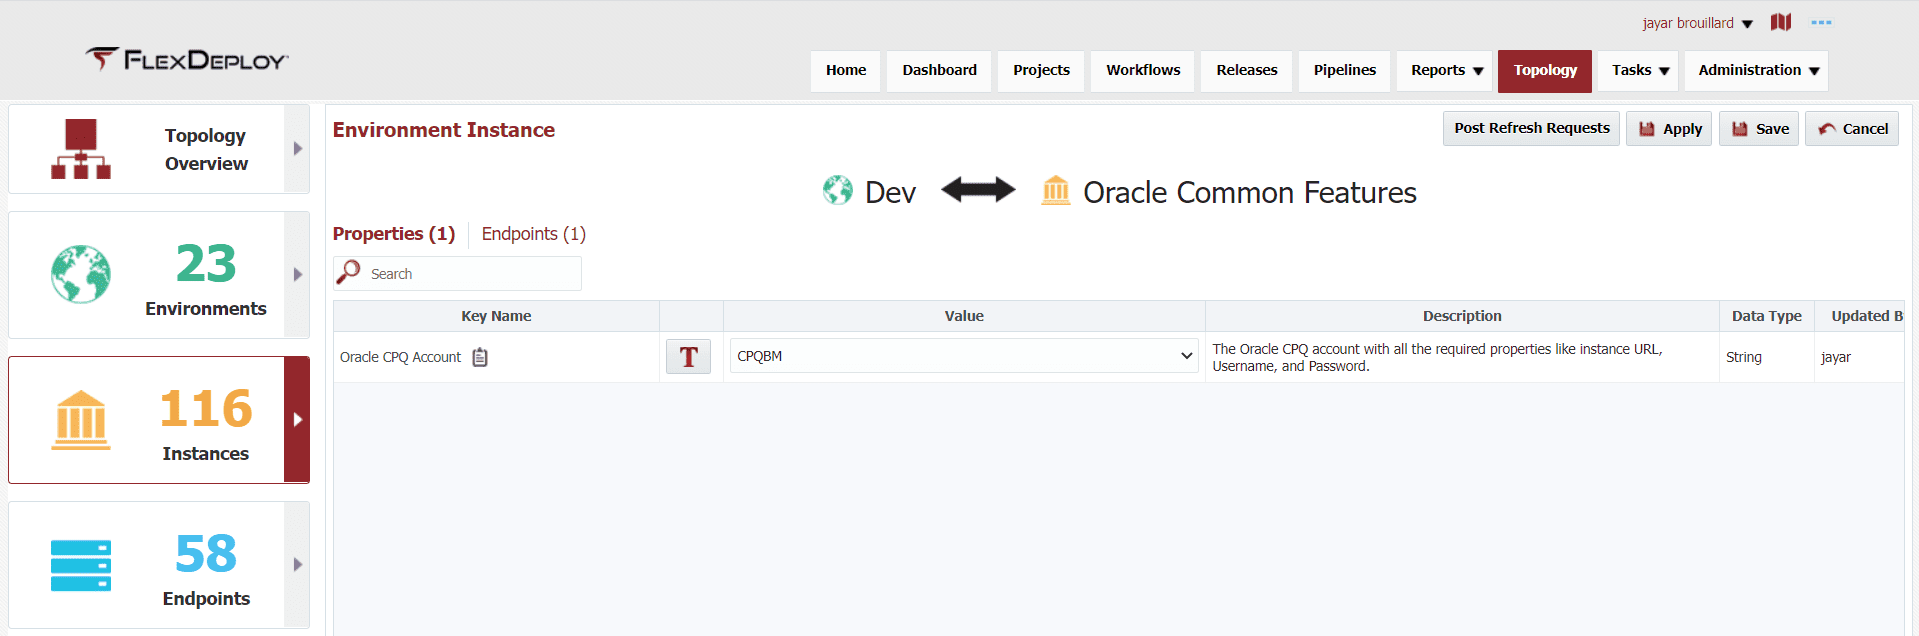
Environment Instance
Each of your Oracle CPQ Cloud environments will be mapped one-to-one with a FlexDeploy environment instance. Environment Instances define the environment-specific properties which are required to communicate to an underlying technology. Here on the DEV -> Oracle Common Features environment instance we will set the Oracle CPQ Account to point to our DEV CPQ environment.
I’ve skipped over a few steps in the topology setup to keep the blog more focused. Feel free to checkout our Topology User guide to learn more in depth.
Create Build/Deploy Workflows
FlexDeploy utilizes workflows to determine what steps and operations will be used during build and deploy processing. To support the Oracle CPQ build/deploy process we need two workflows:
- A build workflow that contains a step to execute the packageExport operation from the Oracle CPQ Plugin.
- A deploy workflow that contains a step to execute the packageImport operation from the Oracle CPQ Plugin.
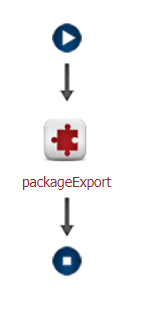
Build Workflow
The build workflow as stated before will contain the single packageExport operation.
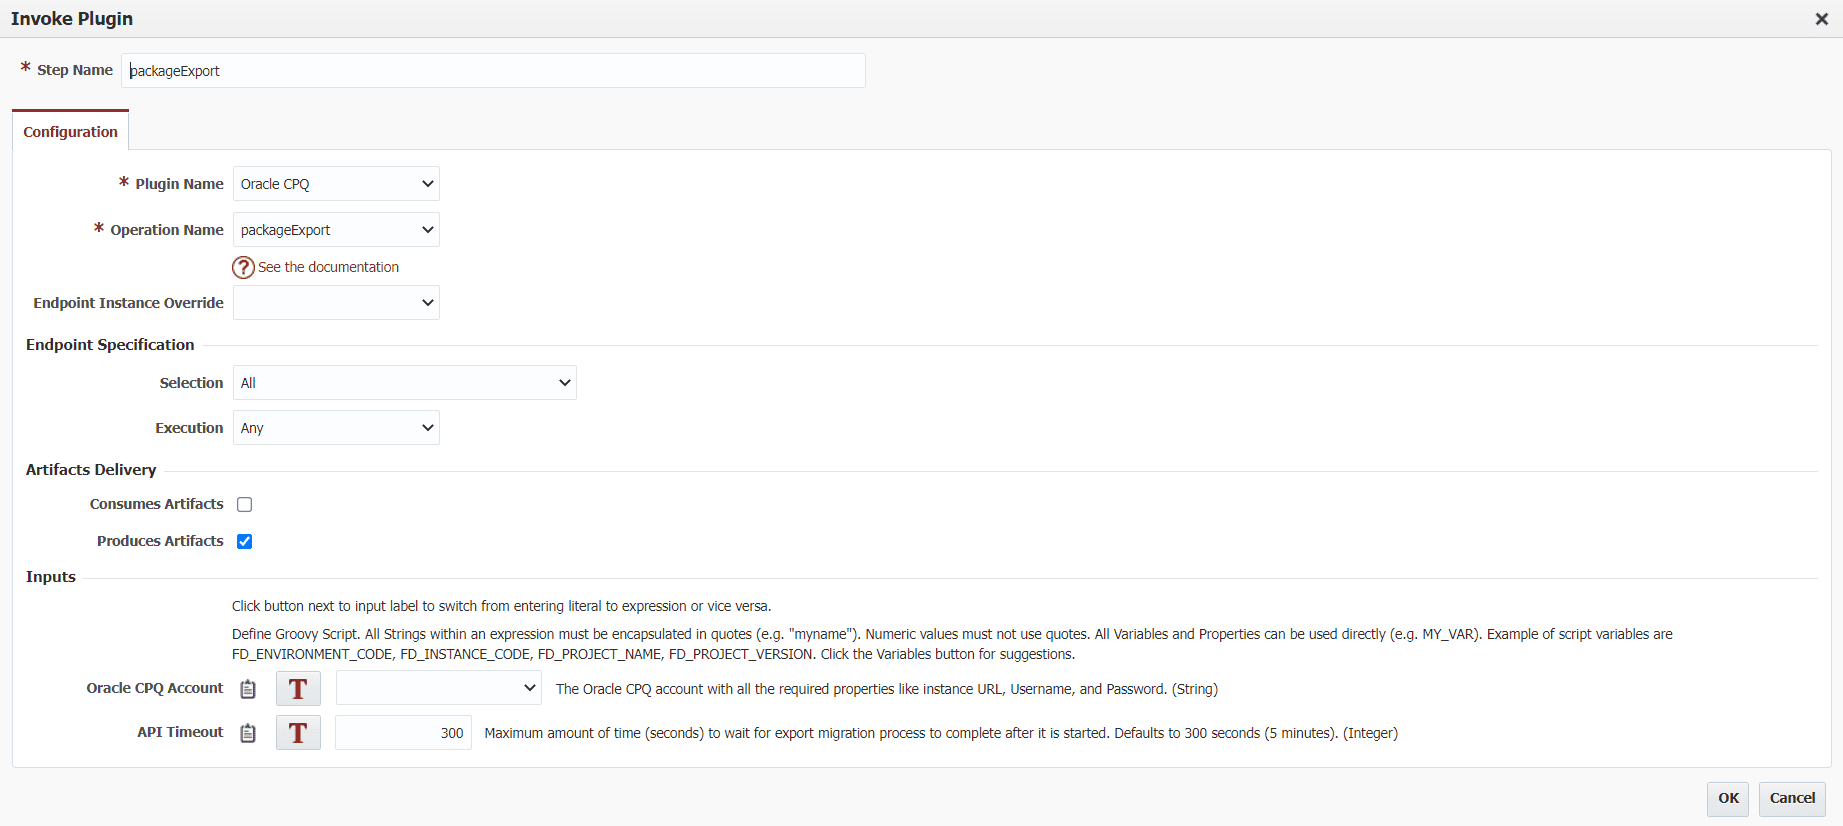
Configuring the packageExport step is very simple. There are only 2 inputs:
- Oracle CPQ Account – Tells FlexDeploy which integration account to use to connect to your Oracle CPQ environment. This input acts a global value and would override our environment instance value, therefore, we will not set the dropdown value here. In general, Oracle CPQ Account will change between environments, so global value is not desired.
- API Timeout – It takes time to process the export of migration packages. This is the maximum amount of time our workflow should wait for each individual file package to export. If it takes longer than the 5 minutes (default value), the execution will fail.
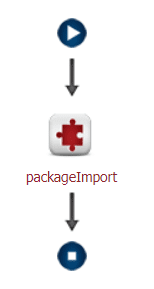
Deploy Workflow
In the same fashion, the deploy workflow is a single packageImport operation.
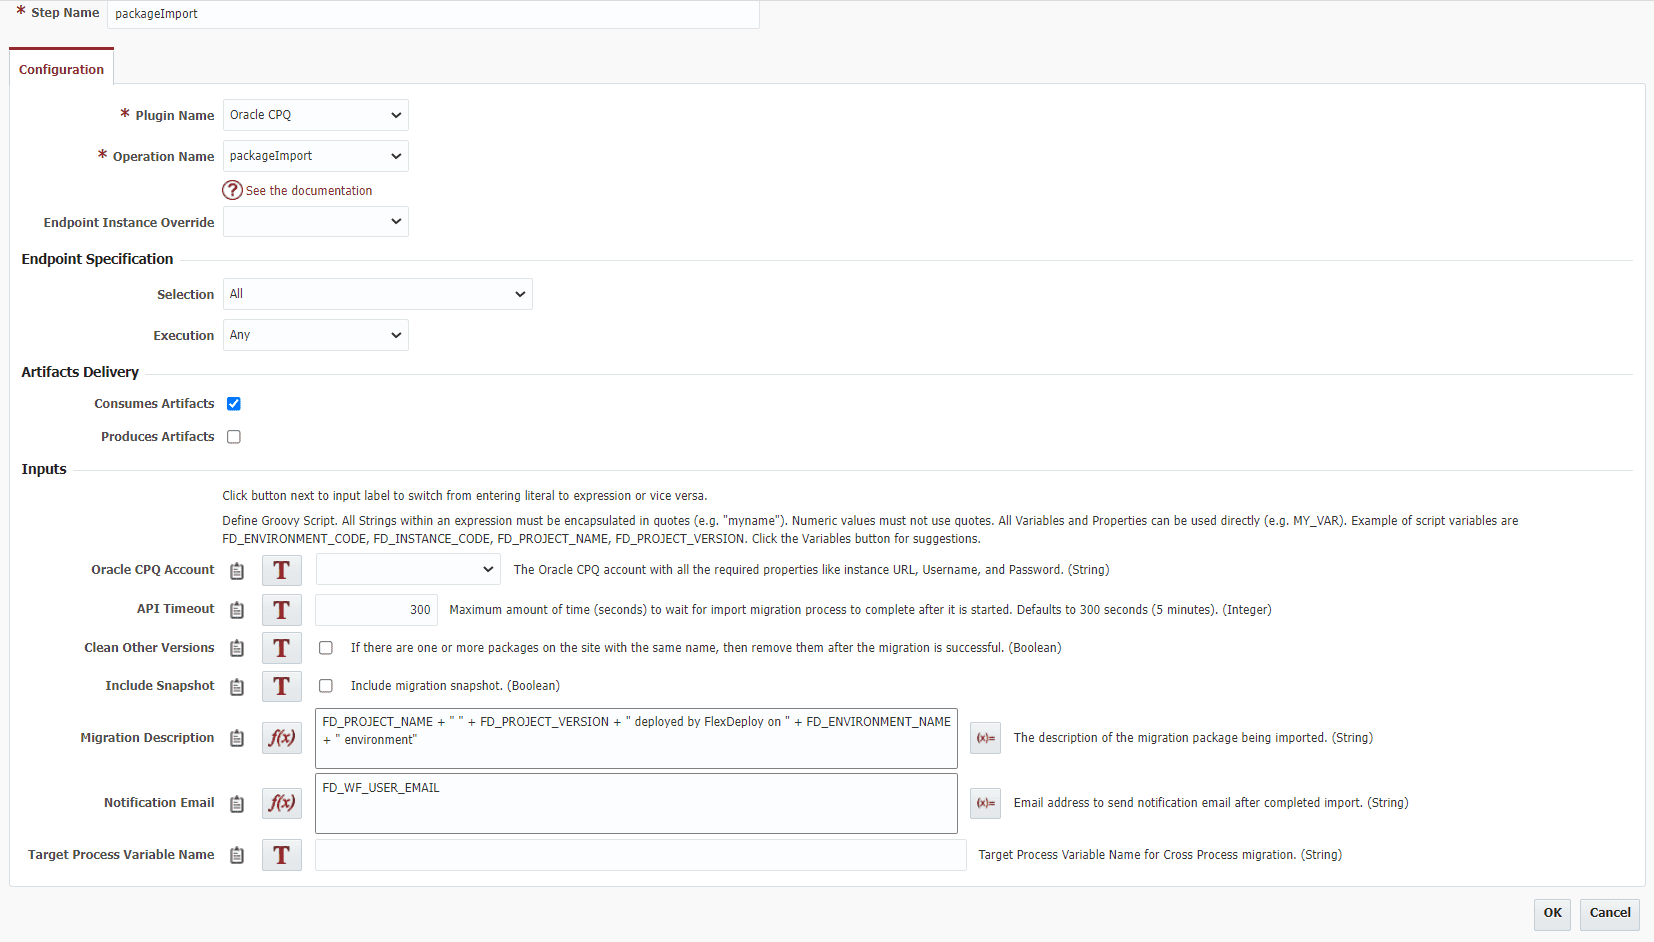
PackageImport has several inputs for customization.
- Oracle CPQ Account – Same as in packageExport.
- API Timeout – Same as in packageExport.
- Clean Other Versions – Upon successful import, delete any migration packages on the target environment with the same package name.
- Include Snapshot – Include a snapshot of the target site immediately before performing the migration. The snapshot can be reverted back if necessary.
- Migration Description – Include a custom description on your target site upon import completion.
- Notification Email – Send user(s) an email upon import completion. Contains useful information such as errors and files which were imported.
- Target Process Variable Name – Variable name for Cross Process migration. If set, then import will check for an already deployed process containing the passed process variable name on the target CPQ environment.
See the FlexDeploy Oracle CPQ Plugin Guide for more information on the packageExport and packageImport operations.
Create the Project
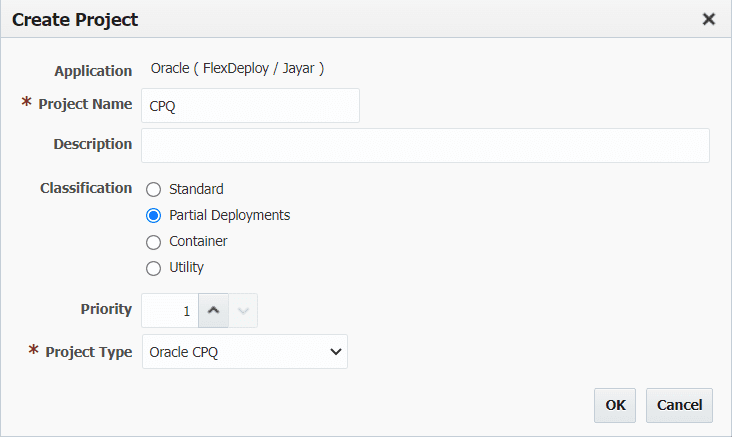
FlexDeploy projects tie together everything we created from the Topology and Workflows. For Oracle CPQ deployments we will need to create a specific project type to make the most use of the plugin and automation. Create a partial deployment project of type Oracle CPQ.
Project Configuration
The configuration portion of the project is used to define properties unique to the project including the build and deploy workflow, instances, and source control.
In this case, we are pointing to the CPQ build and deploy workflows and Oracle Common Features instance shown in previous setup. Notice SCM Type is set to None. A None value will be set to deploy changes environment to environment. Although, changes can also be source from SCM, in which case SCM Type should be set to some value and repository information as well.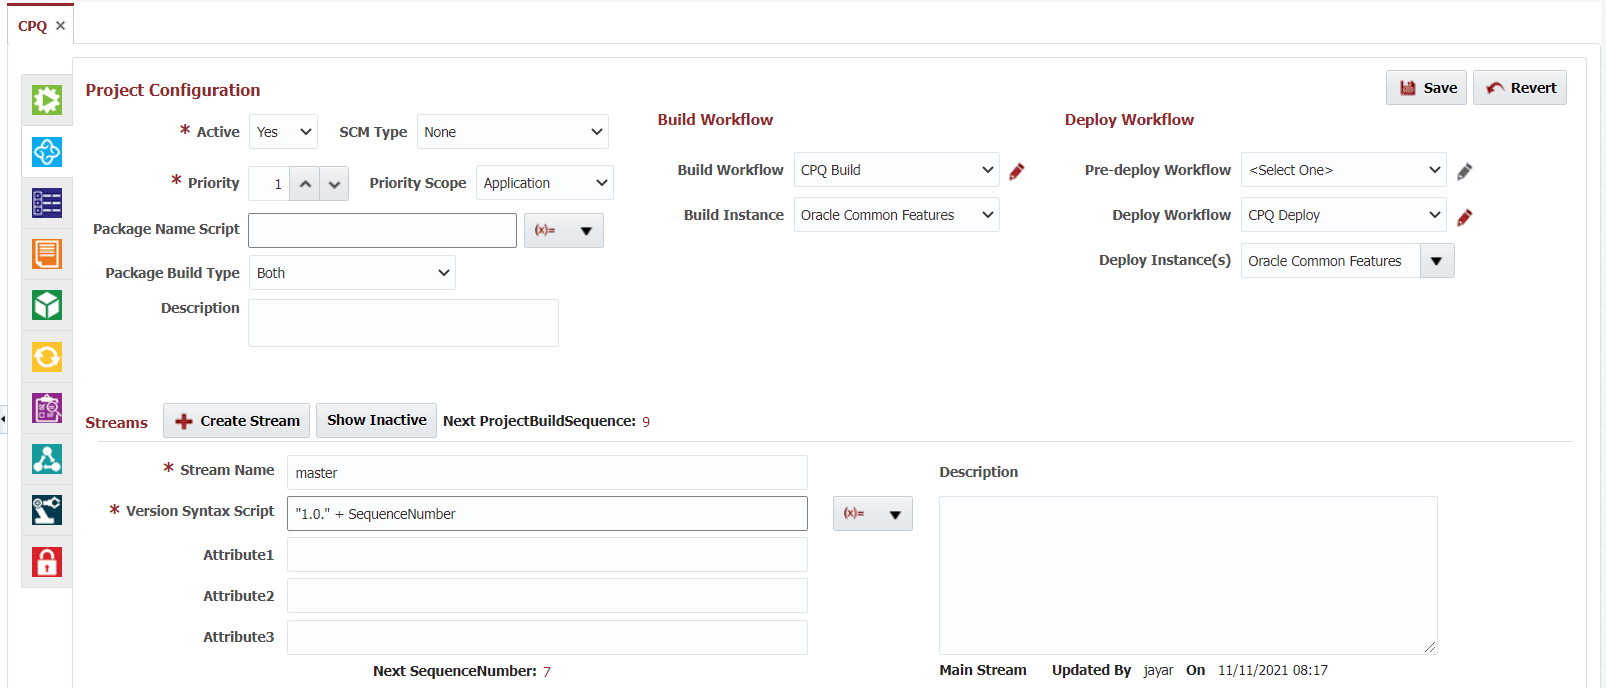
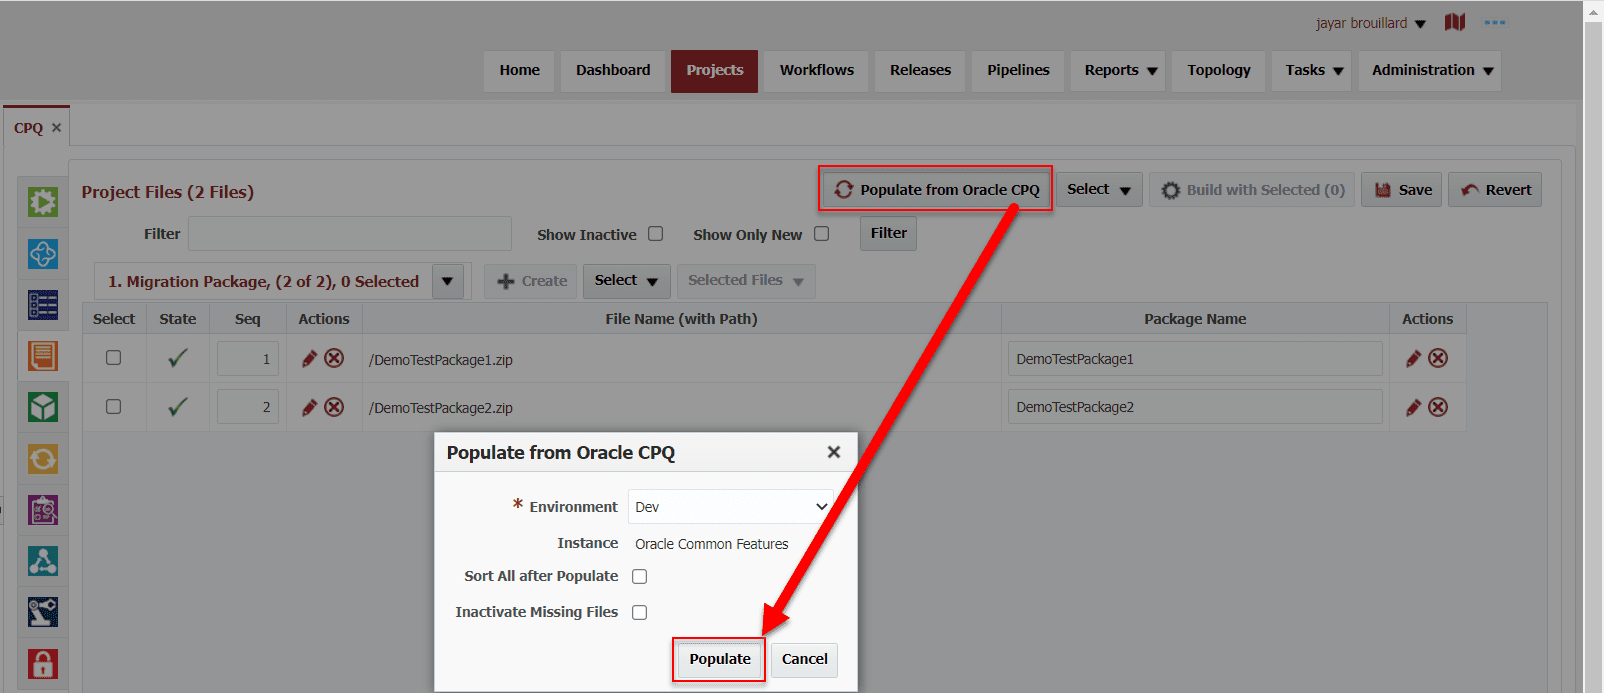
Project Files – Populate from Oracle CPQ
FlexDeploy allows you to pull files from your Oracle CPQ environment and use those packages for deployment. Initially, creating the migration packages on your Oracle CPQ environment will remain a manual activity. However, the ability to pull these after initial creation saves a lot of time manually entering data for each migration package.
Next we will go to the project files screen and click Populate from Oracle CPQ. After some time you should see the project file refresh with all packages existing on the selected environment.
We are ready to start running CPQ migrations from FlexDeploy!
Adhoc Build and Deploy
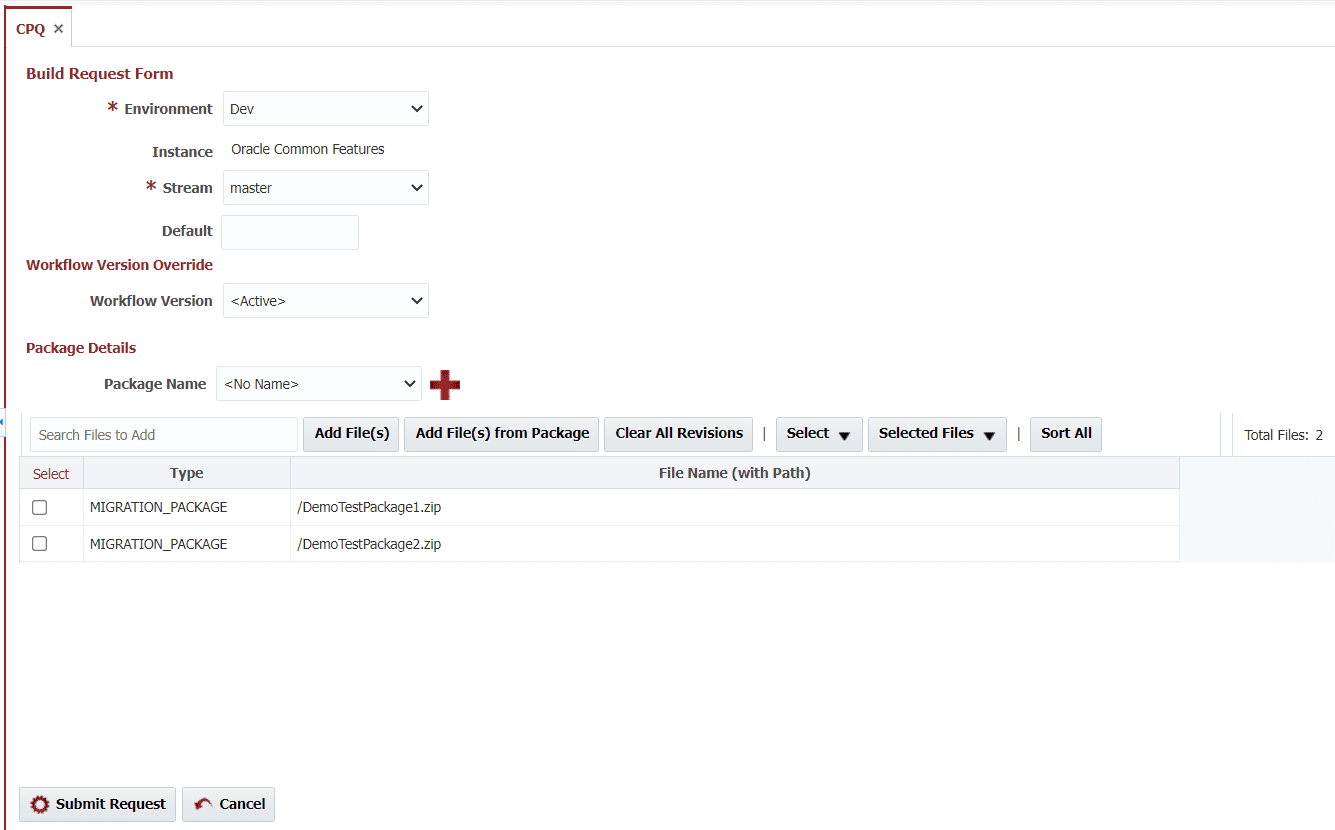
FlexDeploy allows you to executes build and deploy requests in three ways: 1) Build with all files, 2) build with a package, and 3) build with an unnamed package.
Let’s run a build request with an unnamed package for simplicity. All that needs to be done is selecting the build environment and add the files you’re interested in deploying. In this case, we added both of our test files.
 After submitting the build, each migration package file will be sequentially exported into a single zip artifact and saved on the FlexDeploy server. Essentially, this is the same process as logging into all of your Oracle CPQ environments and downloading every migration package you’re interested in.
Once the build is complete, let’s deploy our unnamed package to the Test Oracle CPQ environment.
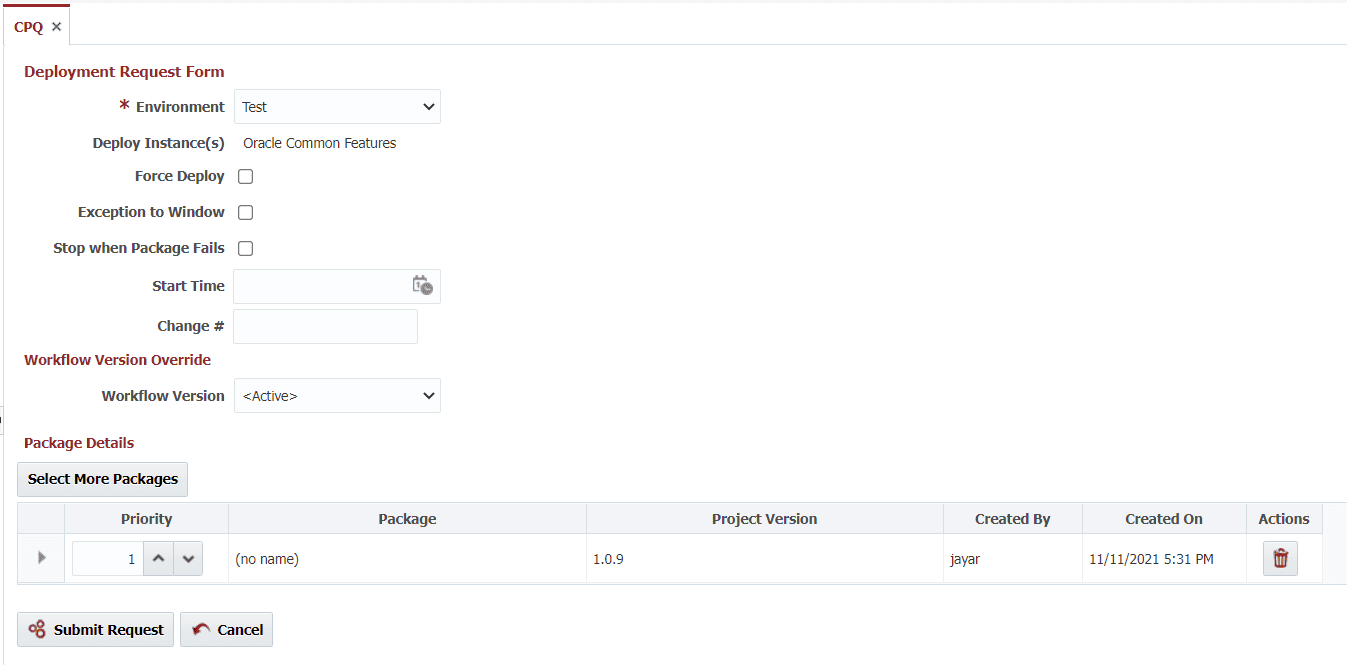
At any time after the build or deployment request is submitted you can view real-time logs of the execution to see progression and to debug if any failures occur.
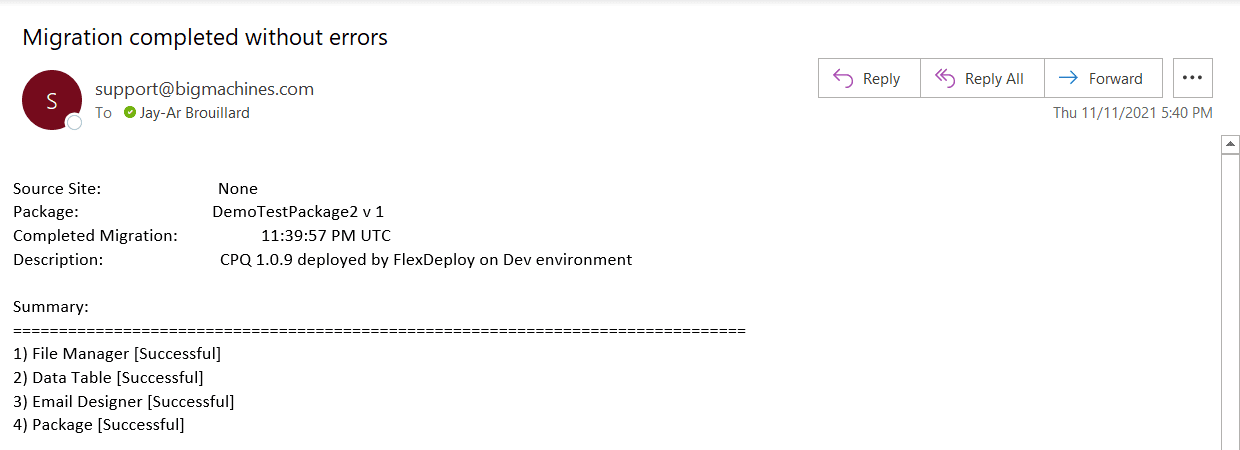
Once our deployment is completed, we should receive an email of completed import for each file based on the notification email input defined in our deploy workflow. Below is an example of that email notification.
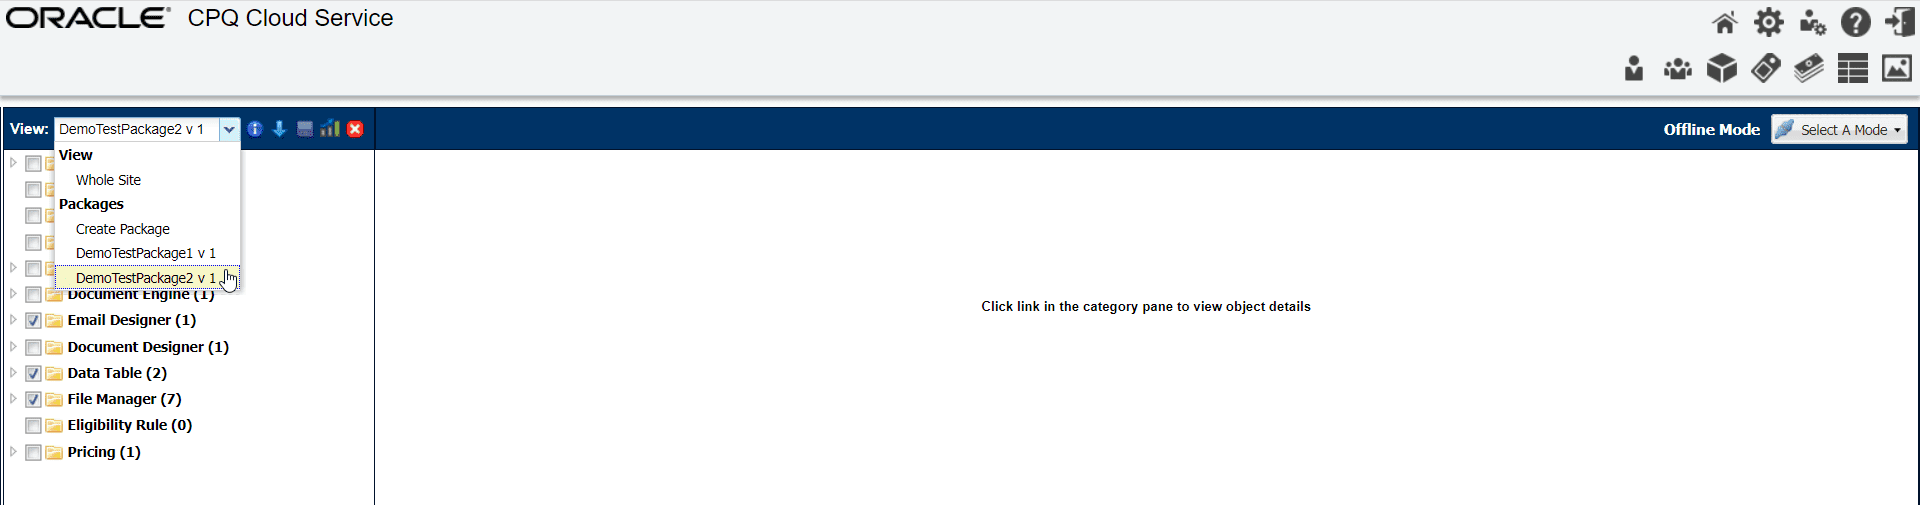
Now we know DemoPackage2 was successfully deployed, but let’s also confirm on the target environment as well. Navigating to the migration center on our Test Oracle CPQ Environment we can see that DemoTestPackage1 and DemoTestPackage2 are present.
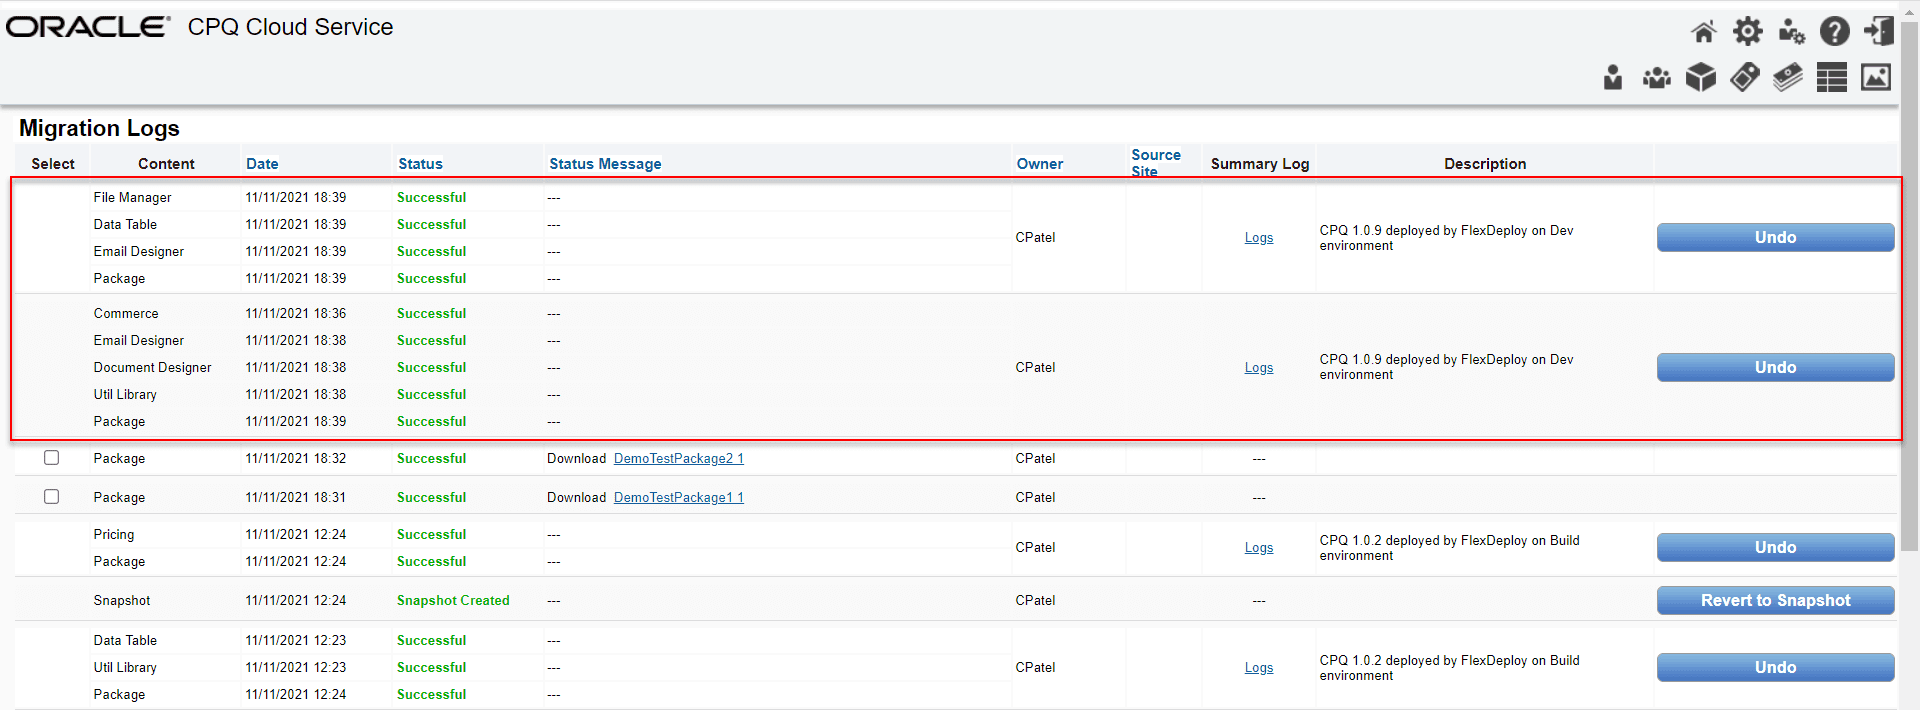
One more place to confirm is also in the migration logs. The first two entries in the table below show successful import, and the description is set based on the Migration Description field in our deploy workflow. You can further navigate into these logs to get more details as well.
Learn more about the ins and outs of Building and Deploying projects here.
Conclusion
Oracle CPQ is a great application that enables organizations to accurately generate quotes and proposals, and capture orders for various products and services. Some aspects of CPQ — such as migration packages — could be better automated. I hope now you can see where FlexDeploy’s Oracle CPQ Plugin solves that issue and reduces manual tasks. Using FlexDeploy’s release and pipeline features, the movement of CPQ migration packages can easily be incorporated into a release and deployment to any number of environments automatically.
For more information on release and pipeline features in FlexDeploy: