The migration of Siebel repository objects can be a time-consuming and manual process. This process involves manually creating and maintaining connections and migration plans in the Siebel migration application. It can also involve copying individual files – like watermark and zip files – between source and target servers.
Tedious. Manual. Error-prone. FlexDeploy changes all of that.
In this blog, we’ll highlight how FlexDeploy can help automate the movement of Siebel-related objects. We will show you:
- how to set up the workflows, topology, and projects in FlexDeploy, highlighting areas unique to Siebel.
- how to run a Siebel repository migration using the FlexDeploy Siebel plugin.
- a typical migration starting from Siebel Tools/Web Tools, using FlexDeploy to migrate the changes to subsequent environments.
Let’s get started.
Setting Up FlexDeploy for Siebel
Create Build and Deploy Workflows
FlexDeploy utilizes workflows to determine what steps and operations will be used during build and deploy processing. To support the Siebel build/deploy process we need two workflows:
- A build workflow that contains a step to execute the siebelBuild operation from the SiebelPlugin.
- A deploy workflow that contains the createWatermark, siebelExport, and siebelDeploy Siebel plugin operations.
Build Workflow
When creating the build workflow, we’ll configure the following:
- The Siebel build step is set up to point to “Siebel Source” for the endpoint selection, forcing the build to run on the source server.
- The workspace version is set up as an input parameter. This allows the user submitting the build to provide the version number of the workspace to be migrated.
- The export type input is set up to allow the user to select whether the build is the full export or an incremental export. A full export type will perform a Siebel full repository migration, while an incremental export type will perform a Siebel incremental repository migration.
- “Include object type” checkboxes should be checked for each of these Siebel Repository object types:
- Schema Service
- Application Workspace Data Service
- Runtime Repository Data Service
- Application Data Service
- Application Data Services with Transformation
- File Prepare and Deploy
- FINS BIB
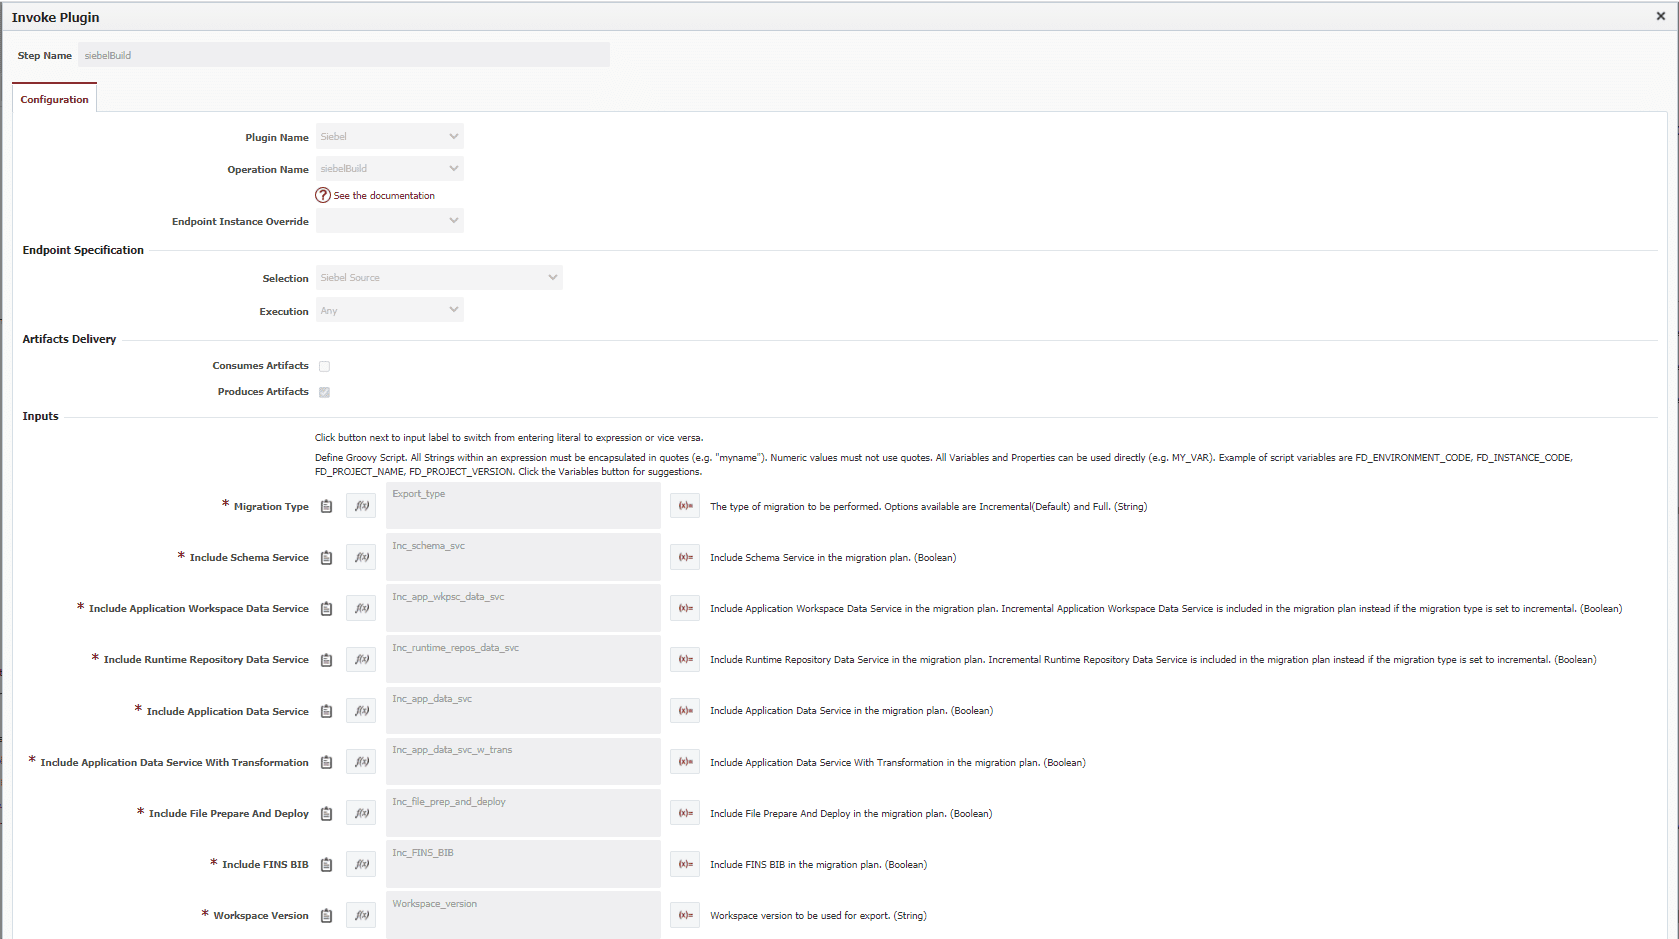
With this setup, the build workflow will generate the artifacts needed for either a full repository or incremental repository migration, including the object types selected by the user at build time for the workspace version provided.
Deploy Workflow
On the deploy workflow, we’ll include steps to create a watermark file, perform an export, and perform an import. As we just mentioned, there are two options when running the deploy.
Option 1: Full Repository Migration
When the export type from the build is selected as full, the full repository export is performed during the build execution, and the resulting zip file is saved as an artifact. The deploy will skip the Create the Watermark File and Export operations because they would not apply in a full repository migration scenario. The final step for an export type of full will be to copy the zip file to the target server and import the repository to a new repository name. Currently, Oracle requires that the renaming of the repository be a manual step so this is not included in the plugin operations.
Option 2: Partial Repository Migration
When the export type from the build is selected as incremental, the plugin will execute the Create Watermark File and Export operations during the deploy process. The workflow will create a watermark file on the target server, and automatically move the resulting watermark file to the source server. Then, the workflow will perform an export on the source server based on that watermark file, producing a zip file of the exported repository objects. The plugin will move the zip file from the source server to the target server and execute the import is on the target server.
The Nitty Gritty Details
There are a few things to keep in mind when using the FlexDeploy Siebel Plugin:
Object Types
Internally, the Siebel migration plan can use these options based on the export type:
Full:
- Schema Service
- Runtime Repository Data Service
- Application Workspace Data Service
- Application Data Service
- Application Data Service with Transformation
- File Prepare and Deploy
- FINS BIB
Incremental:
- Schema Service
- Incremental Runtime Repository Data Service
- Incremental Application Workspace Data Service
- Application Data Service
- Application Data Service with Transformation
- File Prepare and Deploy
- FINS BIB
The main difference is that the two incremental options are not shown when a full export is selected. Instead, the plugin shows just Runtime Repository Data Service and Incremental Application Workspace Data Service. If the export type selected is incremental, then the plugin will dynamically pick the incremental version of the inputs on the migration plan.
Server-Specific Requirements
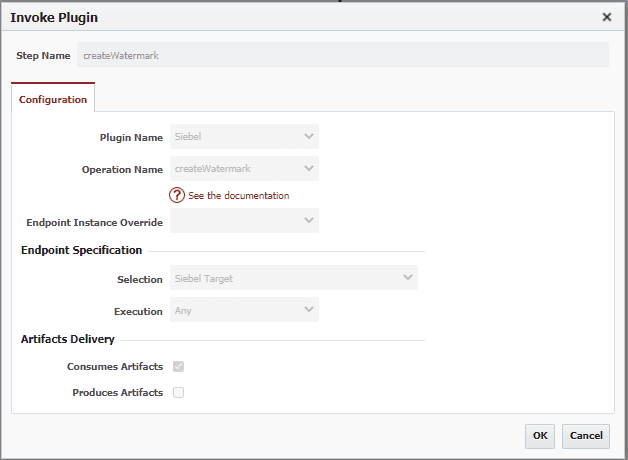
With the Siebel plugin, there are some requirements to execute on a specific type of server. The create watermark file must have the endpoint selection set to “Siebel Target” to force the execution of this step to occur on the target server for the environment instance being deployed to.
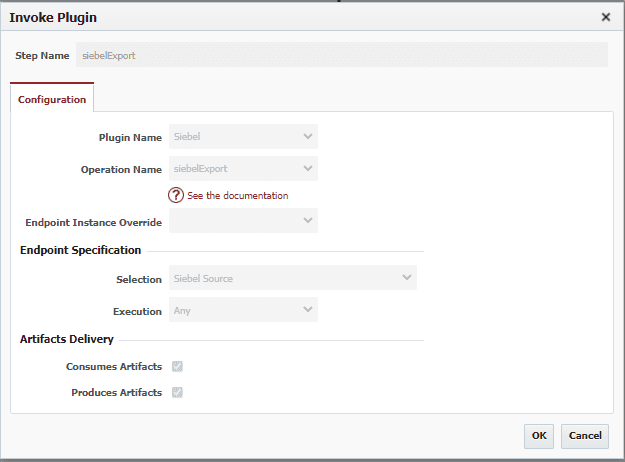
Similarly, the export step must execute on an endpoint defined as the “Siebel Source” type.
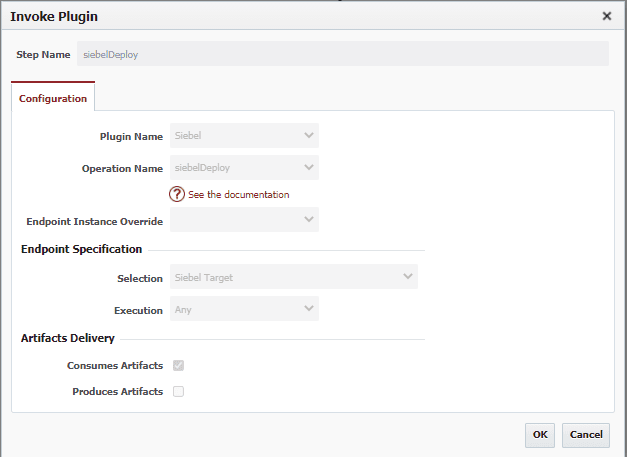
Finally, the import step of the deploy workflow must have the endpoint selection set to Siebel Target. The reasons for the endpoint selection type are clarified in the Topology section of this blog.
Define the Topology
In FlexDeploy, the topology maps the parameters, properties, and endpoints that are specific to an environment/instance. For Siebel projects, there are a few unique items to consider when setting up properties and endpoints.
As with all other FlexDeploy topology definitions, the properties are specific to the environment/instance being defined. In this example, we are defining the properties for the Siebel instance in the QA environment. The URL, usernames, passwords, and other properties would be specific to the QA instance of Siebel.
We make it simple for enterprises to drive continuous innovation through quality software. Together we can help organizations achieve more customer value at lower cost and with less risk.
The Siebel Target Migration Home is a property that requires special consideration. This property represents the location where the Siebel Migration application will write any export or import results. Normally, this directory is in the Siebel File System. The endpoint that accesses resources on the Siebel QA instance must have access to this directory when defining endpoints. For this reason, the endpoint is normally the Siebel application server. But it can be any endpoint if this file system is mounted on that server.
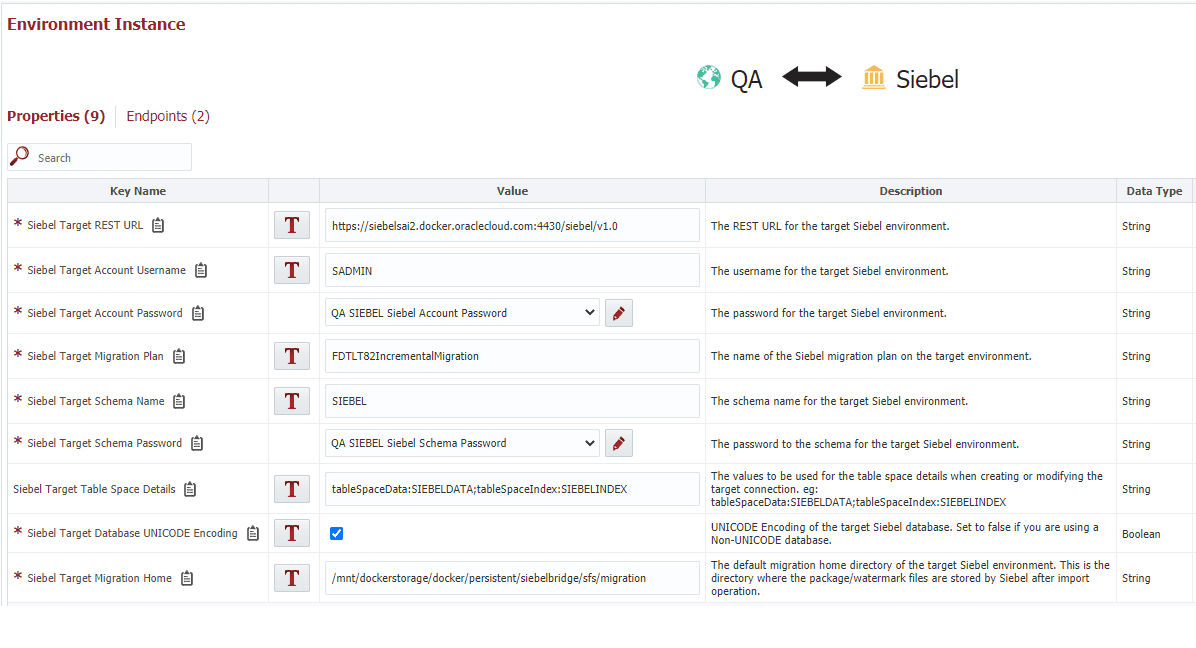
Next, the endpoint(s) and resource types need to be defined. The resource type “Siebel Source” is meant to signify that this endpoint serves the functions as server defined as a Source in the Siebel Migration application. “Siebel Target” represents that the endpoint would be considered a target in the Siebel Migration application.
In the build environment, there will normally be a single endpoint defined and it would have a resource type of “Siebel Source”. In any target environment, there would be two endpoints defined. One would be defined as the Siebel Source and the other the Siebel Target. In the workflows defined above, you can see that during the deploy, the create watermark step would execute on the Siebel Target or endpoint SIEB0002 in this example. The export would then run on the Siebel Source or endpoint SIEB0004. Finally, the import step would run on the Siebel Target or SIEB0002.

Create the Project
The project in FlexDeploy is used to tie together the build and deploy details for a specific technology. A project will link build and deploy workflows to specific instances in the topology. A link can also be made to source control systems. Additionally, some properties can be defined for the project.
The configuration tab is used to define the properties unique to the project, such as source control, associated build and deploy workflows, streams, etc. In this case, we’ll select an SCM type of None, but we’ll set the Stream Name to match the Siebel Workspace Branch Name. In this example, that would be MAIN and also int_release_0721. The stream name information will be used when the workflow steps interface with Siebel to allow FlexDeploy the ability to pull the code/repository from the correct branch. Additionally, the Build and Deploy workflows and instances that we created earlier will be assigned.
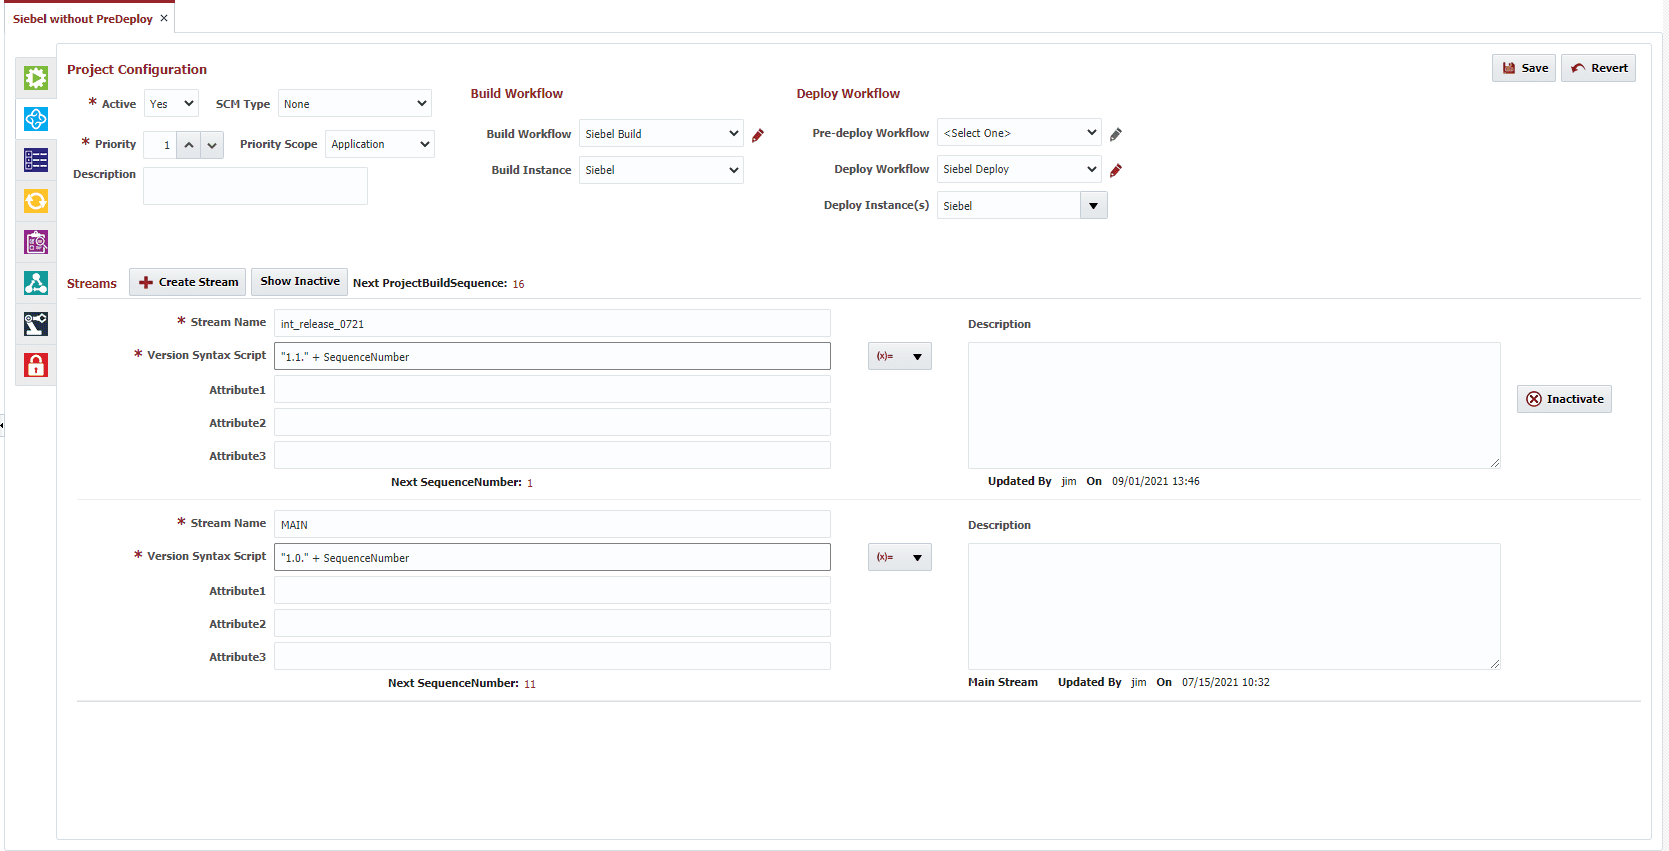
NOTE: The stream name can also be a Siebel integration workspace (as illustrated above with the int_release_0721 stream). If multiple branches are used in Siebel Tools, creating multiple streams in FlexDeploy to match will provide you with a drop-down to select the branch/stream name at build time.
Now, we need to define the project properties. In the project properties section, we’ll define the build or source environment properties. These are needed to perform an export from the source environment during a deploy to a different target environment.
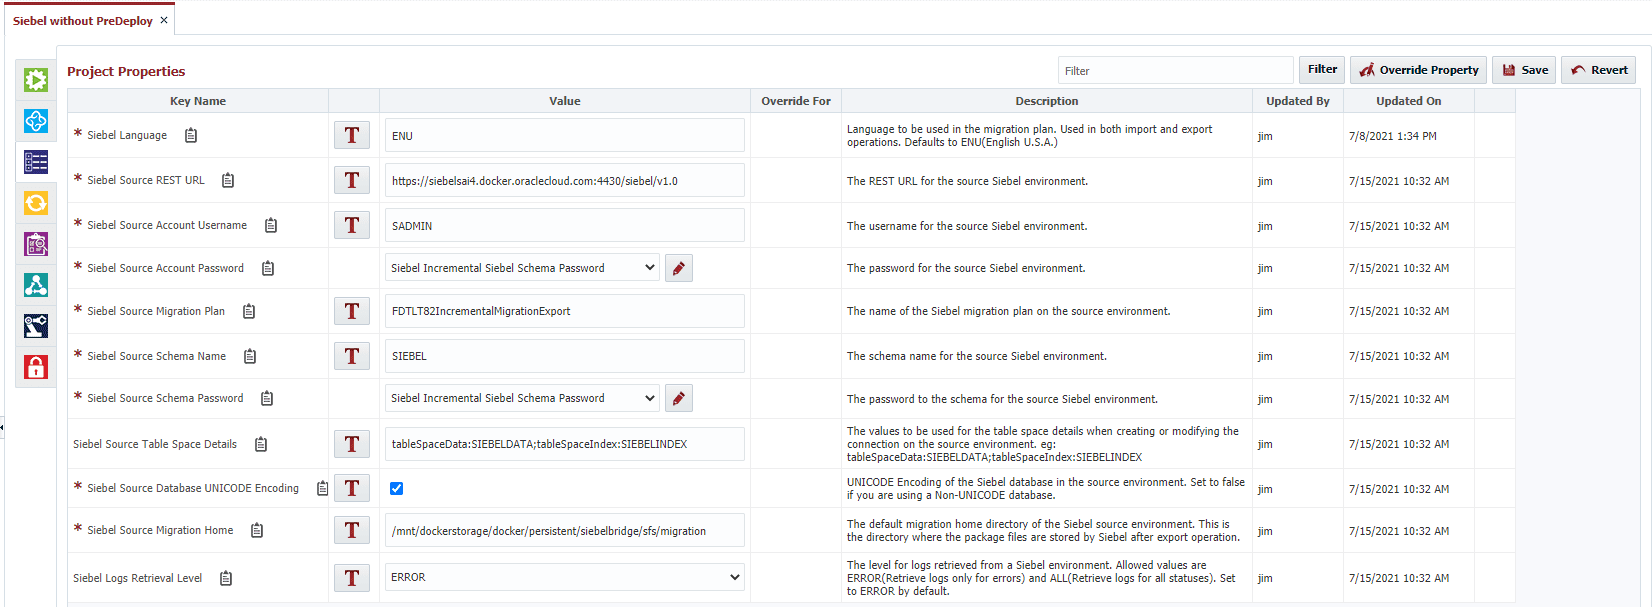
At this point, we are ready to run Siebel deployments from FlexDeploy.
Example of the Development Lifecycle – Using MAIN Branch
In Siebel Tools, a workspace is created, and the change is made. In this example, we are creating a regular workspace off the MAIN branch.
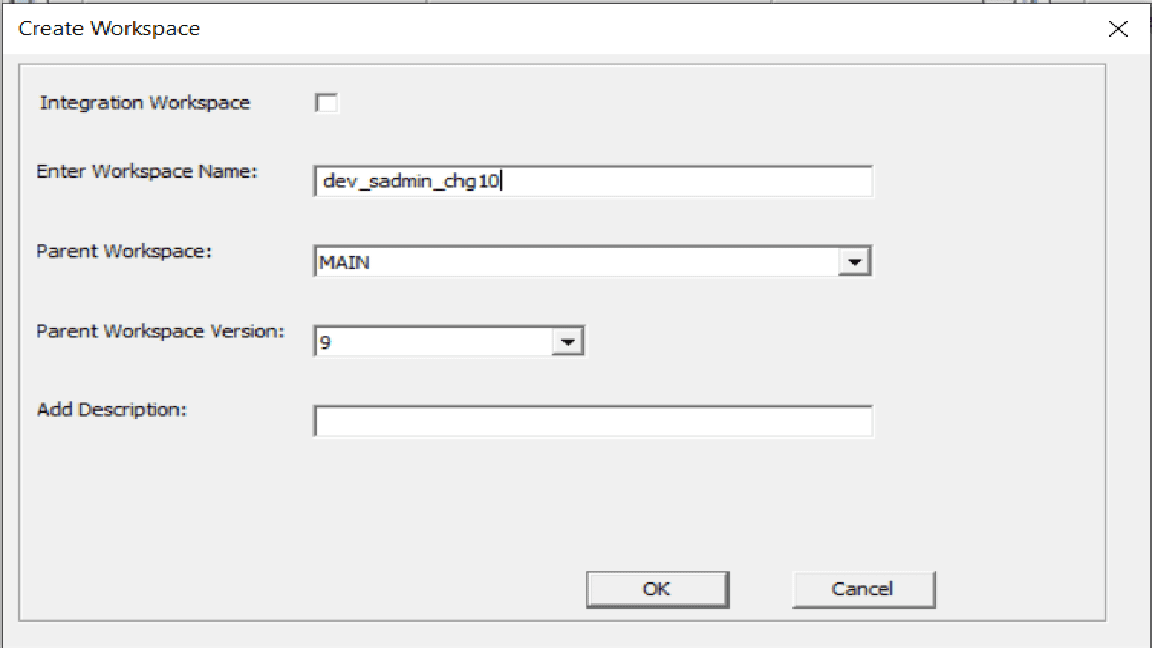
Using Siebel Tools, the normal checkpoint and submit for a delivery process are executed. Finally, the Deliver Workspace is executed. Take note of the “To Workspace”. In this example, the change is being delivered to the MAIN branch under version 10:
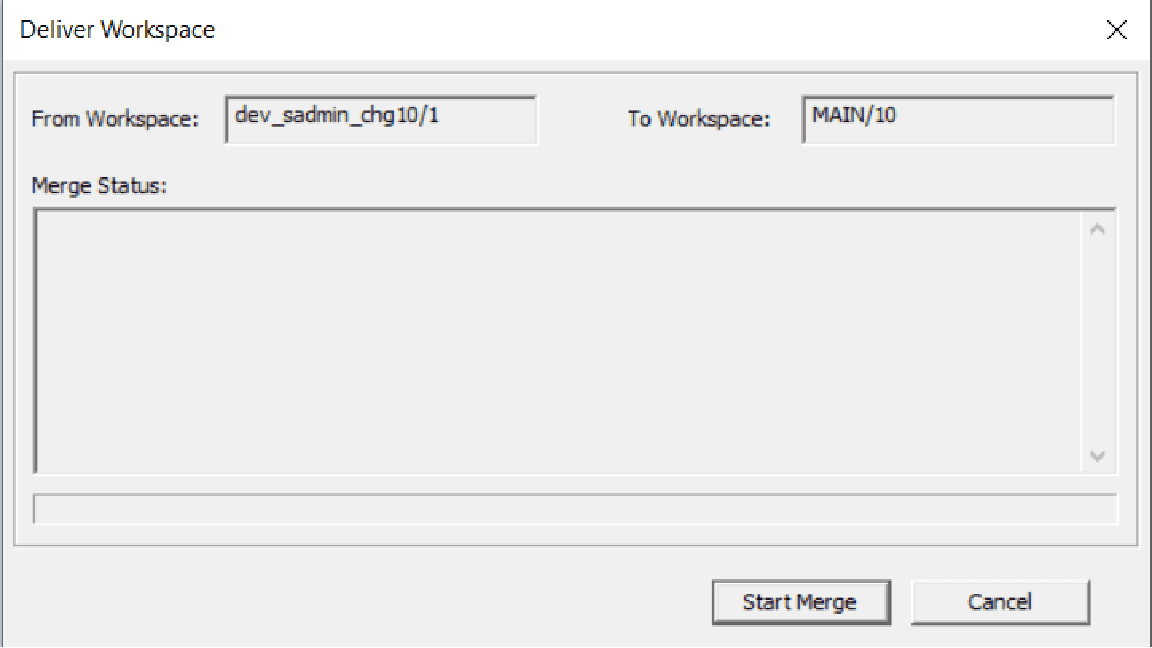
We will now use FlexDeploy to migrate this change from the Development to the QA environment.
From the execution tab of the project, select Build. Select the Development Environment, the Stream name of Main (matches the To Workspace Branch Name from the deliver), set the Workspace version to 10 (matches the version number from the deliver), and select the Export Type to Incremental. This is assuming the target Siebel environment is already running with a runtime repository that allows incremental imports. Finally, the checkboxes for the desired Siebel Repository objects are selected and the build is submitted.
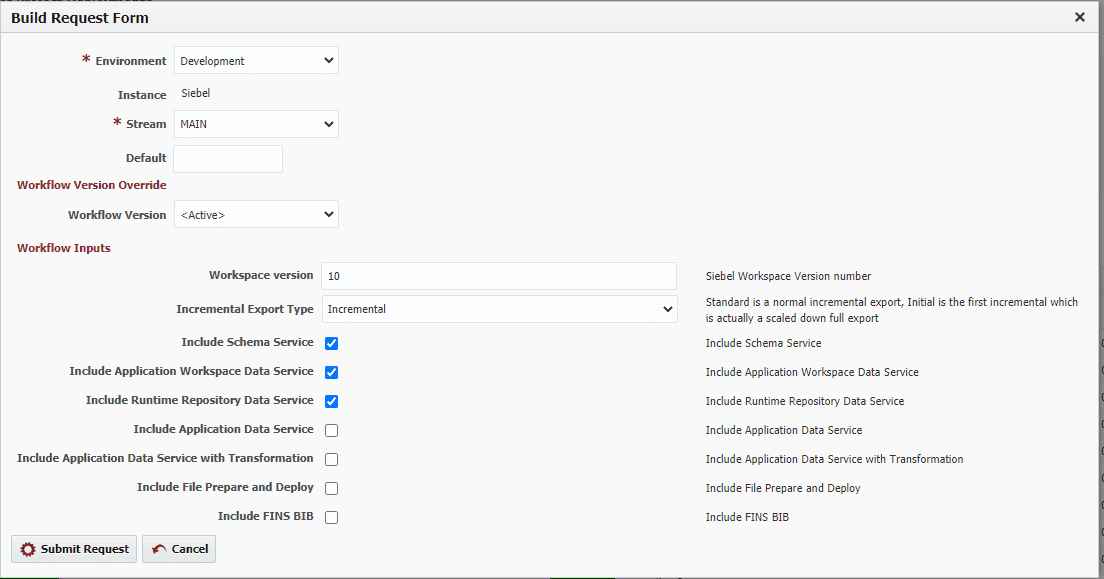
The build workflow calls the Siebel Build operation to generate a JSON file containing the relevant information to migrate. The build process in the incremental scenario does not connect to Siebel or the Siebel repository. For a full export type, the build operation would perform the export from Siebel as well and produce the zip as an artifact in FlexDeploy. The results would look like this:

Next, select Deploy from the execution tab of the Project in FlexDeploy. Select the QA environment and click Submit Request to deploy the changes from the MAIN version 10 workspace in Development to the QA environment:
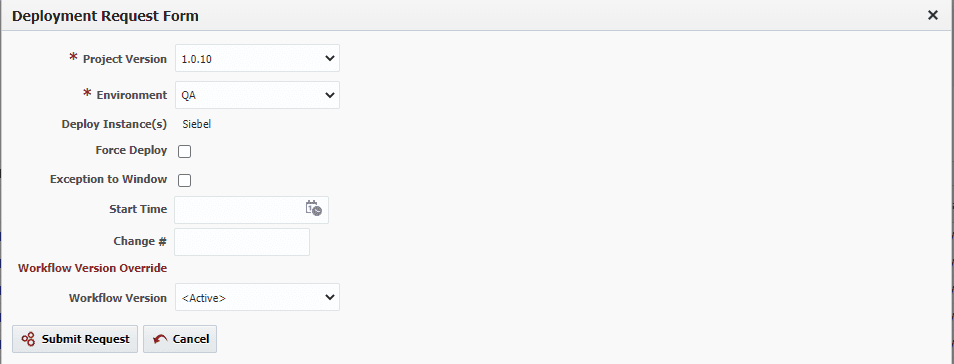
The deploy workflow will:
- Create the watermark file from the QA environment if the export type is incremental. If the export type is full, this step does nothing.
- For incremental exports, the watermark file will be automatically copied to the development or source environment for use during the export
- On the source server, the Siebel Export operation uses the watermark file along with the JSON artifact from the build operation to export the Siebel Repository changes to a zip file
- Internally, the plugin will automatically copy the zip file from the development environment to the QA environment
- Finally, the Siebel Import will import the zip into the target QA environment
Sample results would look like this:

We make it simple for enterprises to drive continuous innovation through quality software. Together we can help organizations achieve more customer value at lower cost and with less risk.
Example of Development Lifecycle – Using Integration Workspace
In Siebel Tools, when an integration workspace is created developer workspaces are created under that integration workspace, and the change is made. In this example, we will be using FlexDeploy to perform the initial migration to the target environment. The initial migration is required by Siebel because the full repository migration to the target will allow future incremental migrations using that branch.
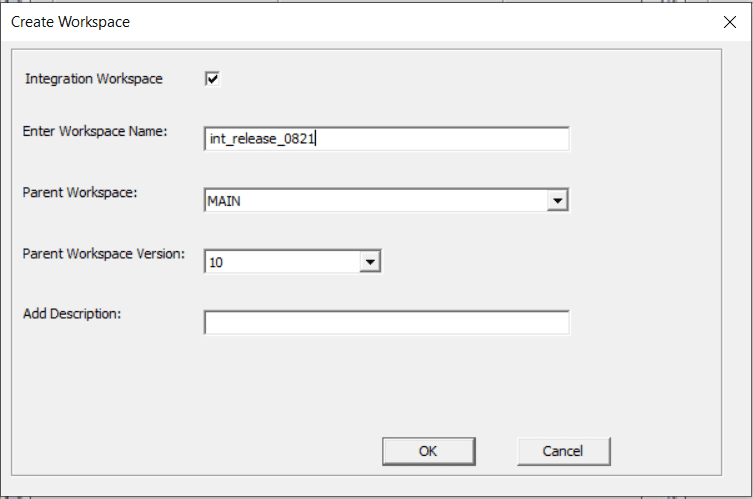
Add the new stream name to FlexDeploy to allow deployments to use that branch:

We can now use the same FlexDeploy project to perform migrations using the integration workspace name of int_release_0821. To accomplish this, simply select the int_release_0821 from the Stream drop down when submitting the build:
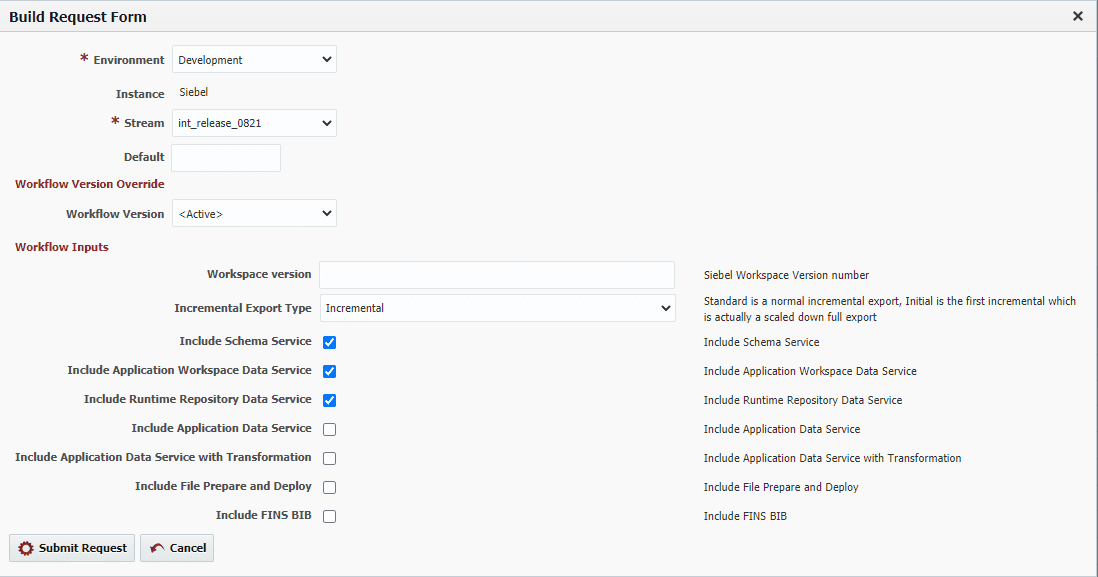
After submitting the build, the remaining process is the same as is outlined above. The only difference is that the export and import operations are now looking at the select integration workspace within Siebel.
Special note: If performing a full repository migration using this process, the renaming of the repository will continue to be a manual process. Oracle documents the repository rename as always being a manual step.
Conclusion
You just saw how to migrate different types of Siebel projects. Using FlexDeploy’s release and pipeline features, the movement of Siebel repository objects can easily be incorporated into a release and moved along with other projects involving a wide range of technologies. FlexDeploy also allows you to incorporate things like schedules, approvals, notifications, and maintenance tasks (like recycles) in the pipeline to fully automate the process from end to end.
For more information on release and pipeline features in FlexDeploy:
- [Case Study] How One Customer Reduced Deployment times by 60x
- 5 Real Life Lessons About DevOps
- 6 Benefits of Release Orchestration
- Extending the Automation of Siebel Deployments with Release and Pipeline
To see FlexDeploy in action, contact us today.


