Maven makes distributing software easy with automated dependency injection. With FlexDeploy 3.0, the Maven plugin, and a Spring project, you are only minutes from deploying a sustainable app to your Tomcat server. Let’s take a look at how we can set up the workflow and project to build the Spring Pet-Clinic sample, from https://github.com/karlhenselin/spring-petclinic. This tutorial assumes that you already know the basics of FlexDeploy, and focuses on the new features: the Maven plugin and Git SCM integration.
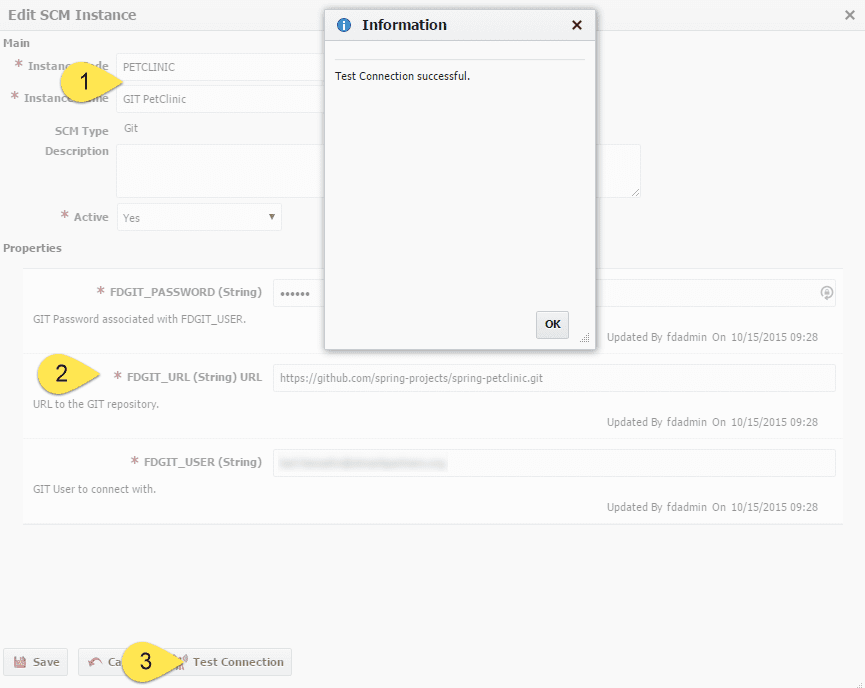
First, create a new Git SCM instance for the Pet Clinic App.
- Create a name for the SCM Instance.
- Enter the data for the Git repository (If you don’t have a Github account, any email and any password will work for a clone from this repository)
- Click Test to verify that the data was entered properly.
If you don’t already have a build Instance configured with Git, you need to do that. Make sure to install version 1.7.6 or newer. Additional features of FlexDeploy also unlock if Git is also installed on the FlexDeploy server machine, but they are not needed for this tutorial.
Next, setup a build workflow.
This workflow will be very reusable. It should work for any Git + Maven build that you create in the future, so choose a name like Git Maven.
- Drag in the operation cloneProjectSources from the Git Plugin. There is nothing to configure on the plugin.
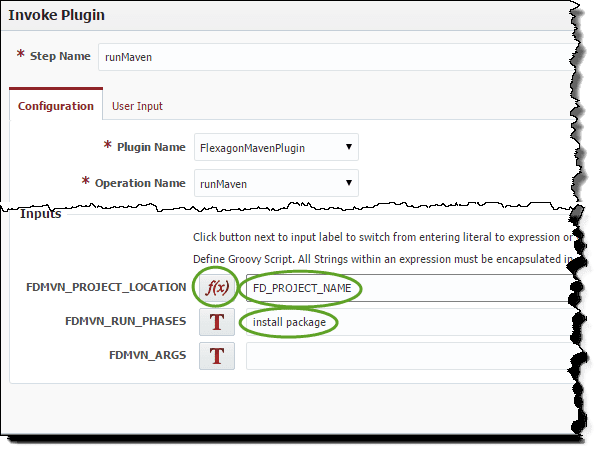
- Drag in the operation runMaven from the Maven Plugin.
- For FDMVN_PROJECT_LOCATION choose Groovy Script and enter FD_PROJECT_NAME.
- For FDMVN_RUN_PHASES enter install package.
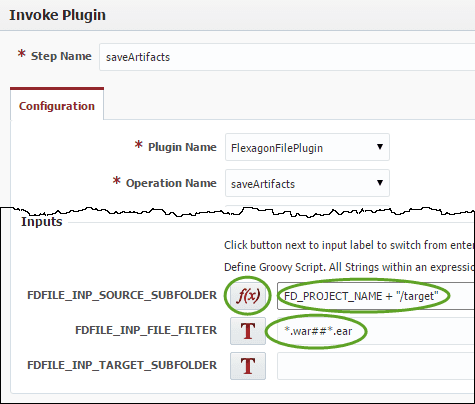
Next, drag in the file plugin operation saveArtifacts.
To make the code reusable, I suggest the following inputs:
For FDFILE_INP_SOURCE_SUBFOLDER, choose Groovy Script and enter FD_PROJECT_NAME + “/target”
For FDFILE_INP_FILE_FILTER, enter *.war##*.ear to select whatever compiled web packages are present.
Activate the WorkFlow.
Next, let’s setup the project.
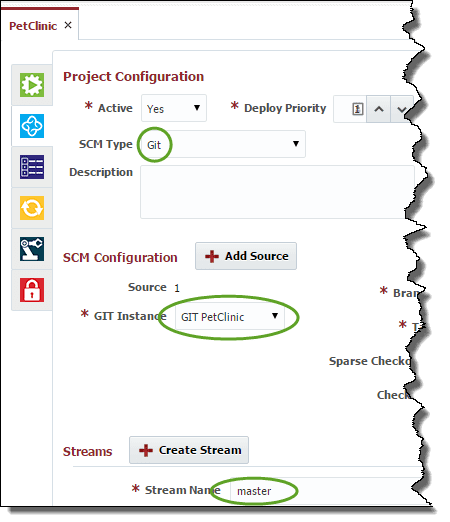
Create a project with this configuration:
SCM Type – Git
GIT Instance – The Instance that you created for the PetClinic Application on GitHub.
Stream Name – master (Don’t capitalize it or it won’t work)
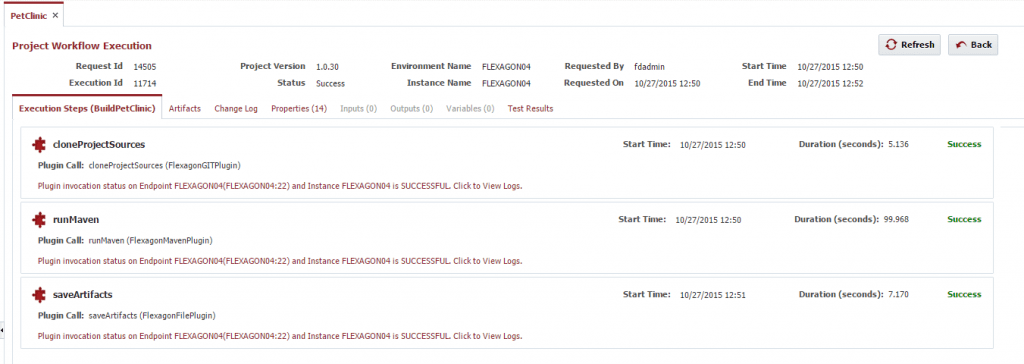
Finally, run the Build
A shiny new War should be created. You can deploy it to Tomcat and test it out.
