
There are many source control systems available today to allow sharing code and viewing historical changes, but verifying check-ins through an automated build and test process is also very important. Writing test cases and especially tests for APIs can be a tedious process. Nobody would disagree that having tests is good and we should be running them as often as possible. In practice, writing tests, verifying whether they are working, setting up the testing environment, and then eventually plugging them with the build system is hard. Teams tend to skip this part accruing a ton of technical debt in the process. FlexDeploy simplifies this process with the help of the Test Automation Framework.
Postman is a useful tool for both automated and manual testing of APIs. FlexDeploy allows using Postman for automated testing of your APIs by using Newman, which is Postman’s command line collection runner utility.
FlexDeploy has a generic Test Automation Framework (you can read more about it here) and various testing tools are supported out of the box. In this blog, I will discuss the FlexDeploy Postman plugin, which plugin operations are supported, and how to implement them into your workflow execution life-cycle.
Preparing FlexDeploy to use the Postman Plugin
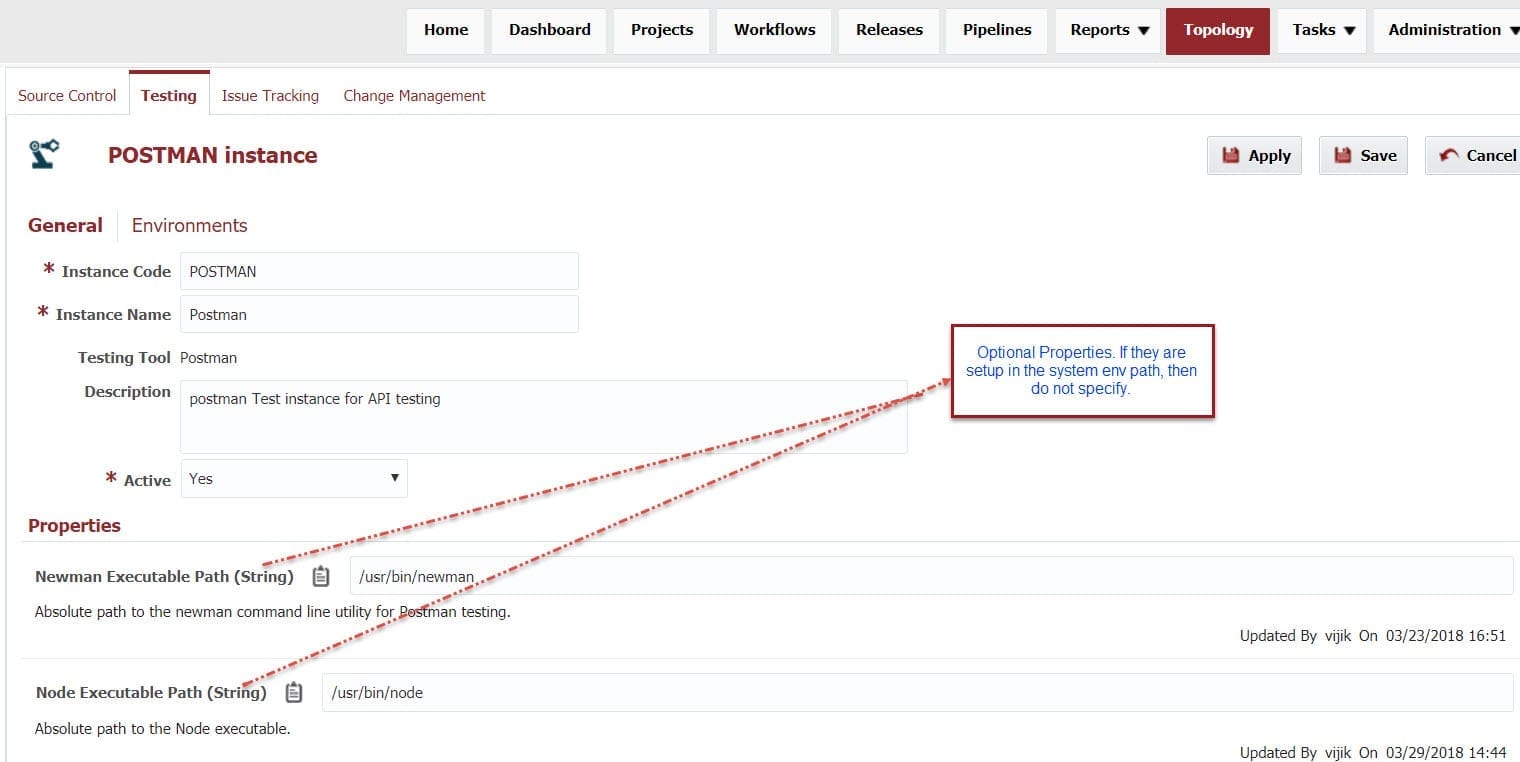
We need a Test instance and Endpoint to be created as below which will be mapped with the build/deploy environment instance in order to execute tests after the deployment process. If you have installed Newman on your developer server and it is available on PATH, you can skip this step.
FlexDeploy executes test cases using a Test Definition workflow and a “Postman-runCollection” workflow that is provided out of the box in FlexDeploy to execute Postman collections.
Implementing Postman tests using FlexDeploy’s Test Automation Framework
FlexDeploy provides the ability to invoke your functional or load tests automatically after each deployment, and in fact, we would recommend this as a best practice. The test automation framework is highly customizable.
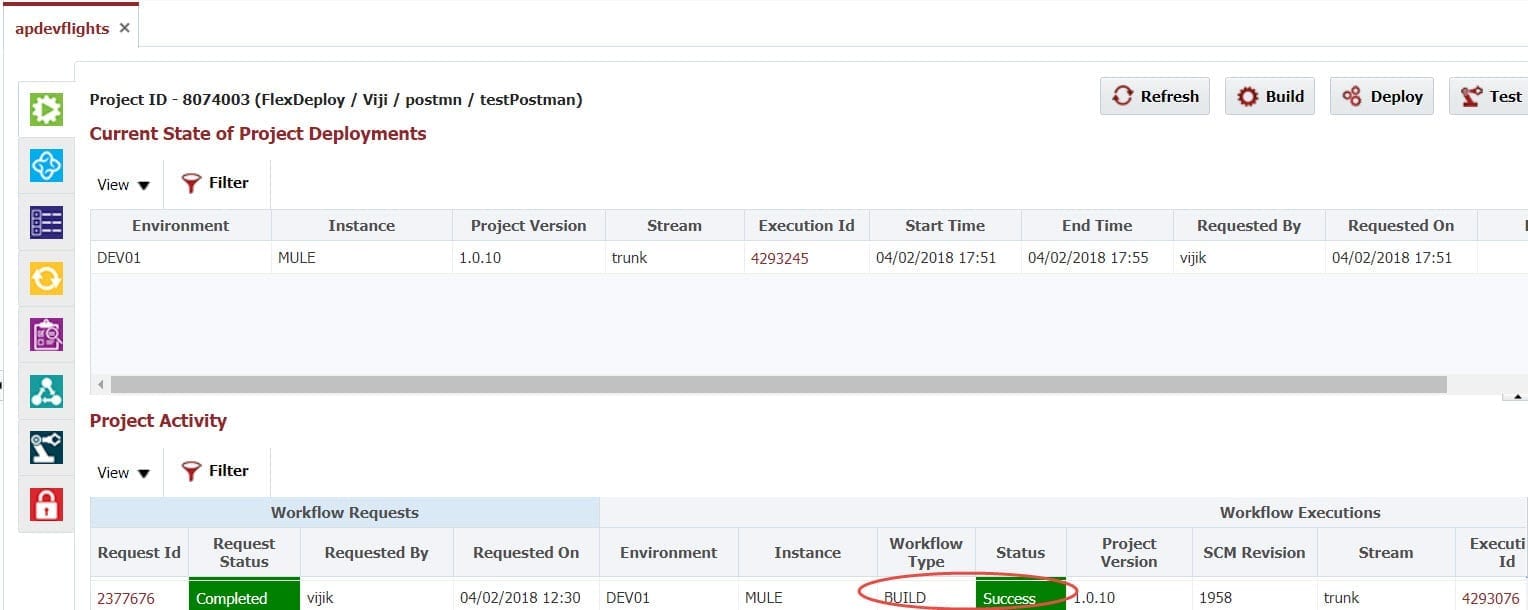
Consider an example Mule Application (apdevflights) which has been built and is ready to deploy using the FlexDeploy Project as shown below.
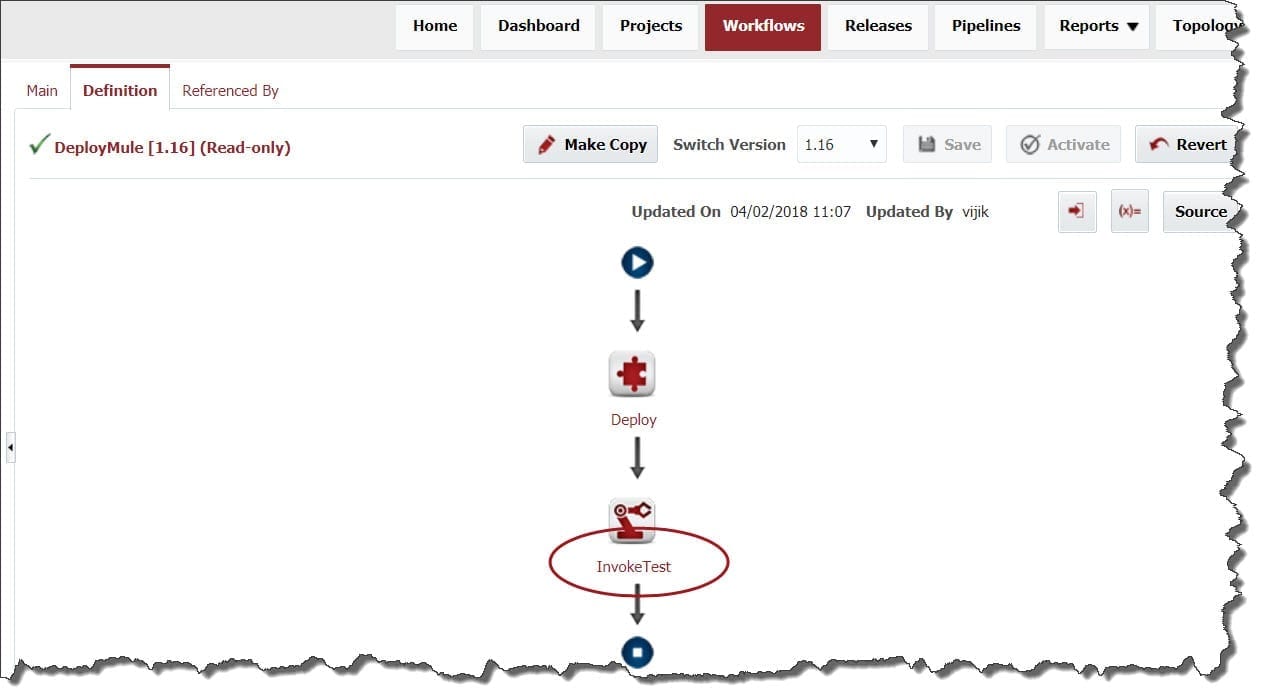
The next step is to define the Deploy workflow and ensure it has the “InvokeTest” workflow operation, which runs any correctly scoped tests configured on the project. To make it simple, leave the inputs as blank for this operation. See example below.
 Now that everything is configured, I can set up the project to use Postman tool with the Test Automation Framework. So, I will switch to the Test Automation tab of Project, and the first thing to do is set up the Strategy for when and where my tests will run.
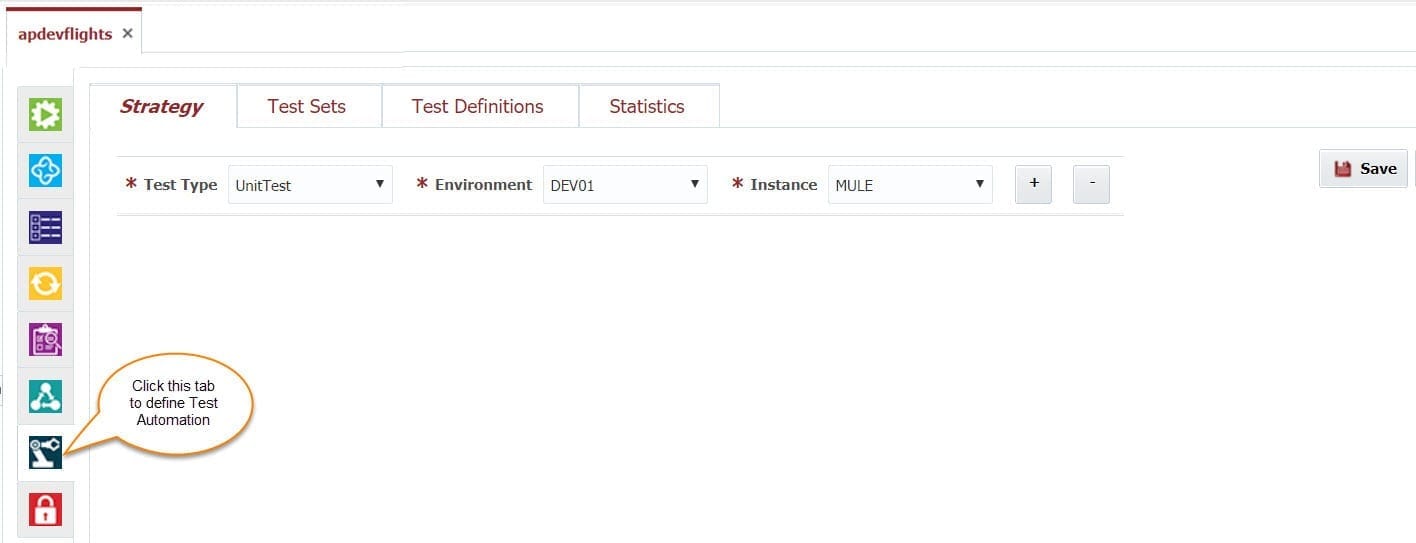
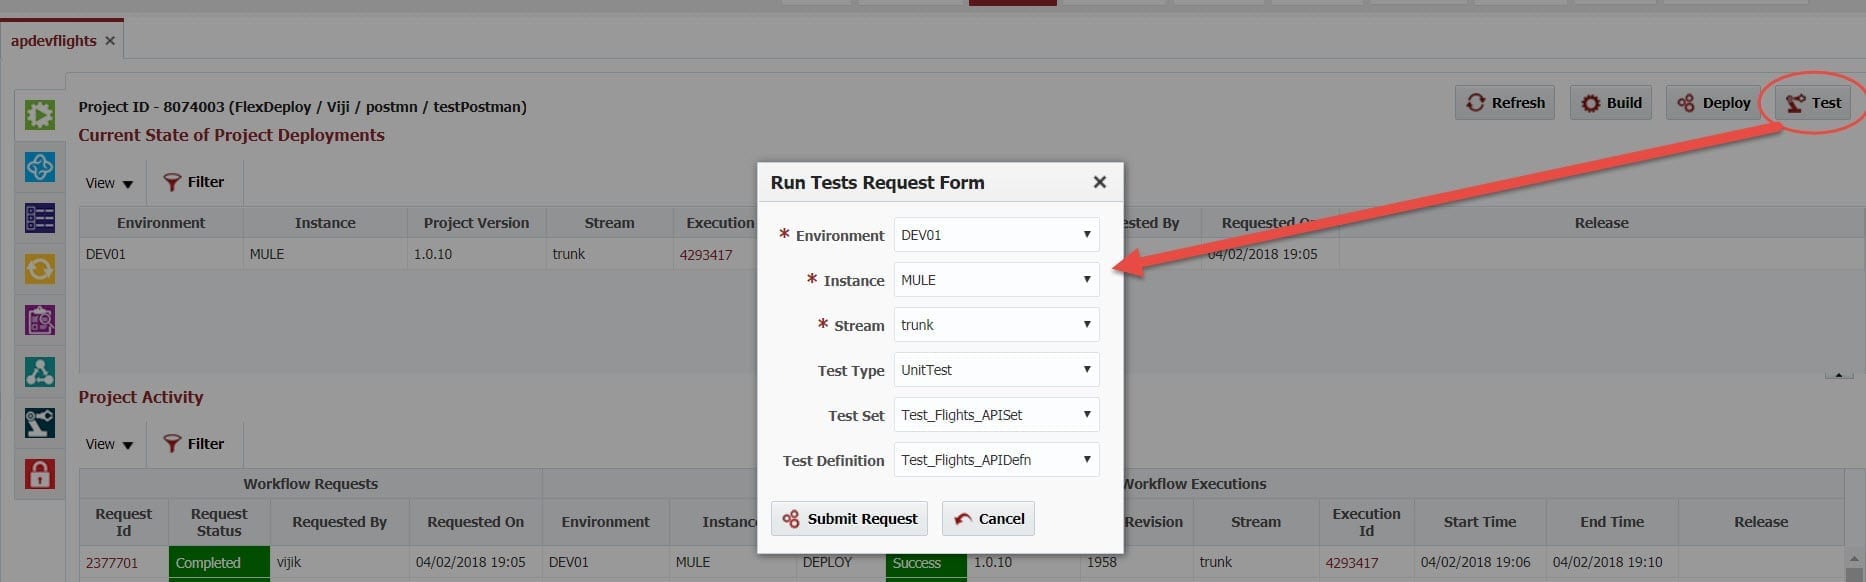
This strategy says to run any “UnitTest” that I have defined, when I invoke tests to the Development environment on the “MULE” instance, whether using the “InvokeTest” operation inside the Deploy Workflow or the Test button in the Project page. (For reference, please check the below screen).
I will next create the Test Set, which is a wrapper for any number of Test Definitions. I chose the test type to be “UnitTest” to match the Strategy.
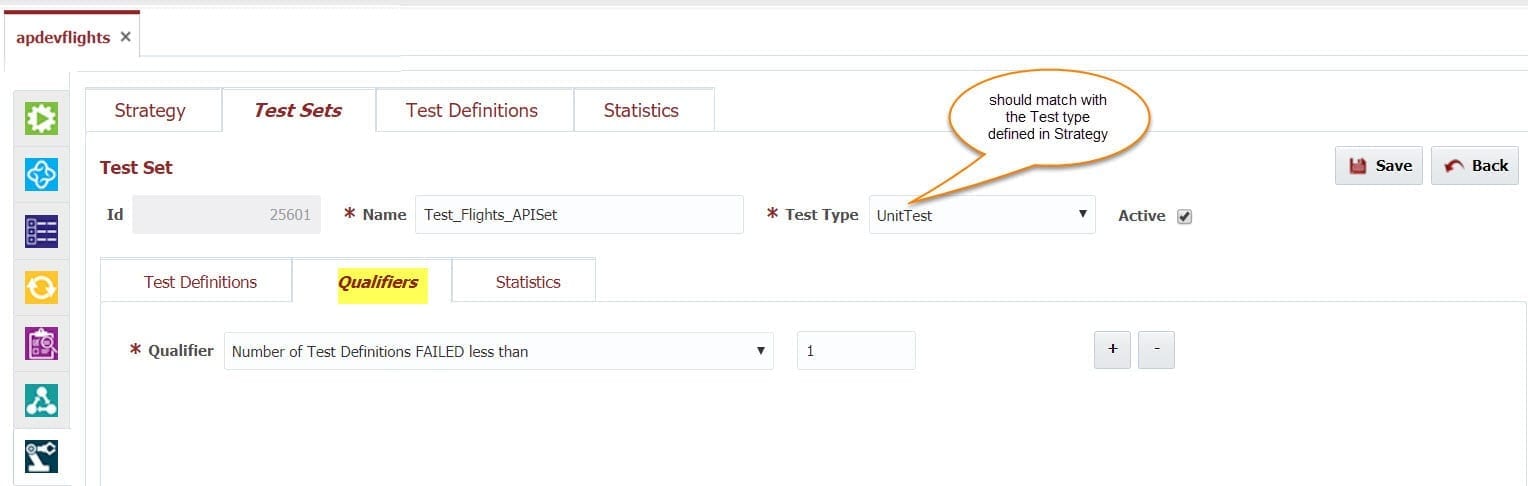
I also set Qualifiers here, which indicate what constitutes a passed set of Test Definitions.
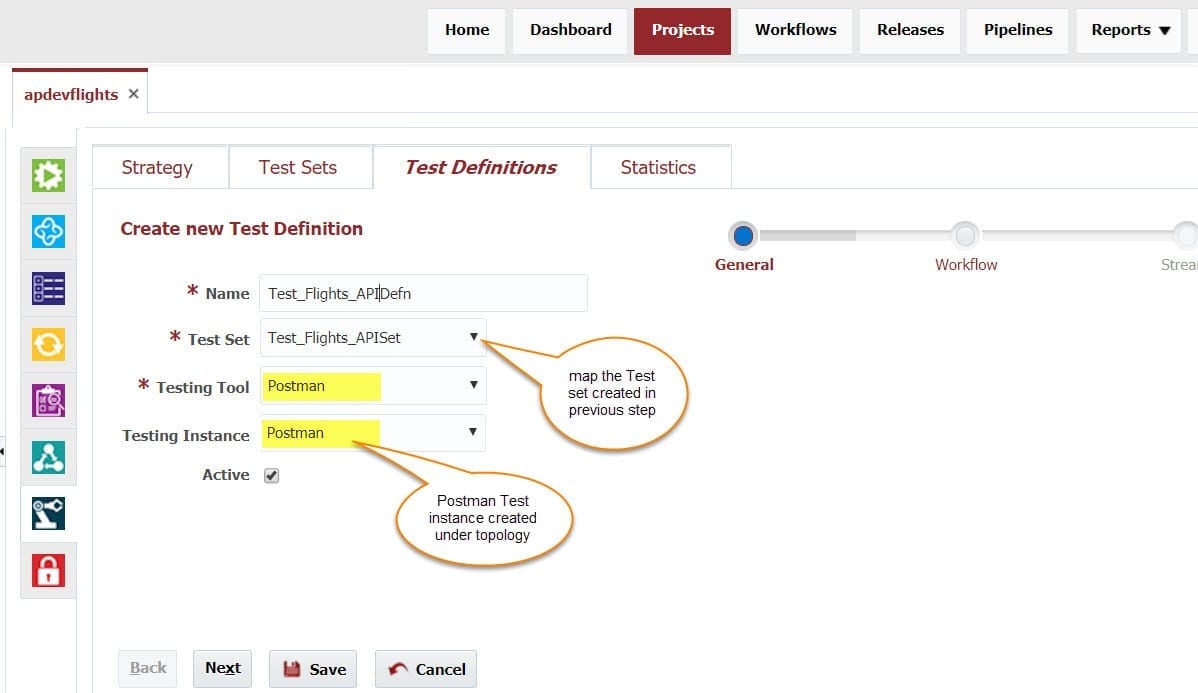
Then I will set up the Test Definition, which I named to identify the test for Postman, then select the appropriate Test Set and Testing Tool as Postman from the list.
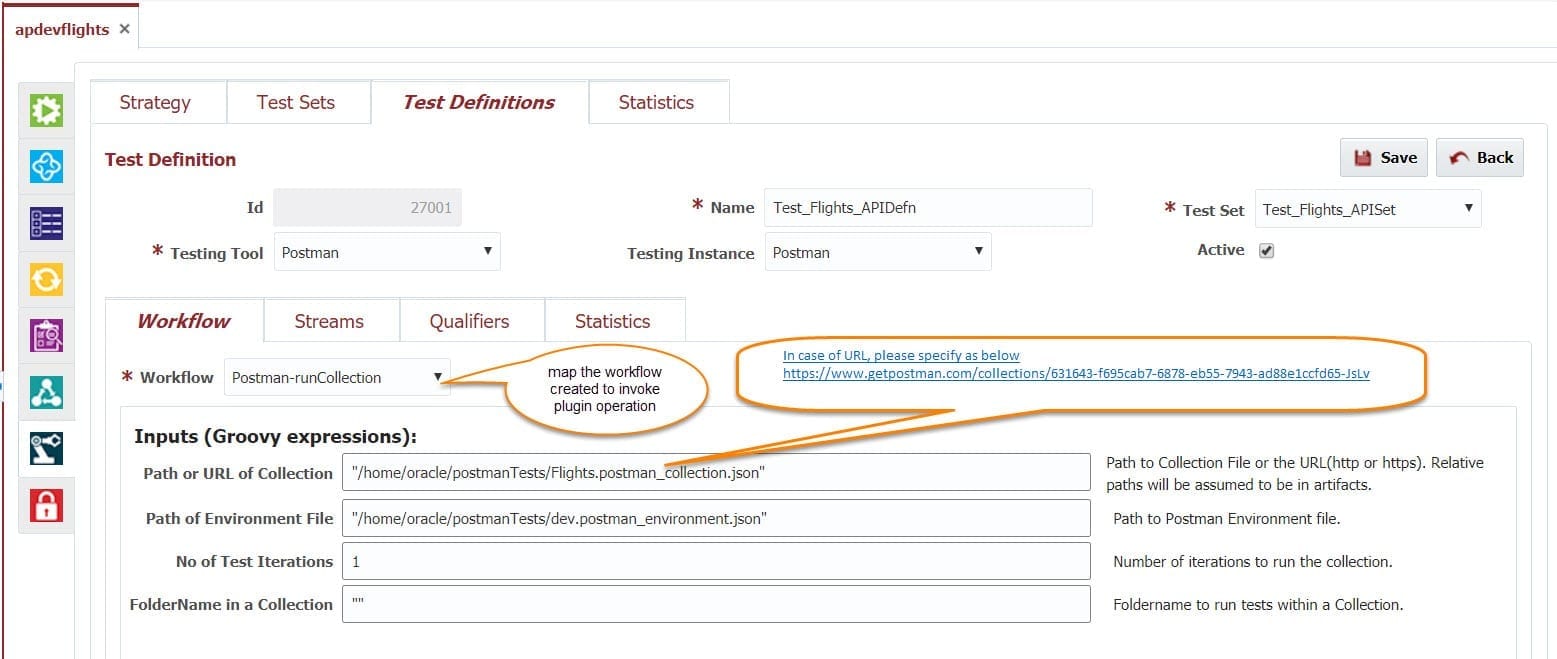
On the next page of the wizard I chose to invoke the workflow “Postman-runCollection” which performs the Postman “executeCollection” operation. This workflow is used at runtime, when it is invoked by the Deploy workflow or by using the Test button on the Project itself.
This then populates the inputs list expected as per the “executeCollection” operation, where I provided the values for “Path or URL of Collection”, “Path of Environment File”, “No of Test Iterations” and “FolderName in a Collection” parameters (refer the screenshot below).
At this point, everything is set and ready to run the Postman test for the Project.
Invoke Test during Deploy Execution
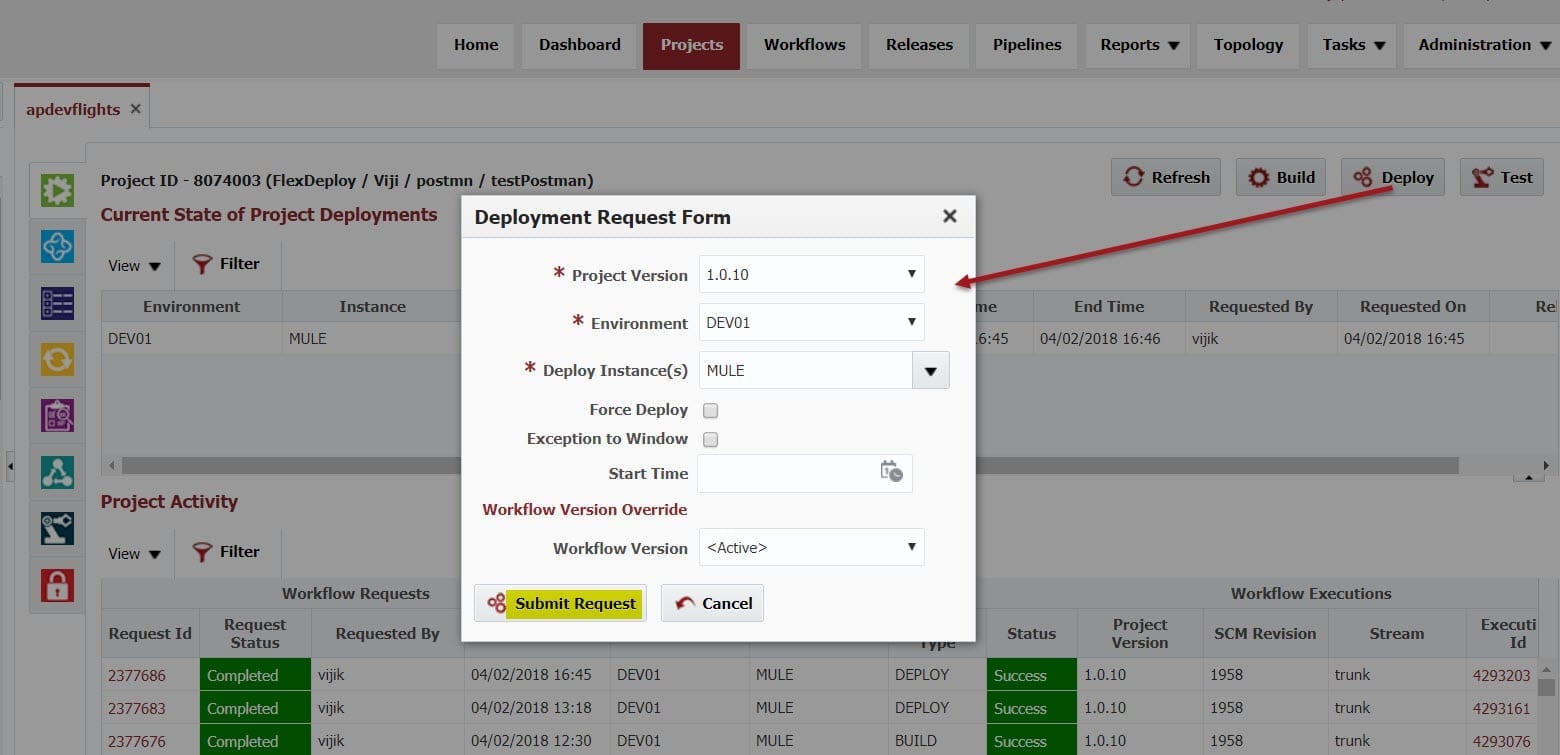
Since FlexDeploy requires that at least one deployment must be completed to the desired environment, I will start with using the deploy workflow from earlier.
View Test Results in FlexDeploy
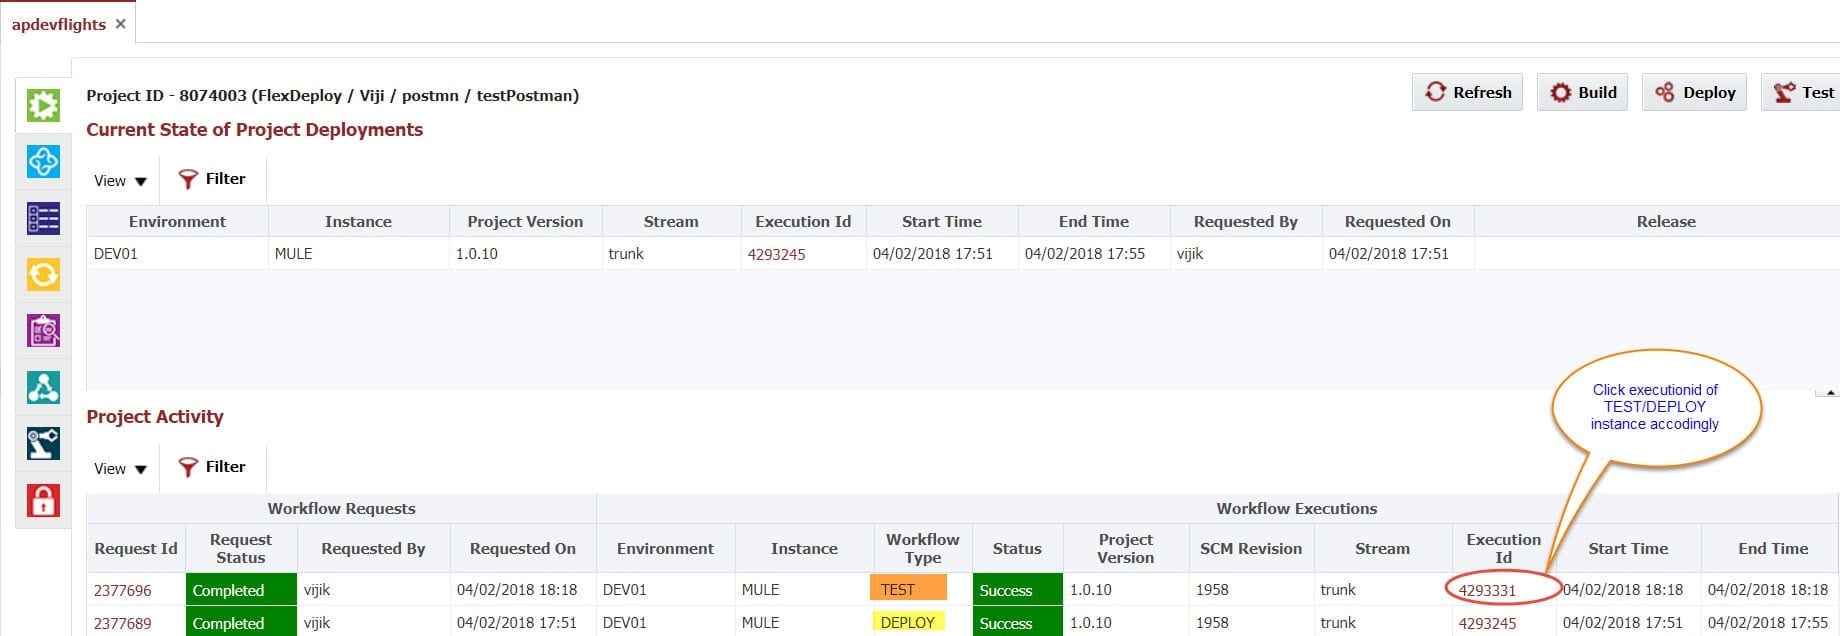
You can view the Test Results in FlexDeploy by clicking on the Execution Id of the workflow instance and select the Test Results tab.
The Execution detail page provide the details of workflow steps executed.

The results provide information relevant to the tests that were executed, such as test name, execution duration, and performance metrics when applicable. The following screen shows the Test results with all the details.
 Test Failures

FlexDeploy provides complete visibility when there is a failure. Identifying what changes caused the tests to fail is easy with FlexDeploy. The above screen shows Test Results that have a failure for 2 test cases.
Conclusion
As shown throughout this post, it’s easy to integrate Postman tool into the Test Automation Framework. Ultimately, FlexDeploy makes it easy to integrate your automated tests with your CI/CD and release life-cycle. FlexDeploy boosts quality significantly by providing end-to-end automation across your build, deploy, and release life-cycle.