In March of 2018, the WebLogic plugin was updated with a few new features. We already told you about the support for creating and updating Work Managers in this blog post. Another new feature is the addition of support for creating and updating Bridges and Bridge Destinations that allow Bridges to be created across environments efficiently and accurately. Support for Bridges and Bridge Destinations extends the existing JMS object support through the createOrUpdateJMSEntries operation.
If you are already familiar with implementation of the JMS Entry configuration, you will be pleased to find that your existing workflows don’t require any modifications.
Here are example build and deploy workflows.
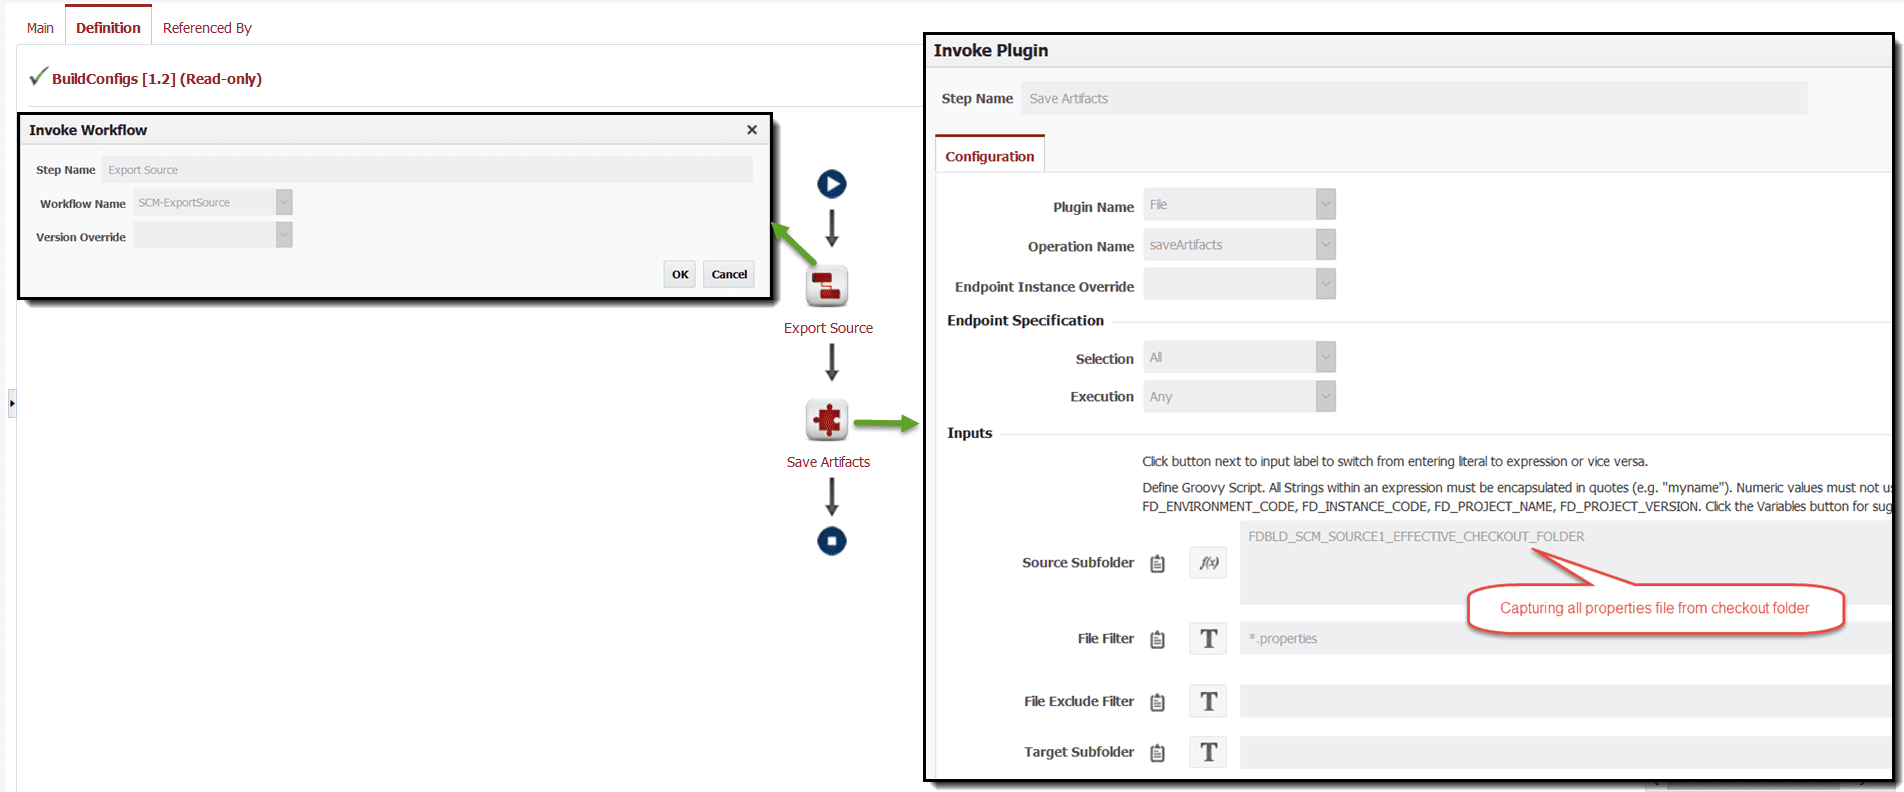
Build Workflow
This workflow checks the property files out of source control and saves them as an artifact. Steps of the workflow are..
- Built-in workflow SCM-ExportSource which will use appropriate export operation based on Project’s SCM Type selection. You can instead use specific operation like Git – cloneProjectSources if you are using Git as SCM.
- File – saveArtifacts operation. Note that we are using variable for Source Subfolder. This is necessary as project may be configured with or without checkout folder and there are other folders in exported folder structure. This allows us to just capture configuration files as Artifacts.
By using FlexDeploy, organizations establish an automated and repeatable process for building, packaging, and safely deploying code, APIs, meta-data changes, and data migrations from development through test to production environments.
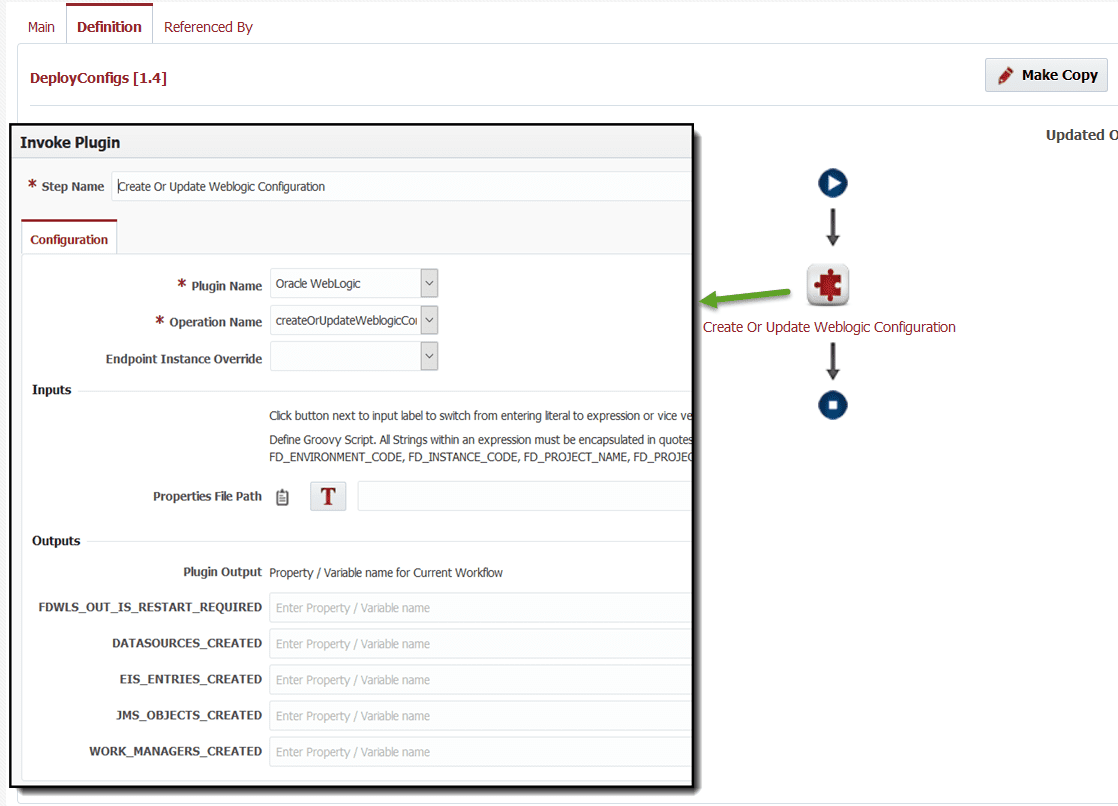
Deploy Workflow
This workflow executes the property files using the WLConfig operation. If want to just manage JMS objects, use the createOrUpdateJMS operation instead. Steps of the workflow are..
- Oracle WebLogic – createOrUpdateWeblogicConfiguration operation. This operation will detect all WebLogic configuration files and process them appropriately.
Here is the property file for a sample Bridge with destinations.
BridgeDestinationList=myBridgeSource,myBridgeDestination
BridgeList=myBridge

myBridgeSource.ConnectionFactoryJNDIName=jms/cf1
myBridgeSource.DestinationJNDIName=jms/q1
myBridgeSource.DestinationType=Queue
myBridgeSource.UserName=user
myBridgeSource.Password=password
myBridgeSource.Notes=some notes are in here.
myBridgeSource.ConnectionUrl=t3://soalt06:7001

myBridgeDestination.ConnectionFactoryJNDIName=/jms/cf2
myBridgeDestination.DestinationJNDIName=jms/q1
myBridgeDestination.DestinationType=Queue
myBridgeDestination.UserName=user
myBridgeDestination.Password=password
myBridgeDestination.Notes=some notes are in here.
myBridgeDestination.ConnectionUrl=t3://soalt08:7001

myBridge.Targets=AdminServer
myBridge.SourceDestination=myBridgeSource
myBridge.TargetDestination=myBridgeDestination
myBridge.Started=true
That is all it takes to create the two destinations and the bridge between them, and now you are prepared to make identical bridges in each environment without manual errors.
See documentation at FlexDeploy Documentation for more details.


