Salesforce continues to be at the core of business operations for companies large and small around the world. It is an incredibly powerful tool, but that’s not to say it doesn’t have its challenges. Migrating Salesforce changes across environments has historically been a manual, tedious, and error-prone process. It can be difficult to tell what needs to be migrated across sandbox environments, and there isn’t clear visibility into what has been migrated to each environment, when the changes were made, or by whom.
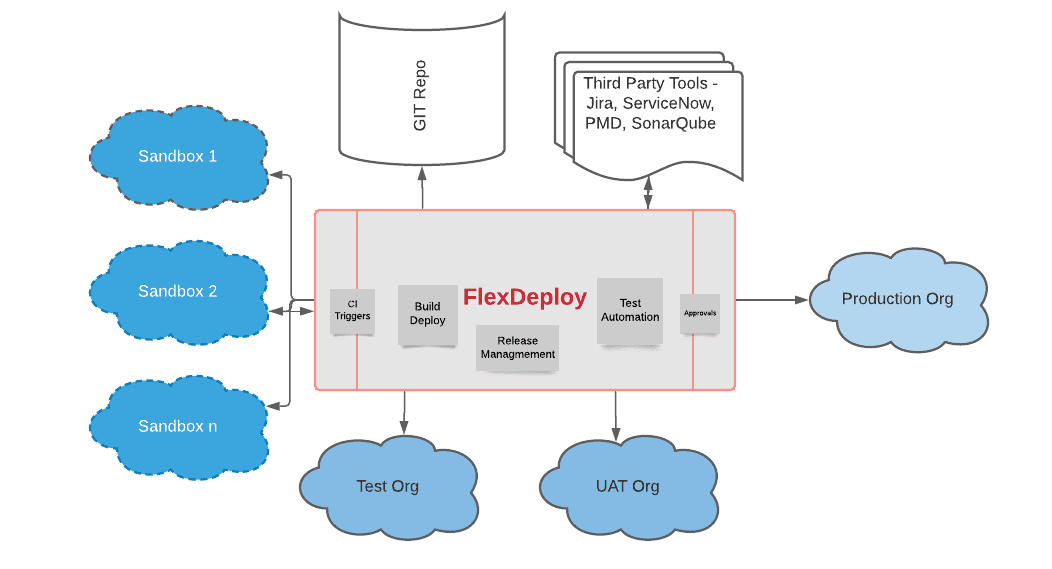
At Flexagon we understand the complexities of development environments such as Salesforce. Our innovative CI/CD solution, FlexDeploy, uses CI triggers to achieve Continuous Integration for Salesforce applications. Developers can retrieve their changes from Sandbox / Development Orgs and push them to the Source Code repositories like Git. Additionally, you can set up CI to build from your source code repository, deploy to the Test orgs continuously, and verify/test your packages.
When you utilize FlexDeploy’s release management platform, you will enjoy all the benefits of FlexDeploy — full-featured pipelines, toolchain integration, approvals and visibility, etc. — to deploy your changes to Production faster and be assured of its high quality.
In this blog, we will look at how to achieve CI/CD for Salesforce applications.
Continuous Integration (Populate) Trigger
FlexDeploy provides Webhooks and many trigger types to connect with a myriad of tools and applications. The Populate Trigger type helps automate the population of source code from a source control management (SCM) or from applications like Salesforce.
The schedule for this trigger is set using a cron expression, which schedules the populate at a specific interval or time of day. To configure, select the Environment, Stream, Package Name, and Salesforce Account Code, and enter values for the cron expression.
For example, if developers are adding new files to a Sandbox, this will allow for files to be discovered and committed to the selected branch automatically and eliminate manual action. When you select the Package Name, this trigger automatically adds the files to the package.
Most of the time you will be committing the source code to one branch and merge to the release or master branch with the pull request after a review. You can select the branch name where you would like to commit the changes in the Stream Name field. Additionally, you can have a Build trigger type to build the committed code to build and validate any build-time issues.
Continuous Deployment
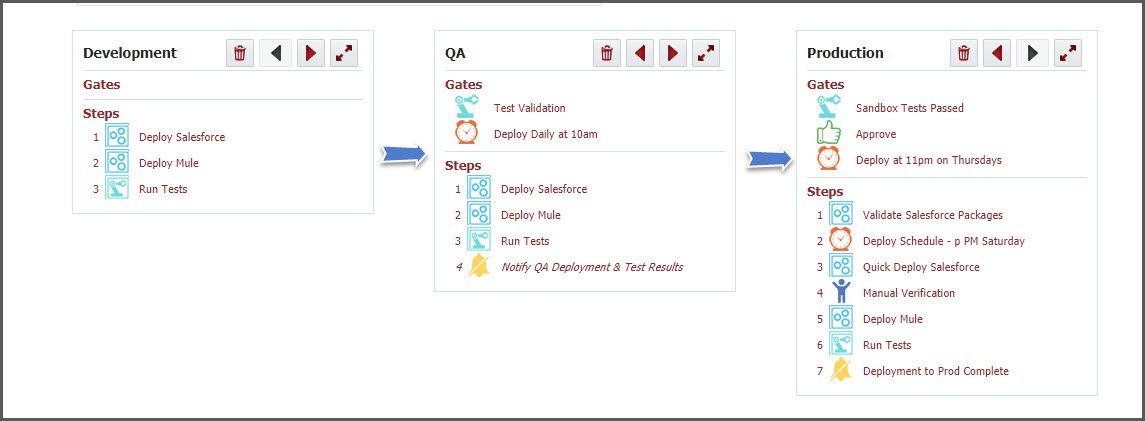
We will use FlexDeploy’s release management and Pipelines to deploy the changes to Development, QA, and Production Orgs. We created the following pipeline to Deploy Salesforce and MuleSoft changes through the identified environments with validations and tests before finally deploying into production. 
Once changes are committed, you can use the build trigger to create a snapshot of those changes. The snapshot will flow through the pipeline to deploy to all the environments. We have three environments in this case, but you can have any number of environments defined in your pipeline. Additionally, you can define any number of gates to ensure quality and approvals when necessary.
Release Dashboard
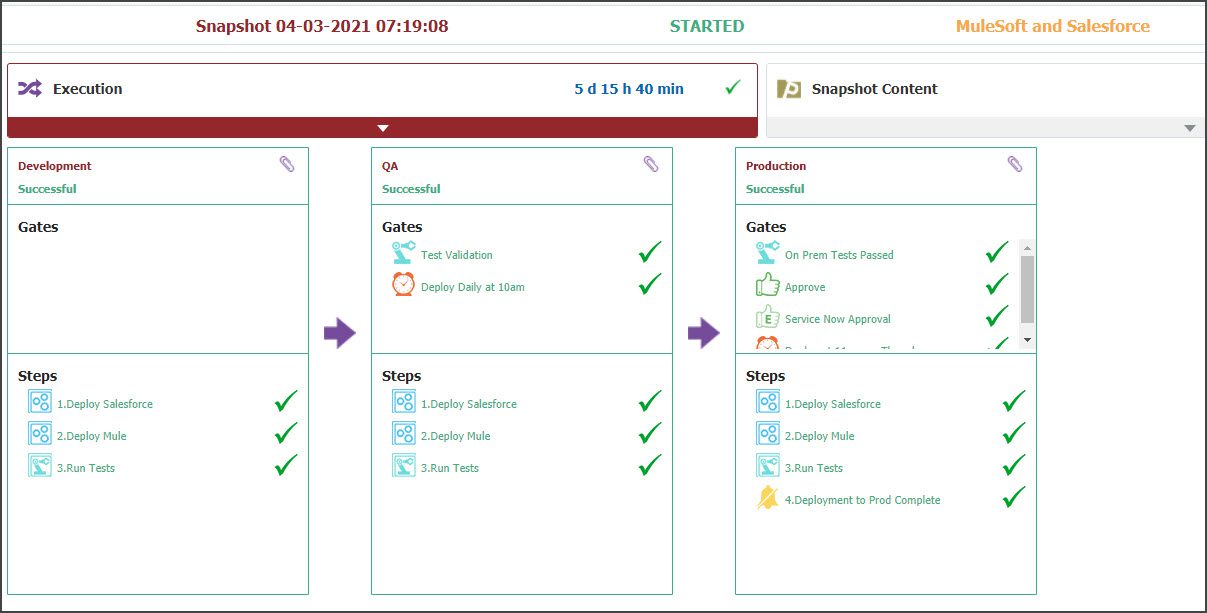
FlexDeploy’s release dashboard will show where changes are in the lifecycle. The dashboard will identify any failures such that you can drill into the details to fix issues and keep the continuous deployment going.
An Enterprise Solution
Salesforce Continuous Integration and Continuous Deployment can be rolled into an enterprise DevOps implementation, enabling faster quality software delivery and happy business customers. Integration doesn’t stop at Salesforce. FlexDeploy has out-of-the-box solutions for many commercial applications and open source tools and technologies.
Learn more about FlexDeploy’s support for Salesforce in this blog series.


