

Azure App Service is an HTTP-based service for hosting web applications, REST APIs, and mobile back ends. This is a fully managed platform as a service (PaaS) offering from Azure. Azure Web App (Web App Service) is a subset of App Service, which can host websites and web applications. It supports various languages such as .NET, Java, Node.js, PHP and Python.
Azure Web App provides simplified deployment along with features like high availability, scalability, security without worrying about underlying infrastructure. Instead focus on the code that matters to you, in the language that works best for you.
Configuring and deploying a web application with associated properties to Azure Web App is a multi-step process when done manually using Azure CLI. FlexDeploy’s Azure Plugin provides many options to manage deployments to the Azure Cloud in an easier and more streamlined process.
In this blog, I will explain how conveniently we can deploy a Node.js application to Azure Web App through minimal configurations/steps. We can leverage the same strategy for any other language or application as well. As part of the Web App deployment, FlexDeploy also provides a cleaner and more efficient way to manage relevant Application Setting and Connection String properties. In addition, visibility into and throughout the pipeline helps identify and debug issues faster.
Execution steps
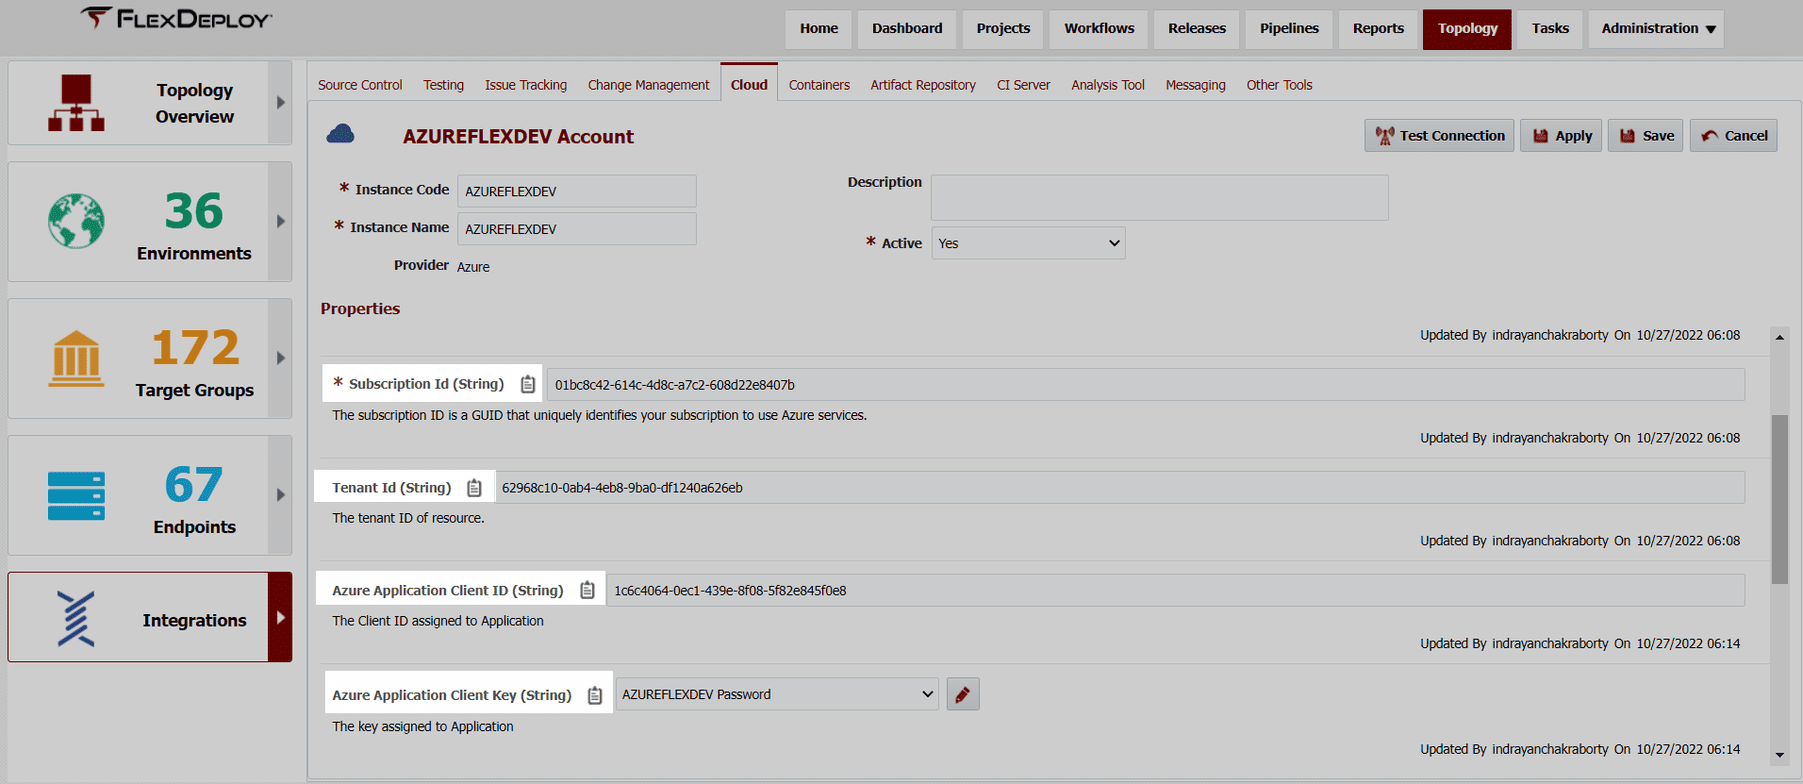
FlexDeploy cloud account configuration
Your Azure account needs to be configured as a Cloud account under the Topology section of FlexDeploy. It should have a Client ID, Client Key, Tenant Id, and Subscription Id configured in it. The Client ID must have relevant access in the target Web App to deploy code and make other associated changes (Application Setting update etc).
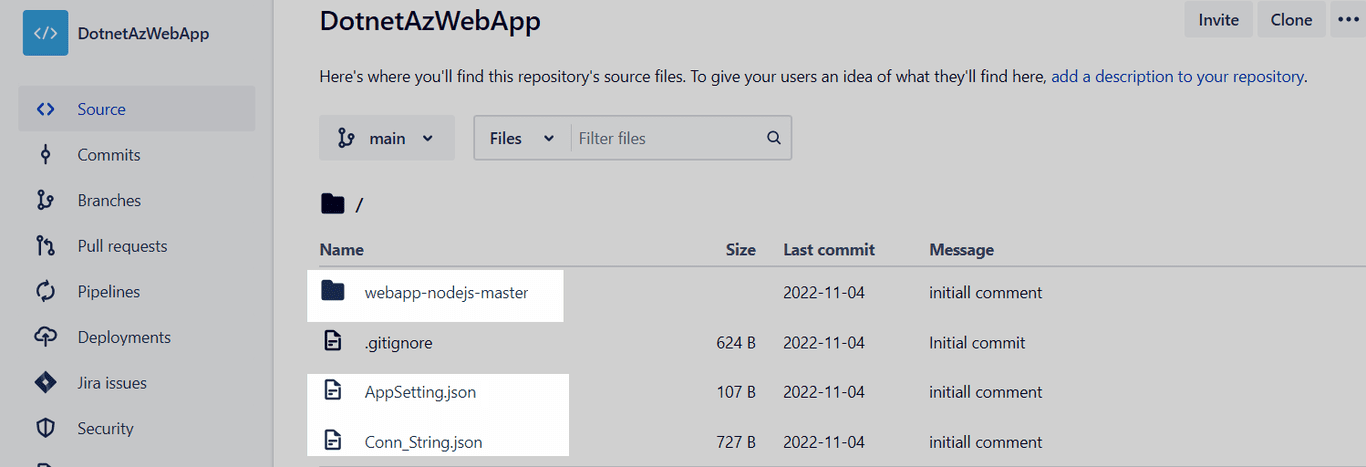
Git repo structure
The Git repository may be configured as shown below. It should contain the Node.js codebase. If needed, we can also keep Application Setting and Connection String files along with the codebase.
Build and Deployment process
We need to create one Build and one Deploy workflow as shown below. The workflow Type field defines the type of workflow.

The workflow execution steps can be created as shown below. We will explain the steps in details under the Process flow section.
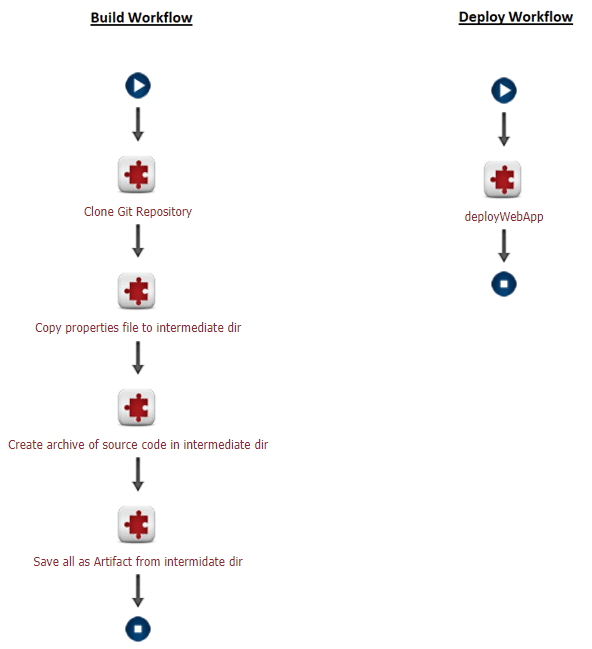
Process flow execution
The first step in your workflow will clone the Git repository codebase into the project execution working directory. The Git url will be retrieved from the Source Control configured under Project Properties. We can leverage FlexDeploy Git plugin to perform this operation.
Application Setting and Connection String json files (if applicable/present) need to be moved to the intermediate directory. An intermediate directory can have any name. In this case, we are using the artifactsObjects folder inside the temp directory. File names (to be copied) are mentioned under File Filter with ‘##’ separated (as advised in the description). Application Setting and Connection String values can also be passed as input to deploy workflow.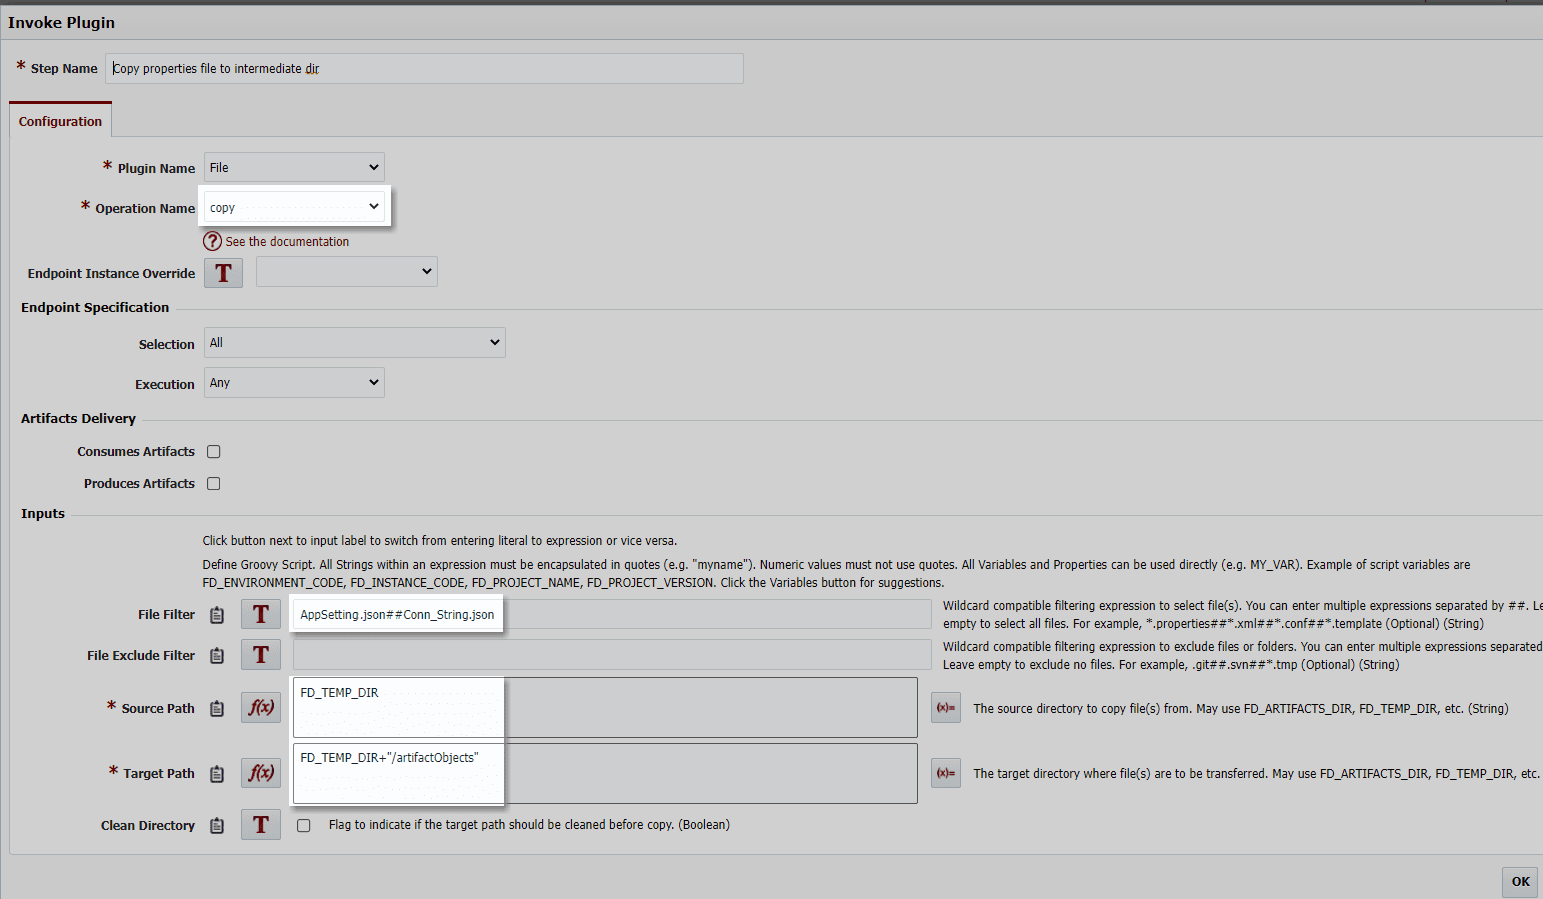
Per the Azure Web App deployment requirement, we need to create an archive with the Node.js source code inside it.
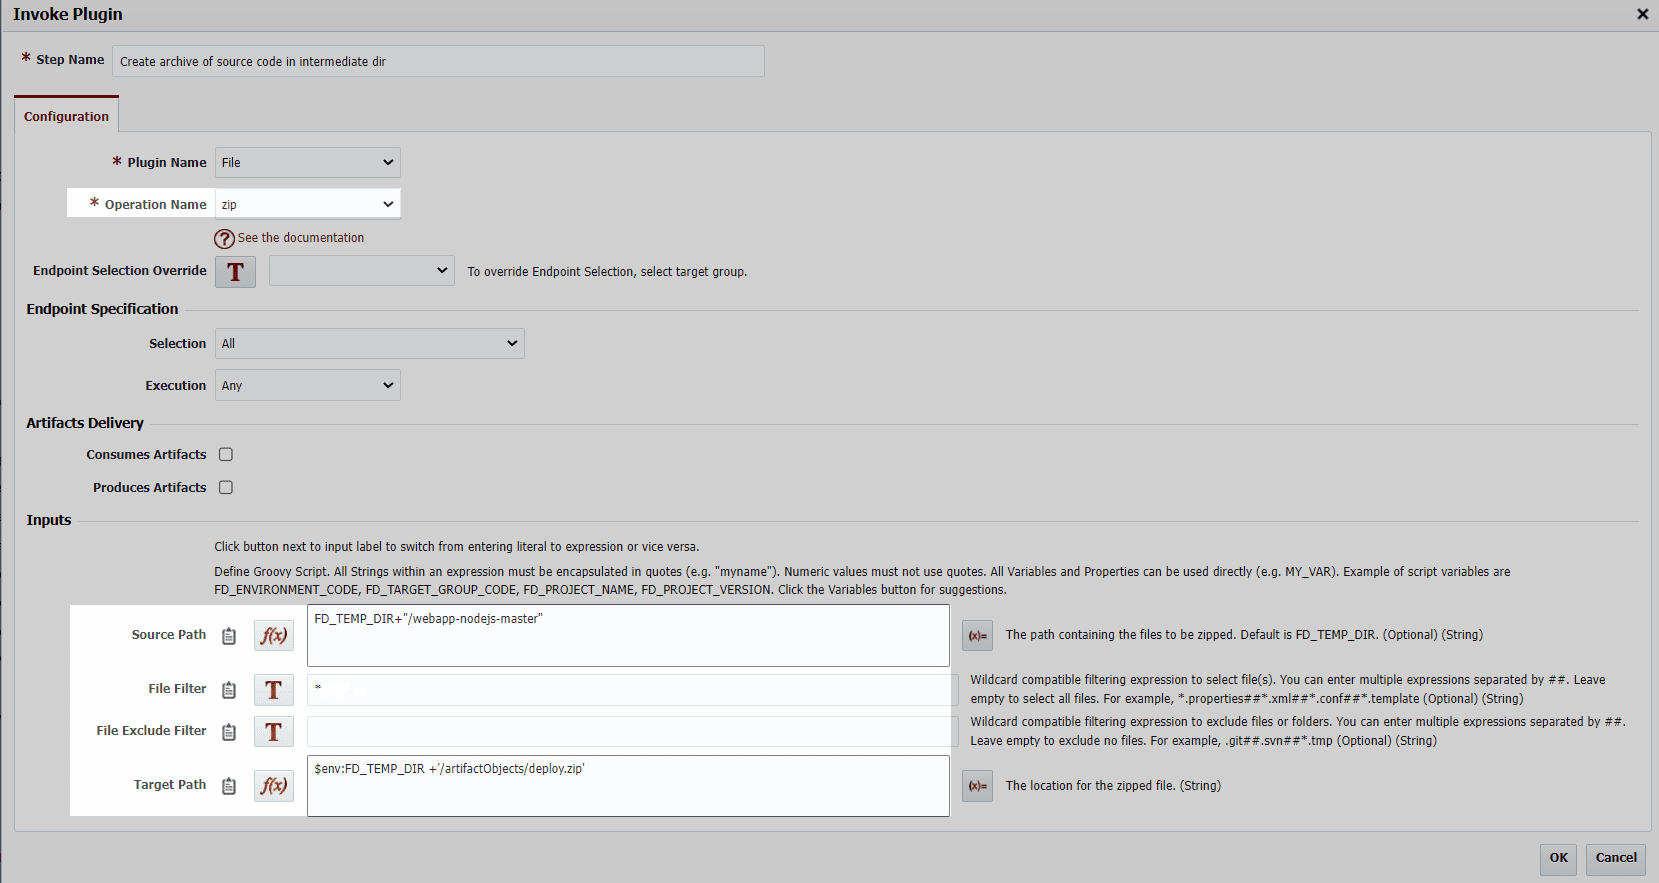
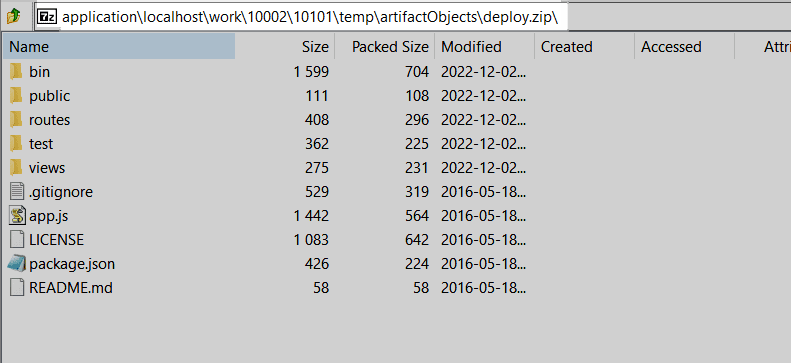
If we navigate inside the created deploy.zip, you’ll see the source code files which need to be copied to the Azure Web App backend. Azure Web App will first create the executables from the source code and subsequently will run the Web App from it.
As part of last build step we have to create an archive (artifacts.zip) with all objects present inside the Artifacts directory. We also enable Produces Artifacts checkbox to save the zip file as an artifact.
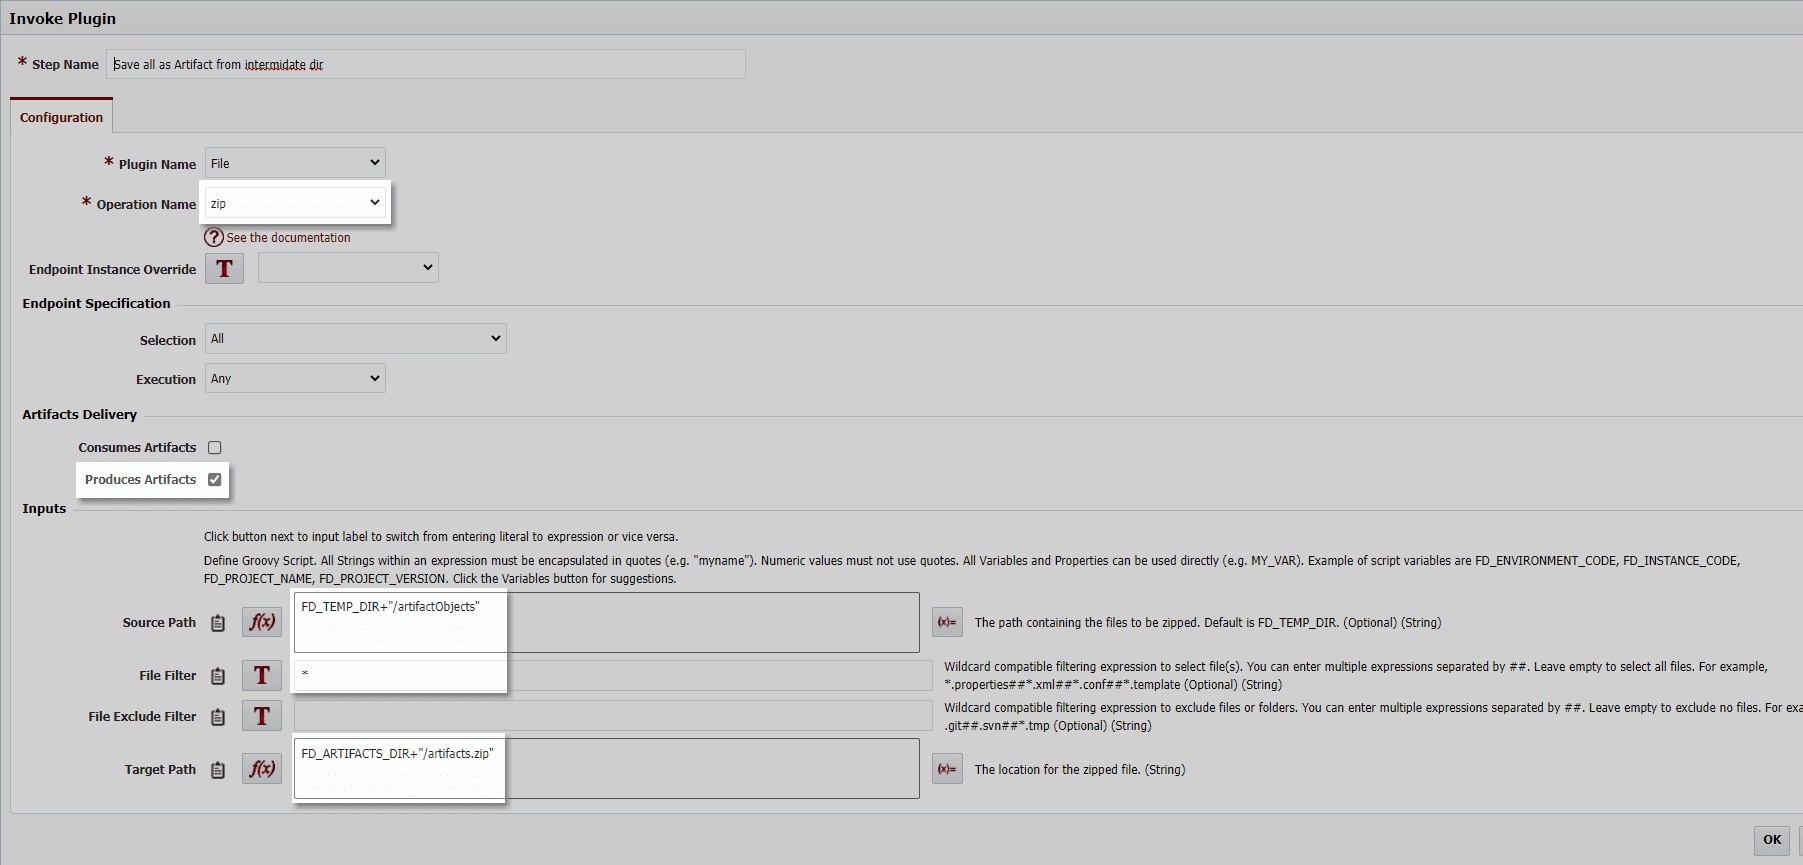
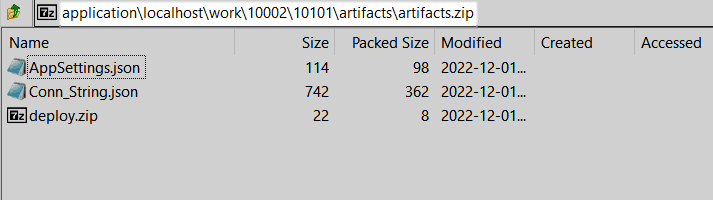
As part of the previous step, all files inside the artifactObjects folder are archived to create an artifacts.zip which will be saved as an artifact for future reference from the deployment workflow.
The Azure plugin operation deployWebApp will be used in the deploy Workflow for Azure Web App. In case the Application Setting and Connection String files are part of the artifact, the plugin operation will first update respective values in designated Azure Web App. Next the plugin will deploy the source code archive (generated through build Workflow) to Azure Web App.
Note: This operation(deployWebApp) is not going to create the Web App infrastructure. Instead, you may use FlexDeploy’s Azure plugin executeARMTemplate operation to create the infrastructure prior to deployment. Also, to support Node.js, the Azure Web App Runtime stack must be created as Node.
Heathrow needed more modern processes, including automation and a shift to the cloud.
Configuration steps
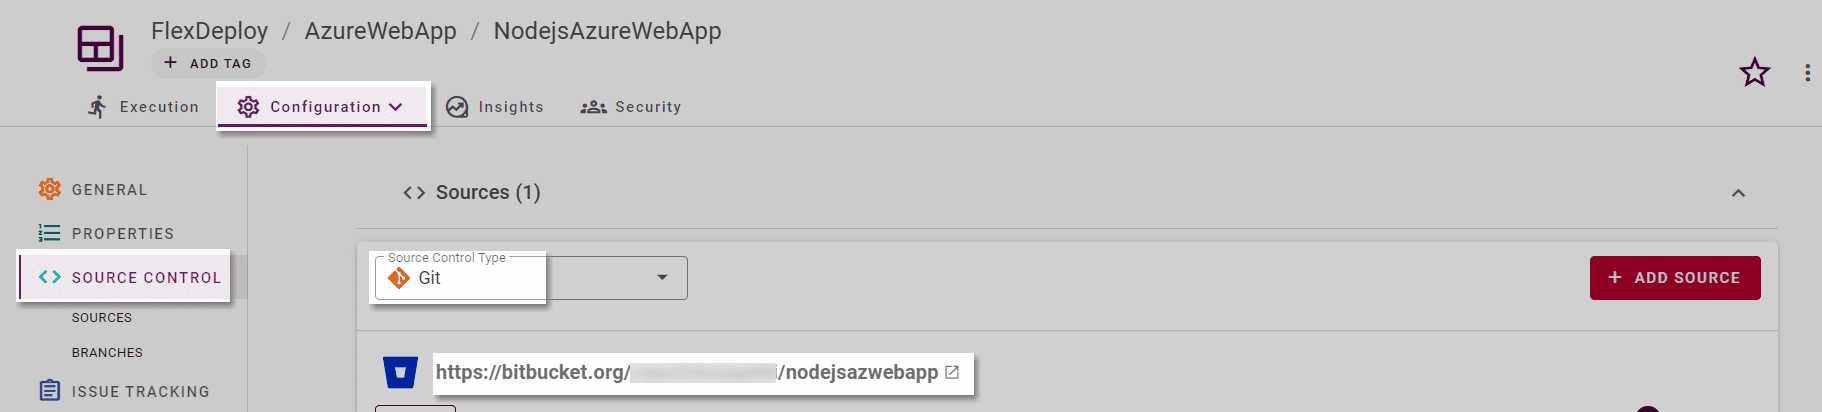
Source Control
The Git Repository should be configured in Source Control section under Project Properties.
Target details
As part of Project properties, target Azure Web App Name and corresponding Resource Group Name details must be provided.
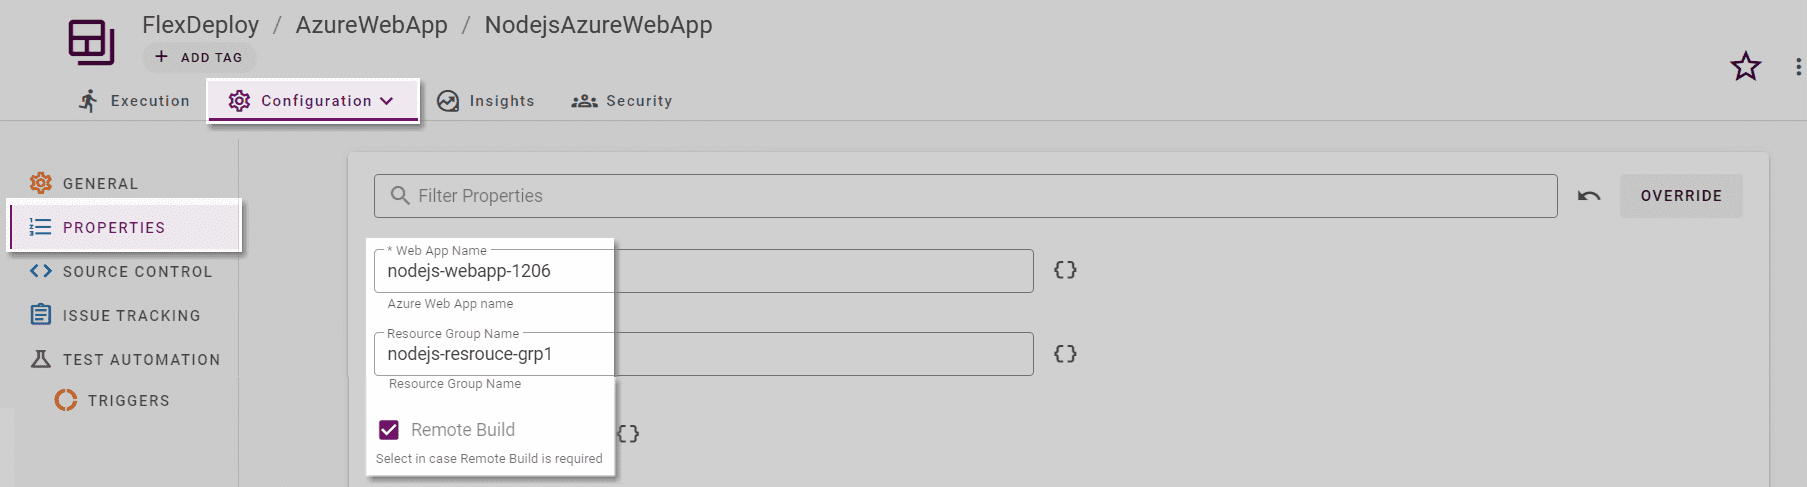
The key question which may arise is, how would Azure Web App understand if the deployed archive is an executable and can be run directly? Or is it just the source code which needs to be built first before execution?
To perform a build in Azure Web App backend, you just need to check the Remote Build flag under Project properties. The plugin will do all necessary configurations behind the scenes.
Application Setting and Connection String properties
Please refer to Managing Application Setting and Connection Strings section from this blog for a detailed explanations and steps for handling Application Setting and Connection String properties.
Execution details
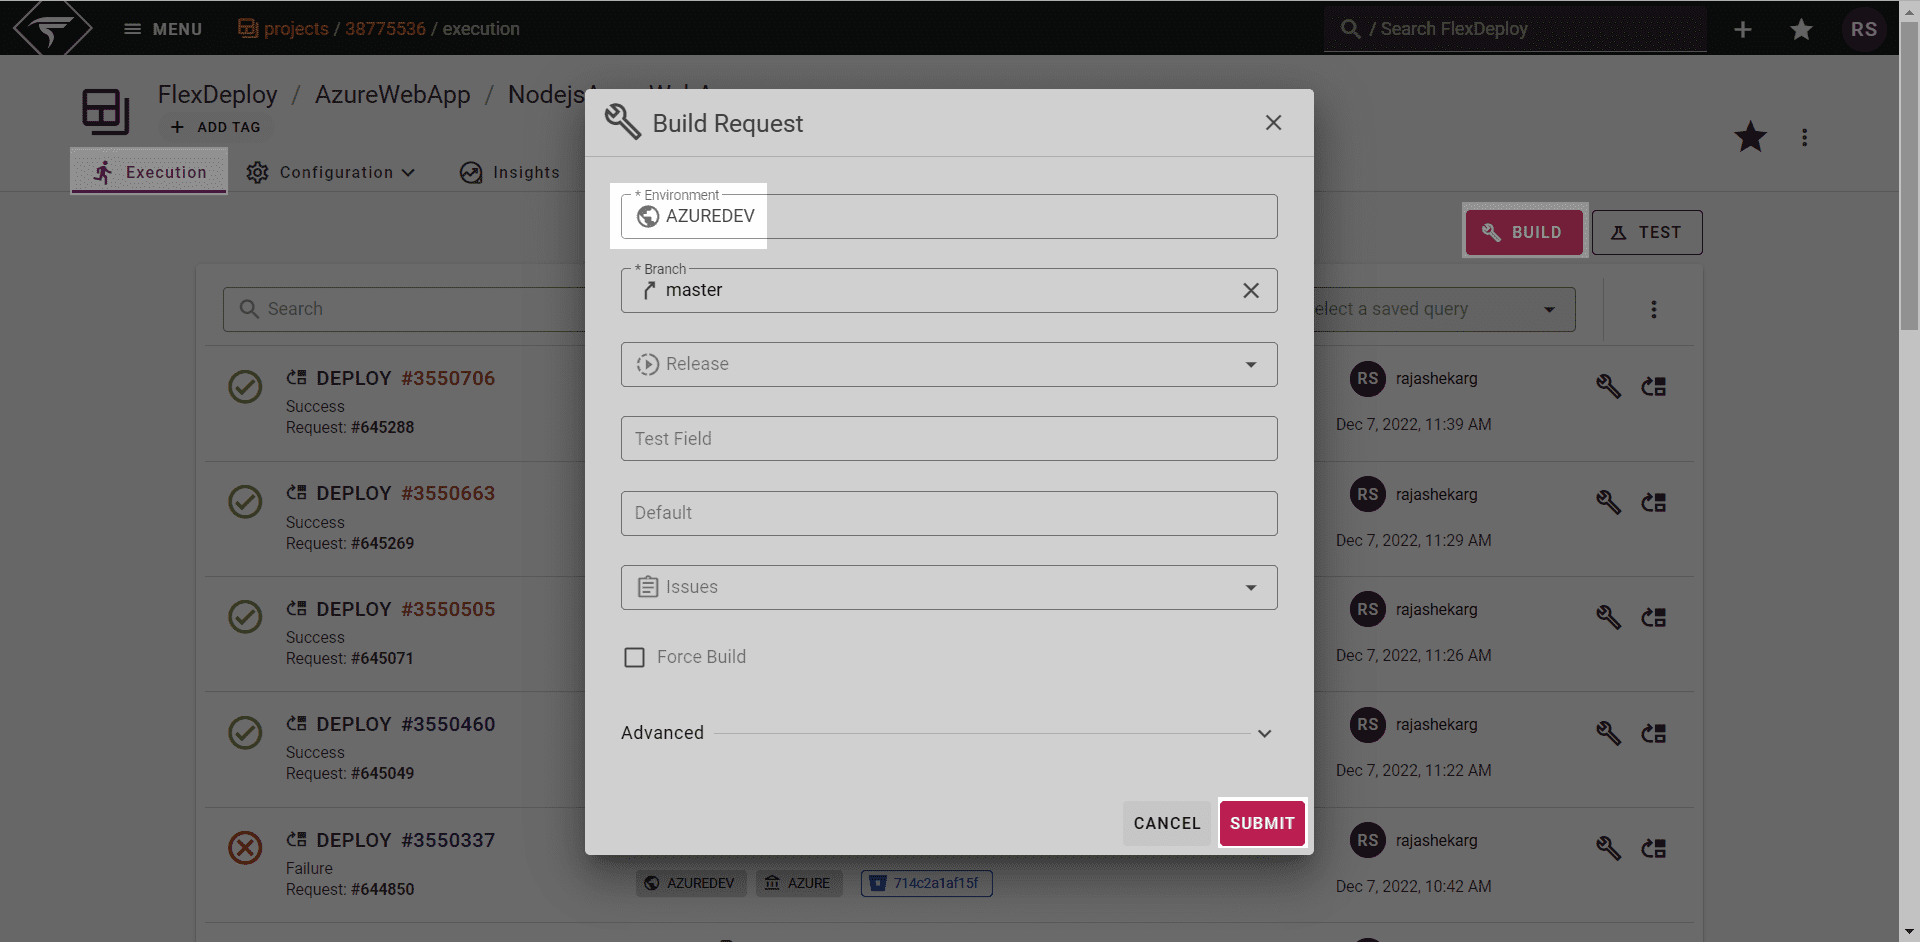
To initiate the build Workflow, navigate to the Project Execution tab. Select the BUILD button on top right corner. This will open a popup to submit build request. We need to select the configured Environment and select SUBMIT.
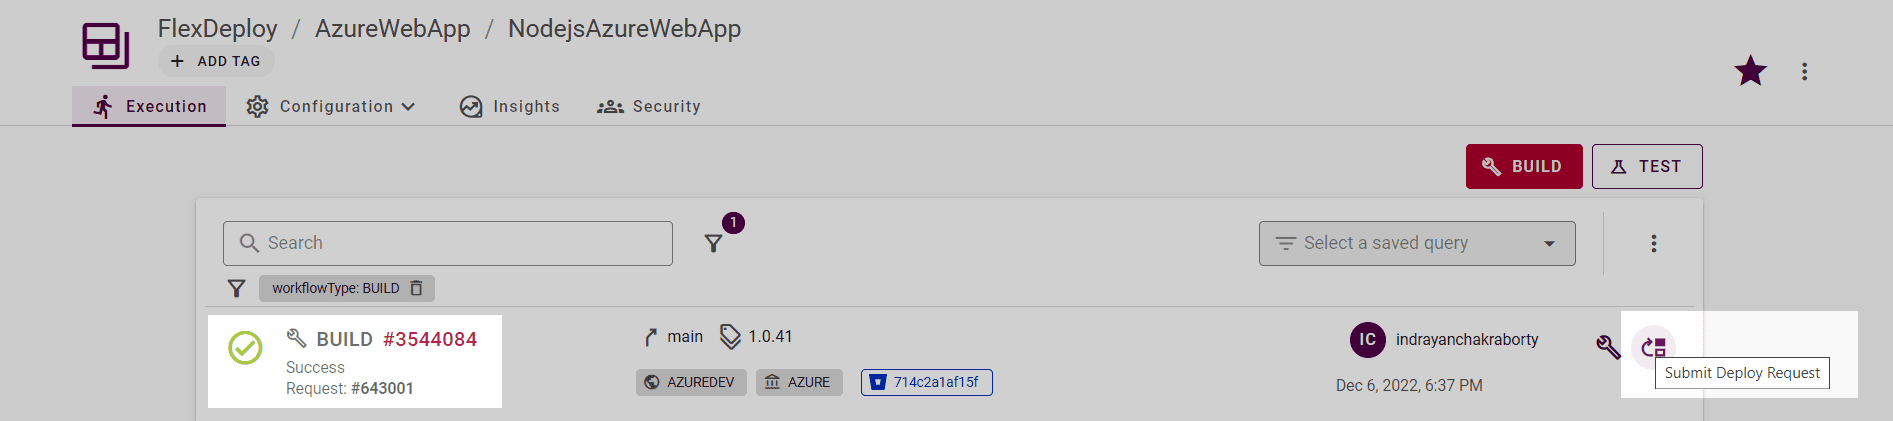
Once completed, we can find the artifact being generated with the source code archived in it along with properties files. Once built, we can initiate the deployment by selecting Submit Deploy Request as shown below.
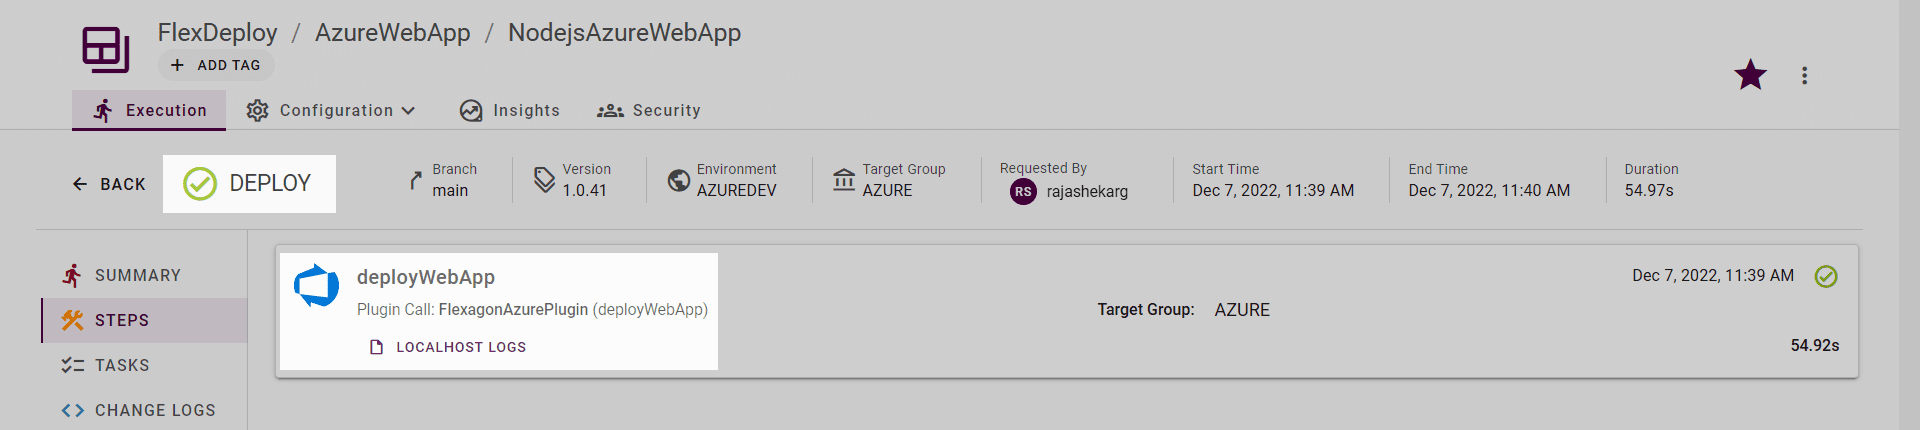
Once successfully executed we can verify from the log that deployment got successful.
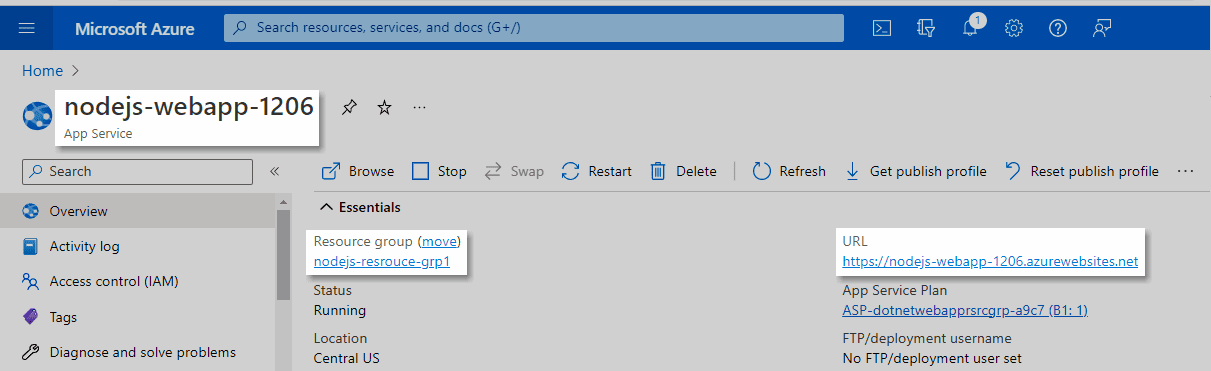
From Azure Portal we can find the the Web App is already in Running state and we can find the Web App url also as shown below.
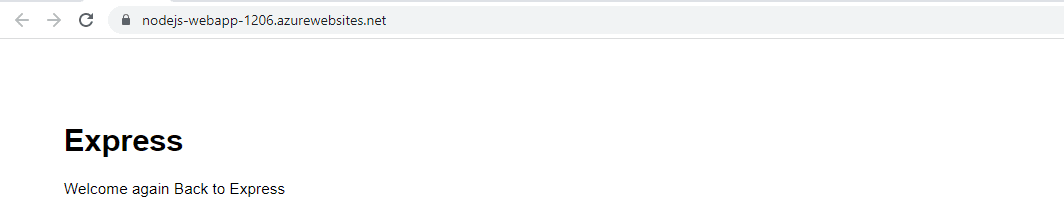
We can verify the deployed application through Web App url as shown below.
Conclusion
For anyone dealing with Azure Web App, FlexDeploy’s Azure plugin can be a significant value addition. Your deployment can be streamlined with minimum effort ensuring end-to-end visibility and reducing manual error.
FlexDeploy supports Continuous Integration for all your build tools and Continuous Deployment for Azure and other major Cloud providers. You can fully automate your Azure infrastructure and code deployments using FlexDeploy’s Release and Pipelines. With toolchain integration, you can implement quality gates, approvals, notifications, automated code scanning, and test automation with simple configurations.