In this blog, we are going to show how you can use FlexDeploy to get your MFT artifacts checked into your SCM and then deploy those artifacts to your other environments.
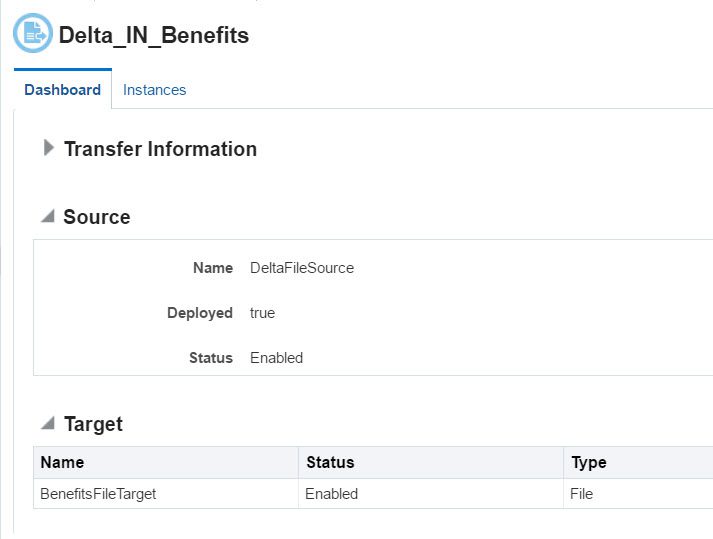
I have a transfer I built in Oracle MFT that is ready to be deployed to the test environment. We want to first check this into SVN, our source code control system, then deploy it to the next environment (Test). We will use FlexDeploy to easily deploy this transfer and its associated source and target. Below you can see the transfer (Delta_IN_Benefits), source (DeltaFileSource), and target (BenefitsFileTarget):
Checking the Transfer into the SCM
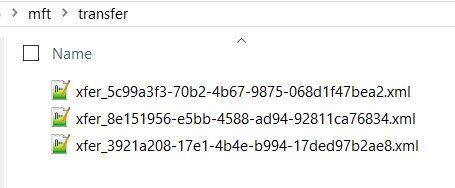
To check-in the transfer, we run a workflow in FlexDeploy which uses the exportTransfer operation on the MFT plugin. The value of using the exportTransfer operations is it can rename the artifact to the name you gave it in the MFT designer. Below I have the 3 files before they are renamed (straight from the export file), its hard to tell the purpose of each file:
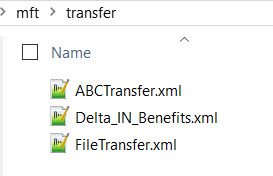
After the exportTransfer renames the files, it much easier to tell the purpose of each transfer because the names match the names I gave them in the designer:
After exporting and renaming the files, the workflow checks the artifacts into the SCM.
Building a Package to Deploy
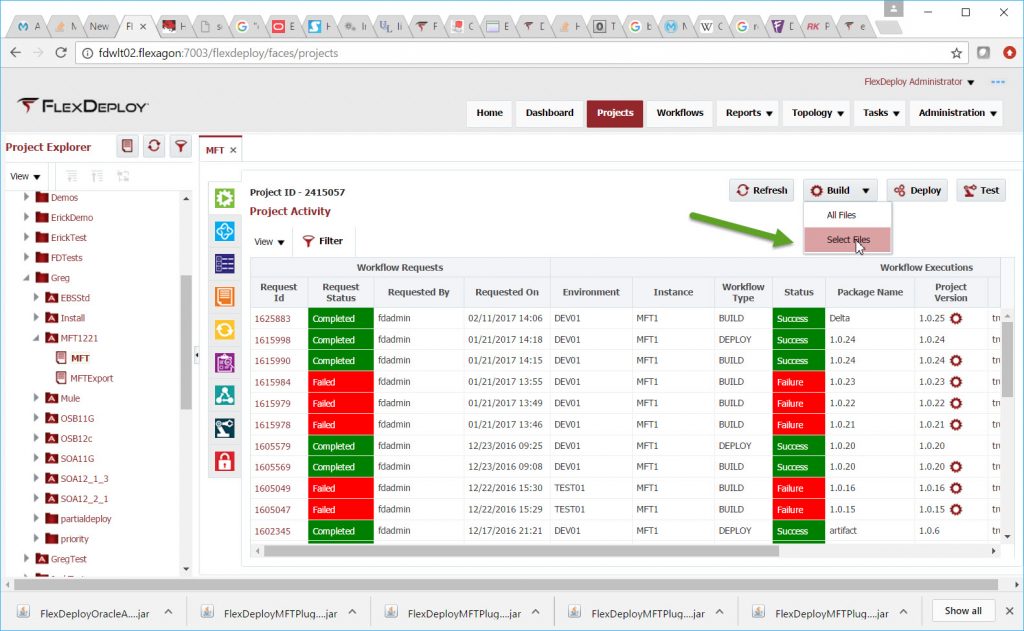
FlexDeploy uses a file level deployment. This means we can choose which files we want to package into a deployment at build time. For me, it will be the three files we listed at the start of this Blog. I start the build process for my MFT package by clicking the Build button and selecting Select Files from the drop down:
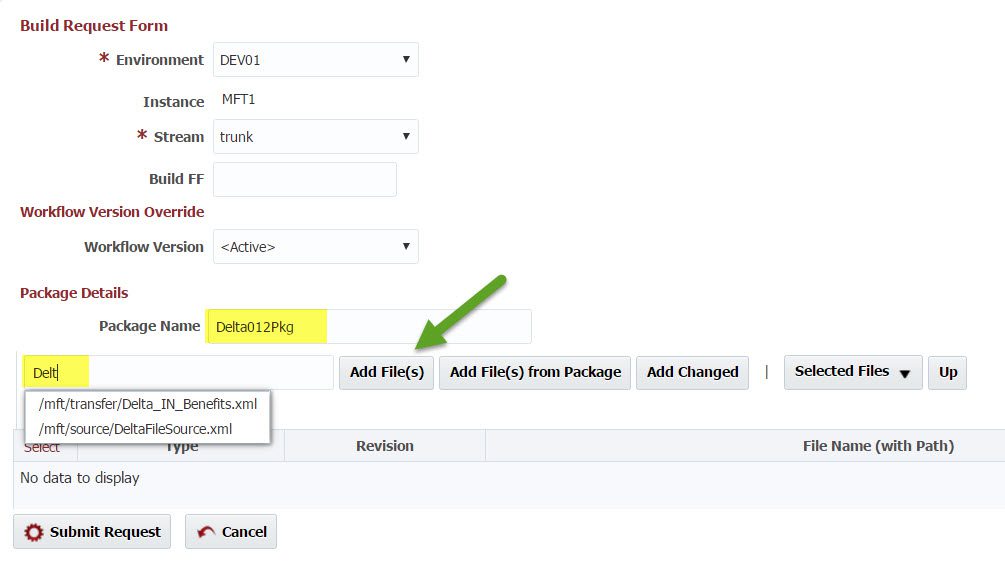
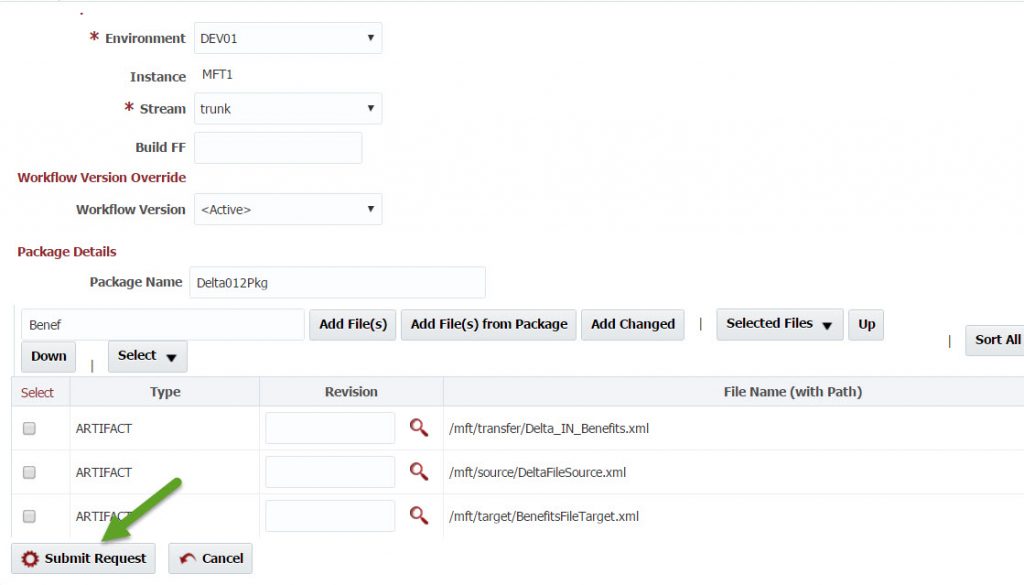
The following Build Request Form pops up. I enter the package names which I will use when I deploy the package. To populate the files, I type “Delt” and select Add Files. This filters all the files checked into my SCM for any files containing “Delt”. We are still missing one file, so I enter “Benef” and select Add Files. As we add files, its easy to understand why its nice to have meaningful file names.
We now have all the files, so we can submit the build:
Deploying Artifacts to the Test Environment
Now I can take this package and deploy it to my Test Environment. Notice at the top of the list of workflow requests, the package I built succeeded. Click the Deploy button to initiate the Deploy:
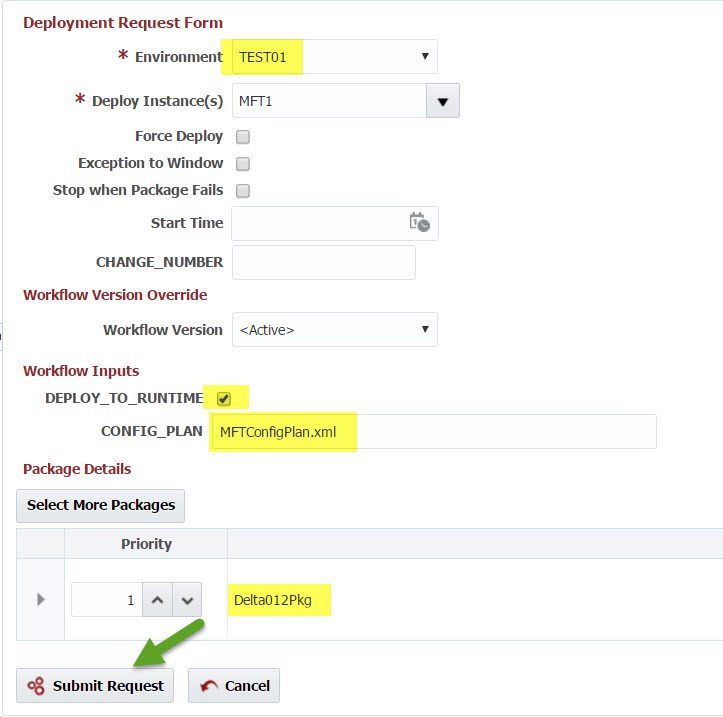
On the Deployment Request Form, I did the following:
- selected TEST01 (our Test Environment) from the environment dropdown,
- selected the DEPLOY_TO_RUNTIME input, this will tell the plugin to not only deploy to the design time, but also the runtime
- I applied my config plan. I took it as an input into my project, but I have many options as to how this can be handled
- Verified that my package was selected, I can remove this package and add a different package if it is not correct
- Clicked the Submit Request button.
After testing, I can then deploy this same package to production.
FlexDeploy keeps track of the version of each file deployed to each environment. I can then run discrepancies reports to ensure all my changes deployed to test are then deployed to production.
Additional documentation for the FlexDeploy MFT Plugin can be found HERE.
