FlexDeploy’s rich DevOps features, flexibility in controlling release automation, and integrated Salesforce support provide a highly efficient solution for your enterprise. If you are looking for an introduction to FlexDeploy’s support for Salesforce, start with this blog series.
In this blog, we’ll cover how to deploy Custom Metadata object types in Salesforce using FlexDeploy.
Custom Metadata Type Definition
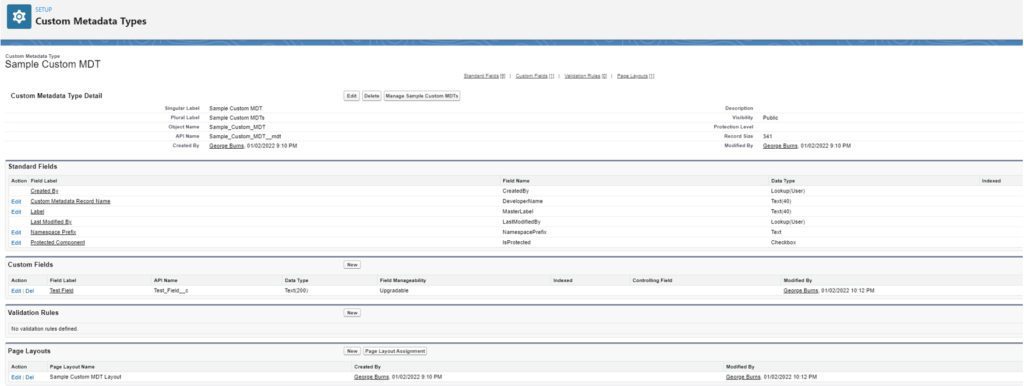
The Custom Metadata Type in Salesforce is defined as a custom object, page layout, and any custom metadata type records with data values. When a new Custom Metadata Type is created, the actual definition of this item is a custom object with an _mdt suffix. The Custom Metadata Type can have custom fields, validations, and related Custom Metadata Type and page layouts like any other custom object.
When deploying a new Custom Metadata Type item, we need to include the Custom Metadata Type record, custom object, and page layouts in the FlexDeploy package.
Deploying a new Custom Metadata Type Item
Add Custom Metadata Type Records
Once development is done in the sandbox/development Salesforce Organization, we can discover the changes and artifacts, add them to a package, and deploy them to desired environments using FlexDeploy.
After Navigating to the Projects tab in FlexDeploy, click on the Salesforce Org Management tab to go to the artifact discovery page. You can either directly compare and change to the repository or compare between two Orgs or from a package to Org.
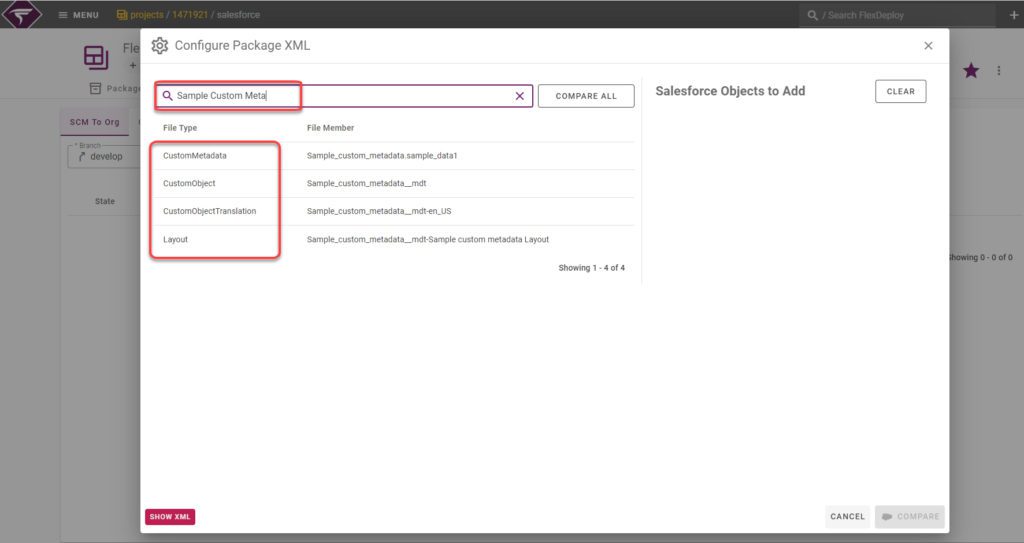
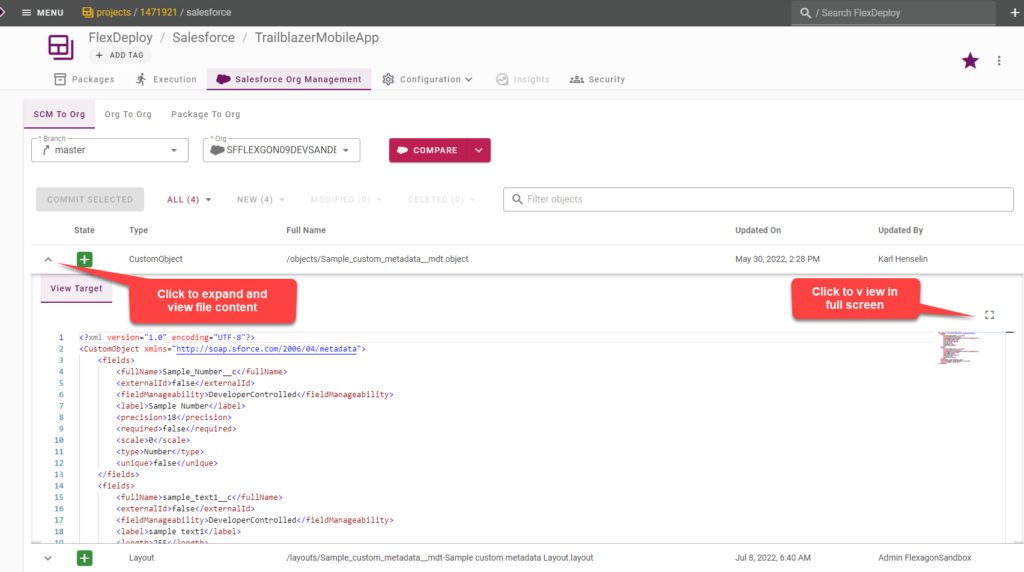
Select SCM to Org to compare the metadata from the repository (respective Branch) against the salesforce org. In the Discovery Window you can search for the name of the Custom Metadata to get all the related custom metadata files and records as shown below.
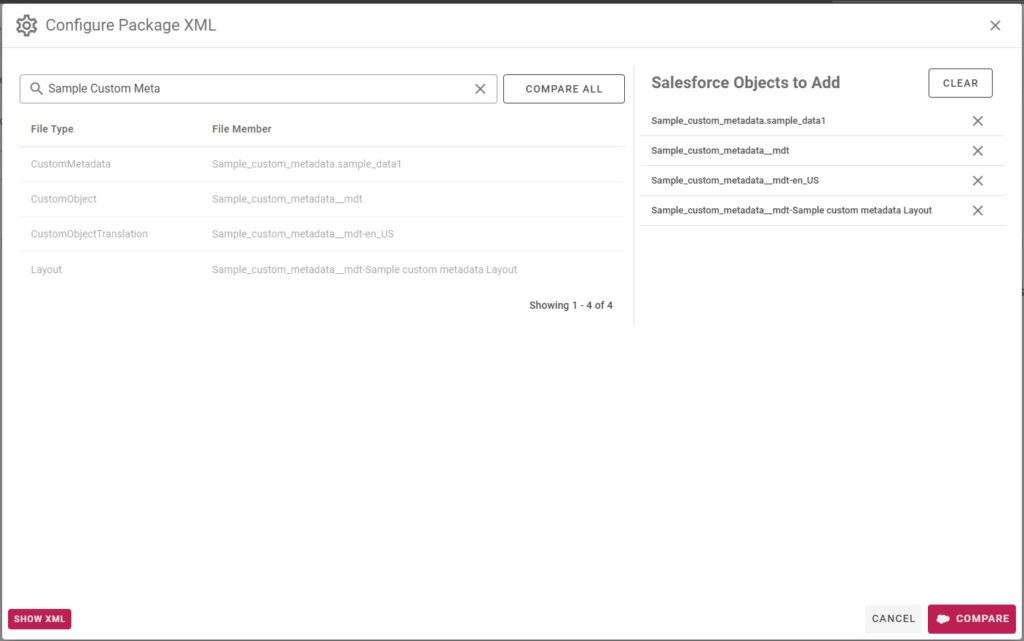
To deploy this new Custom Metadata Type record, you will need to ensure the custom object it belongs to is also deployed. Select all the relevant artifacts and click Compare button.
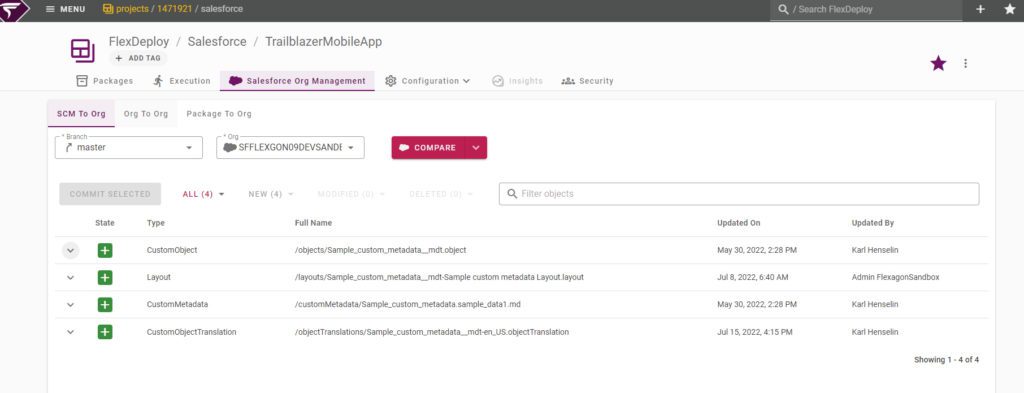
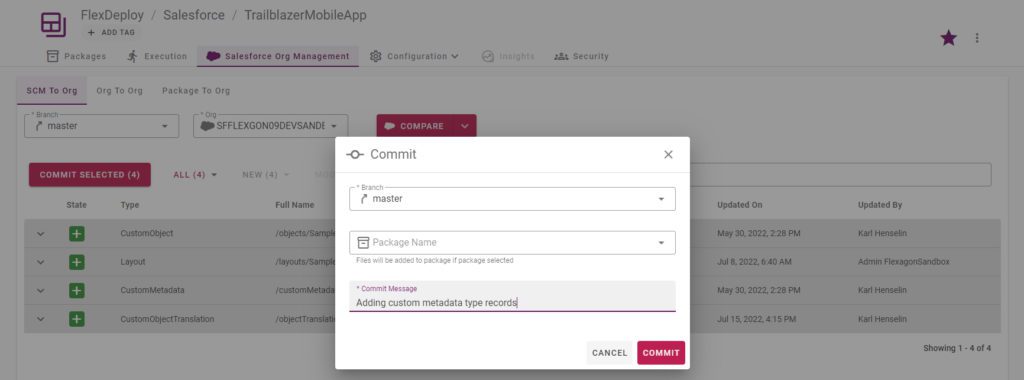
The New or Changed artifacts will be shown. Select the Custom Object, Layout, and Custom Metadata to commit to your version control system.
You can view the content of these files by expanding the down arrow icon. If the file is modified you will see differences between the source and target file side by side to review.
Commit to SCM
Create a Package
Once the review of the files is complete, select components to merge to your code base in SCM. Here, we can either give the package name to add the committed files to the package, or we can create a new package from the create package tab.
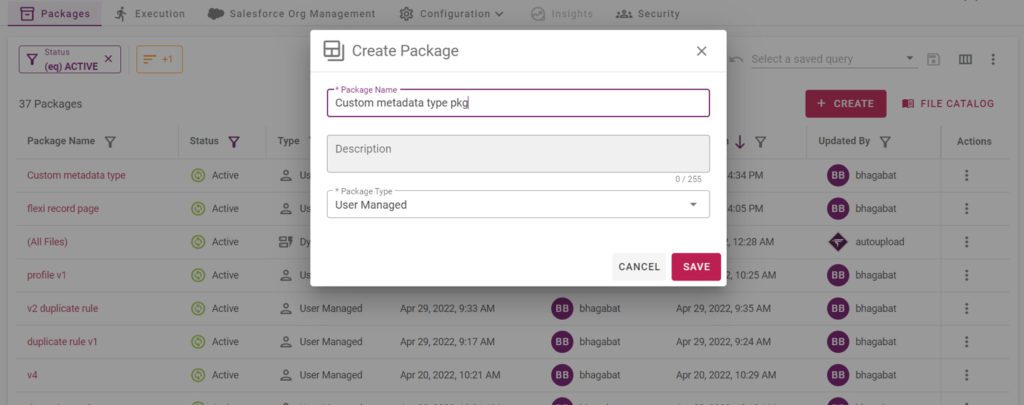
To create a new package with the committed files, navigate to the Packages tab and click on the create button. This approach will be more useful when the files are committed to your source code directly by developers.
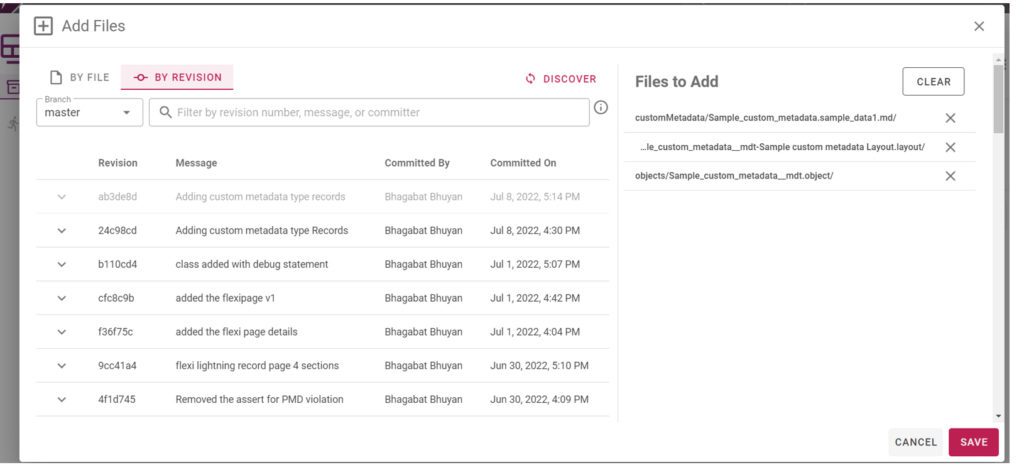
After the package is created, add the components to the package as shown below. The components can be searched with the file names or with the commit revision id of the repository. The revisions/files are added to the package by clicking the save button.
Build the Package
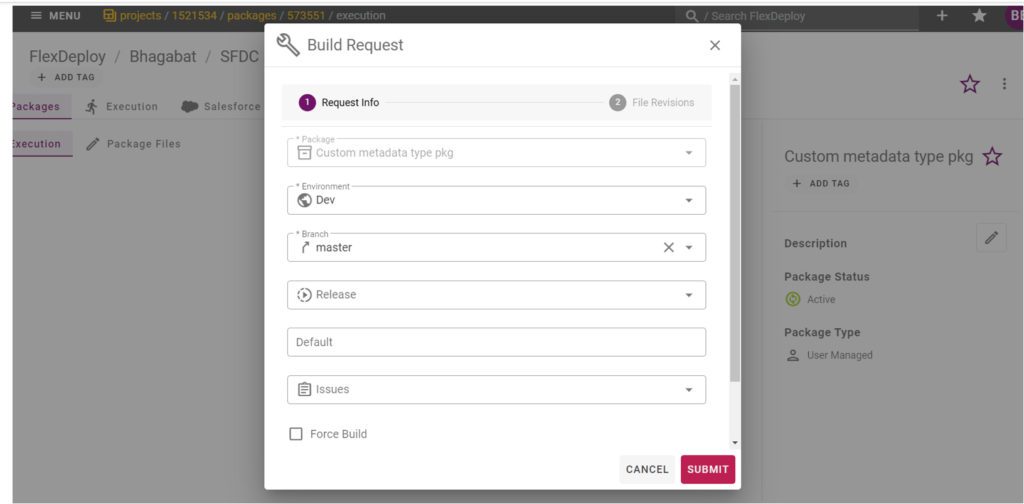
After the package is ready, click on the build icon to submit the build request. The build operation will extract the files that are part of the package. FlexDeploy creates an Artifact that will be used to deploy to other environments.
Deploy the Package
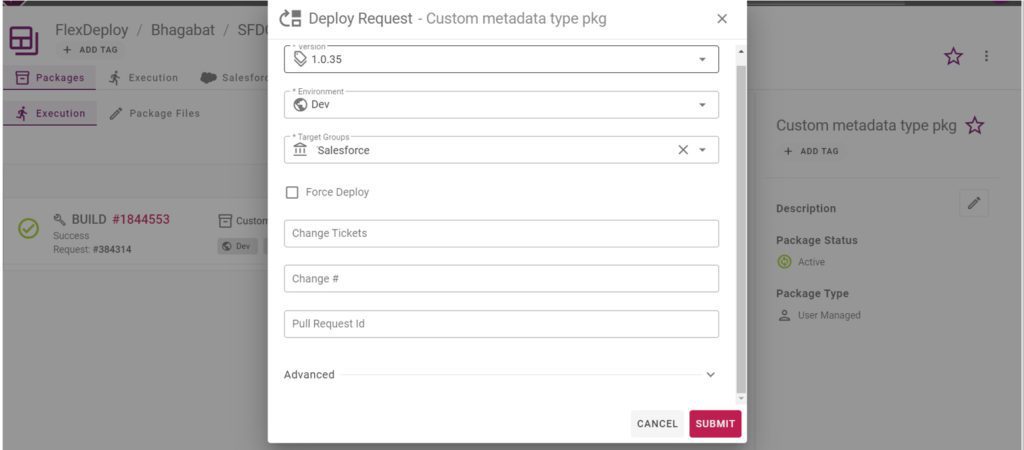
After the build is successful, click on the deploy icon to submit a deploy request. This deploys the custom metadata type to the destination Org. This is the manual deployment, most of the time you would use the release pipeline to deploy changes to destination Orgs.
Conclusion
Custom metadata types are deployable and configurable artifacts containing data values. They are different from other artifacts like objects, fields, or apex classes as they are a combination of data and metadata in Salesforce. FlexDeploy supports Continuous Integration with your development Salesforce org. You can use fully automated pipelines to migrate these changes or you can review as described in this blog and deploy. FlexDeploy can perform a smooth deployment of custom metadata types from one Salesforce environment to another environment, ensuring a robust DevOps process.

