Oracle JET Made Easy
Developing new enterprise applications? Building JavaScript based user interfaces that need deployment? Then Flexagon’s new Oracle JET Plugin (FlexDeploy 5.1.0.3) may be for you. With the evolution of technology, companies such as Oracle and Flexagon have been transitioning to the cloud. The move to the cloud has emphasized the use of responsive, scalable, browser-based interfaces.
Oracle JavaScript Extension Toolkit (JET) is an open source toolkit targeted at JavaScript developers. It is filled with multiple architectures, patterns templates, techniques and components for building new applications. JET empowers developers by providing these tools on modern JavaScript, CSS3, and HTML5 design and development principles. What is nice about JET is that it allows users to use as much or as little of the features as they desire. As such, FlexDeploy’s JET plugin contains two new operations for its users, buildJet and deployJet.
The buildJet operation is a wrapper around the ojet build command from the JET Command Line Interface (CLI). With the CLI comes several build options which can be easily configured for your JET application. There is no need to interact with the command line with FlexDeploy because it will handle the specific CLI syntax for you. Simply enter or enable the build options you would like for your application and you’re on your way. Running the buildJet operation will execute the ojet build command to package the application, zip the contents, and publish the result to the artifact repository.
Note: The JET Plugin will automatically run an ojet restore command before running the build to ensure the dependencies, libs, and web components are present.
The deployJet operation unzips the Oracle JET artifact from the artifact directory (produced on build) and then copies the contents to the target location.
For more details check out the FlexDeploy JET Plugin Documentation.
Create build and deploy workflows
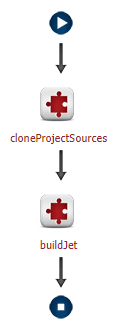
Let’s create a build workflow named ‘Jet Build’. The steps in the workflow are:
- Get the source code from SCM (For example, Git, Subversion, Microsoft TFVC, CVS, PVCS etc.).
- Running the buildJet operation will produce the ojet build command and also save the artifact to the repository.
In our example, we are building an Oracle JET template application sourced in a GitHub repository.
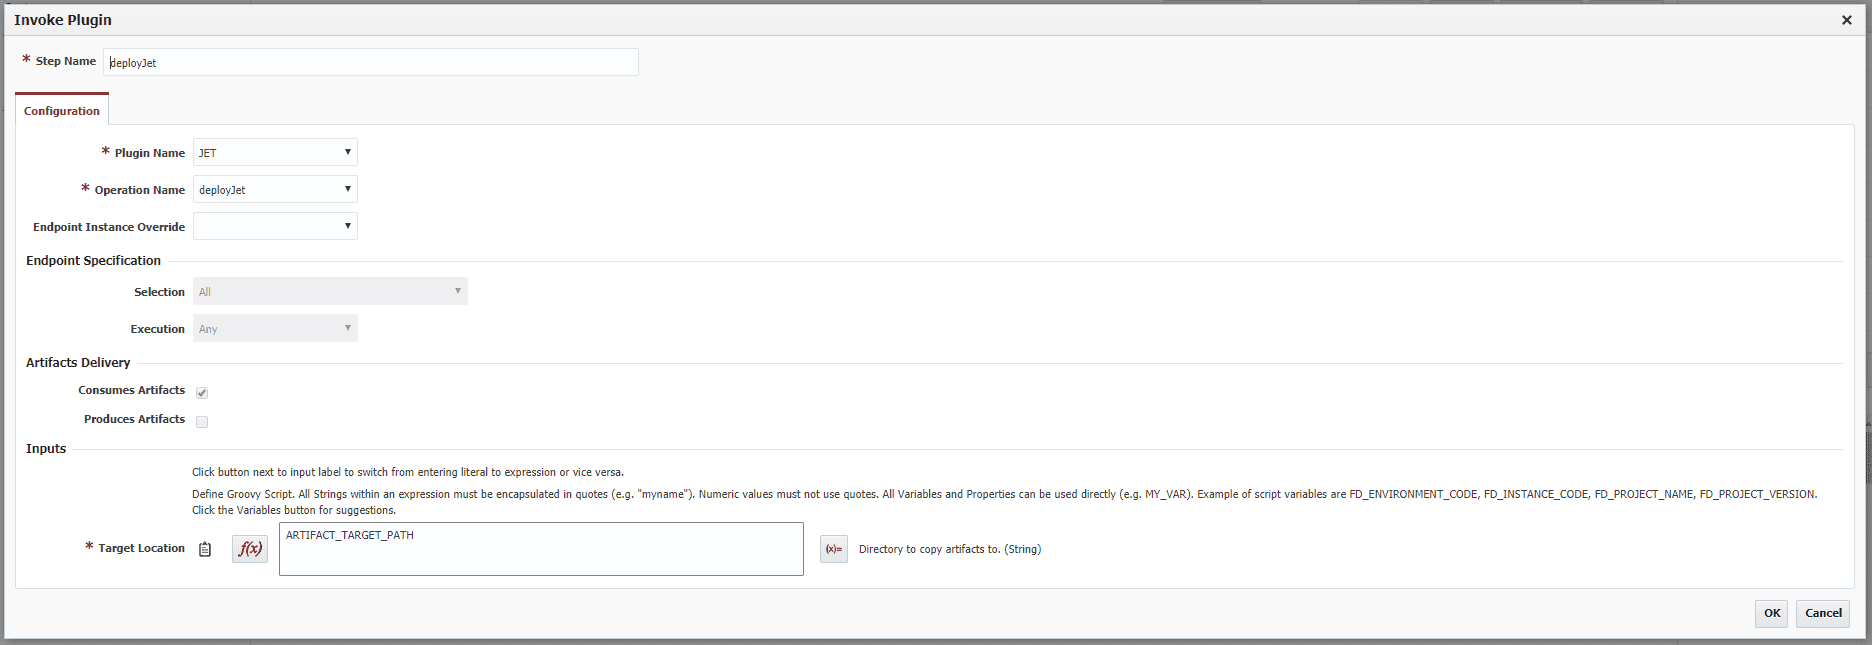
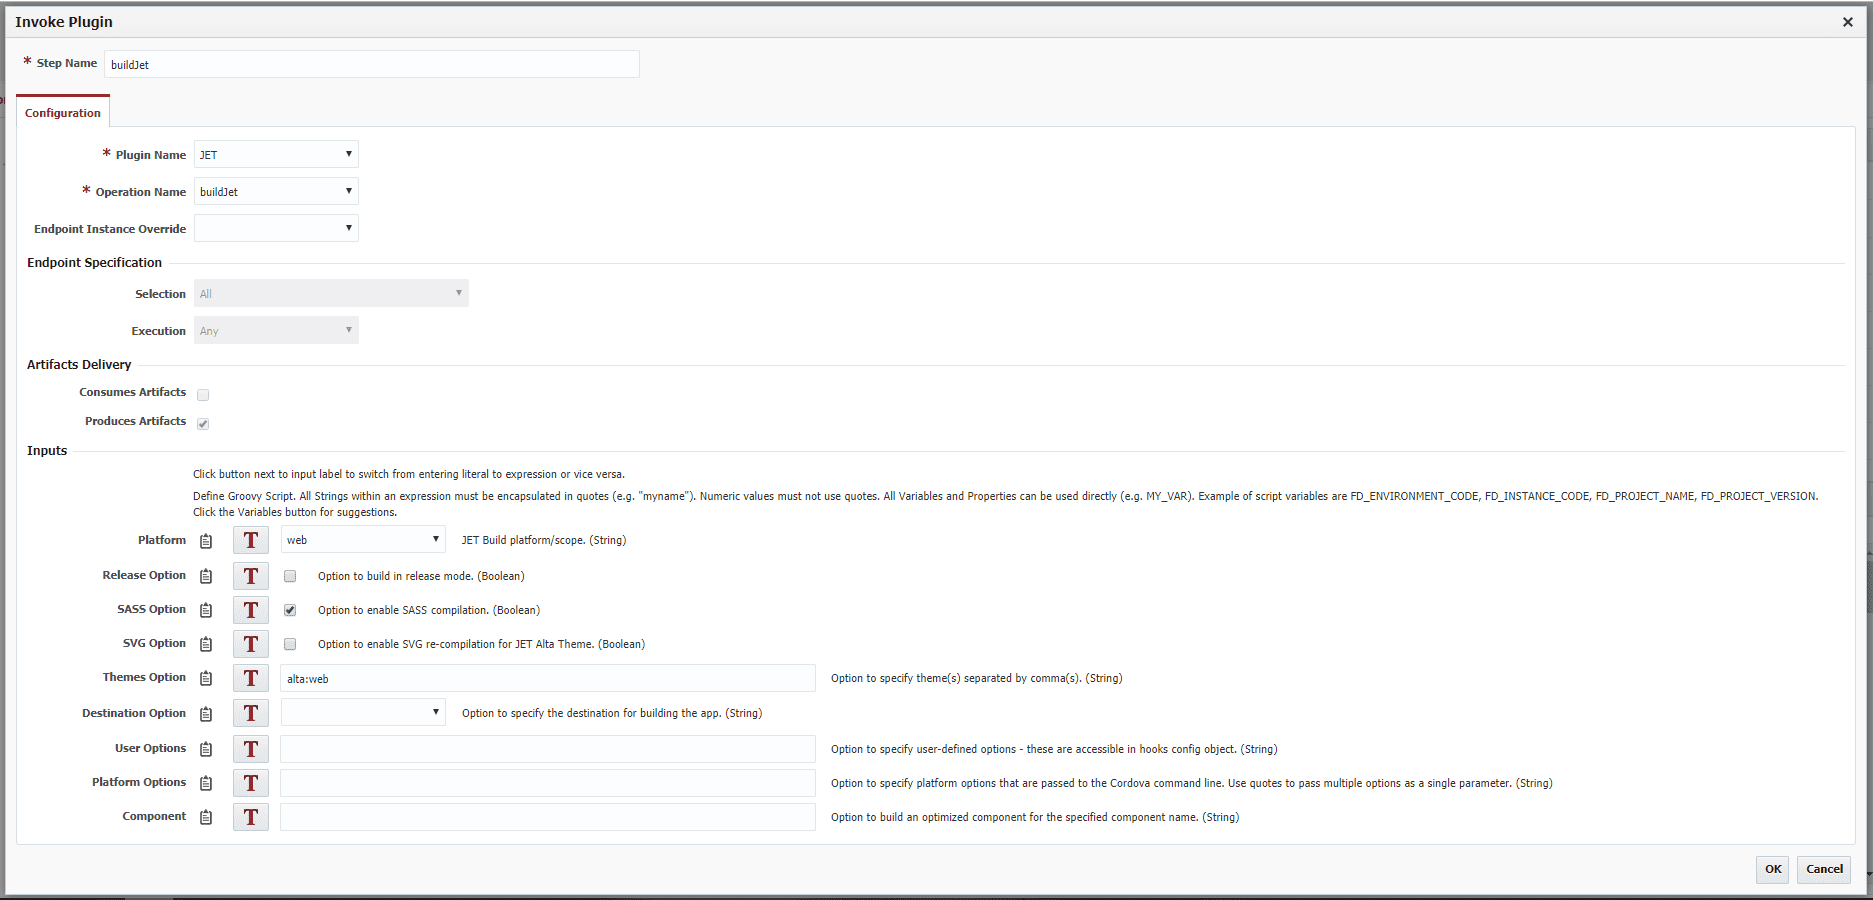 Now we will create a deploy workflow named ‘Jet Deploy’. The deploy workflow will deploy the artifact produced in the build workflow to a host server. The only step in the workflow is the deployJet plugin operation.
We configured a Workflow property, ARTIFACT_TARGET_PATH, and used it as the target location. This will allow us to setup a different path per environment if necessary. In the next step we will define the Workflow property for each specific environment.
Create a JET instance
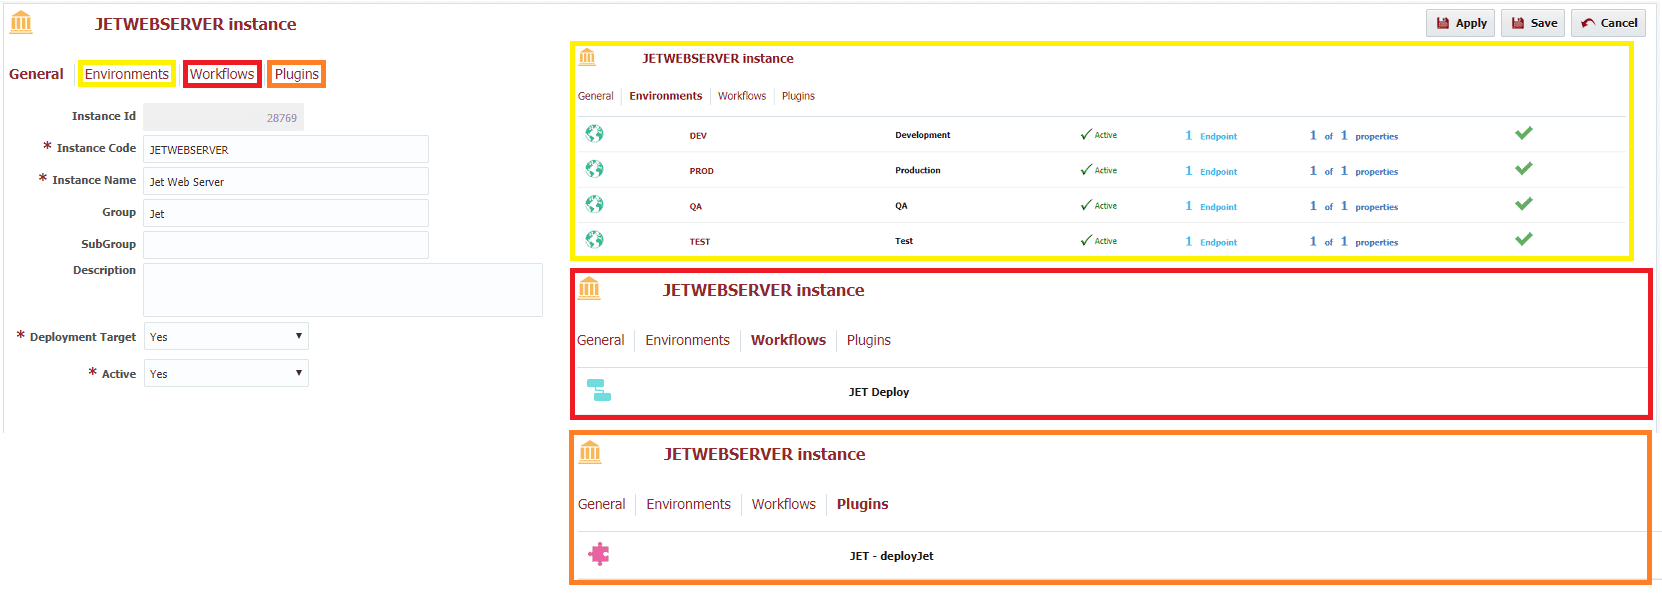
Navigate to the instances screen under Topology tab and create a new instance for JET. In our example we created two instances, one for each operation, however you can also create one instance to accomplish both tasks. This is how the instances will look after the setup. An instance is a logical target which is mapped to one or more environments. Deployment will be performed to a specific instance and environment.

Update environment instance properties
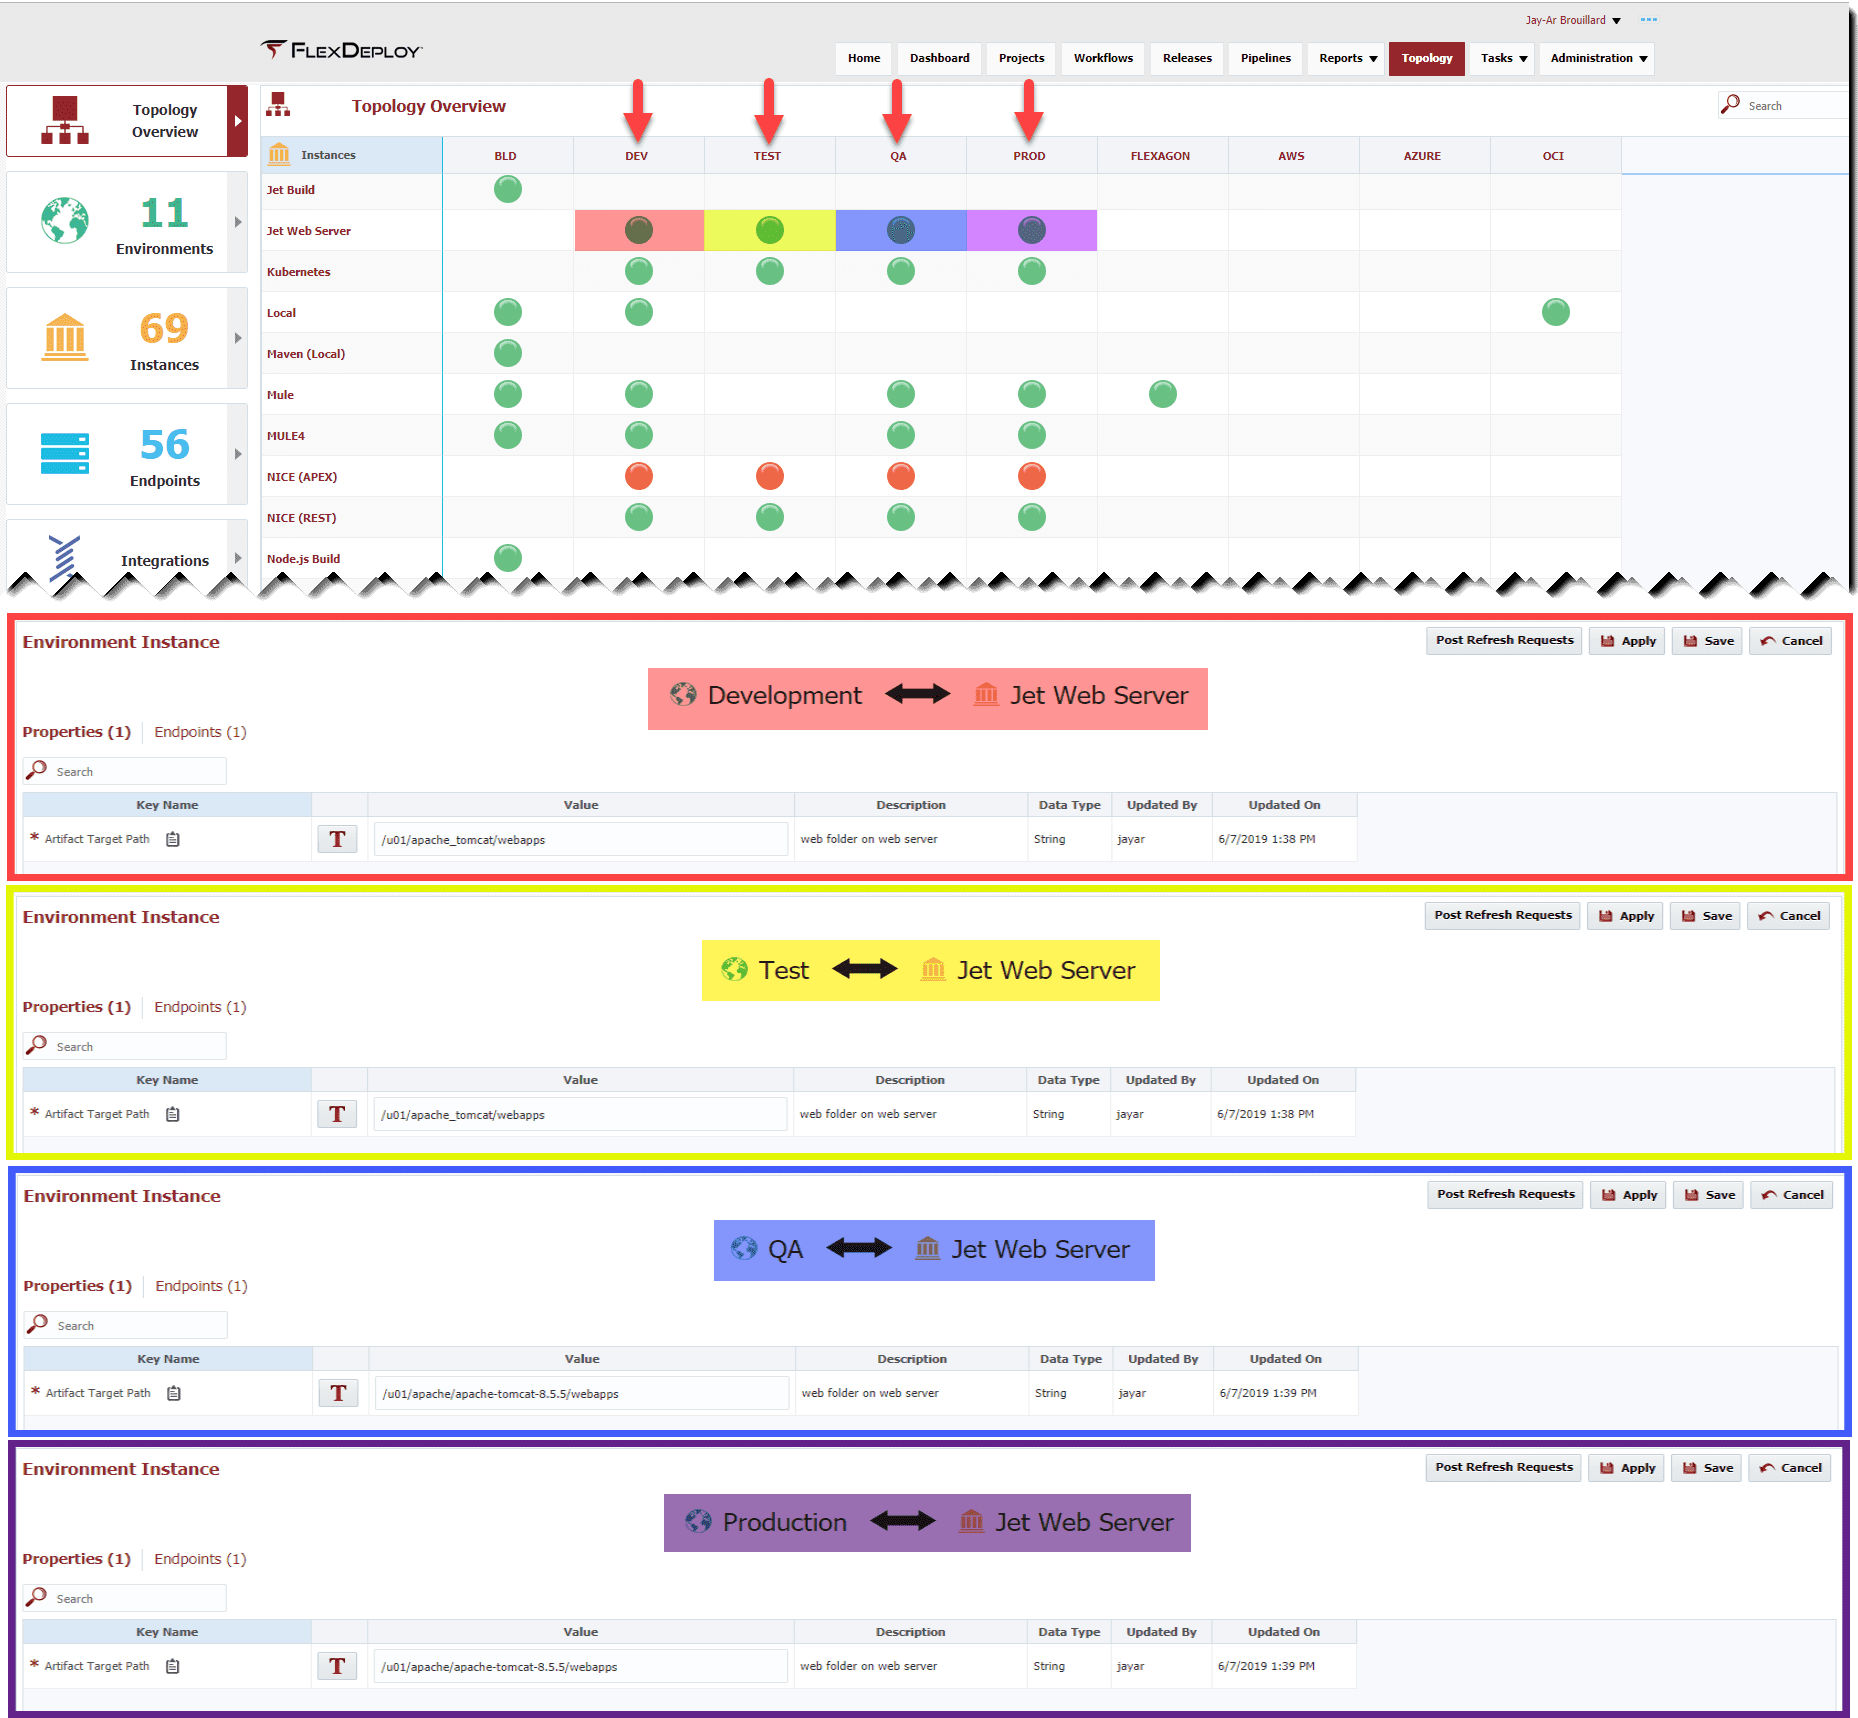
Navigate to the Topology Overview and update the environment instance property for JET WEB SERVER instance. In this example, DEV, TEST, QA, and PROD are the JET environments. Click on the colored balloon to access the instance properties. Define the target location of your JET app. Our example will be the webapps folder on a tomcat server. Repeat for all environments.
Then for each Environment Instance, we map the endpoint our application will run on. Click on”Endpoints” tab then search/scroll for the endpoint on the right and then drag and drop the endpoint to the center canvas. Repeat for all Environment Instances. In our example, we mapped DEV, TEST, QA, and PROD all to the same Tomcat server (TEPLT01).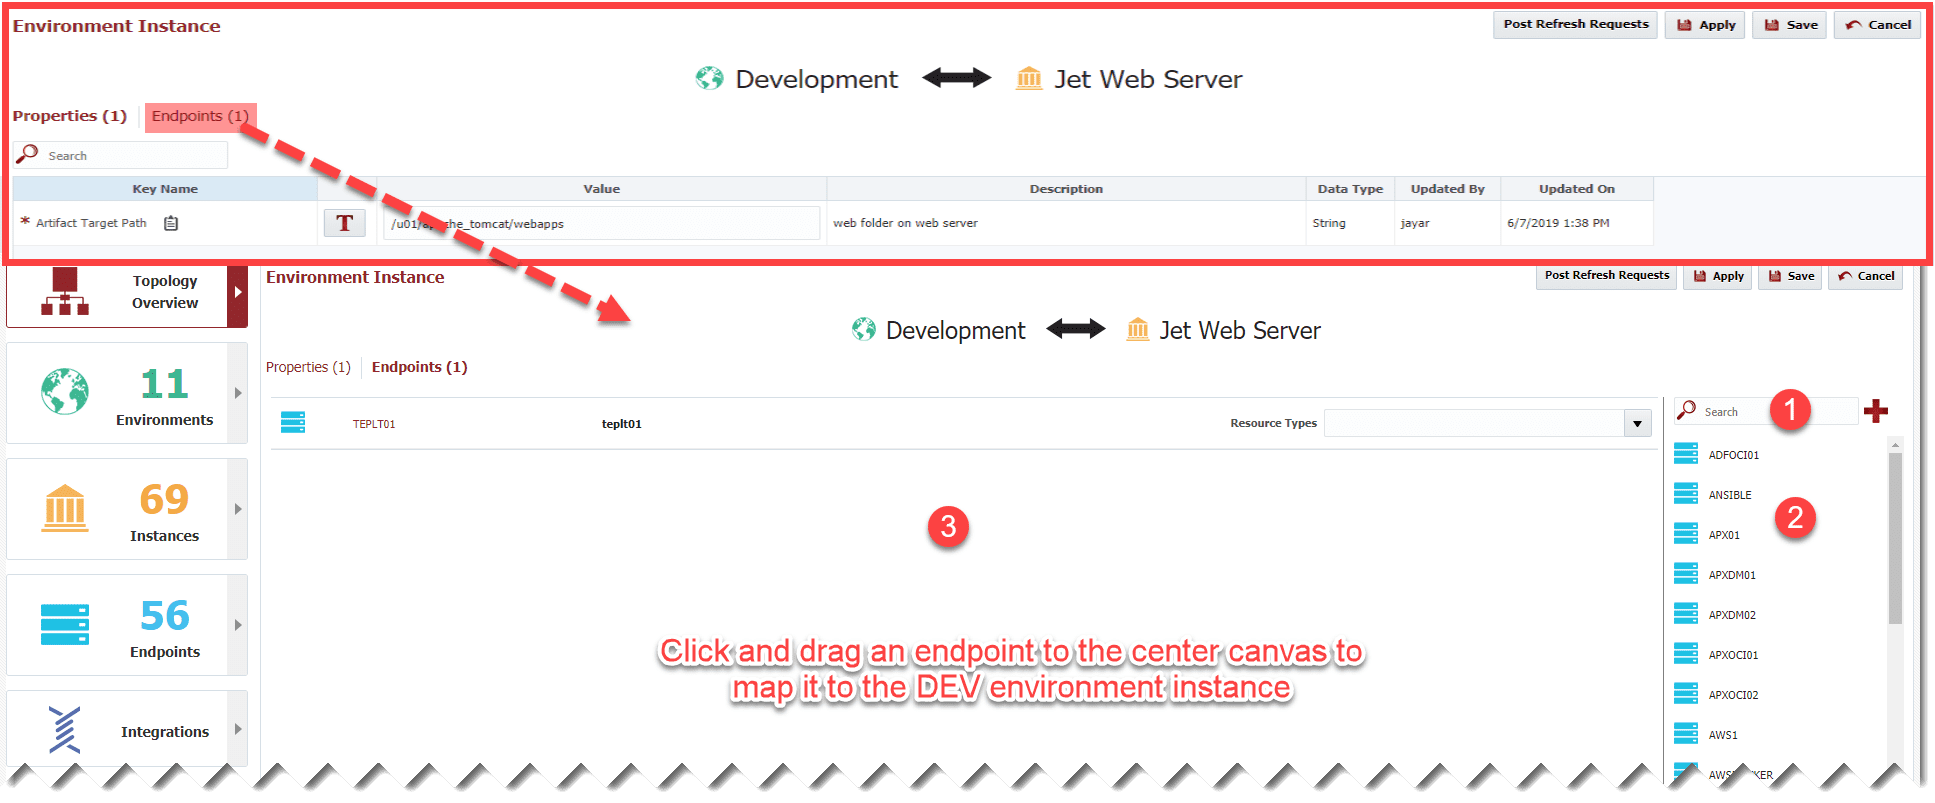
Setup JET project
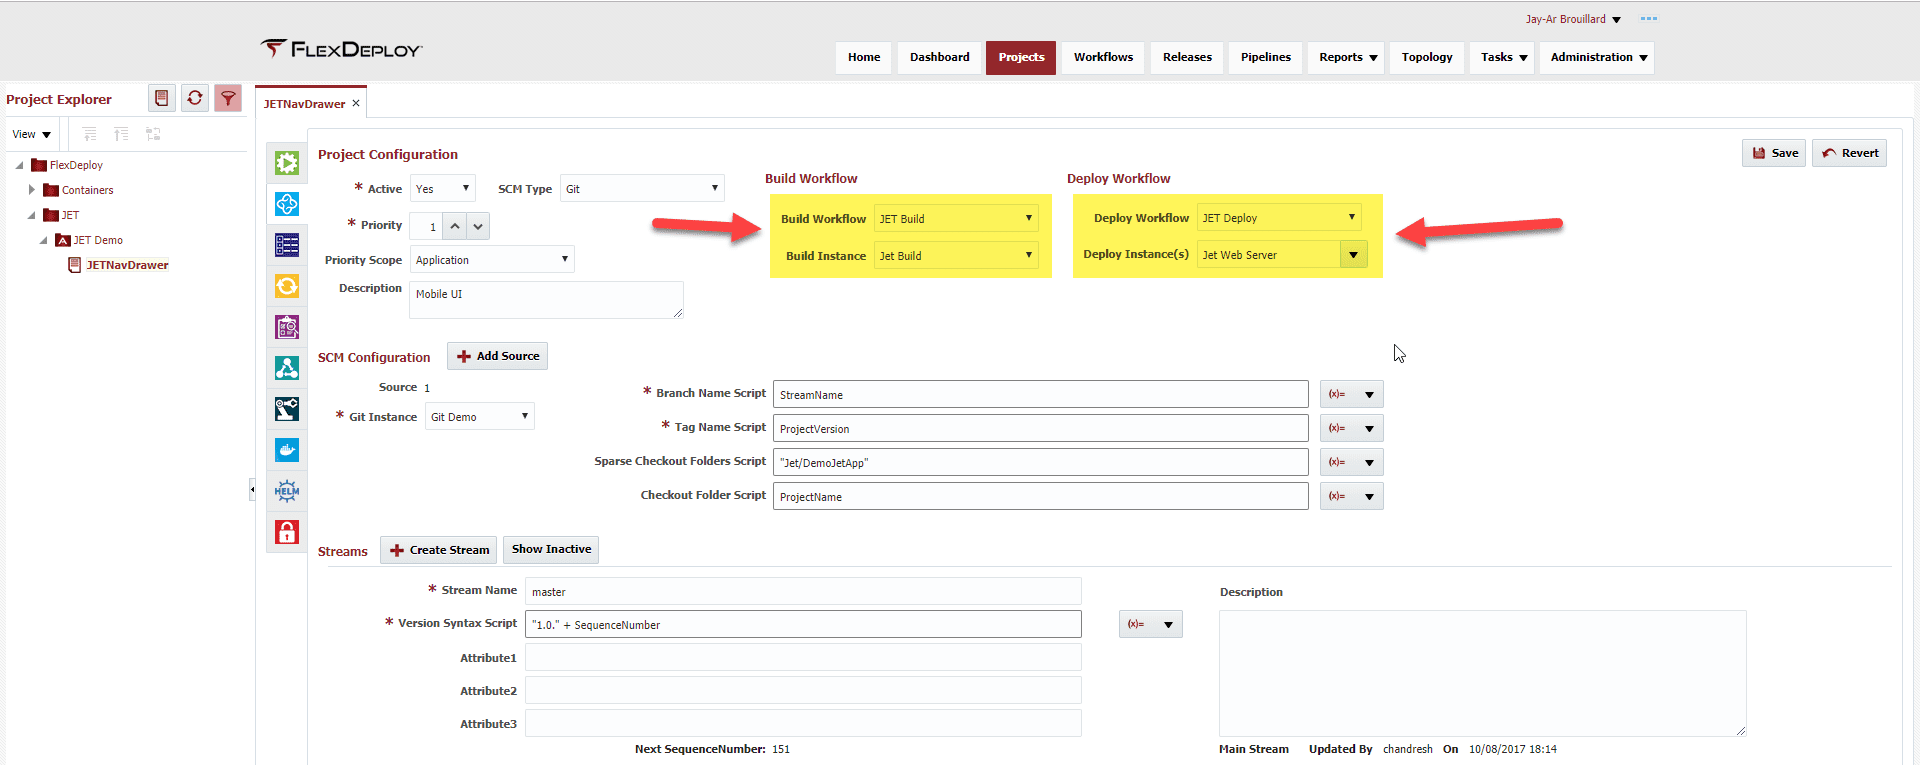
Create a project in FlexDeploy under the Projects tabs. In this example, we created a JETNavDrawer project and setup the configuration to use our Build and Deploy workflows and associated instances we created earlier. When our JET application is finally deployed it will be located at the web server <targetLocation>/<application name>.
Under Project Properties, the application name will be the project name in all lowercase by default (“jetnavdrawer” in our case) but this can be adjusted as necessary.
Build and Deploy JET project
Now, let’s run the build and then deploy workflows and look at the expected outputs.
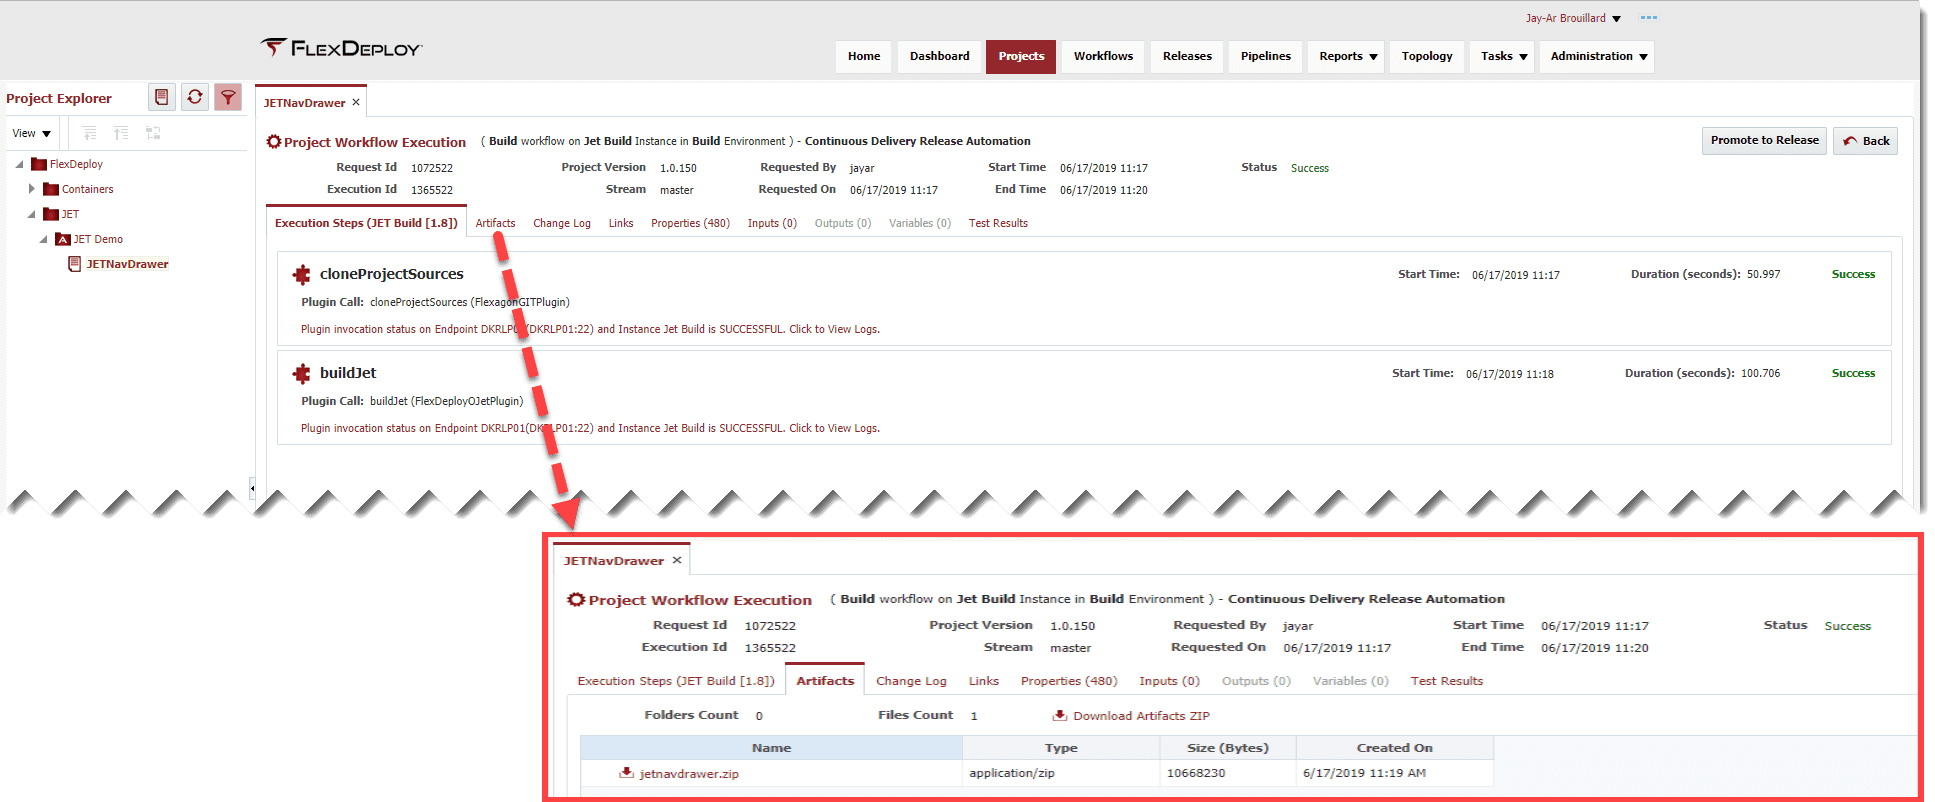
BuildJet will zip up the artifact and store it under the Artifacts tab. DeployJet then has access to that zip file to deploy the application where the user specified.
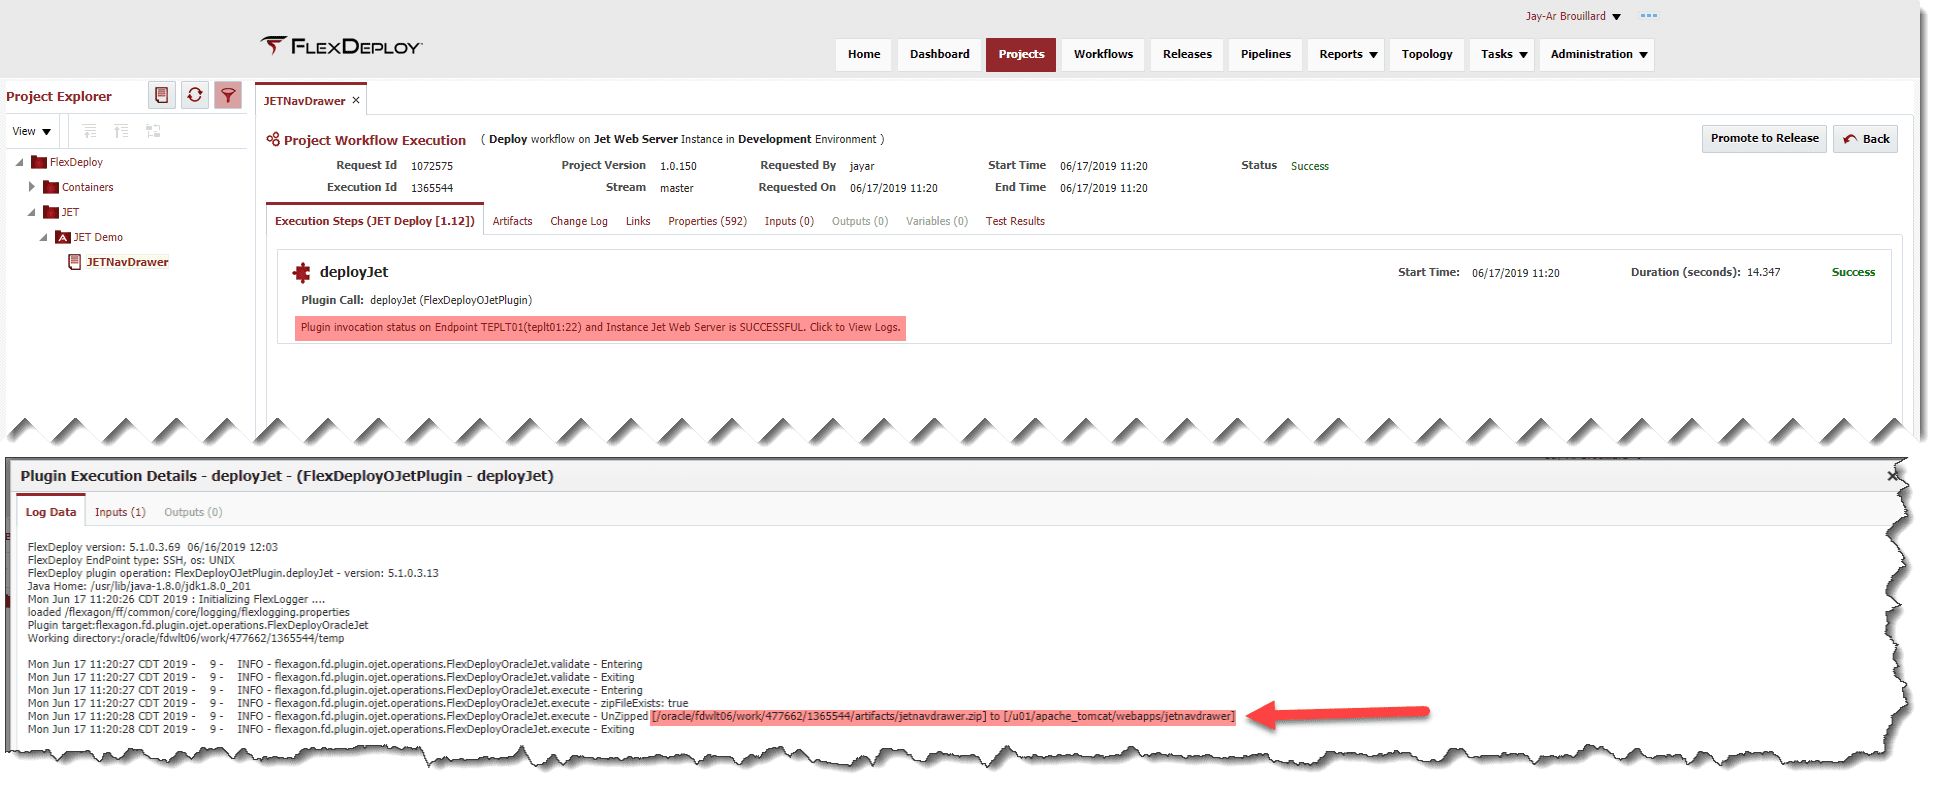
In the logs of deployJet we can see exactly where the JET application was unpackaged and copied to.
Verify JET Application Deployment
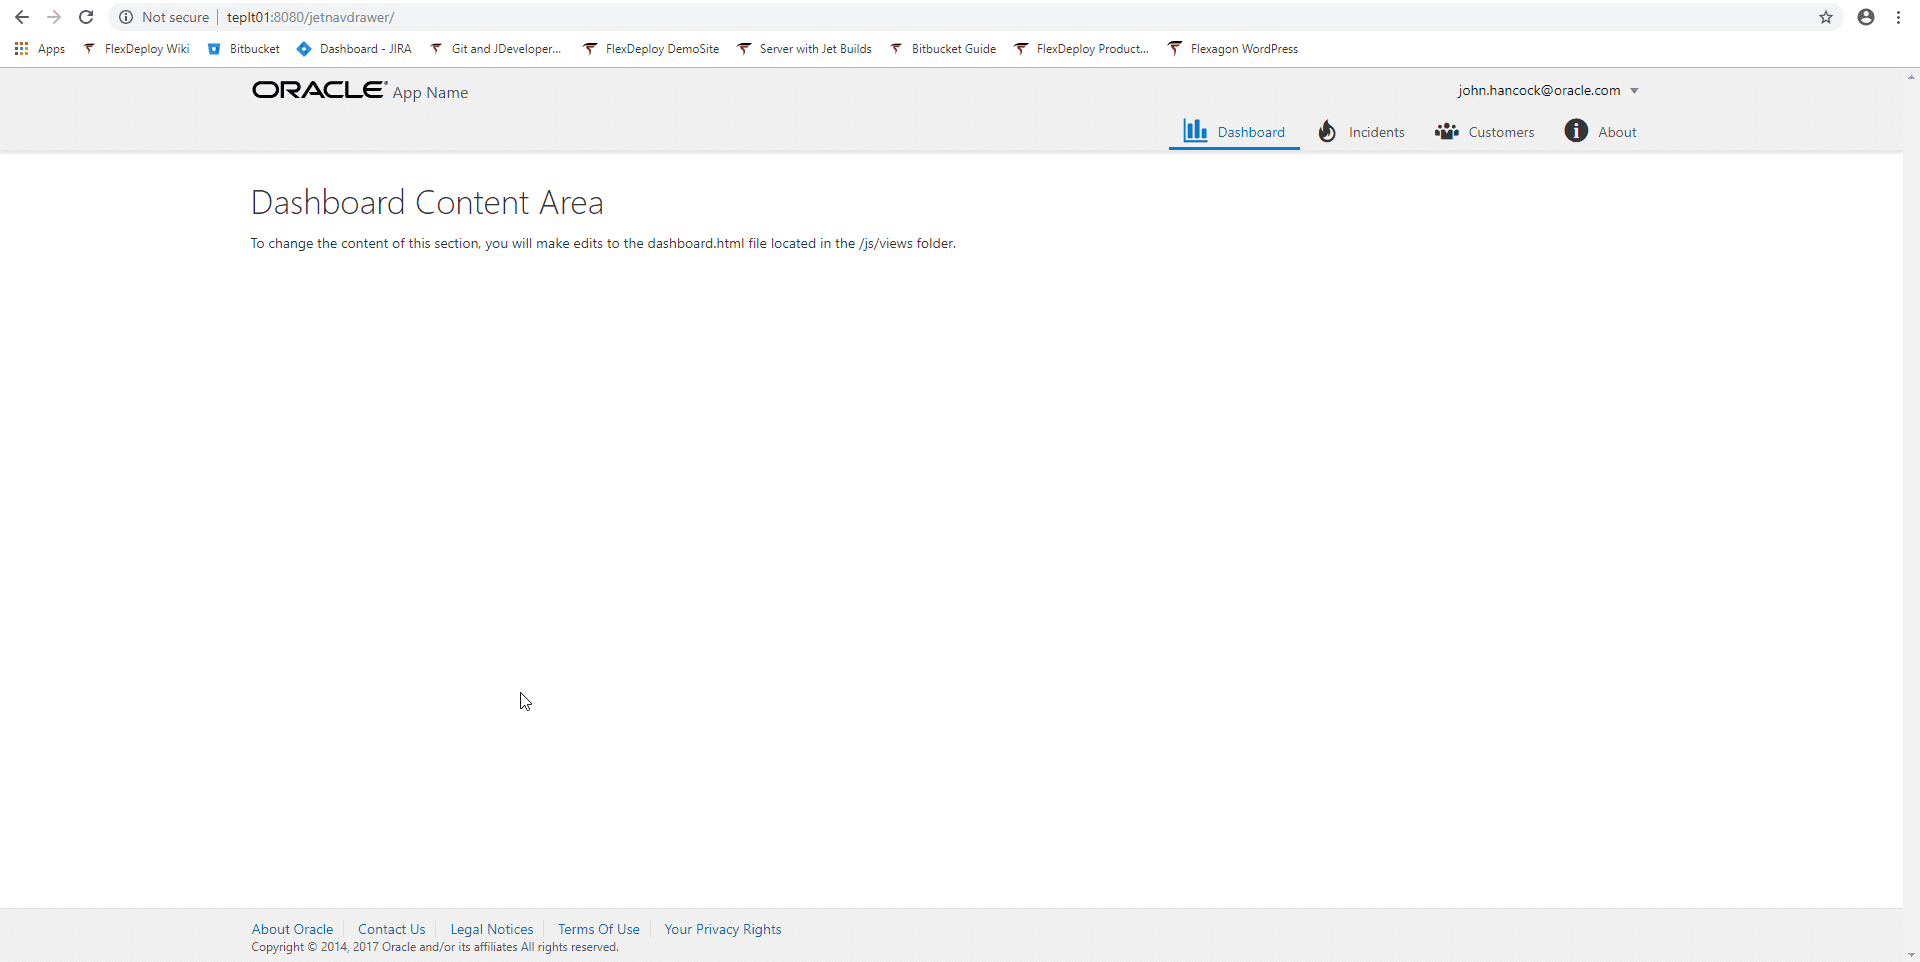
FlexDeploy deploys the JET application to the target location appended with the application name. Since our application is a web app, we can verify successful deployment by going to the URL.
Conclusion
FlexDeploy makes it easier to use Oracle JET build tools. You will no longer need to interact with command line interfaces when building JET applications. These features will seamlessly integrate with the continuous integration and continuous delivery objective that FlexDeploy is designed to tackle.

