Oracle’s Functional Setup Manager (FSM) UI provides export/import capabilities to move setups and other configurations from one environment to another, however it requires a user to manually invoke the move. While not a challenging task, it can be time consuming to manually submit the export process, monitor, download the artifact file, and do the reverse to import into a subsequent environment. Additionally, some setup tasks can be migrated partially allowing users to move only a subset of a single setup. While it’s helpful to move only needed setup components, this adds more manual work as a user will need to perform migrations by carefully selecting which components or pieces to migrate.
With FlexDeploy’s Oracle SaaS FSM Plugin, users have the ability to automate the export and import of setup tasks as a whole or partially using FlexDeploy’s export criteria feature. This removes manual intervention and brings this migration into the Enterprise DevOps platform with support for governance and audit.
Let’s get started.
Configuring FlexDeploy for SaaS Setup Tasks
To start automating deployments with FlexDeploy, we will need the following:
- A build and deploy workflow using the csvExport operation and csvImport operations from the OracleSaaSFSM Plugin, respectively.
- Defined topology. In other words, the accounts, properties, and endpoints needed to connect to an Oracle application such as ERP, Oracle HCM Cloud, and SCM in order to execute instructions. This includes:
– An Oracle SaaS FSM cloud account containing credentials for Oracle cloud application.
– Reference the cloud account on an environment instance. - An Oracle SaaS FSM project.
Details on creating all of these components have already been covered in Automate Migration of Oracle SaaS Configuration with FlexDeploy. See that blog for general setup instructions. We will keep this blog focused on Setup Tasks with export criteria.
The Details
A few things to keep in mind for working with the FlexDeploy Oracle SaaS FSM Plugin.
Object Types
FlexDeploy will internally store attributes for each file you are trying to deploy whether you want to deploy the generic setup task or specifically a fast formula setup task.
- Task Code
- Export Criteria
- Task Code
- Formula Name
The main difference between these two object types is that Setup Task Attributes deploy all setup data related to a given setup task unless export criteria are specified. On the other hand, Fast Formula Attributes deploy setup data for a specific formula for the fast formula setup task. As such, it is reasonable to ignore the Fast Formula type and only use Setup Task type for Fast Formula as well. See the corresponding object type pages for more details.
Example Setup Task Deployment
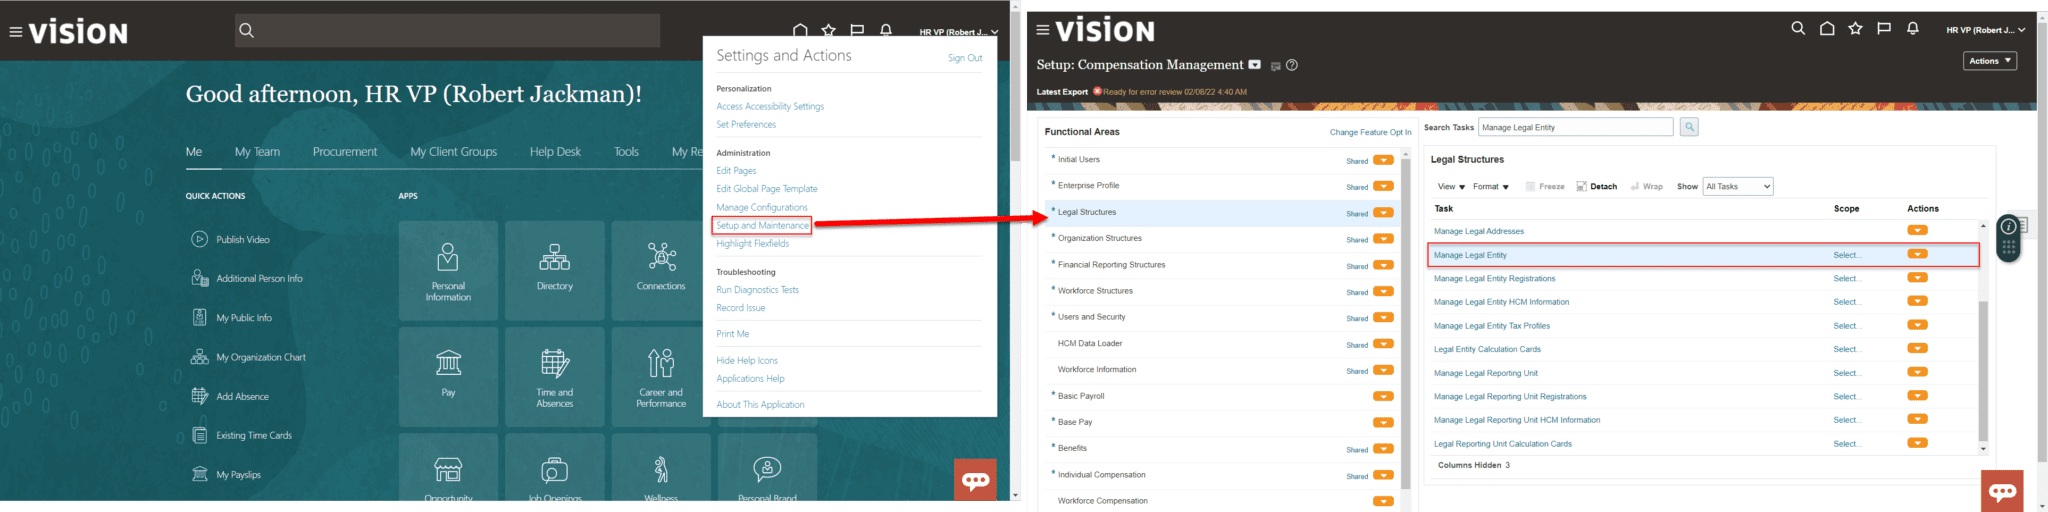
At this point, we should have the main configuration in FlexDeploy (Workflows, Topology, and a Project) done. We will use the setup Manage Legal Entity as our scoped deployment example.
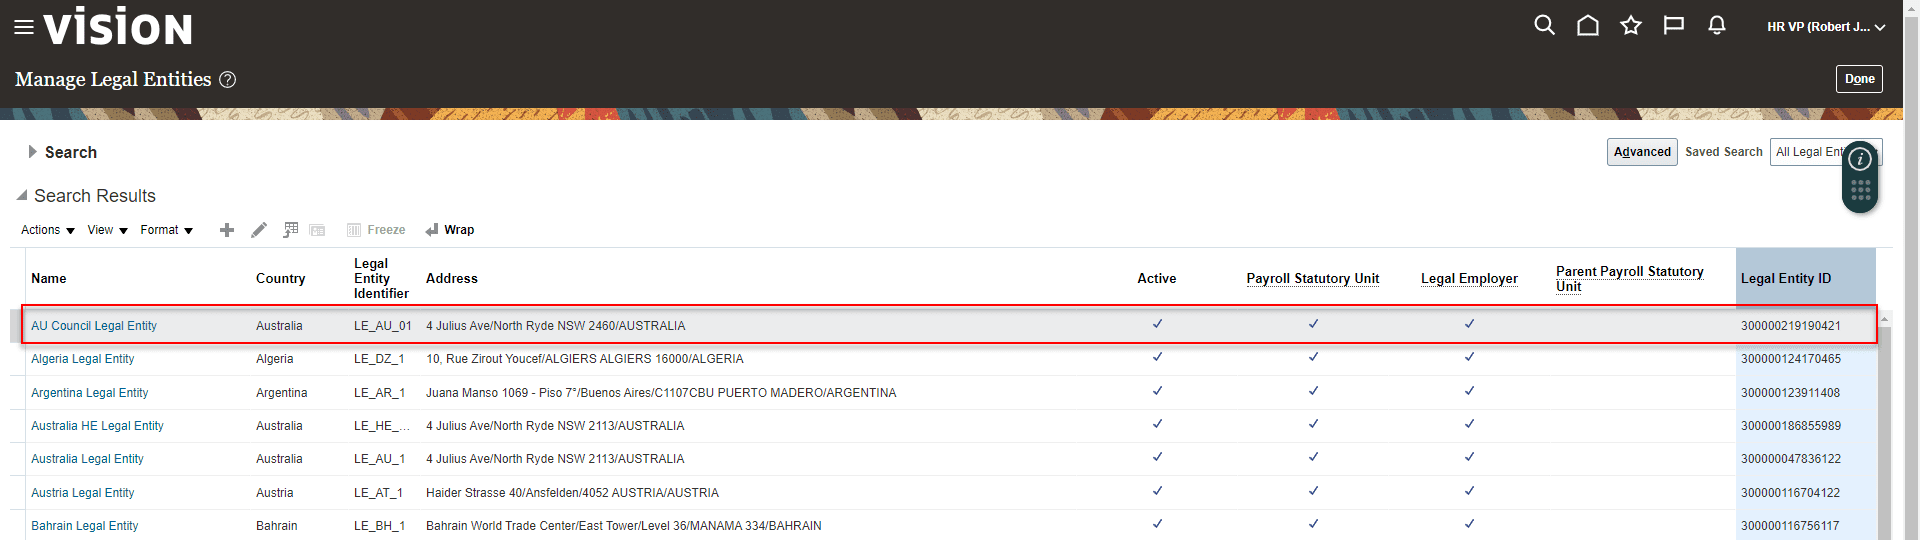
Click into the Manage Legal Entity task to see a table of existing entities available on your SaaS environment. Let’s use the value AU Council Legal Entity as our scope value. Note that we chose Name as the scope field, however, Legal Entity Identifier and Legal Entity ID are also supported for this specific setup.
We make it simple for enterprises to drive continuous innovation through quality software. Together we can help organizations achieve more customer value at lower cost and with less risk.
In FlexDeploy, navigate to your FSM project -> Packages -> File Catalog to create a Setup Task with export criteria for Manage Legal Entity. Keep in mind that Setup Tasks without export criteria do not need to be created manually. “Discover” would populate those files automatically.
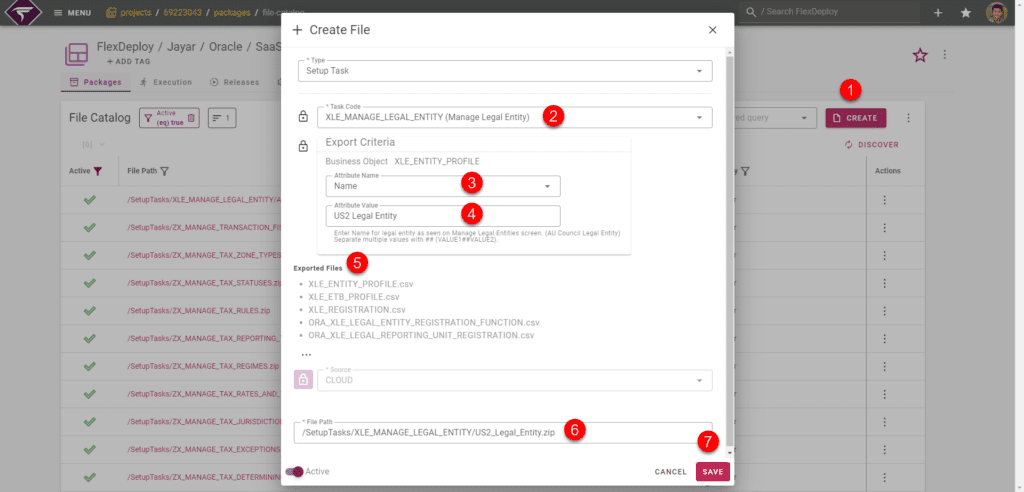
To create a Setup Task file manually, follow the below steps:
- From File Catalog, click the Create button.
- In the Task Code input, start typing in the task name or task code, in our case Manage Legal Entity, and FlexDeploy will give you a list of suggestions to choose from.
- If your task is scopable, then Export Criteria will populate a table of scopable attributes for you. Simply select the attribute you want, Name in our case
- Type in the value for the Attribute Name you choose. I choose “AU Council Legal Entity” for the value.
- Exported Files is tip for you to know which CSV files will be exported as part of the CSV file package when build is executed.
- File Name (with Path) will automatically generate a default path for you based on the setup and any criteria you define. Feel free to change this but this is the recommended convention.
- Click the Save button once you’re ready to create the file.
I will now add the new file “/SetupTasks/XLE_MANAGE_LEGAL_ENTITY/US2_Legal_Entity.zip” to a package I named “FD-3” and execute the build from my Development environment.

After the build completed, I’ve downloaded the artifact to show the content.
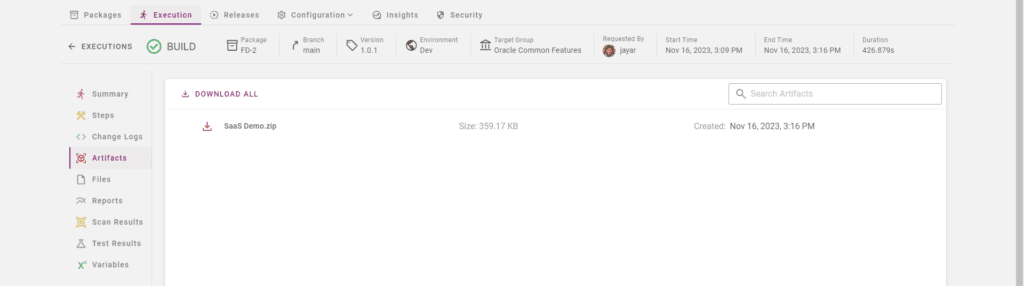
Unzipping the artifact, you’ll find a CSV file package for Legal Entity. Notice the .csv files match what the file catalog hinted previously.
I will perform the deploy of this package to our Test SaaS environment and we’re done!
Conclusion
In this post you have seen how we can automate and manage Oracle Fusion application deployments using FlexDeploy. After an initial setup and file population, FlexDeploy can easily be used to monitor and deploy any number of changes to any number of Oracle applications such as ERP, Oracle HCM Cloud, and SCM. Keep track of your setup task deployments either on the whole file package level and/or on a scopeable level.
See the FlexDeploy Oracle SaaS Plugin Guide for the most up to date information.