

Are you able to build fast, test fast, and fail fast? Achieving speed within the software delivery process requires end-to-end automation. Achieving quality in your delivery requires extensive testing at various stages of the lifecycle. Although there is a place for manual tests, organizations need to increase test quality and effectiveness, and that means they need to incorporate automated testing.
FlexDeploy offers integrated test automation using your preferred testing tools and framework, allowing users to accelerate the delivery of high-quality software by reducing manual test cycles. An integrated test automation framework increases quality, speeds software delivery, and improves performance and deployment frequency. It also reduces the risks associated with inferior quality releases and the risk of late deliveries because of quality issues.
FlexDeploy’s Test Automation Framework for post-deployment testing got a major overhaul in FlexDeploy 6.0. While build testing done through your tools of choice continues to run as before, users benefit from a new UI that makes it easier to track and see both the big picture and the details. FlexDeploy 6.0 Test Automation features a number of great improvements. Let’s take a look.
Configuring the Test Automation Framework
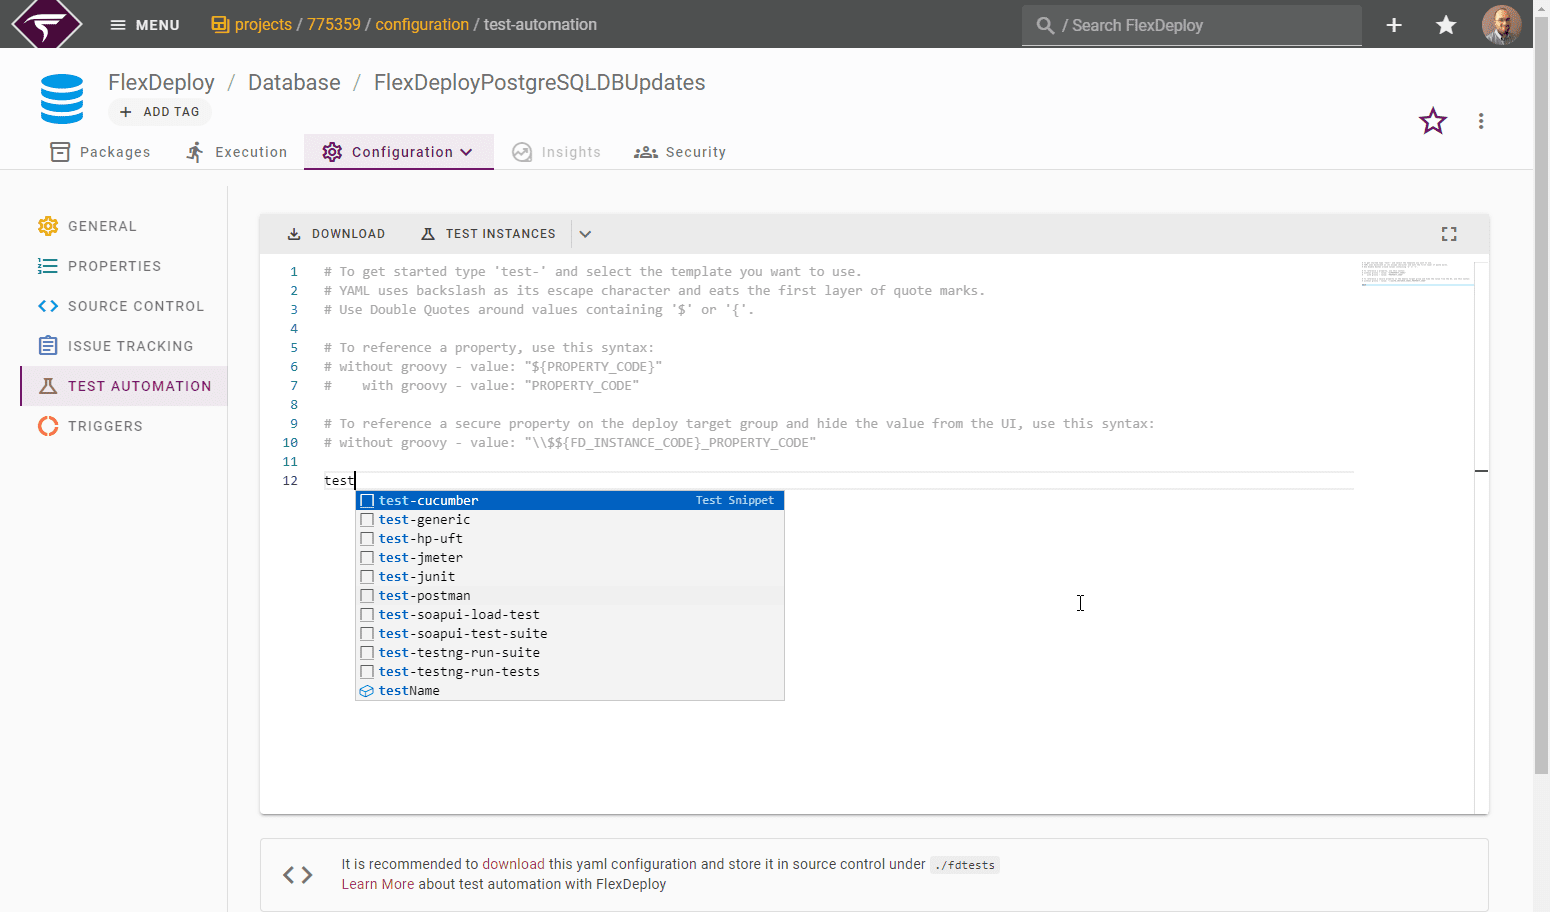
The new test automation framework is based on YAML configuration files. Instead of traversing menus to set things up, you can just type a few lines of code. You can version that code in source control and it will be picked up automatically by FlexDeploy and executed.
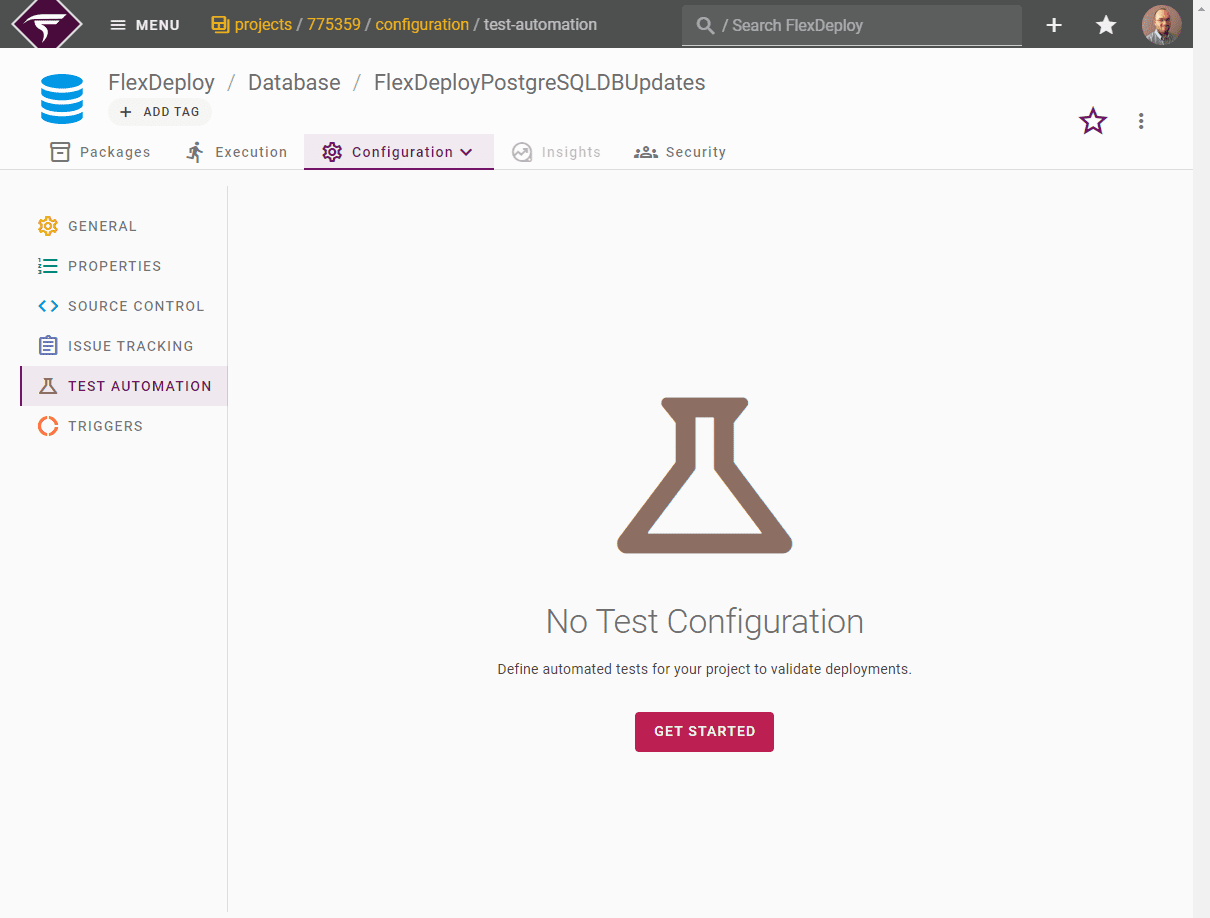
When you first arrive at the test automation screen for your project, click Get Started. You will also see a tooltip on your first visit with a link to the documentation.
A helpful guide explaining how to write your first post-deployment test appears. Type “test” or Ctrl + Space to see the auto-suggestions for built-in test configurations of some popular testing tools.
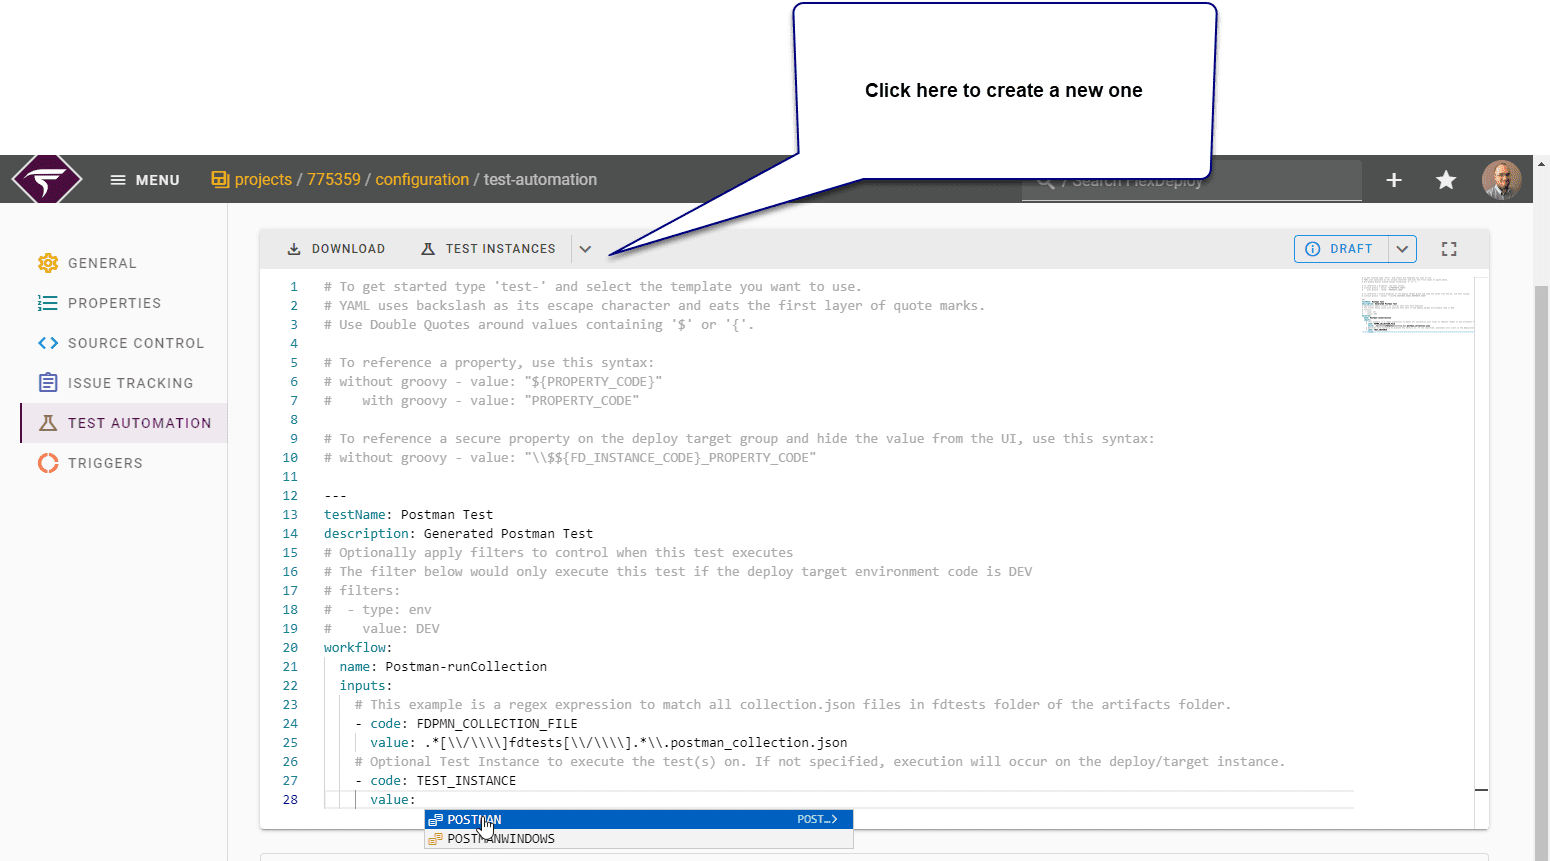
Several test types are baked in from the factory, but you can also build your own. Let’s add a Postman test. We need to add the test instance because we haven’t installed Postman on all our different endpoints, just on a certain one. I already have created a test instance, so I just click in the TEST_INSTANCE value and press Ctrl + Space. If you don’t have an instance created, no options will appear. In that case, click the drop down and create a new test instance. After reviewing the name and description, you may need to also define workflow inputs depending on your Postman scripts and what is in your environment files.
Setting up Postman Options
This default configuration has a regex that will run all of the Postman Collections that are stored inside of a folder named fdtests. That regex can be seen on line 25 in the image above. Add your Postman Collection files to that location, checking them in with the project sources. Click save or press Ctrl+S to save. If your sources are already saved with the project, but in another location, edit the regex instead to find the files that you want to run. The build workflow for your project should save the fdtests folder into the artifacts folder, which will make it available for the test workflow.
Running Post Deployment Tests with the Test Automation Framework
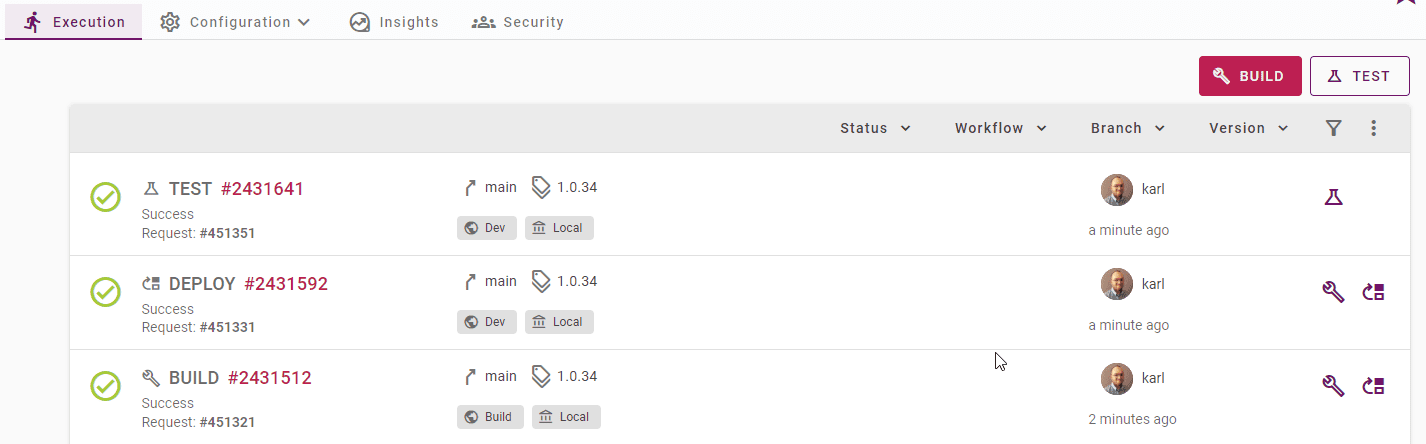
Now let’s test our configuration before we check it in. It’s faster to catch a typo and change the code in the UI than to check it in while we are getting things figured out. Go to the execution screen and execute a build, deploy, and test on your project. When you run the test, you can leave the test name field blank to run all of the tests you set up.
If the test passes, you are ready to store the test configuration in source control.
Click Configuration -> Test Automation. Then, scroll down and click download.
Save the downloaded YAML file in the same fdtests folder in which you saved the Postman Collection files. Once it’s secure, you can delete the YAML from the FlexDeploy UI. Migrating the YAML to SCM isn’t required, but config is code and code is stored in SCM. This allows developers to version the tests with their changes. That means new features can be tested and if a code change is backported, the tests that are made for new features in one branch don’t get run on code that doesn’t support them in another branch. Changes to the tests are audited and preserved too, so you know who ignored a test or changed the conditions for passing.
Once you have stored it in the fdtests folder, run another build, deploy, and test execution. Review the execution and you should see something like this:
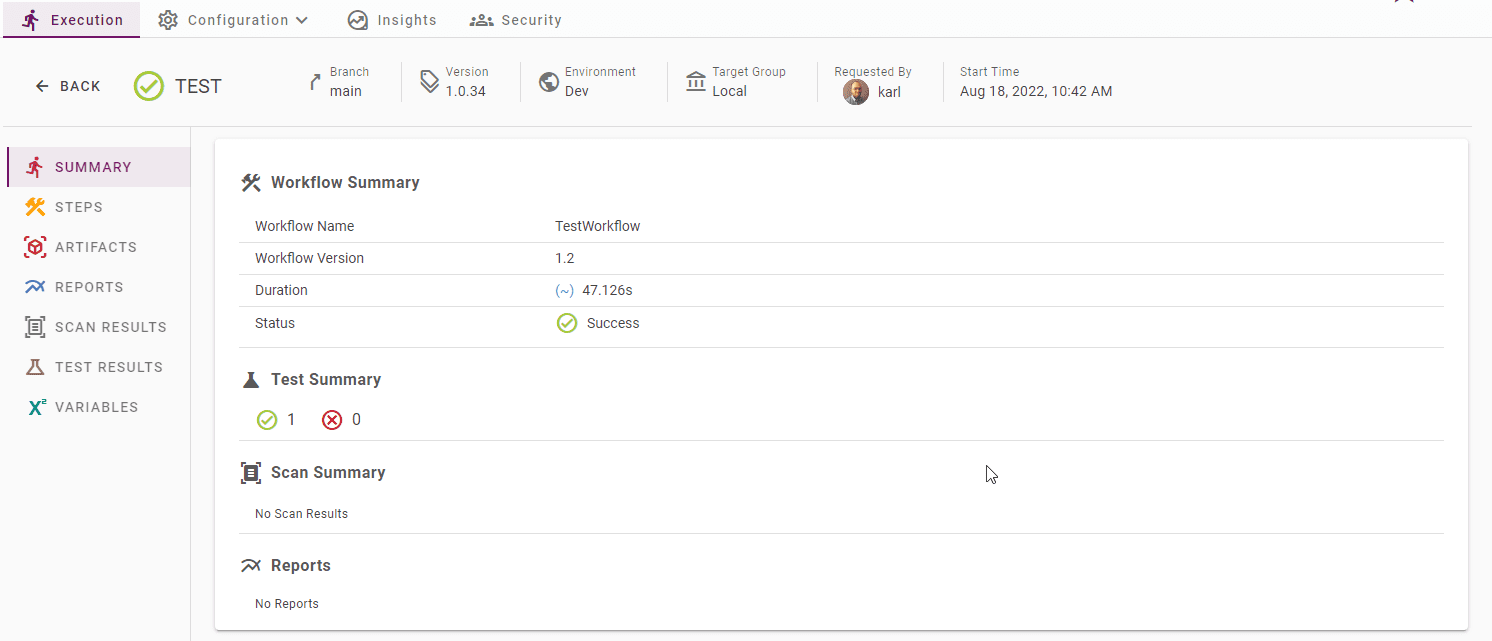
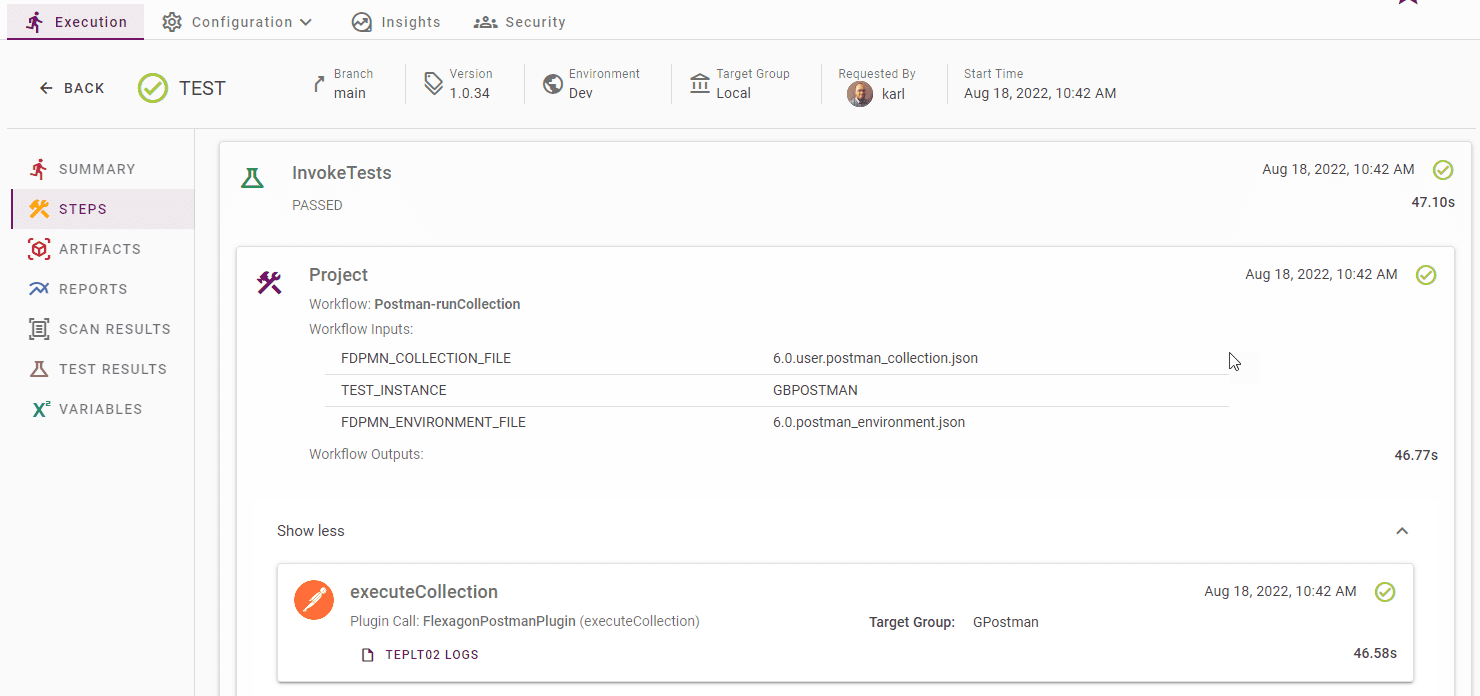
This shows that 1 test was executed and that it passed. You can click the Steps tab to see what steps were taken.
And you can click the Test Results tab to see the details about which tests passed and failed.
Since this is more interesting when more tests are present, this screenshot is from our production FlexDeploy server where we test our FlexDeploy releases continuously as we deploy them to different testing environments. This testing caught a regression.
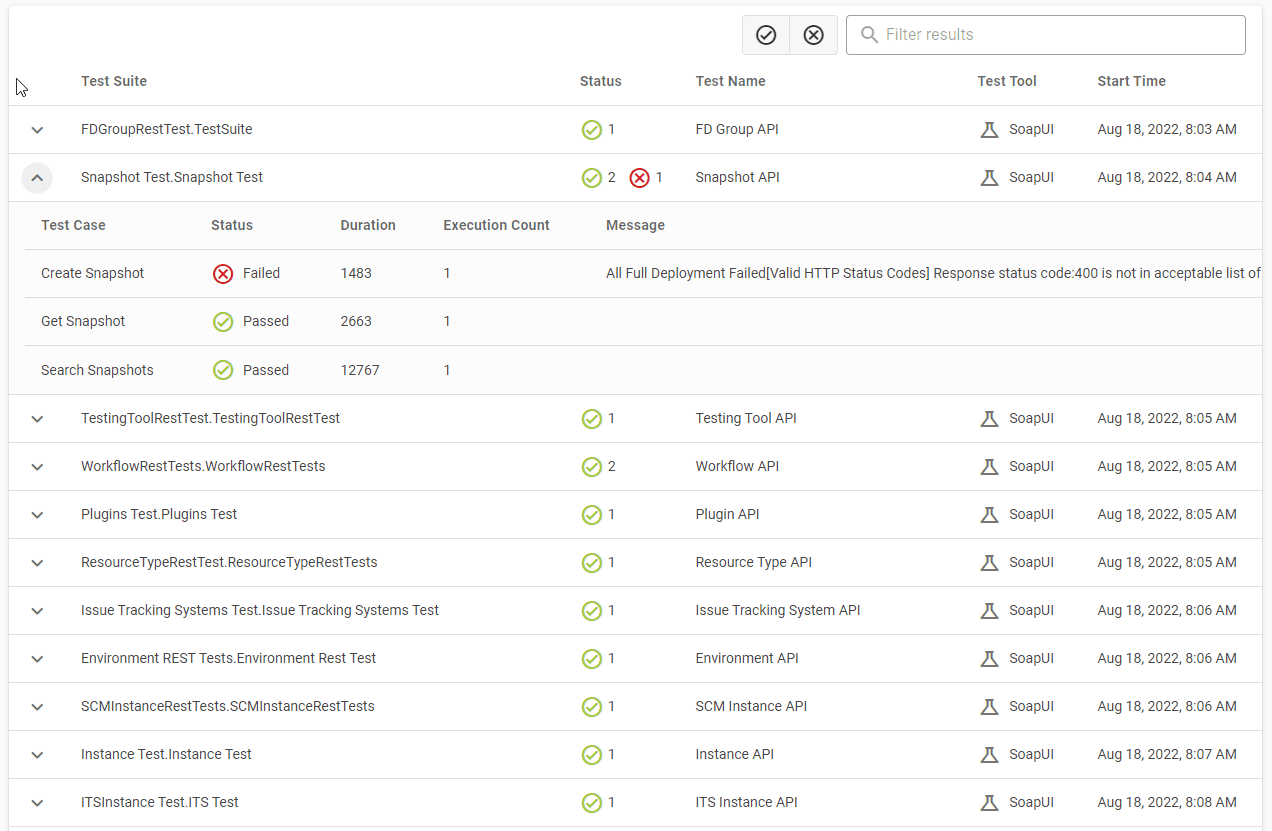
This test result can also be referenced from a pipeline gate where it prevents unstable builds from propagating to higher environments. This build will never get deployed past our dev environment, protecting us and our QA validation team’s time.
Conclusion
You can see the power and flexibility that FlexDeploy offers with its post-deployment test automation framework. You can use it to design your tests, run them, validate the results, and filter builds as they progress through environments. Give FlexDeploy 6.0 a try and enjoy the new test automation features.