

FlexDeploy 8.0 marks the conclusion of FlexDeploy’s next-gen UI journey, as the last two screens have been converted to the new UI: workflows and project types (formerly file types). In this blog, we’ll explore all the new changes introduced with the project types screen.
Project types are used to categorize package-based projects in FlexDeploy. The type assigned to a project determines the expected file types to be sourced in the project and the details collected for each file, ultimately used for building and deploying the file. Alongside managing the 25 built-in project types offered, FlexDeploy now supports the creation of custom project types, providing a more integrated interface for custom use cases.
Project Types
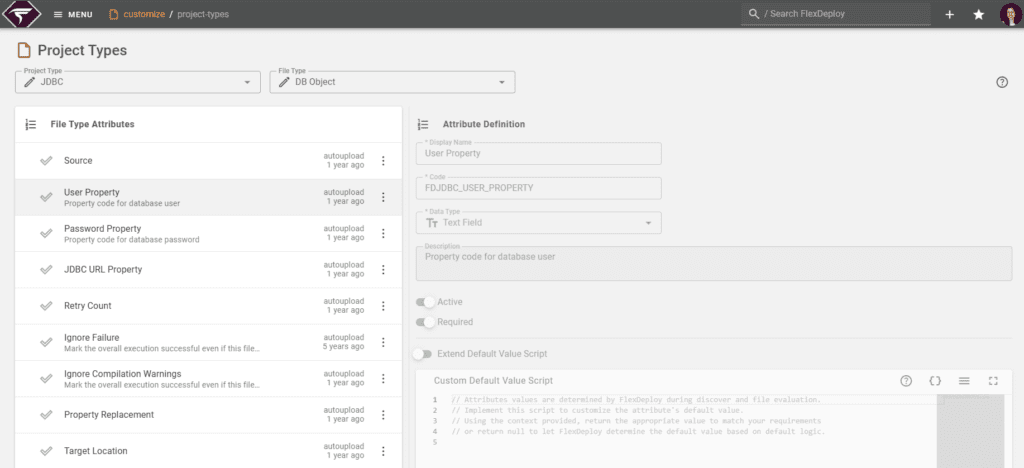
The new project types screen serves as a central hub to manage project types, file types, and file attributes. Project types and file types are managed entirely from the dropdowns at the top of the page, allocating most of the space for attribute management.
Match Script
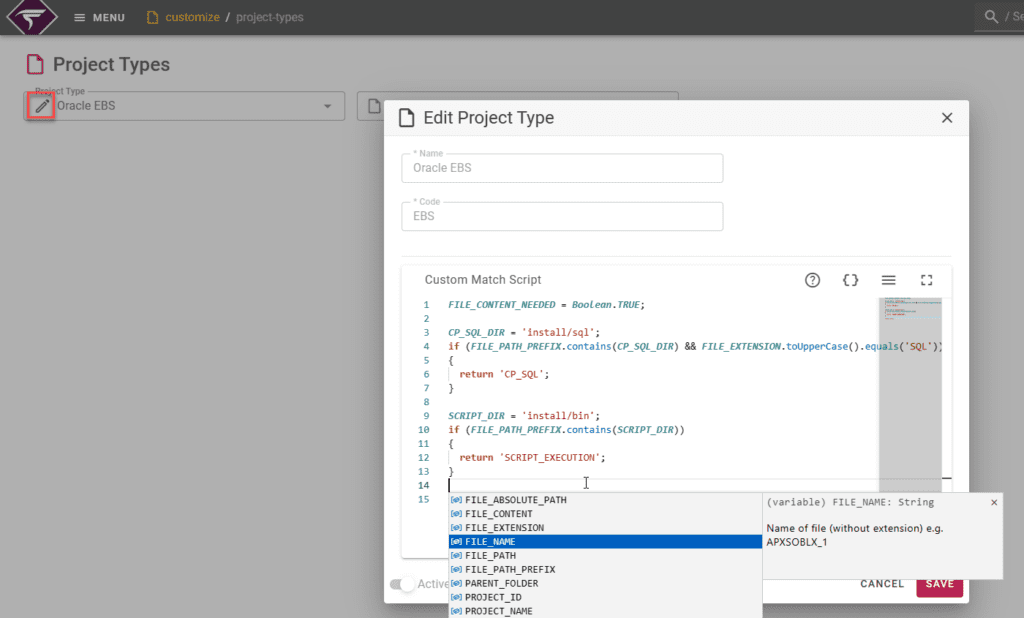
Every project type features a Groovy match script used to assign a file type to each new file during file discovery on a project. You can customize this file type detection behavior by writing a custom match script. To edit the match script, select the project type you’re working on and click the edit button next to the project type name. In the popup, you’ll find the match script editor, where you can return any file type based on the given context. Various variables are available to assist in determining the type, or you can return null to allow FlexDeploy to decide the file’s type.
Managing File Type Attributes
Select a project type and file type to see a list of attributes for that file type. For built-in project types, this list is primarily for implementing your own custom scripts:
- Default value scripts: Determine the initial attribute value when a file is discovered or re-evaluated.
- List data scripts: Provide a set list of values for this attribute.
Implementing a Custom Default Value Script
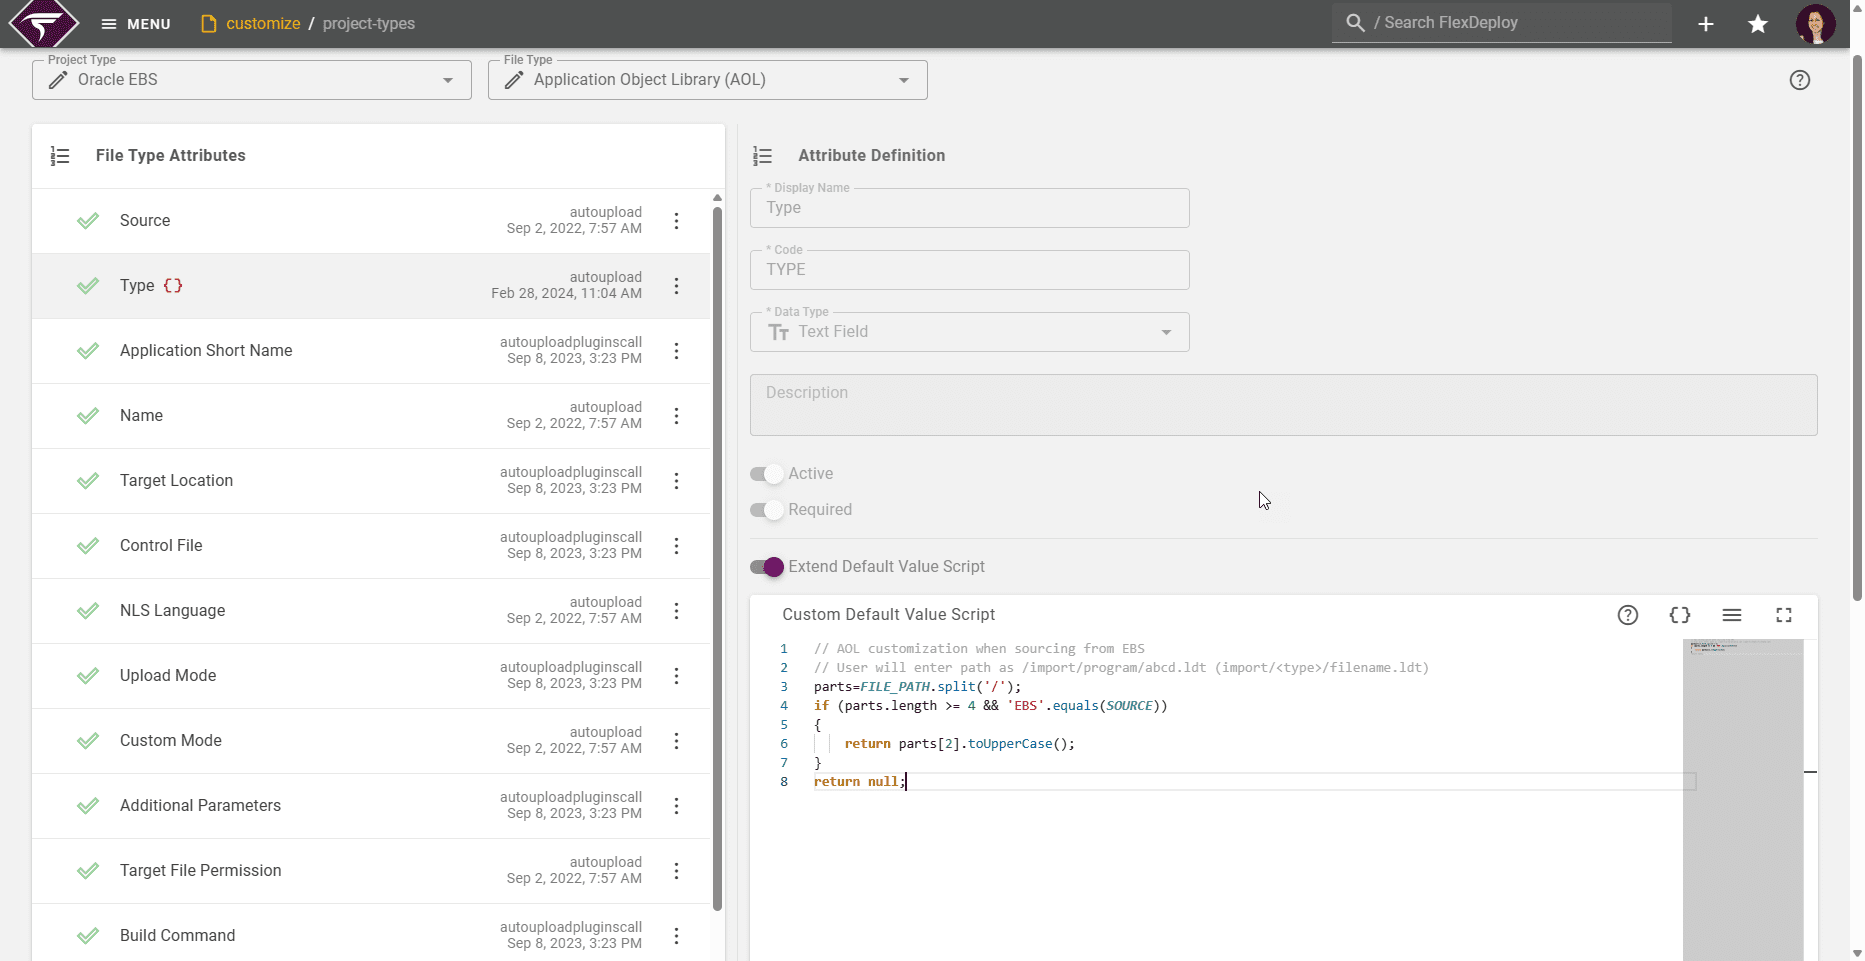
As an example, here are the general steps we would follow to change the default value of the AOL type attribute for EBS:
- Find the attribute on the page by selecting its project type (Oracle EBS) and file type (AOL), then clicking the Type attribute from the list.
- Write the Custom Default Value Script using the necessary variables. In this script, we’re assuming the AOL type can be extracted based on the folder the file is in. When the file doesn’t meet our conditions, we can return null and let FlexDeploy determine the attribute value.

- When ready to test, enable your custom script by clicking the Extend Default Value Script slider.
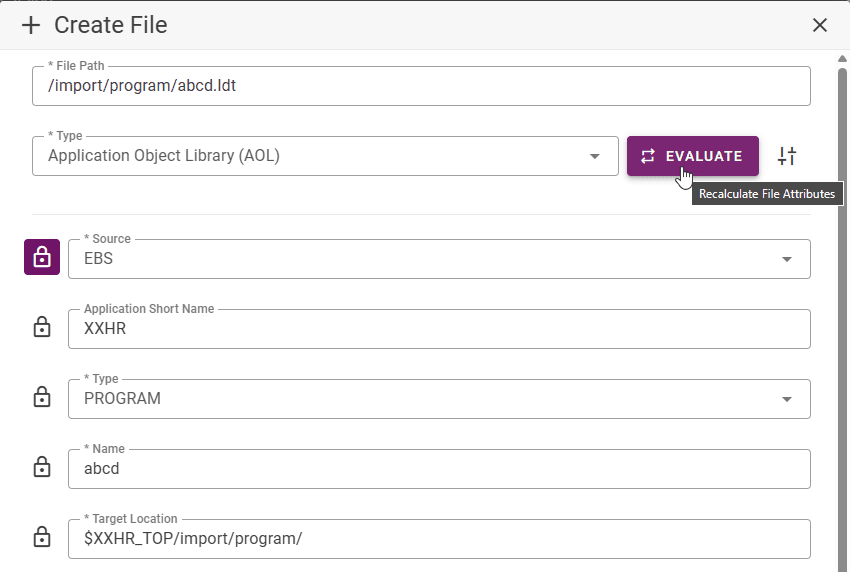
- Open or create an AOL file within an EBS project and evaluate it. Verify that the attribute changes as expected, along with the deploy command (in this case, correctly identified as ‘PROGRAM’).

- Click the
 customize button to return to the project types page if any other adjustments are needed.
The steps for writing a custom list data script or any other attribute remain similar regardless of the project type.
Using Custom Project Types
Custom project types now allow you to categorize files as needed and utilize user-defined attributes required for building and deploying. Once you configure everything for your new type on the project types screen, you can build and deploy files of this type using generic plugins like shell within your workflows. Here are the high-level steps to implement your own:
- Create the project type, ensuring to implement the match script for file discovery.
- Create all file types for this project type.
- For each file type, define its attributes.
- The Source attribute is automatically added for each file type, aiding FlexDeploy in determining whether to extract the file from the project’s configured SCM when running a build.
- Drag and drop the attributes to order them, with the order matching how they appear when opening the file in the file catalog or in a package.
- Provide the required name, code, and data type, and optionally fill in additional description and script details.
- Complete other general configuration for the project, such as build/deploy workflows and topology.
- Create a project and ensure all details on the Configuration tab are correctly entered.
Conclusion
The new project types screen encompasses all the features of the former file types screen in a simplified, all-in-one location with a more modern UX. Additionally, it introduces a significant new feature: the ability to create custom project types.
Stay tuned for more blogs on upcoming features before the release of Version 8.0 at the end of the month!