
Atlassian Jira has grown in popularity over the past several years and is used by many IT teams to manage and release software. Once known as a bug tracking tool, Jira has evolved into the de facto standard for teams implementing agile methodologies. Many organizations are making Jira the center of their universe for managing software releases, and therefore, creating a demand for integration into their overall DevOps solution. Jira provides a rich set of APIs which enables integration with other tools in your DevOps tool chain.
FlexDeploy makes use of these APIs to provide a seamless integration, creating a very rich and powerful user experience for both agile and traditional software delivery methodologies. The integration is bi-directional, providing flexibility to meet many different use cases. The key to all integrations, whether inbound or outbound, is associating Jira issues to FlexDeploy builds. This is accomplished by referencing Jira issue numbers in SCM commit messages that are subsequently processed by a build.
In this blog article, I will focus on the following tasks:
- Creating a Jira instance in topology
- Configuring the Jira issue tracking system
- Associating a project to the Jira instance
- Automatically updating associated Jira issues based on build and deploy operations in FlexDeploy
In the next blog article, I will show how to automatically approve FlexDeploy tasks based on Jira workflow transitions.
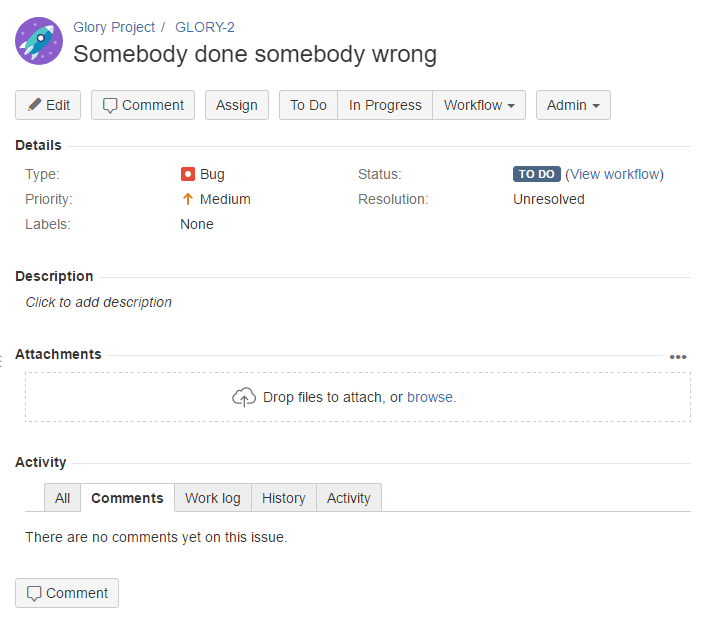
Let’s consider the following issue created in the Glory Project. Note that the project key is GLORY, and the ticket number is GLORY-2.
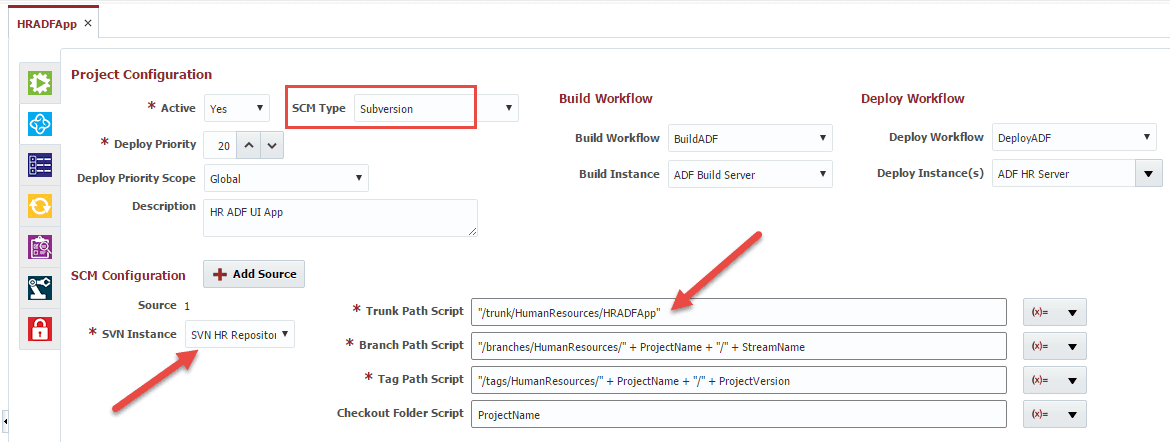
And let’s configure a FlexDeploy project to integrate with the Glory Project. The FlexDeploy project is configured to use Subversion as the SCM.
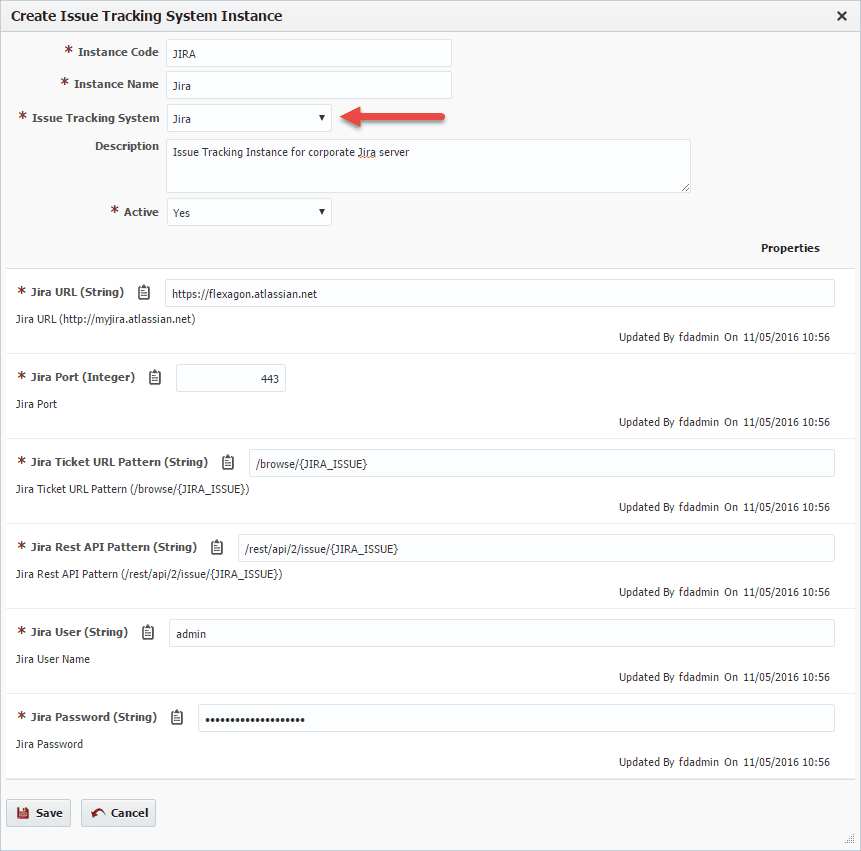
To integrate FlexDeploy with Jira, the first thing we need to do is configure a connection to the Jira server. This is accomplished by creating an Issue Tracking System Instance within the topology. Here I have simply named the instance Jira, selected Jira as the issue tracking system type, and provided the required connection information to our Jira server.
The next step is to configure the global FlexDeploy settings for the Jira issue tracking system. From the Administration menu, select Issue Tracking Systems, and then edit the entry for Jira.
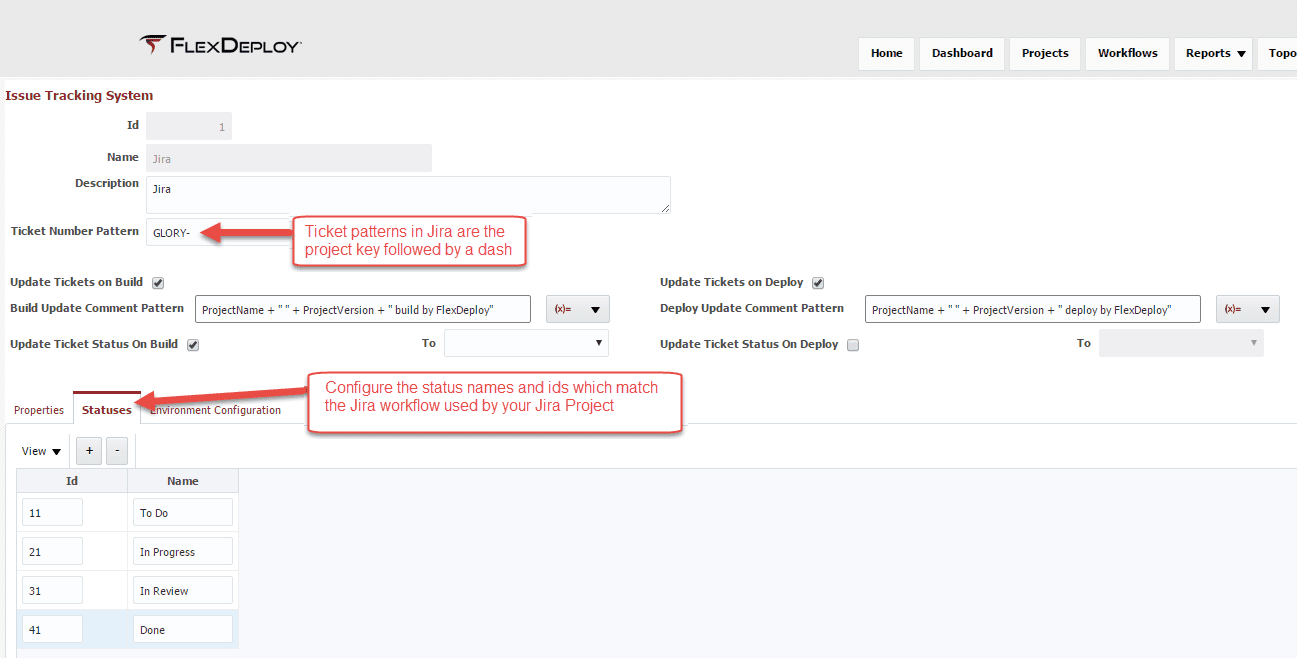
The Ticket Number Pattern provides the prefix for Jira issues, which allows FlexDeploy to scan SCM commit messages and find references to issues. The Update Tickets on Build section enables FlexDeploy to automatically updated associated tickets upon a successful build operation. FlexDeploy can be configured to add comments or update the status. The same functionality can be applied to FlexDeploy deployments using the Update Tickets on Deploy section. A little later we will see how we can override these settings at the project level
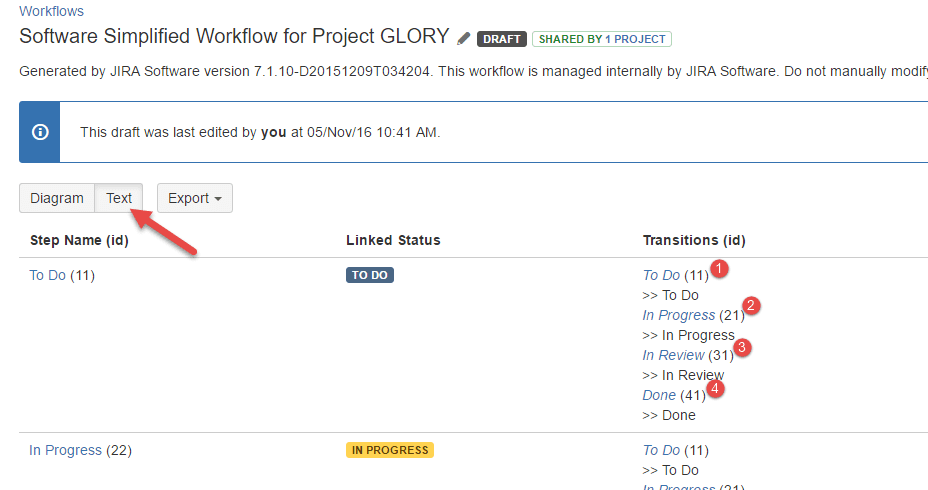
You must then configure the statuses configured within the Jira workflow associated to your Jira project. You can find the status and their ids within the Text view of the Jira workflow. Note that the id is the workflow transition id, and not the step id.
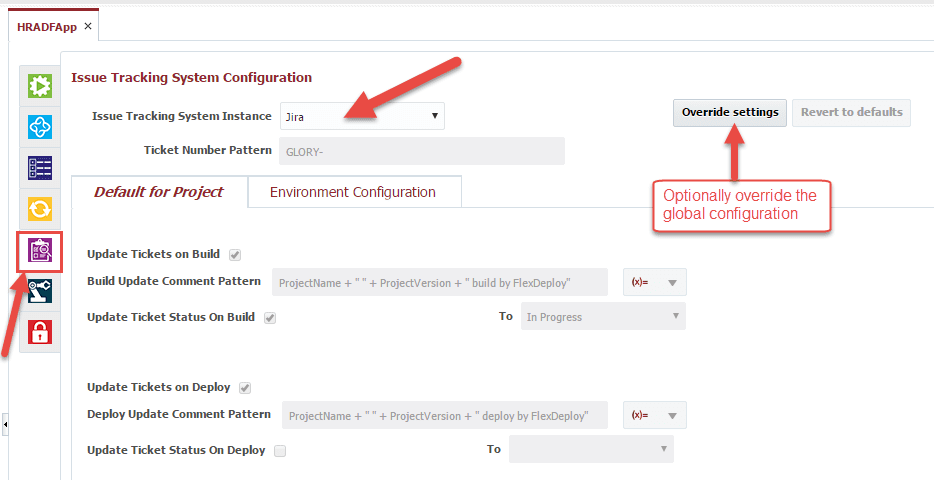
The last step is to link any FlexDeploy projects to the Jira instance, and optionally override the global configuration for that project. On the Issue Tracking tab, select the Jira issue tracking instance that we created earlier. The global configuration can be overridden for the entire project, and even further refined for each target environment.
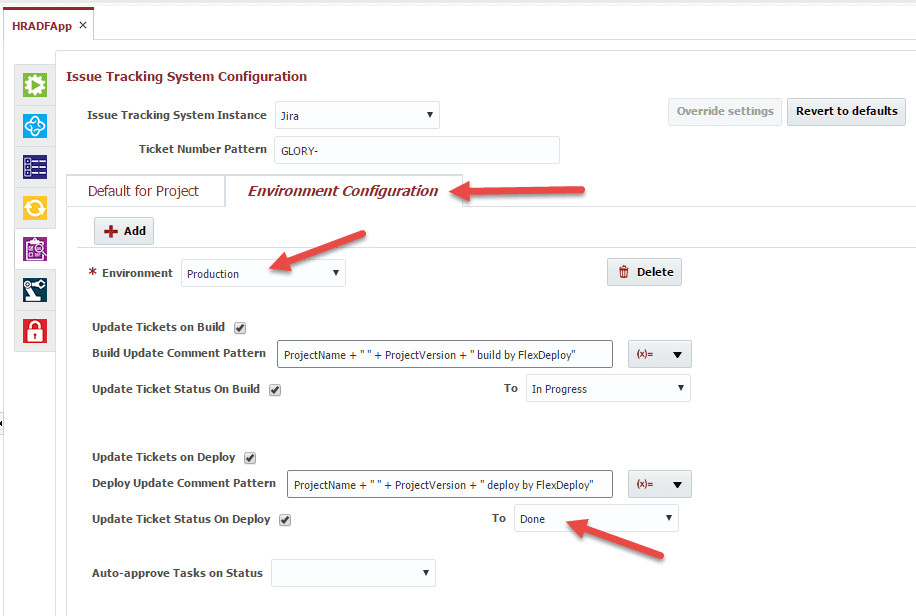
Let’s update the ticket status to Done after deploying to Production (or any other environment which you have configured in your topology). On the Environment Configuration tab, click the Add button to create an environment override, and select the Production environment out dropdown. Now select the Done status from the update ticket status on deploy section. Note that this overrides the configuration for the Production environment just for this project. We could also choose to configure global settings by environment back on the Issue Tracking System menu.
By using FlexDeploy, organizations establish an automated and repeatable process for building, packaging, and safely deploying code, APIs, meta-data changes, and data migrations from development through test to production environments.
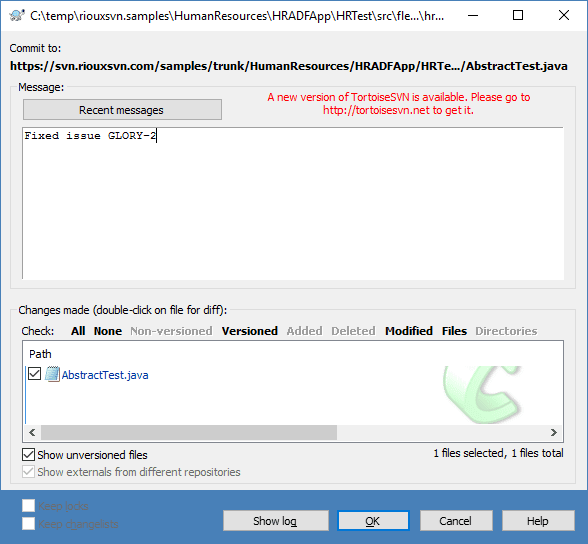
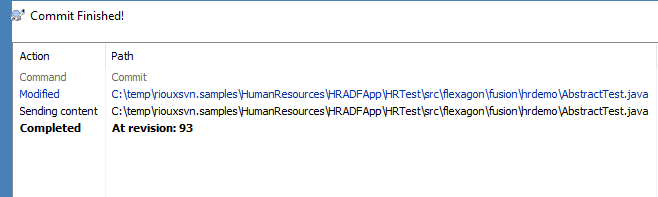
Now let’s see it all in action. To associate an issue, we will mention the GLORY-2 issue in an SCM commit message for the project.
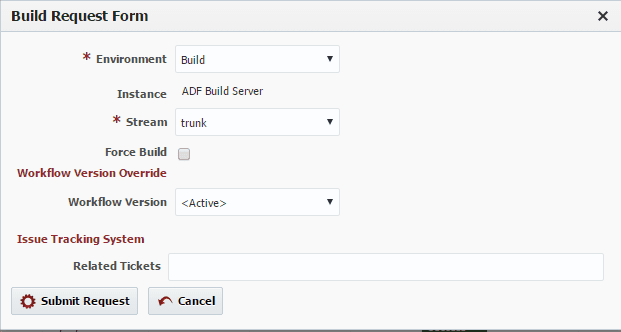
Now we can submit a build.
If we drill down into the workflow execution we will see the associated Jira ticket.
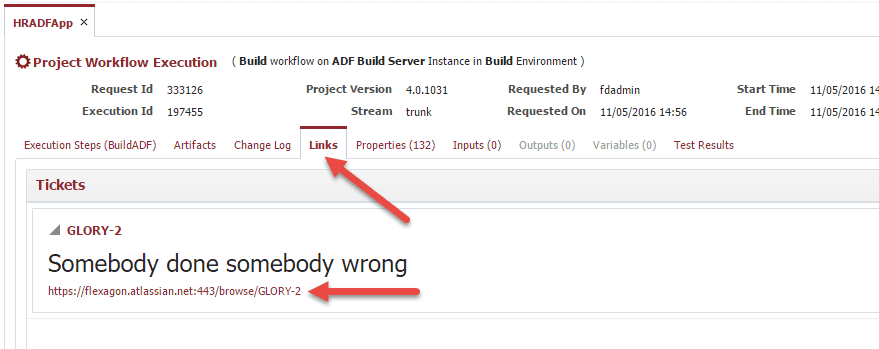
Click on the ticket link to view the issue in Jira. Notice that the comment we configured was added to the linked ticket.
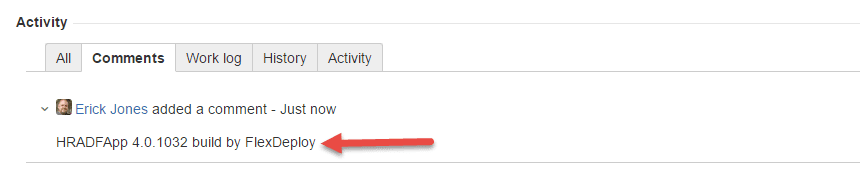
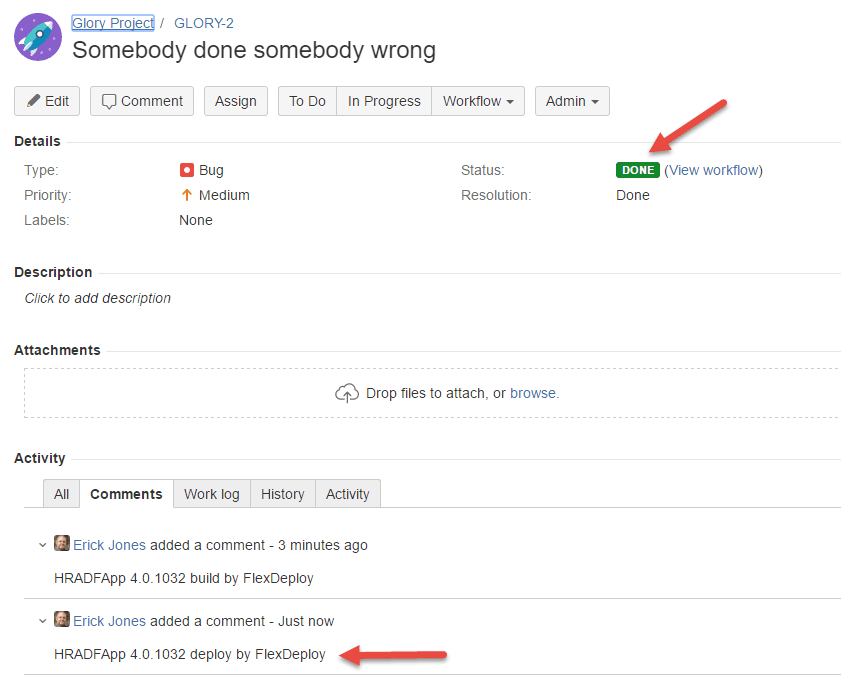
Now let’s deploy the build to Production. Notice that the comment we configured was added to the linked ticket, and the status was updated to Done.
In the next blog article, I will show how to configure external approvals, and manage their status based on workflow transitions in Jira.