I recently blogged about automating installation of binaries for Oracle BI 12c using FlexDeploy. In this blog post, I will demonstrate how to create WebLogic domain for Oracle BI 12c using FlexDeploy Utility Workflow. Files used in this blog post can be downloaded from OracleBICreateDomain.zip. You can use Workflow XML included in download zip to create FlexDeploy Utility Workflow in your environment. You can alternatively just use shell scripts provided in zip.
At this point you must have Oracle BI 12c and Java installed. Keep in mind that this example only creates single node domain.
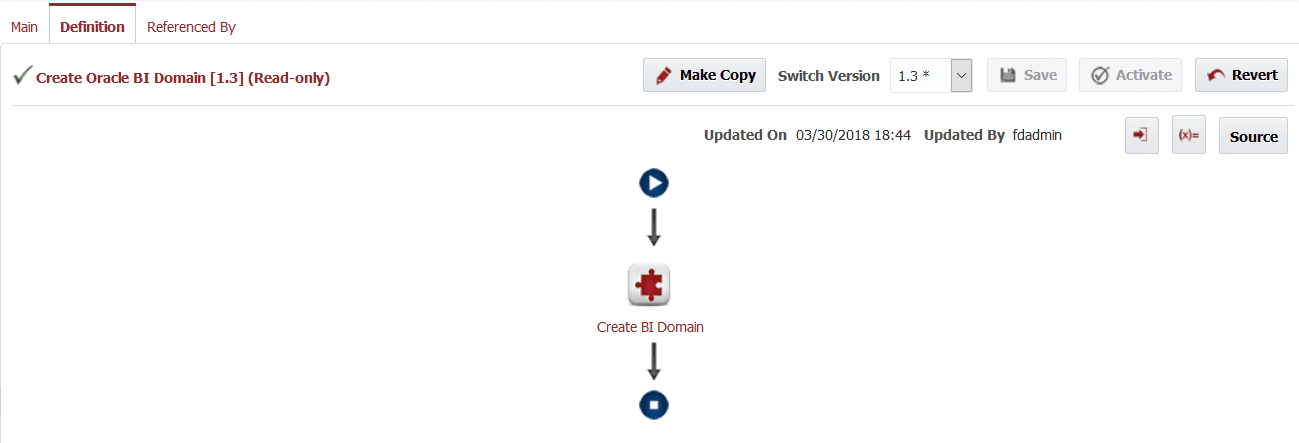
Let’s take a quick look at the Steps involved in FlexDeploy workflow. In fact, we will just have one Shell plugin step in the workflow, details of the shell script are described below.
- Create response file by copying it first from BI Installation and running property replacement on it. Property replacement is done with sed command using Workflow Input values provided by user.
- Invoke config.sh script using response file.
 Here are the details of shell script used in this workflow.
# export JAVA_HOME=/oracle/jdk1.8.0_91
# export ORACLE_HOME=/u01/oracle/fmw12211
# export DOMAIN_NAME=bi_domain
# export DOMAINS_DIR=/u01/oracle/config/domains
# export WLS_ADMIN_PASSWORD=welcome1
# export DB_HOST=obilt02.flexagon
# export DB_PORT=1521
# export DB_SERVICE=obt02.flexagon
# export DB_SYS_PASSWORD=welcome1
# export RCU_SCHEMA_PREFIX=BI
# export RCU_SCHEMA_PASSWORD=welcome1

mkdir -p $DOMAINS_DIR

RESPONSE_FILE=$FD_TEMP_DIR/response.txt
cp $ORACLE_HOME/bi/modules/oracle.bi.configassistant/response.txt $FD_TEMP_DIR

sed -i -e "s|@@DOMAIN_TYPE@@|DOMAIN_TYPE_EXPANDED|g" $RESPONSE_FILE
sed -i -e "s|@@ENABLE_SSL@@|true|g" $RESPONSE_FILE
sed -i -e "s|@@CONFIGURE_ESSBASE@@|true|g" $RESPONSE_FILE
sed -i -e "s|@@CONFIGURE_BIEE@@|true|g" $RESPONSE_FILE
sed -i -e "s|@@CONFIGURE_BIP@@|true|g" $RESPONSE_FILE
sed -i -e "s|@@DOMAIN_NAME@@|$DOMAIN_NAME|g" $RESPONSE_FILE
sed -i -e "s|@@DOMAINS_DIR@@|$DOMAINS_DIR|g" $RESPONSE_FILE
sed -i -e "s|@@ADMIN_USER_NAME@@|weblogic|g" $RESPONSE_FILE
sed -i -e "s|@@ADMIN_PASSWORD@@|$WLS_ADMIN_PASSWORD|g" $RESPONSE_FILE
sed -i -e "s|@@SCHEMA_TYPE@@|SCHEMA_TYPE_NEW|g" $RESPONSE_FILE
sed -i -e "s|@@DB_TYPE@@|ORACLE|g" $RESPONSE_FILE
sed -i -e "s|@@DB_CONNECT_STRING@@|$DB_HOST:$DB_PORT:$DB_SERVICE|g" $RESPONSE_FILE
sed -i -e "s|@@DB_ADMIN_USERNAME@@|sys|g" $RESPONSE_FILE
sed -i -e "s|@@DB_PASSWORD@@|$DB_SYS_PASSWORD|g" $RESPONSE_FILE
sed -i -e "s|@@PREFIX@@|$RCU_SCHEMA_PREFIX|g" $RESPONSE_FILE
sed -i -e "s|@@NEW_DB_SCHEMA_PASSWORD@@|$RCU_SCHEMA_PASSWORD|g" $RESPONSE_FILE
sed -i -e "s|@@APPLICATION_TYPE@@|APPLICATION_TYPE_SAMPLE_APP_LITE|g" $RESPONSE_FILE
sed -i -e "s|@@AUTO_DROP_SCHEMAS@@|false|g" $RESPONSE_FILE
sed -i -e "s|@@DEFAULT_SI_KEY@@|ssi|g" $RESPONSE_FILE
sed -i -e "s|@@PORT_RANGE_START@@|9500|g" $RESPONSE_FILE
sed -i -e "s|@@PORT_RANGE_END@@|9999|g" $RESPONSE_FILE
sed -i -e "s|@@APP_PASSWORD@@|$ADMIN_PASSWORD|g" $RESPONSE_FILE

$ORACLE_HOME/bi/bin/config.sh -ignoreSysPrereqs -silent -responseFile $RESPONSE_FILE
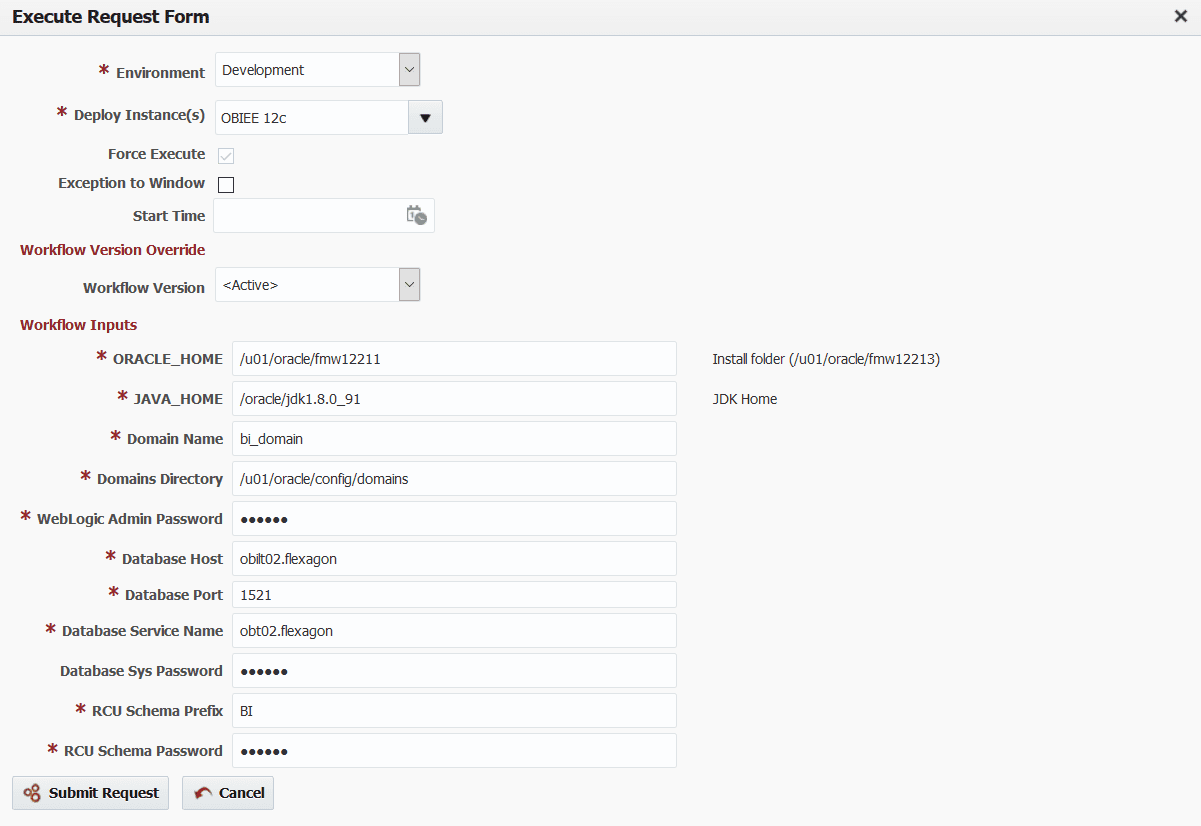
Now, users can request Domain creation using FlexDeploy Utility Project. Here is the sample request form.
- ORACLE_HOME – must be same where binaries were installed.
- JAVA_HOME – provide location of JDK 8 install.
- Domain Name – name to be used for new domain.
- Domains Directory – This should be outside of binary location for clarity and do not include domain name in this input.
- WebLogic Admin Password – provide password to be used for default weblogic user.
- Database Details – provide appropriate database details, RCU schemas will be created as per provided Schema Prefix.
- Database Sys Password – sys user password is required to run RCU.
- RCU Schema Details – Same password will be used for all schema created using RCU.
 Now you can see the execution details in FlexDeploy.
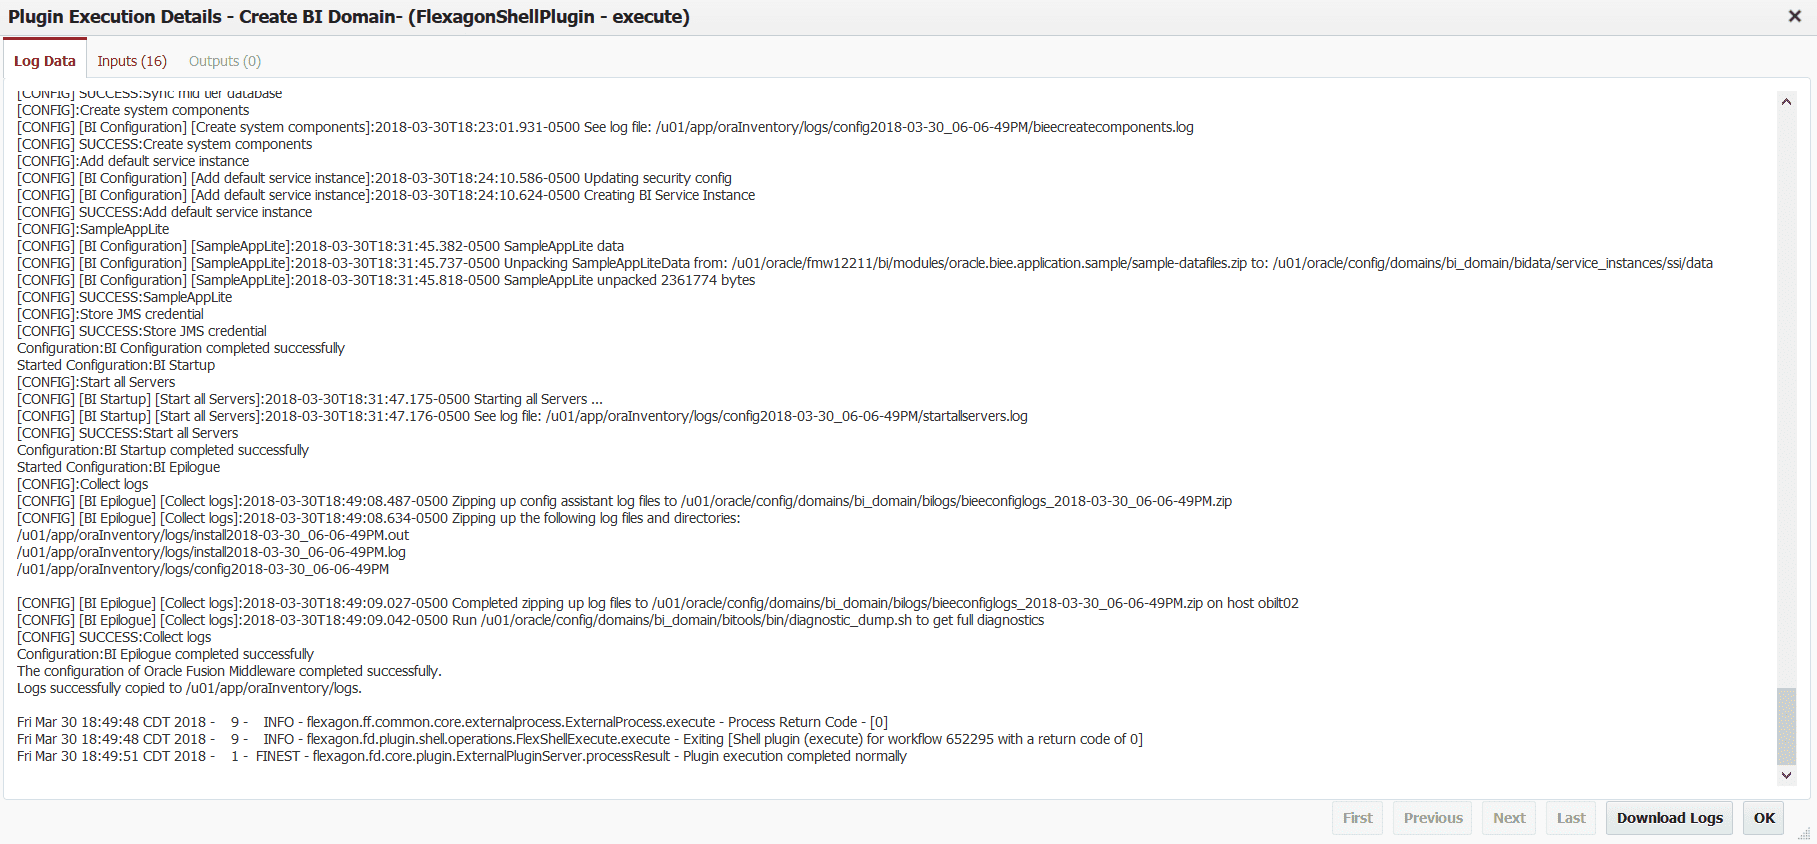 This will start BI Environment as well. You can launch console once process is complete.

Now you can use FlexDeploy to further automate build and deploy process. See Oracle Business Intelligence Migration with FlexDeploy – Flexibility and Choice.