FlexDeploy includes an out-of-box integration with a popular tool in the development toolchain – Azure DevOps! This article will focus on Azure Boards and Azure Repos, but FlexDeploy also integrates natively with Azure Key Vault.
Azure Repos
FlexDeploy’s integration with Azure DevOps goes beyond the basics, focusing on the use of webhooks to ease the build process. This article will go through the simple steps to create a webhook which will automate builds of relevant projects based on Azure push events.
The webhook function scripts offer flexibility with exactly what actions you want performed when a webhook is received. Some possible actions are identifying relevant packages from revisions and building them, creating streams, and managing release content.
Set It Up
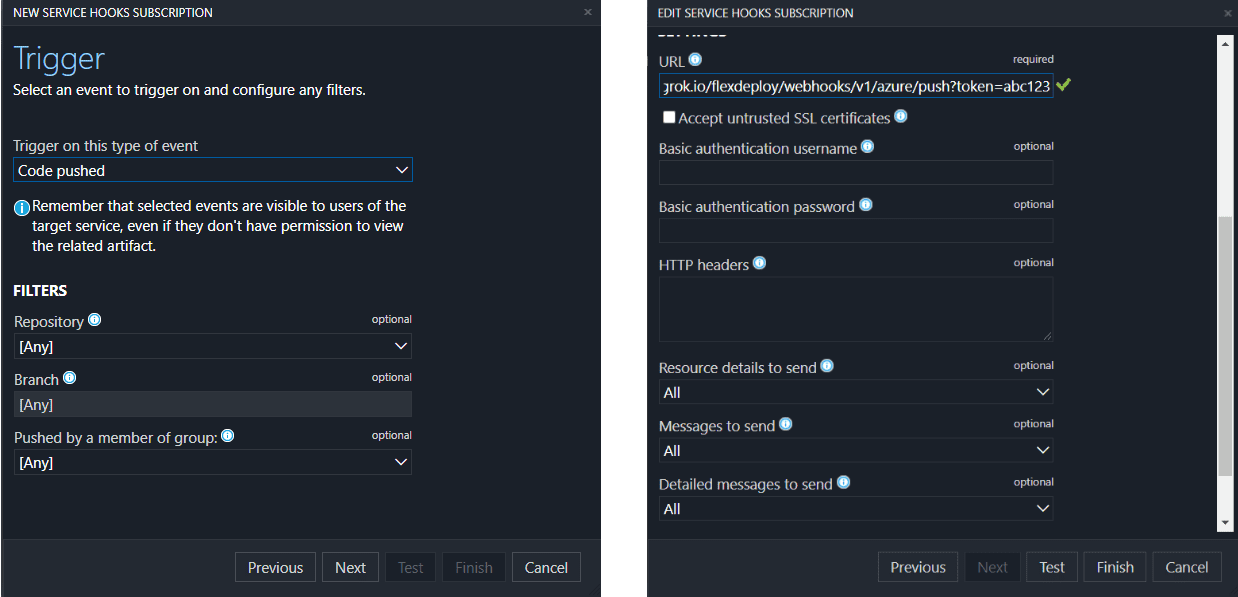
- In your Azure DevOps project, go to Project settings > Service hooks.
- Create a new webhook trigger on code pushed. Optionally, you can limit by branch or repository.
- Enter your FlexDeploy URL and any security parameters in the form of basic authentication or a token query parameter. Read our Webhook Security documentation for more details on this.
- In FlexDeploy, navigate to Administration > Integrations > Incoming Webhooks. Click Manage Providers and create a new provider for Azure. All webhook scripts shown in this blog and more are explained in our Samples.
- Create a Groovy script for matching a received webhook to this Azure provider. The script presented here validates the webhook sender by a query parameter token.
- Create and configure any properties. The user and personal access token properties will be used later on in a webhook function for this Azure provider.
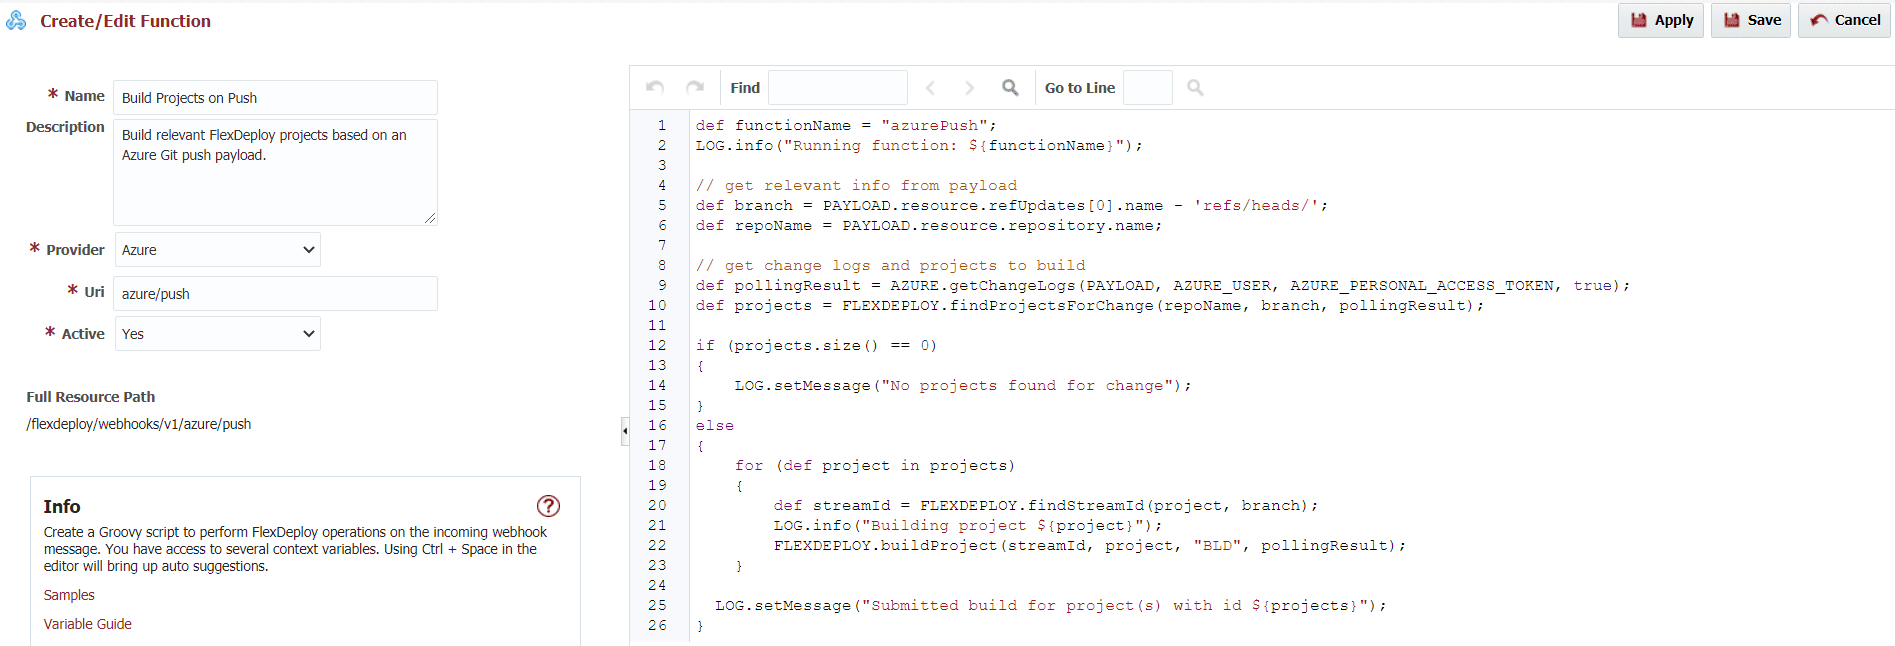
- Create a webhook function for your new Azure provider. The function shown below collects relevant information from the payload, finds the projects affected by this push from Azure, and builds these projects. FlexDeploy provides a simplified buildProjects function that takes the payload as a parameter, cutting your function script down to just one line!
Azure Boards
Another valuable piece of this integration is with Azure Boards whereby you can associate tickets directly to builds and deployments. FlexDeploy can update linked tickets with a status change or added comment in the event of a successful execution. There’s also an option to hold deployments to a specific environment until the linked ticket has reached a certain status.
Here are the high-level steps for setting up an Azure Boards integration. For more detailed instructions, see Issue Tracking Systems.
Set It Up
- Configure global settings for Azure. Go to Administration > Integrations > Issue Tracking Systems.
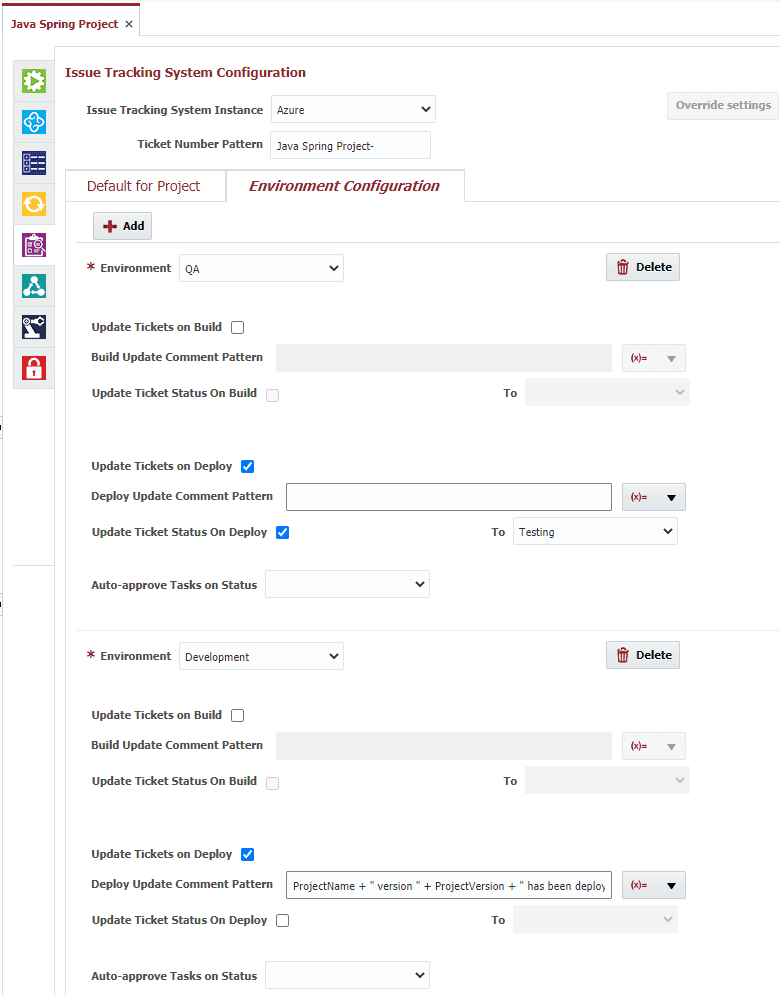
- Set a default configuration. This will apply to all environments in all projects. In my case, I’m going to leave this empty and set configurations for particular environments.
- Add any environment-level configurations. Here, I added a status update for deployments to the QA environment.
- Fill in status names and ids, which are needed for transitioning an issue from one status to another.
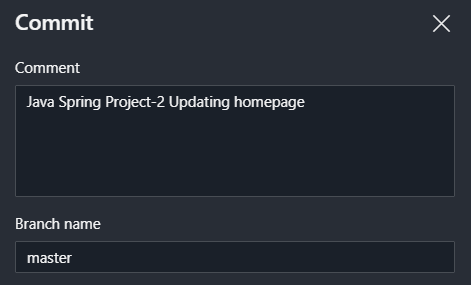
- Set a ticket number pattern. If entered, FlexDeploy will parse change logs during any execution of an issue-tracking-enabled project and link tickets automatically if a ticket number is found in the commit message.
- Create an Issue Tracking Instance. This is where you will define the URLs and credentials for connecting to Azure from FlexDeploy.
- Define how you want the integration to work for each project. For my Java Spring Project, the global settings are overridden and there is an additional comment update that will happen when a deployment to the development environment completes.
In Practice
Now, we’re ready to put these pieces together and understand how they function in our software delivery process. First, I will commit and push to my Azure project repository.
I can see from my webhook messages in FlexDeploy that the webhook was received, and my function was executed. The function associated my Java Spring Project to this change and built it. When I dig into the build execution, I can see my Azure ticket was linked, as I included the issue number in my commit message. Ticket numbers can be entered on the build request form for linking as well. All subsequent deployments of this build version will have this ticket linked.
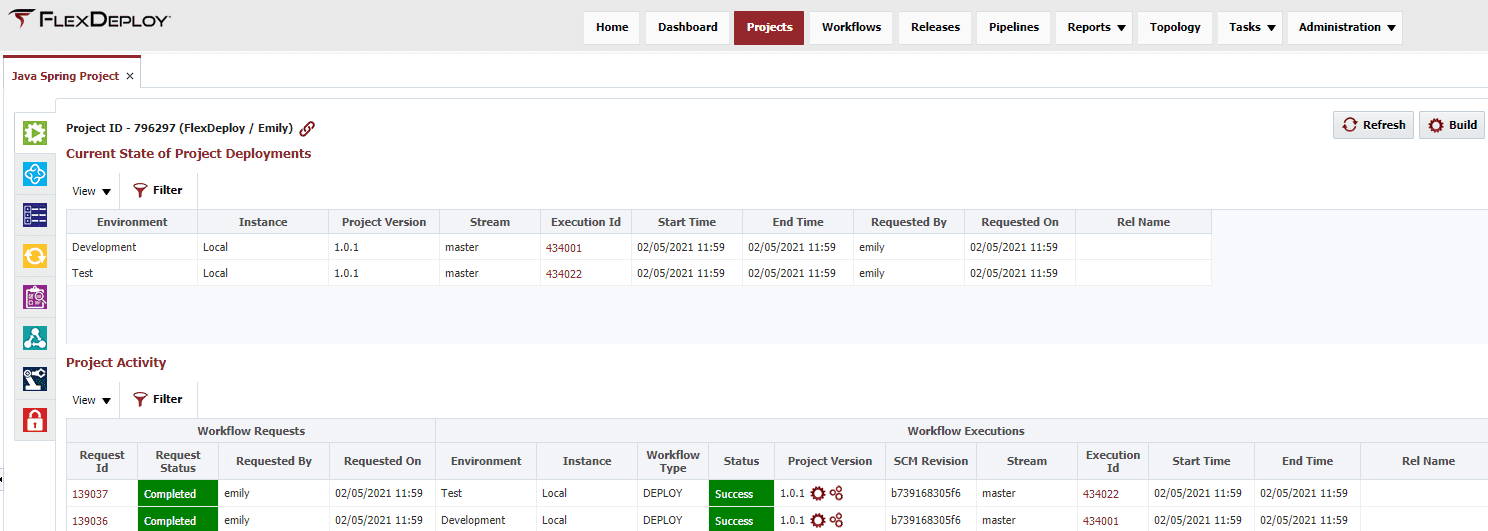
Now, we’re ready to deploy the project across our environments. I will initiate a deployment request to my development and QA environments.
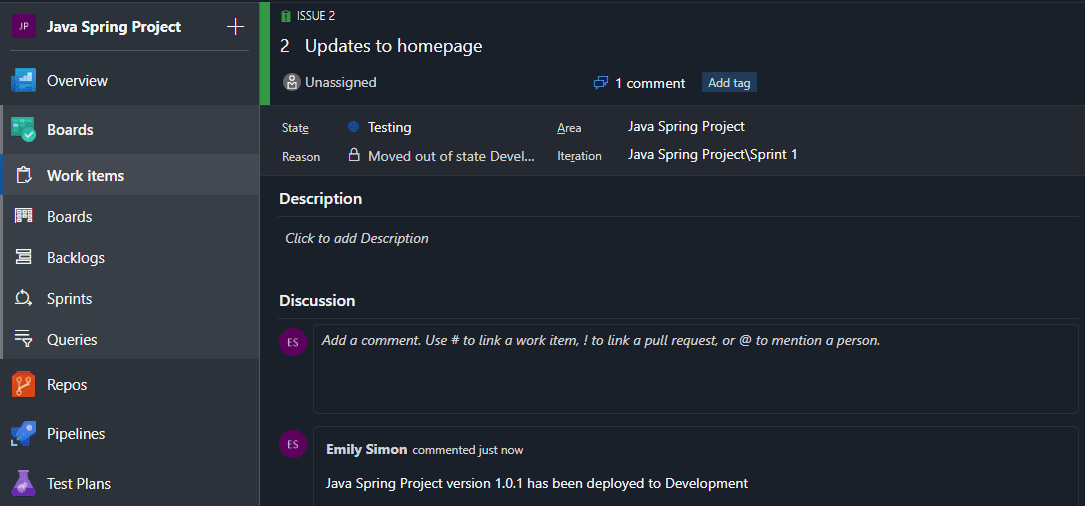
After both deployments complete, I’m able to see the added comment to the ticket from the Development deployment, and the status of the ticket was switched from Development to Testing from the QA deployment.
In Summary
Now we can recognize some of the major benefits of setting up a simple integration between FlexDeploy and Azure DevOps:
- Automate FlexDeploy project builds
- Keep applications in sync
- Increase visibility of associated issues
This is just one of a plethora of possibilities for what an integration could look like. Check out FlexDeploy External Tool Integration for more ideas.

