Service Management plays an integral role in managing, delivering, and auditing changes across the pipeline, as well as tracking incidents that occur as part of the software delivery lifecycle. In this blog series I will showcase four use cases for integrating a FlexDeploy pipeline with ServiceNow.
- FlexDeploy Service Management: Manual Ticket Entry
- FlexDeploy Service Management: Automated Ticket Creation for QA and Production
- FlexDeploy Service Management: One Ticket per Release Package
- FlexDeploy Service Management: Create Incident on Workflow Failure
One of the most common use cases that we encounter for Change Management integration is to use a single change ticket to gate the deployment into production. In many organizations the ticket is required for production, but not for deployment into the lower environments within the pipeline.
In this use case we will assume that the change ticket was created prior to the release reaching the production stage, and that the change number (or related ticket as it is called in FlexDeploy) will be entered by the user.
Change Management System – ServiceNow
FlexDeploy supports integration with ServiceNow out of the box. We will look at advanced configuration for the change management system in the next blog article in this series, but for the fist use case the default configuration is sufficient.
Change Management Instance
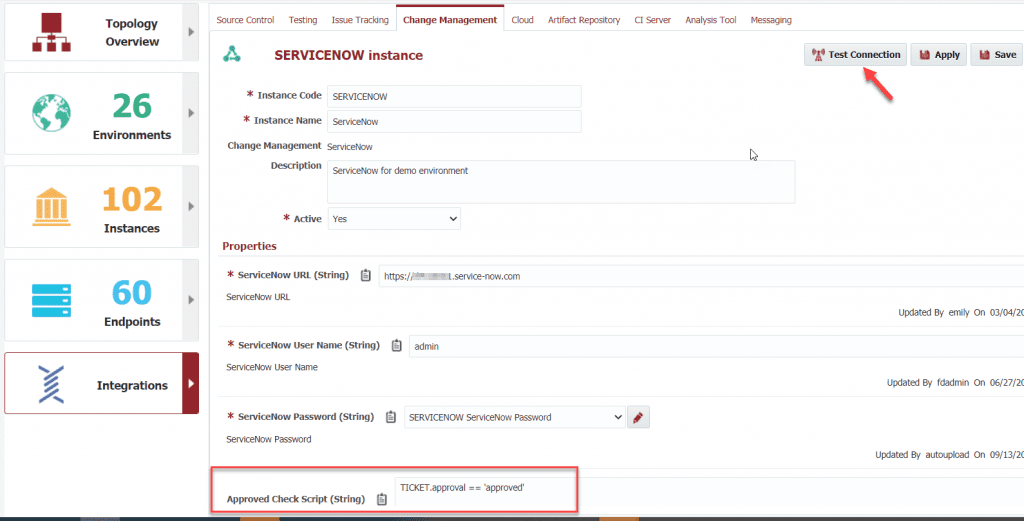
Next we will create a connection to our ServiceNow installation.
In addition to the URL and credentials, an Approved Check Script and a Rejected Check Script (not shown) are provided to define the rules for determining whether the ticket is approved or rejected. These are Groovy scripts which return a boolean. The TICKET object contains the ticket fields which can be referenced using dot notation (e.g. TICKET.myfield.mysubfield). The fields are the JSON attributes as returned by the ServiceNow REST API. Here we will simply define that the ticket is approved when the approval attribute is ‘approved’.
Pipeline Definition
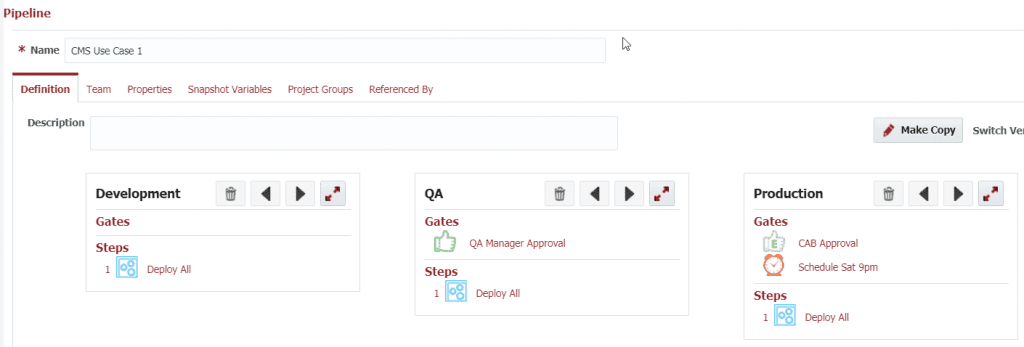
The pipeline defines three stages, Development, QA and Production.
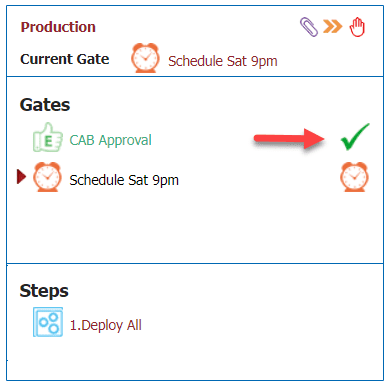
The Development stage does not have any gates and simply deploys the contents of the release snapshot. The QA stage has an approval required by the QA Manager and then deploys to QA. The Production stage is where we will bind an approval to a ServiceNow change ticket (change request). Once the ticket is approved, the scheduled gate will wait until Saturday at 9pm before ultimately deploying.
The CAB Approval gate is an External Approval Gate which is bound to our ServiceNow instance.
Release
I have created a release which has two packages, and bound it to the pipeline shown above.
In Action!
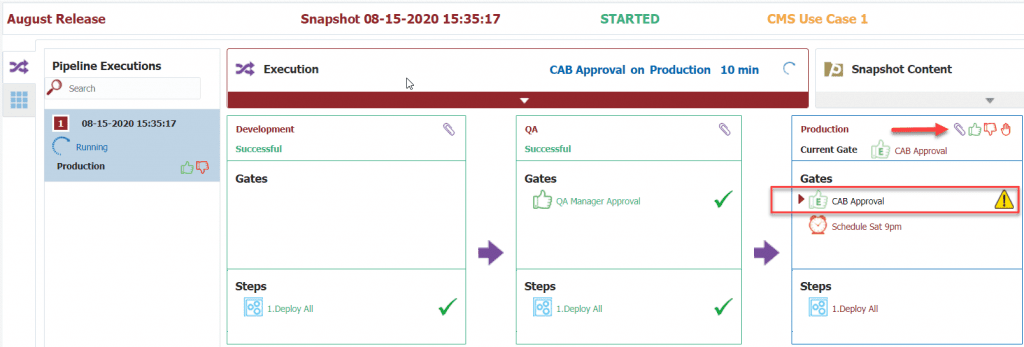
Now that the configuration is complete, I created a snapshot for my release and advanced the execution to the CAB Approval gate in the release dashboard. You can see that the CAB Approval gate is now pending approval.
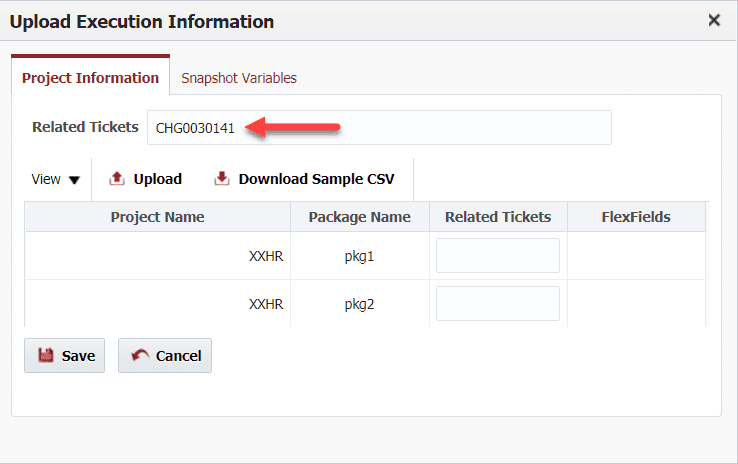
We can associate a change ticket by clicking on the paper-clip icon.
The ticket that I have associated is already approved (i.e. approval field is “approved’) in ServiceNow. After a minute or two we will see that the gate is automatically approved and the execution advances to the scheduled gate.
After 9pm the final gate will be cleared and the production deployment will execute. I will not show it here, but our change ticket will be associated with the deployments in this stage. The execution details and reports will provide the lineage to the change ticket number for audit purposes.
Summary
This is the simplest of the change management use cases, yet the most common one we see from our customer base. The next two blog articles in this series will showcase some other use cases which can be implemented with ease.
Next Post: FlexDeploy Service Management: Automated Ticket Creation for QA and Production


