Oracle Integration Cloud (OIC) serves as a unified platform for seamlessly integrating cloud and on-premises applications. FlexDeploy, a robust DevOps platform specializing in CI/CD and Release Automation, offers out-of-the-box support for OIC.
Whether you’re a developer or an administrator, working with OIC Integrations presents challenges during migration across instances. Various elements within an Integration need careful handling when moving between instances, and implementing a DevOps solution for OIC Integrations requires overcoming key challenges.
These challenges include:
- Discovering all Integrations, Connections, and Lookups from an instance.
- Managing Integration and connection properties.
- Handling Lookup values across instances.
- Maintaining connection attachments and managing dependent integrations.
- Managing different schedules across instances.
This blog explores how to efficiently manage and address these challenges using FlexDeploy. The focus is on migrating OIC objects from a Development instance to a Test instance without utilizing source control. The OIC objects used in our configurations are:
- Integrations
- EMPLOYEE_INFO
- SCHEDULED_INTEGRATION
- Connections
- HR_ATP_DB_CONN
- Lookups
- ENV_LOOKUP.csv
As a developer, migrating these OIC object types—especially when changes involve the ATP database wallet, schedule adjustments, and lookup modifications—requires multiple manual steps performed in sequence. Manual processes lack auditability, and with changes, these steps need repeating. FlexDeploy provides an automated solution that eliminates manual, error-prone activities, ensuring security, repeatability, and auditability.
Project
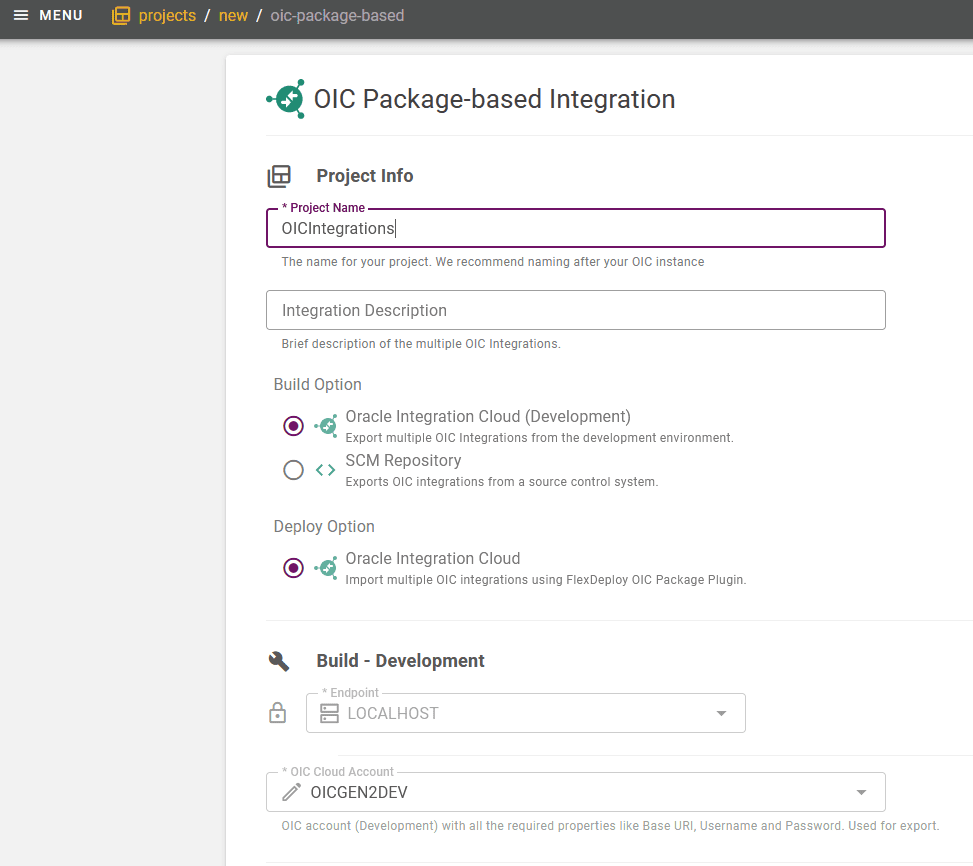
Let’s create a project using FlexDeploy blueprints, defining the project type as Oracle Integration Cloud with a package-based configuration for all integration objects. The project includes technical configurations essential for build and deploy activities.
Wokflows
The OIC project incorporates build and deploy workflows. FlexDeploy workflows provides sequence of steps for the build and deploy processes.
Build
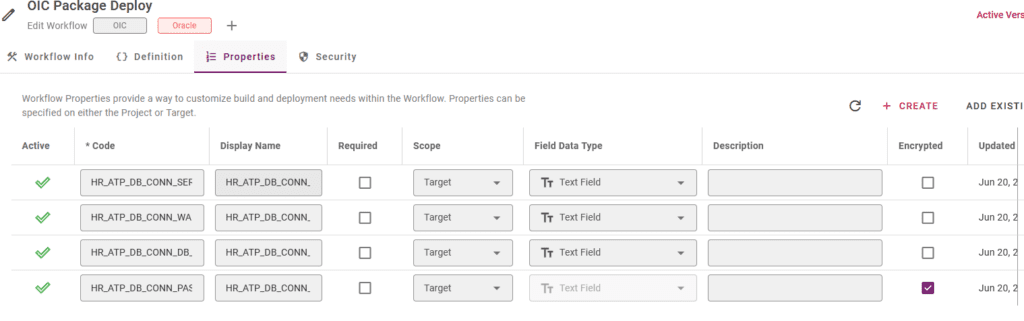
The build workflow involves packaging files for moving the OIC component from the Source Instance to the Target Instance utilizing the packageBuild step. The connection plan file is used to configure the OIC connection properties, drawn from a source control repository. The build operation will copy all files with the extension properties inside the root directory of the repository (includes checkout folder) and adds them into the artifact file.

Here are the details for connectionPlan.properties:
HR_ATP_DB_CONN.connection.Service Name=${{HR_ATP_DB_CONN_SERVICE_NAME}}
HR_ATP_DB_CONN.secure.Wallet Password=${{HR_ATP_DB_CONN_WALLET_PASSWORD}}
HR_ATP_DB_CONN.secure.Database Service Username=${{HR_ATP_DB_CONN_DB_USER_NAME}}
HR_ATP_DB_CONN.secure.Database Service Password=${{HR_ATP_DB_CONN_PASSWORD}}
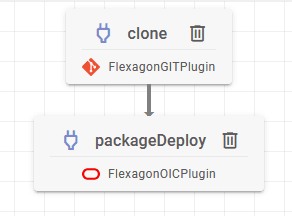
Deploy
In the deploy workflow, the packageDeploy step deploys all OIC objects. Additionally, a clone step checks out files from a repository, necessary for various actions during the deploy execution:
- Configuring Workflow Properties: OIC Connections have varied properties (e.g., username, password, port) for each instance. These properties are defined in a workflow, and the OIC plugin applies values based on the execution environment.
- Managing Connection Attachments: Different instances may require different files for connections like ATP databases or files. We will keep the files in a repository, configure Attachment Override Directory (FDOIC_INP_ATTACHMENT_OVERRIDE_DIRECTORY) to read the file.
- Handling Lookups: For different data in lookups for each instance, configure Lookup Override Directory (FDOIC_INP_LOOKUP_OVERRIDE_DIRECTORY) to read the lookup file.
- Scheduling: To configure different schedules for each instance, use Schedule Override Directory (FDOIC_INP_SCHEDULE_OVERRIDE_DIRECTORY) to read a custom schedule file for an integration.
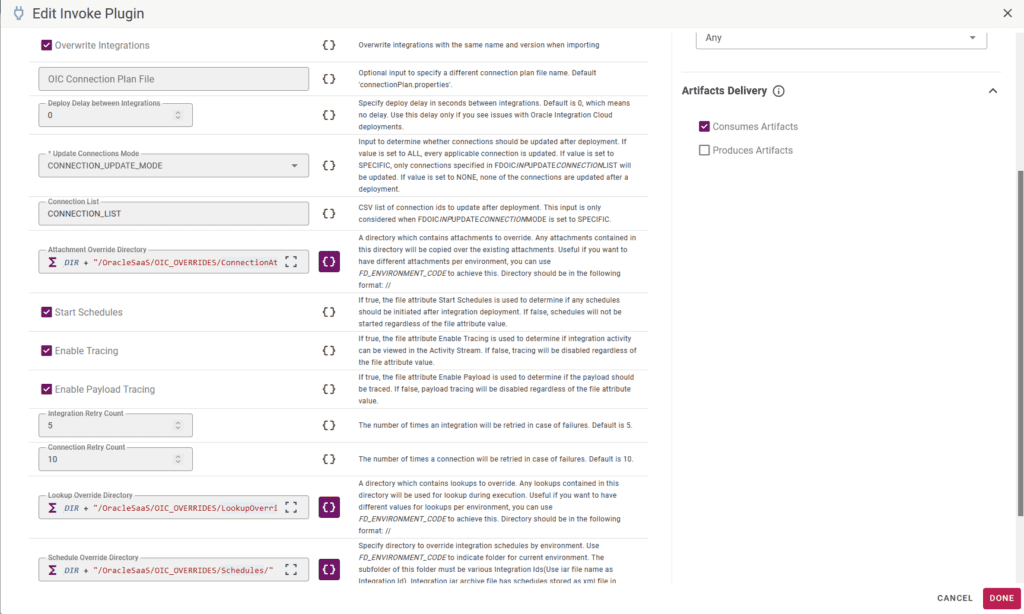
The repository’s high-level folder structure includes folders for each override, ensuring a clear organization for objects.
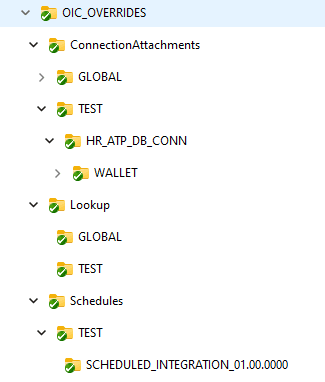


Integration iar archive file has schedules stored as xml file in icspackage/schedule folder which you must copy to the override folder to configure different schedules for each instance. Here is the schedule information in the xml file.
<?xml version = '1.0' encoding = 'UTF-8'?>
<schedule xmlns:xsi="http://www.w3.org/2001/XMLSchema-instance" name="Run_SCHEDULED_INTEGRATION_01_00_0000" xmlns="http://xmlns.oracle.com/scheduler">
  <description/>
  <display-name>Run SCHEDULED_INTEGRATION_01_00_0000</display-name>
  <time-zone>Asia/Calcutta</time-zone>
  <recurrence>
    <start>2024-02-15 00:00:00.000 Asia/Calcutta</start>
    <end>2024-02-22 16:12:00.000 Asia/Calcutta</end>
    <count>0</count>
    <frequency>YEARLY</frequency>
    <interval>1</interval>
    <months-of-year>8 3 9 12 2 10 11 6 4 1 7 5</months-of-year>
    <weeks-of-month/>
    <days-of-month>-1 1 14 30 31</days-of-month>
    <days-of-week/>
  </recurrence>
</schedule>
Cloud Accounts
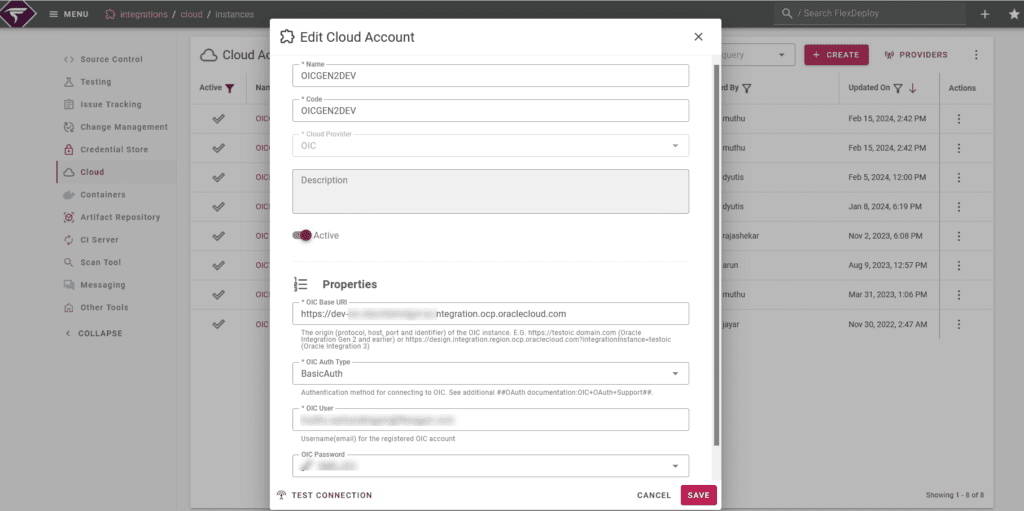
The blue print automatically creates the necessary cloud accounts. In the Integrations section, Cloud accounts for OIC DEV are set up, and the same needs to be done for the Test environment.
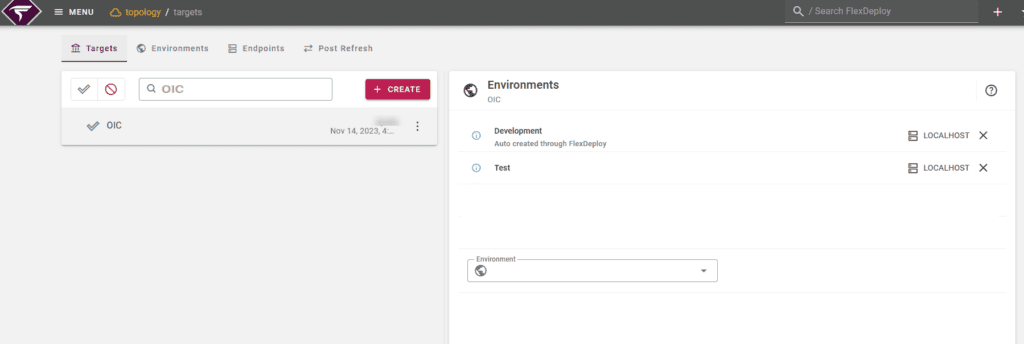
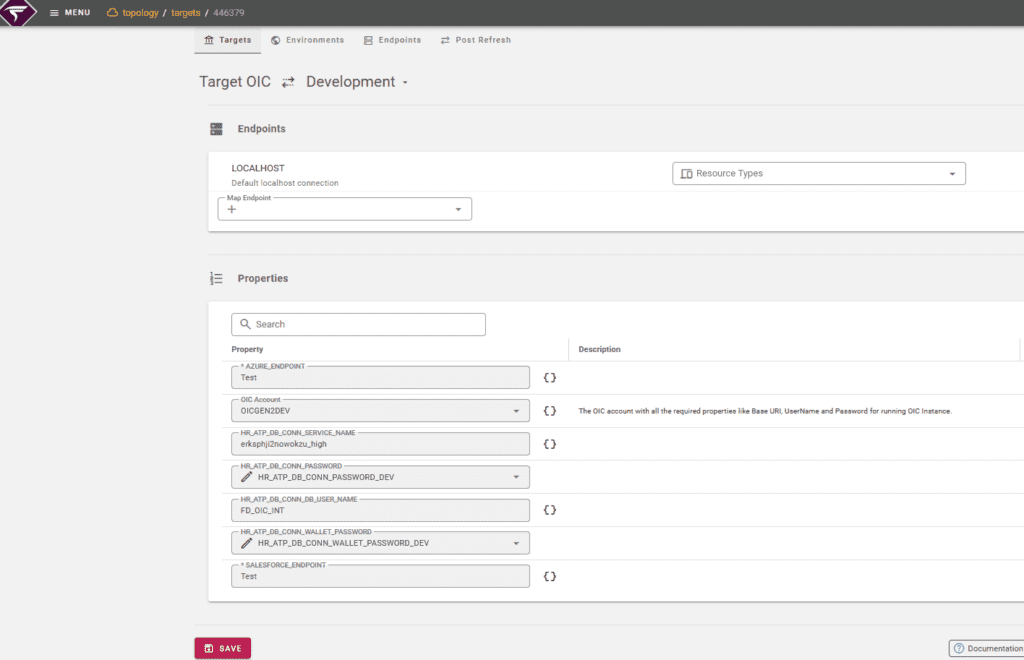
Topology
The OIC blueprint creates the OIC Target Group and associates required targets (environments). For DEV and TEST targets, it associates OIC accounts created earlier. Property values for DEV and TEST are entered accordingly.
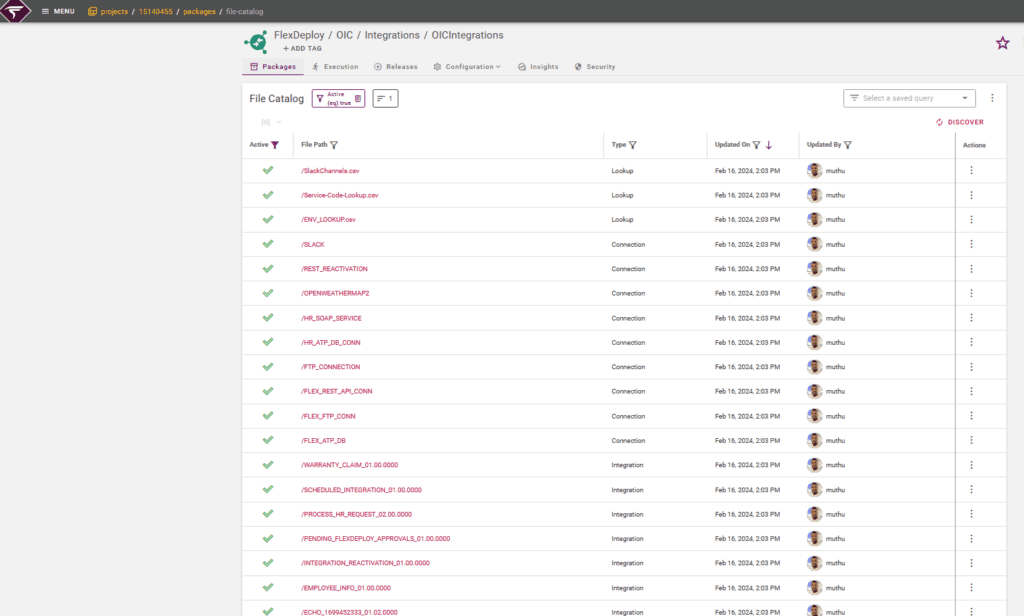
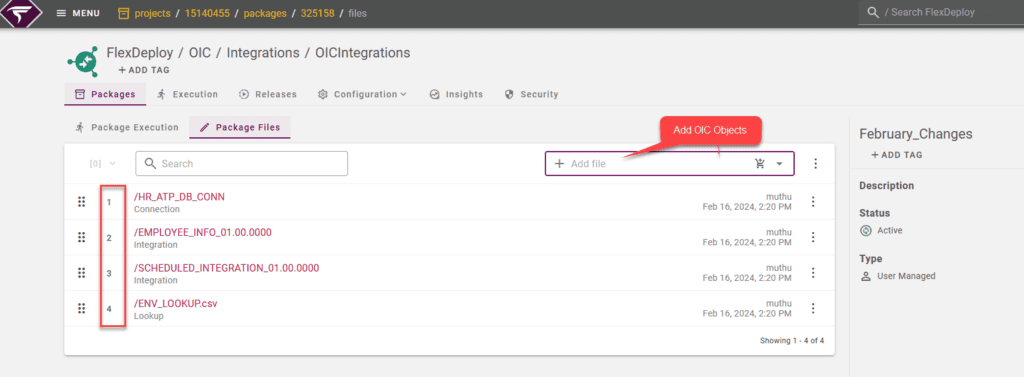
Discovering Objects and Create a Package
Returning to the project, we need to discover all OIC objects from the DEV instance. The File Catalog displays all Lookups, Connections, and Integrations, aiding developers in finding all OIC objects in one place.

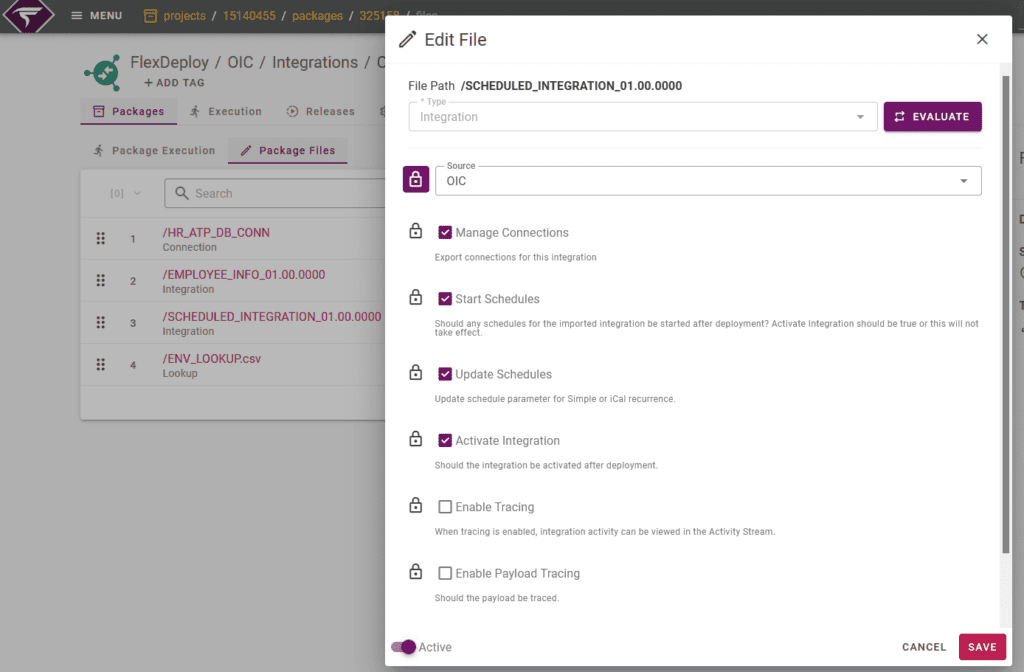
Connection objects include a property to re-activate all dependent integrations upon deployment. Using this property, once the connect is deployed, the plugin will find all(Active) the integration usage of this connection and re-activate them all.

Similarly, for Integration object, there is a property to indicate if a Schedule update is needed during deployment. Selecting Update Schedules will update the schedule in the target instance.
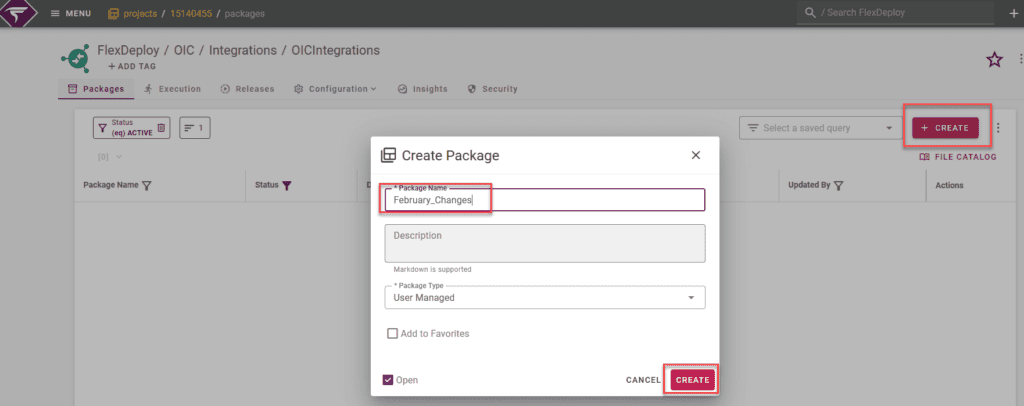
Create a package giving a proper name.
Add the OIC objects in sequence,
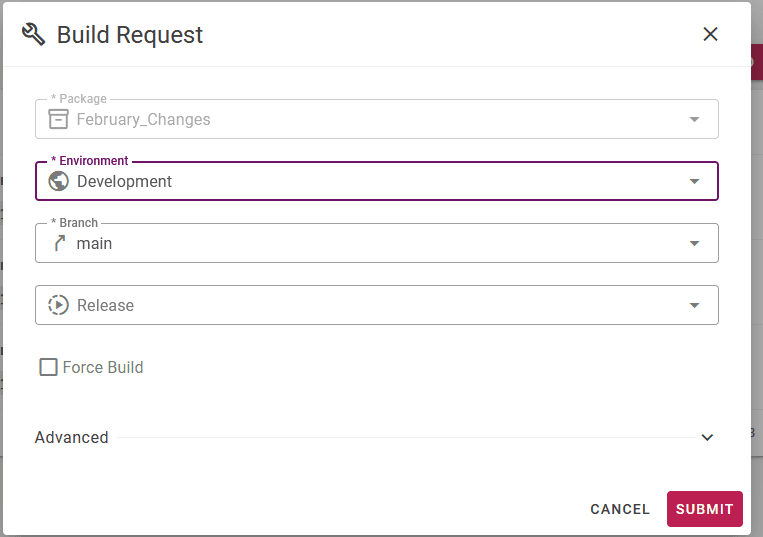
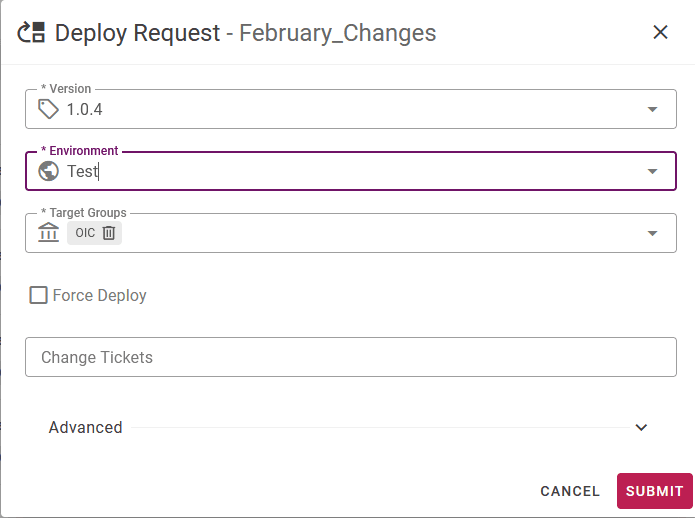
Build and Deploy Package
With the configurations in place, we can now build and deploy the package to Test.
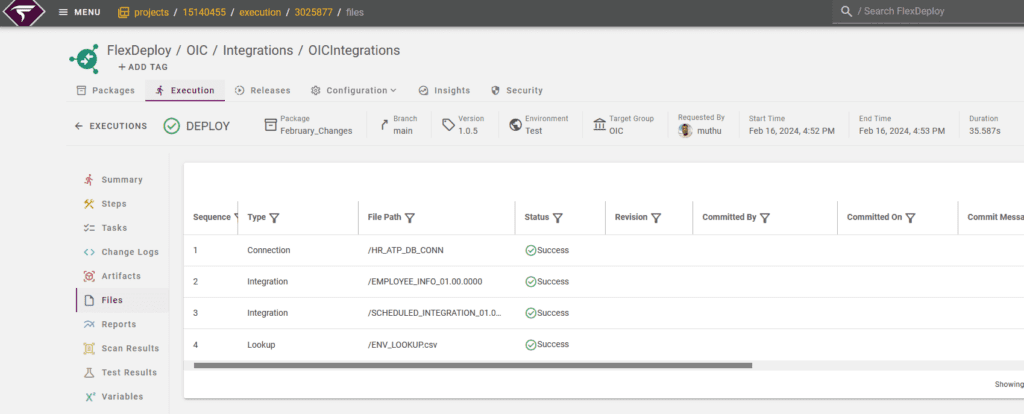
Conclusion
This blog comprehensively covered the steps necessary to build and deploy OIC objects using FlexDeploy. The configurations discussed remain relatively stable. FlexDeploy’s ability to package and sequentially deploy objects to the target instance, along with the OIC plugin’s capabilities, streamlines the complex process of migrating OIC objects. With a single operation, FlexDeploy handles intricate steps, providing a seamless experience for migrating OIC objects with just a click.