FlexDeploy has a Mule Plugin that simplifies the build and deploy process. Rama wrote a great blog overviewing all the capabilities FlexDeploy and the Mule Plugin can provide.
I am going to focus on how FlexDeploy simplifies managing your Mule properties.
Typical Approach to Managing Mule Properties
To enable your deployment across environments it is recommended by Mule that you do the following (from the Mule User Guide 3.8):
You can configure your Mule application to facilitate deployment to one of many different environments, both on-premises and in the cloud. To do so, you must complete the following macro steps:
1. In your application, create a properties file for each environment.
2. Configure a property placeholder in your application to look for the deployment environment upon launch.
3. Configure an environment variable to point to a specific environment during application deployment.
This approach can be challenging, because the security team may not want you to check property files into your SCM with production user IDs and passwords for connecting to the various systems. The production property file will also be deployed to your development environment.
There are alternative approaches, but each come with their own issues.
FlexDeploy Managing Properties
FlexDeploy allows you to manage your Mule properties using FlexDeploy’s Property Management UI. The Mule plugin will use the values you configure for each environment and generate a mule property file specific to the environment you are deploying to for your application to use. Let’s see how this works!
Create the Properties on Your Workflow
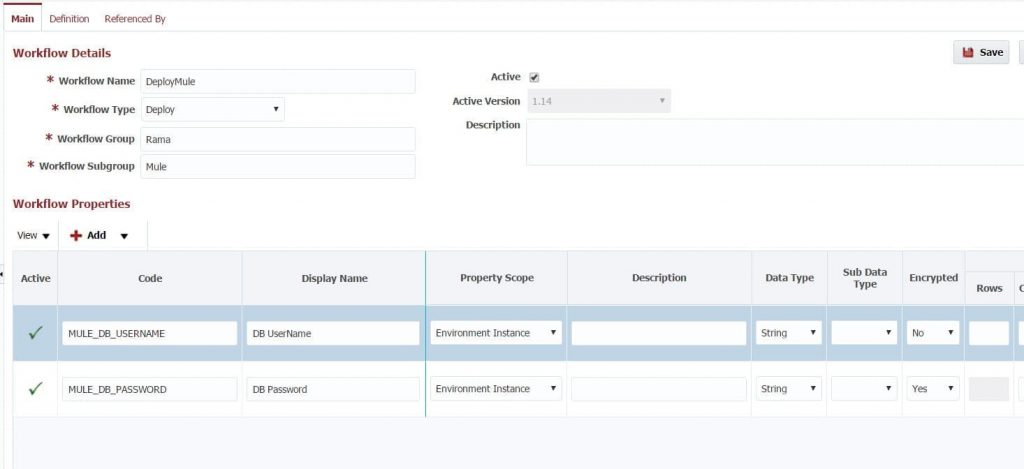
To create properties that can be configured in FlexDeploy, we add them to the FlexDeploy deploy workflow. Below we have created 2 properties (MULE_DB_USERNAME, MULE_DB_PASSWORD). FlexDeploy knows a Mule property will be placed in the mule property file because we prefix the property with MULE_. Notice that the DB_PASSWORD property is set to ecrypted = yes. This ensures the password is not visible on the property screens within FlexDeploy.
Note the Display Names, these will be used when we set the properties on the property management screens in the next session.
Indicate the Name of Your Property File
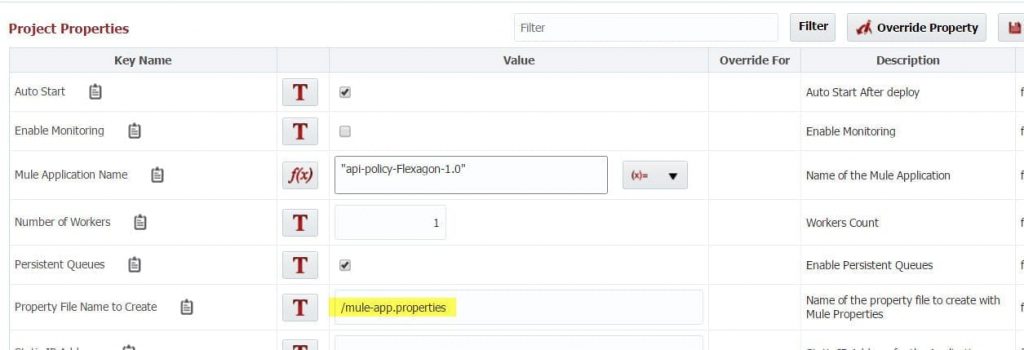
On the project property file page, we configure the mule property file name for the file that will be generated. If you would like to be able to edit the properties in Anypoint Platform, be sure to name the property file /mule-app.properties.
Set Your Environment Specific Properties
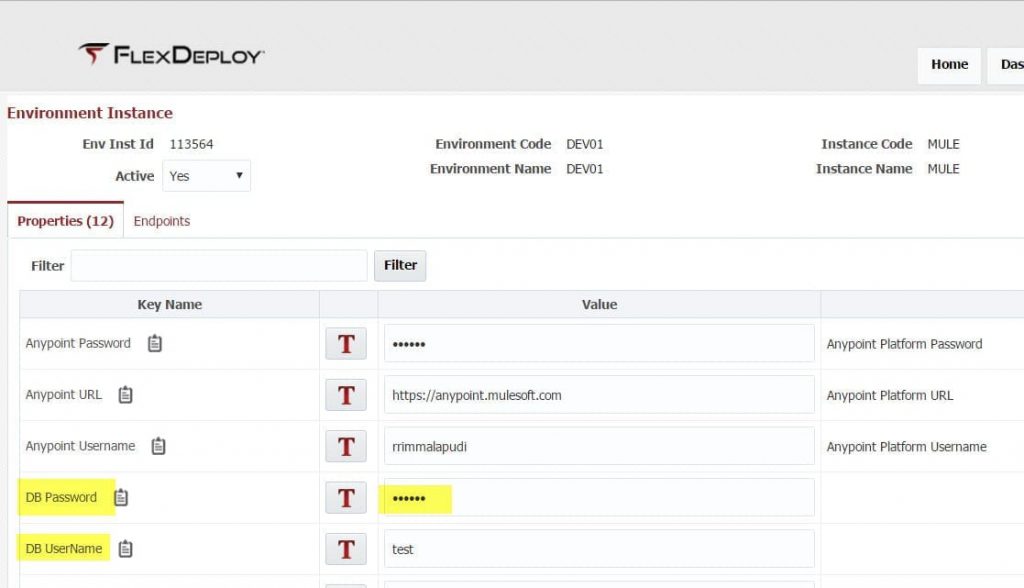
You can set the value for these properties for each environment. Below we select the DEV01 Environment for the MULE instance to edit the properties for that environment but clicking the highlighted link.
On the Environment Instance page, we can set the values of these 2 properties for the DB UserName and DB Password. These values will apply to the DEV01 environment. Note that the DB Password does not display, instead you see ******. You can manipulate these properties for each environment.
You can store these values within the FlexDeploy database in an encrypted form or you can also integrate directly with a credential store application like CyberArk or Azure Key Vault to retrieve the latest value of the credential being used at runtime.
Deploy Your Application
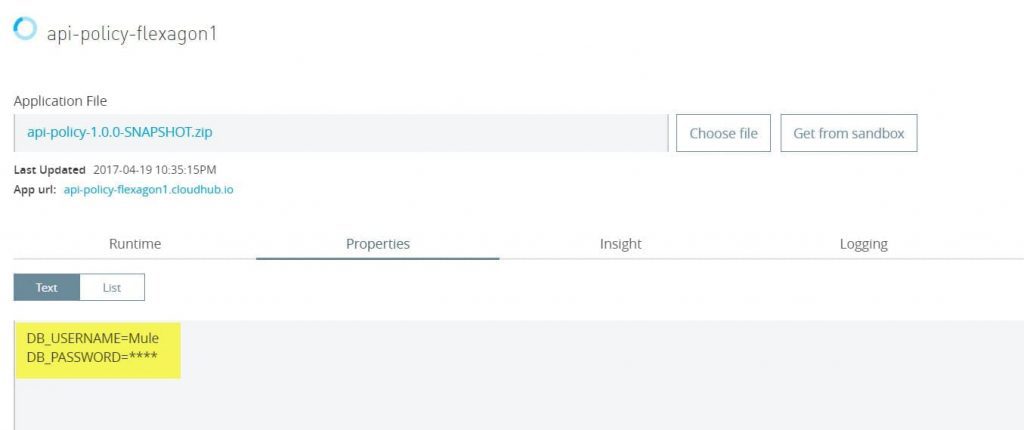
Now you can deploy your application and we will see what the properties look like on the server.
Handling Secure Properties
In AnyPoint Platform, you can update your properties. When you first open the property page, it is empty. You can enter the properties if you want to change them, for instance maybe the password changes regularly. Notice that the DB_PASSWORD property is being displayed as ****. This is the result of using an encrypted property in FlexDeploy, which set the secure.properties=DB_PASSWORD.
Summary
If you are looking for a Build/Deploy tool that can help you simplify the management of your Mule properties, take a look at FlexDeploy.

