

Today I will describe the process of deploying ODI objects such as scenarios, datastores, packages, and sequences with FlexDeploy. We will source ODI objects (XML files) from a Git repository and import using Oracle’s OdiImportObject command. We will start from the beginning to show how you configure the build and deploy workflows, your topology, and the ODI project. This is one-time setup work, and much of it can be translated to manual integrations for other technologies with FlexDeploy. Once we have FlexDeploy configured you’ll see how easy it is to source ODI objects from a Git repository.
Before We Begin
Before we begin you will need to complete the following tasks:
- Set up an ODI Agent
- Export ODI Objects to Git repository
If everything is set up correctly you will be able to execute the OdiImportObject command with the exported XML file shown below.
$ODI_DOMAIN_HOME/bin/startcmd.sh -INSTANCE=$ODI_AGENT_NAME OdiImportObject -FILE_NAME=$XML_FILE_PATH -IMPORT_MODE=SYNONYM_INSERT_UPDATE
Setup ODI_DOMAIN_HOME variable with your domain home. It will look something like /Oracle_Home/user_projects/domains/base_domain and setup ODI_AGENT_NAME with the name of the agent you set up in the previous steps. The default for this is OracleDIAgent1.
If everything has been configured correctly, the command should execute successfully and import the specified XML file.
Build Workflow
Now that we have our initial configurations complete, create a new build workflow to get the exported XML files from your Git repository. In this case simply add a partial shell execute operation. Add the code snippet in the image below and check the ‘Produces Artifacts’ checkbox.
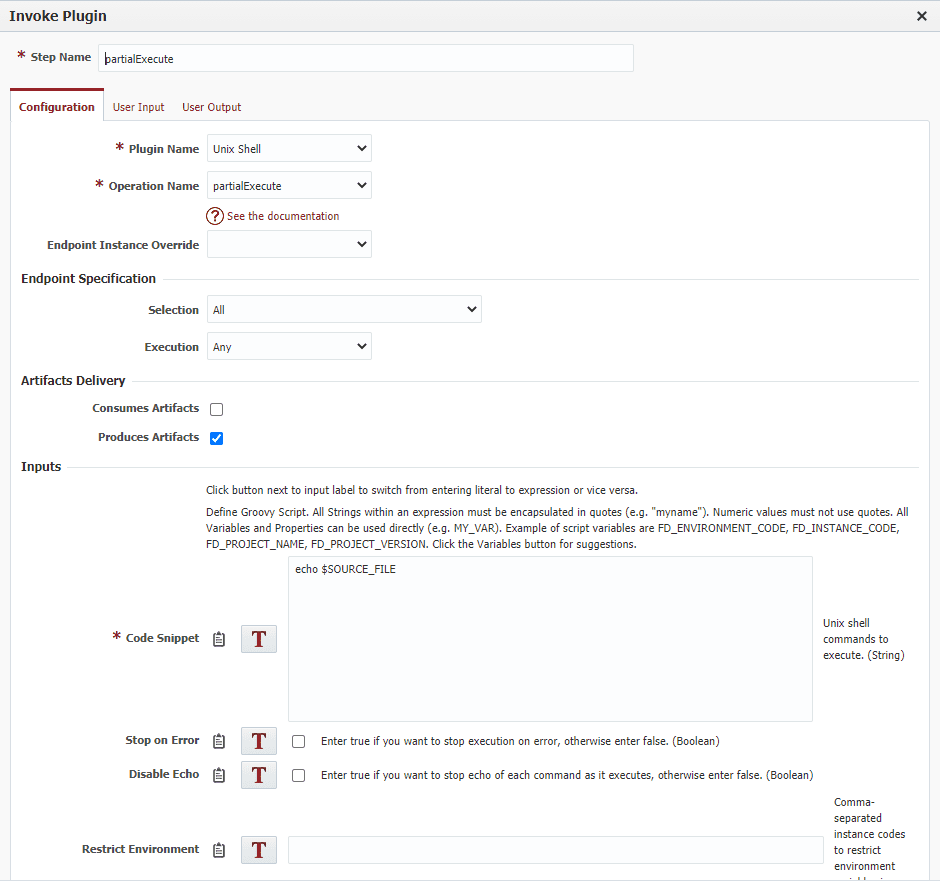
After completing this your build workflow should look like this. Be sure to activate the workflow before moving on.

Deploy Workflow
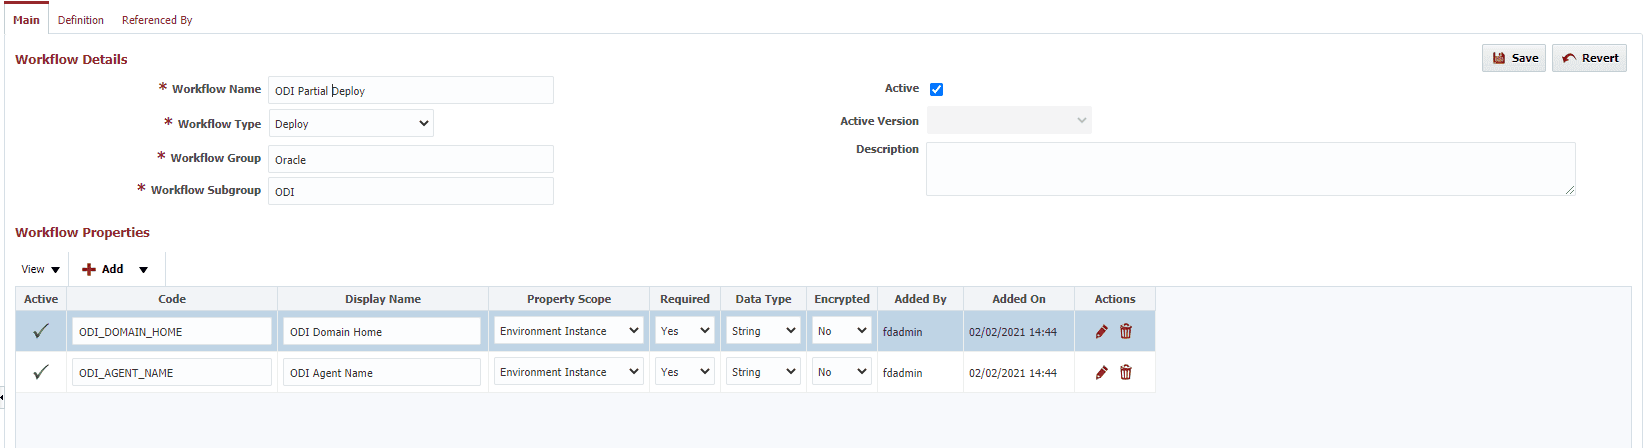
Create a new deploy workflow to run the OdiImportObject command for each file being deployed. First we will need to add some workflow properties that we can reference later on in the workflow definition. Select the ‘+ Add’ icon on the main tab of your new workflow and add two properties, ODI_DOMAIN_HOME and ODI_AGENT_NAME. These property values will be set differently for each environment on Topology later.
Next, add a partial shell execute operation. In this operation we will be executing the OdiImportObject command we discussed earlier. We will add the command shown below and check the ‘Consumes Artifacts’ checkbox. FlexDeploy will automatically replace the shell variables with our properties.
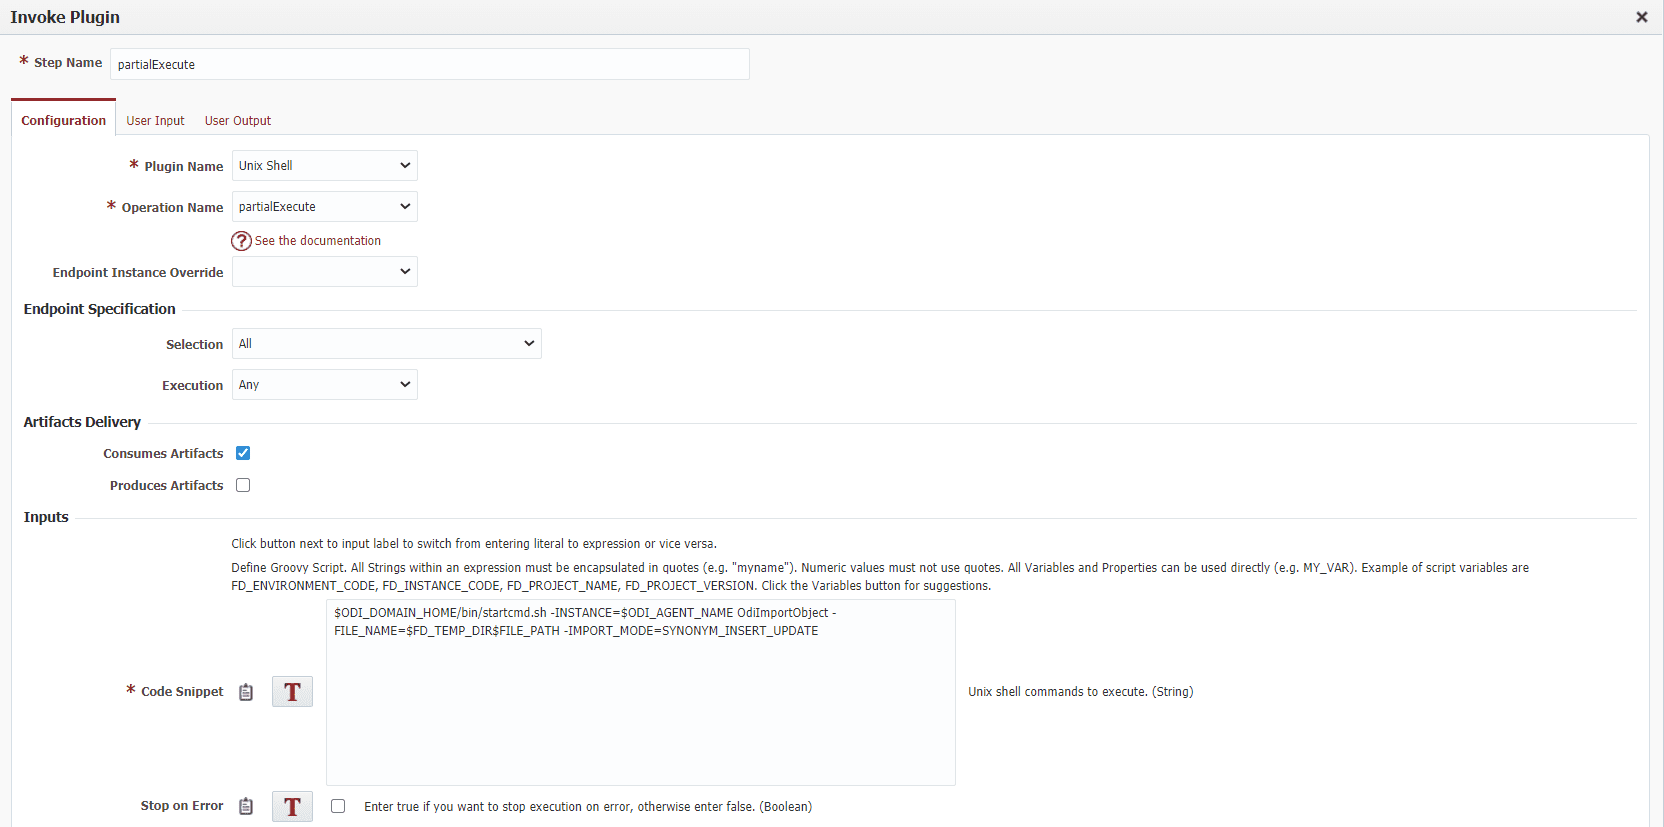
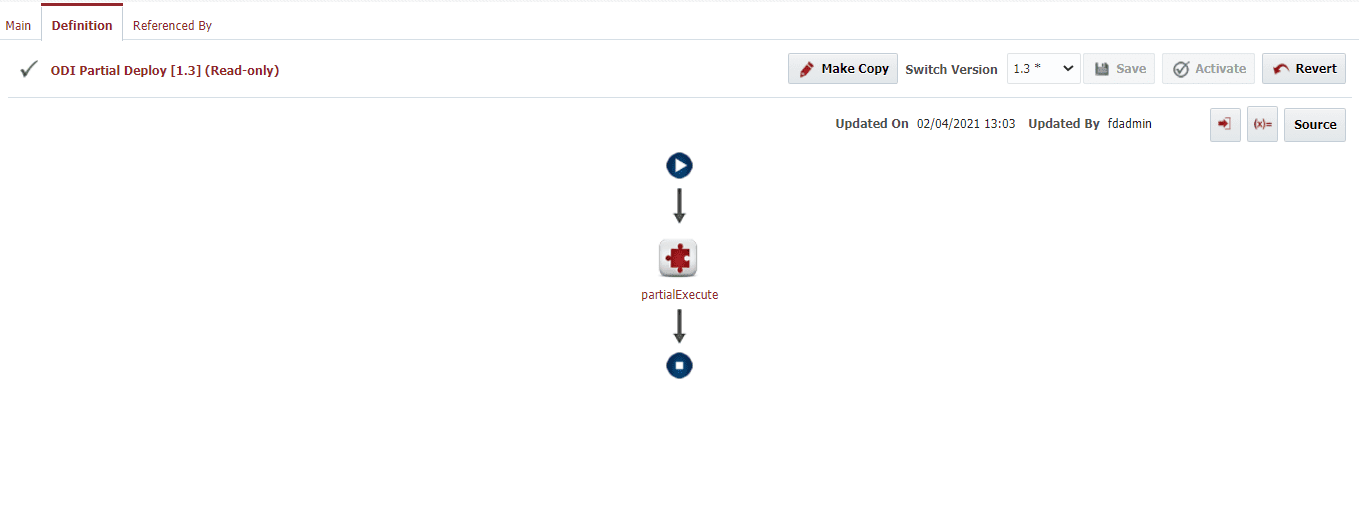
Once the operation is added the workflow will look like this. Be sure to activate the workflow before moving on.
Topology
Now that we have our workflows complete, our next step is to configure our topology. The endpoints, environments, and instance must all be configured before continuing.
Instances
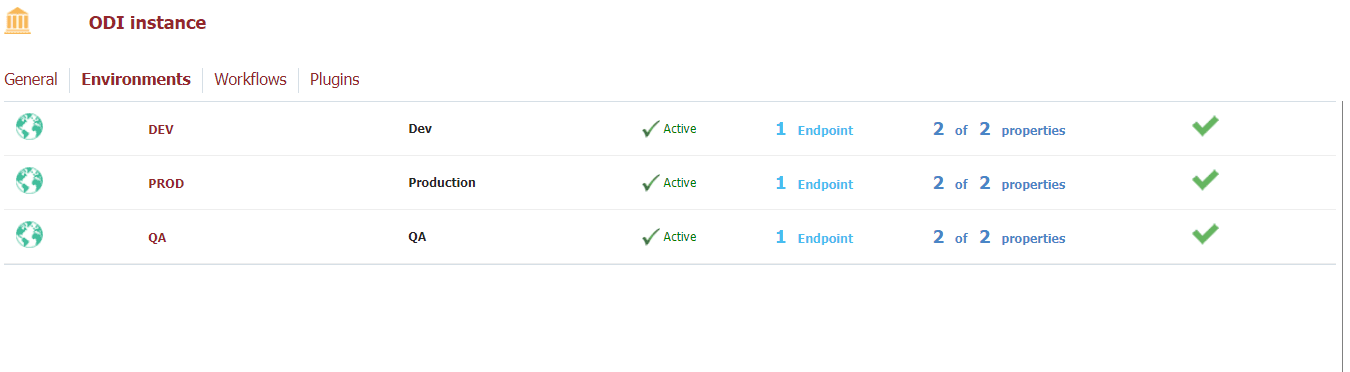
Create a single instance named ODI. If you have multiple versions of ODI you will create additional instances. For example, if you have a ODI 11g and 12c installation you will need to create an instance for both of those versions. Next go to the environments tab for your new instance and associate the relevant environments by dragging them from right to left.
Then go to the workflows tab and associate our new workflows we created.

Environment Instance
Once we have our instance created we will go to the topology overview tab to set our environment instance information. First, we will set our properties with the information discussed earlier for the domain home and ODI agent name.
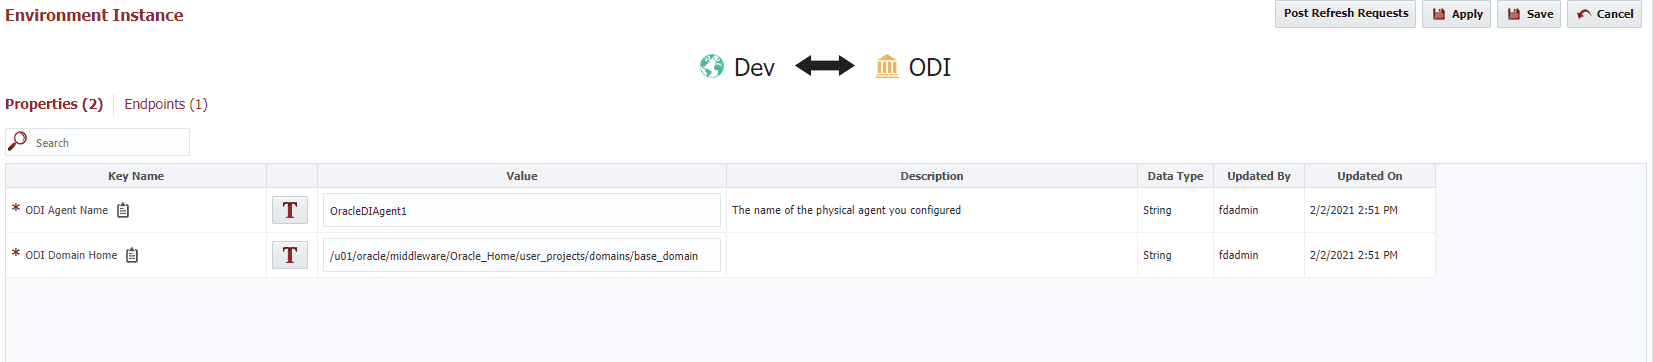
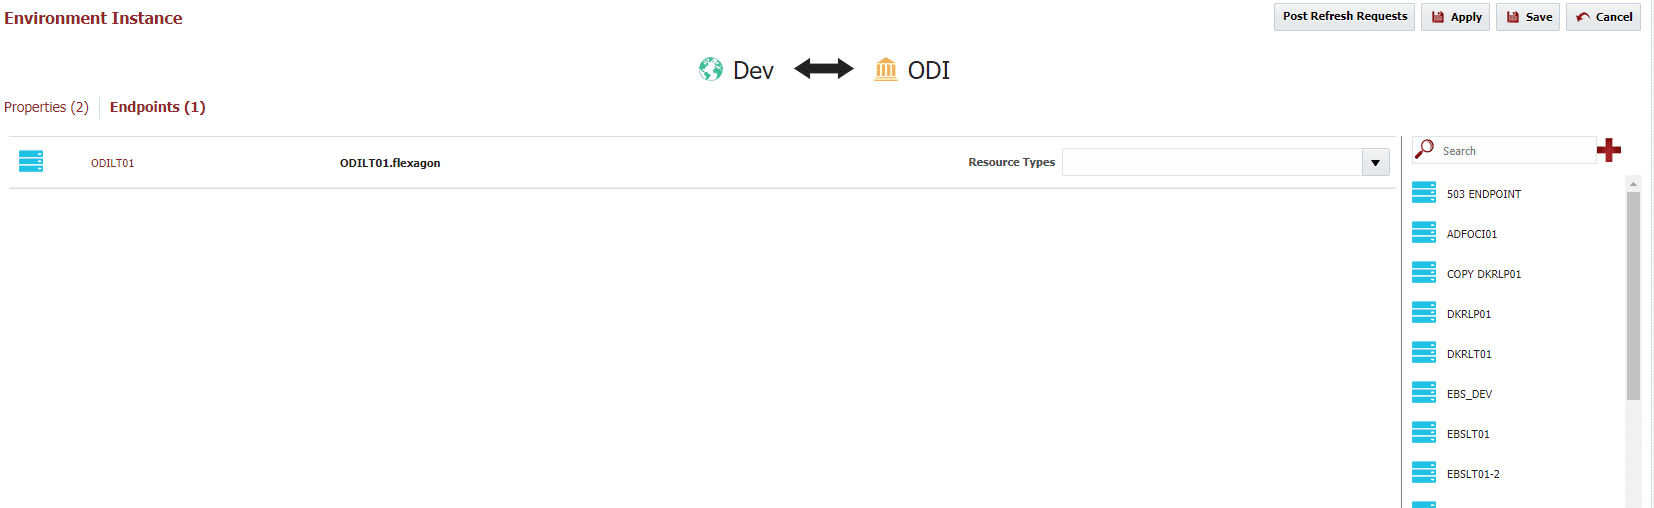
Next, you will need to associate the corresponding endpoint with your environment instance. If your environment instance is Dev-ODI you will associate the endpoint that corresponds with your Dev ODI server.
SCM Instance
Now we will create our SCM instance to integrate the Git repository that we created. This repository will store our exported ODI object XML files. First, go to the Integrations page on the Topology tab. Click on the ‘+’ icon to create a new SCM instance and enter the information for your Git repository.
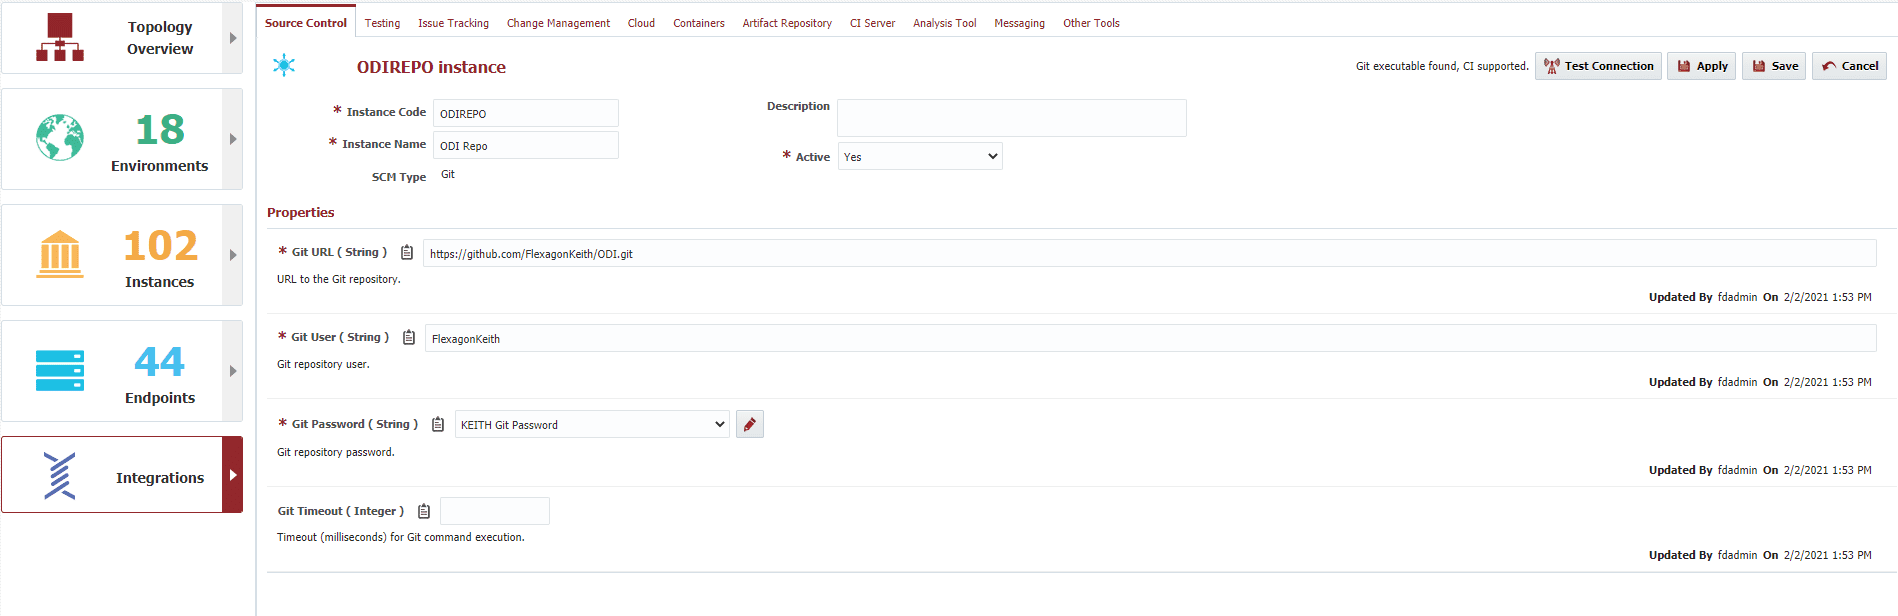
Be sure to test your connection before saving to ensure that the information you entered is correct.
Repository Folder Structure
Some issues may arise when deploying certain ODI object types if they are not in specific order. To ensure this doesn’t happen you can create a folder for each object type. Next, you will prepend letters in ascending order. Your Git repository will look something like this. This just helps ensure file sequence during deployment.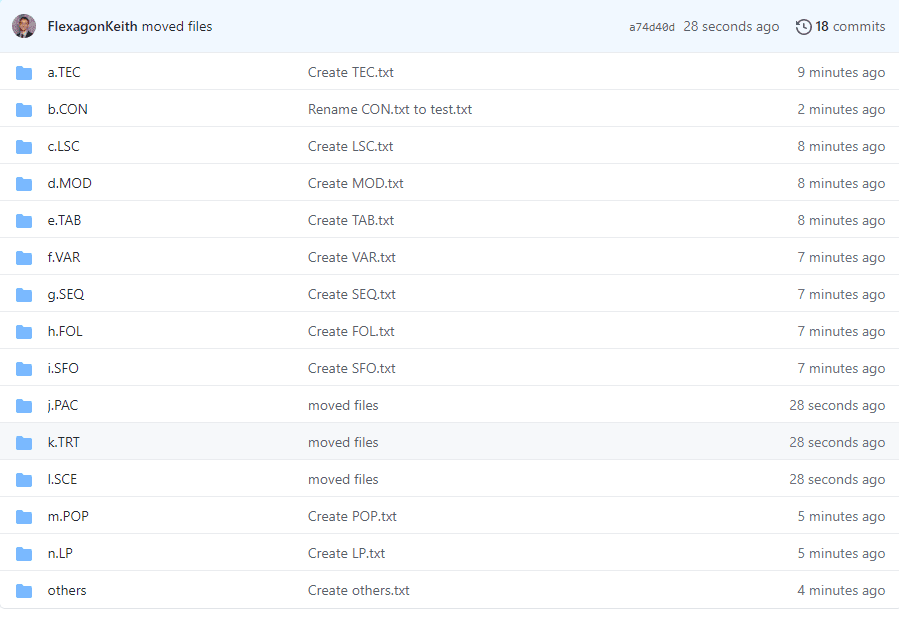
Once this is complete the ODI objects will automatically be sequenced in the order you specified when populating from Git. When populating new files you will need to check the ‘Sort After Populate’ checkbox.
Project
Now we will bring all the previous steps together to create our ODI project.
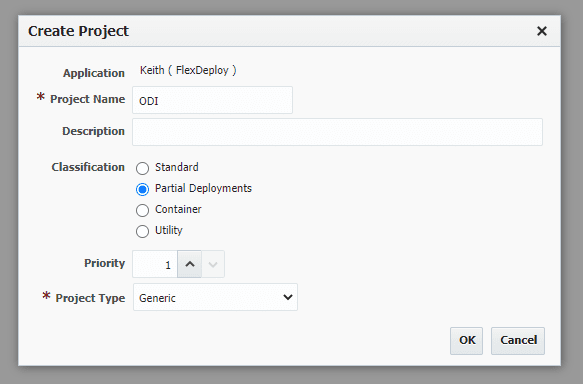
First, we will create our project by right clicking on an application in our project explorer and selecting ‘Create New Project’. This will open an initial configuration screen where we will specify what type of project we are creating. In our case we are creating a generic partial deployment project.
Next, go to the configuration tab and select Git as the SCM type and select our Git instance that we created earlier. Then select our build and deploy workflows as well as our ODI instance for the build and deploy instances. Once this is all complete it should look something like this.

Once the configuration is complete we can move on to the build and deployment execution.
Build and Deployment Execution
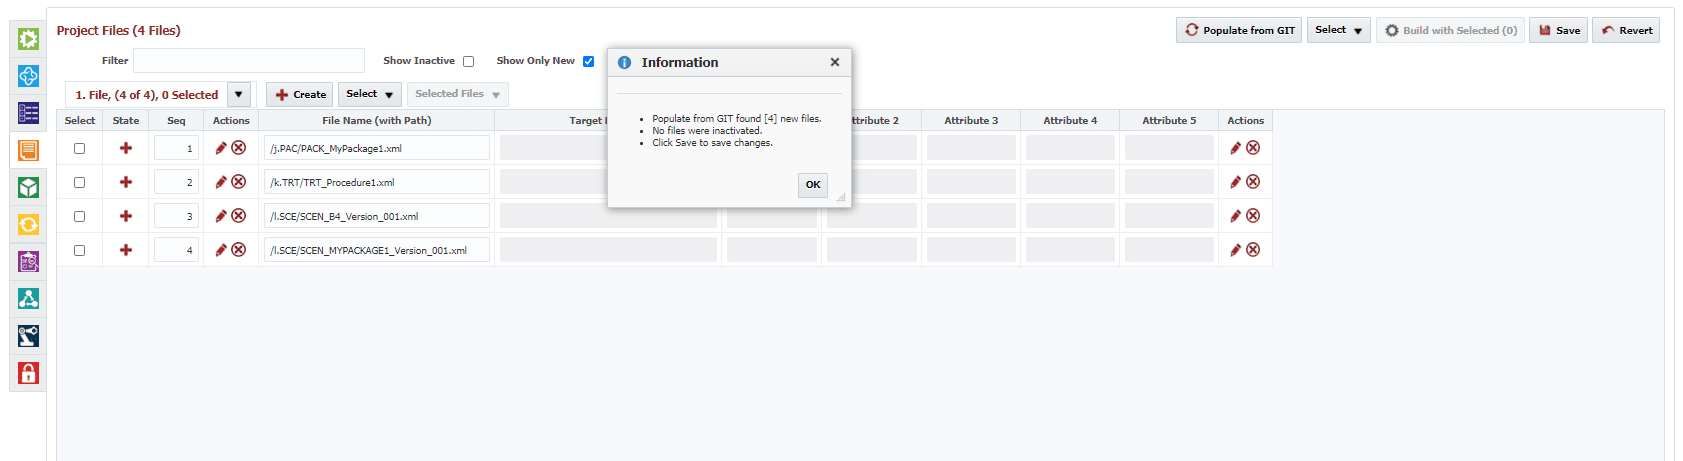
First we will populate our project files from Git. To do this go to the project files tab and click the ‘Populate Files’ button. Once completed we should see all of the exported XML files in our project’s files.
Once the files are populated and saved you are now able to build and deploy selected XML files to your desired environments. We will create a package to build and deploy. To do this go to the packages tab and create a package. Once the package is created give the package a name and add the files that you wish to build and deploy.
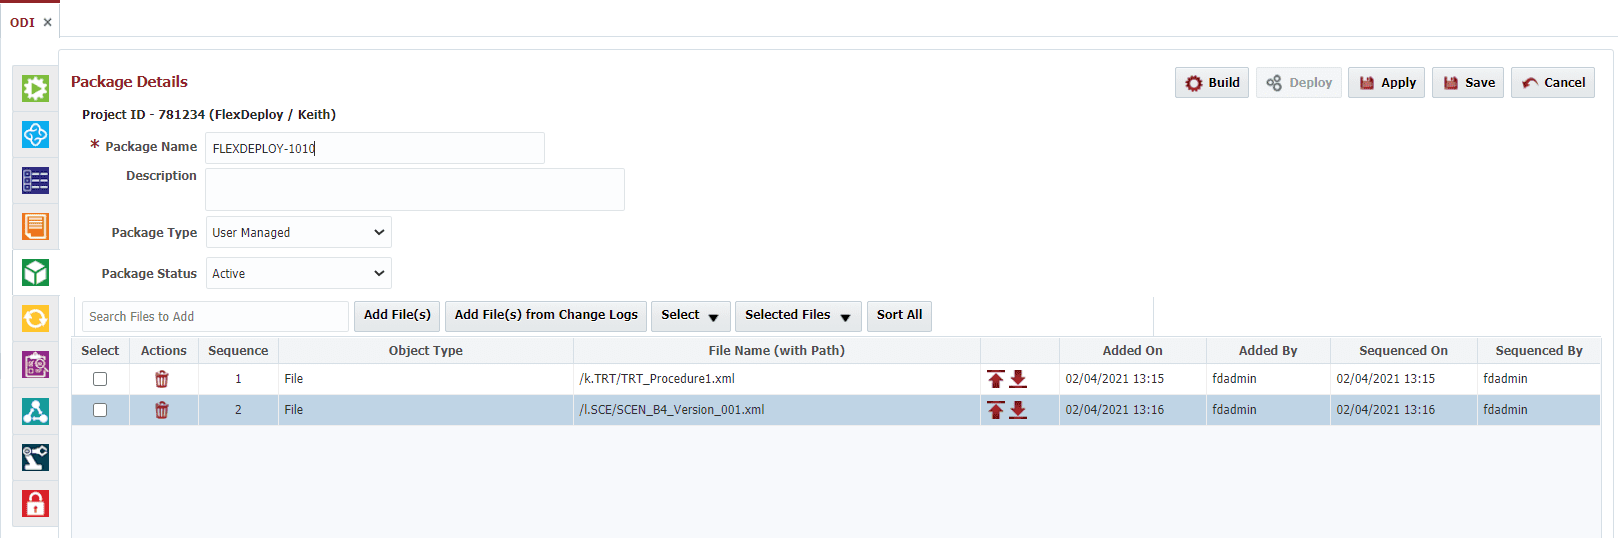
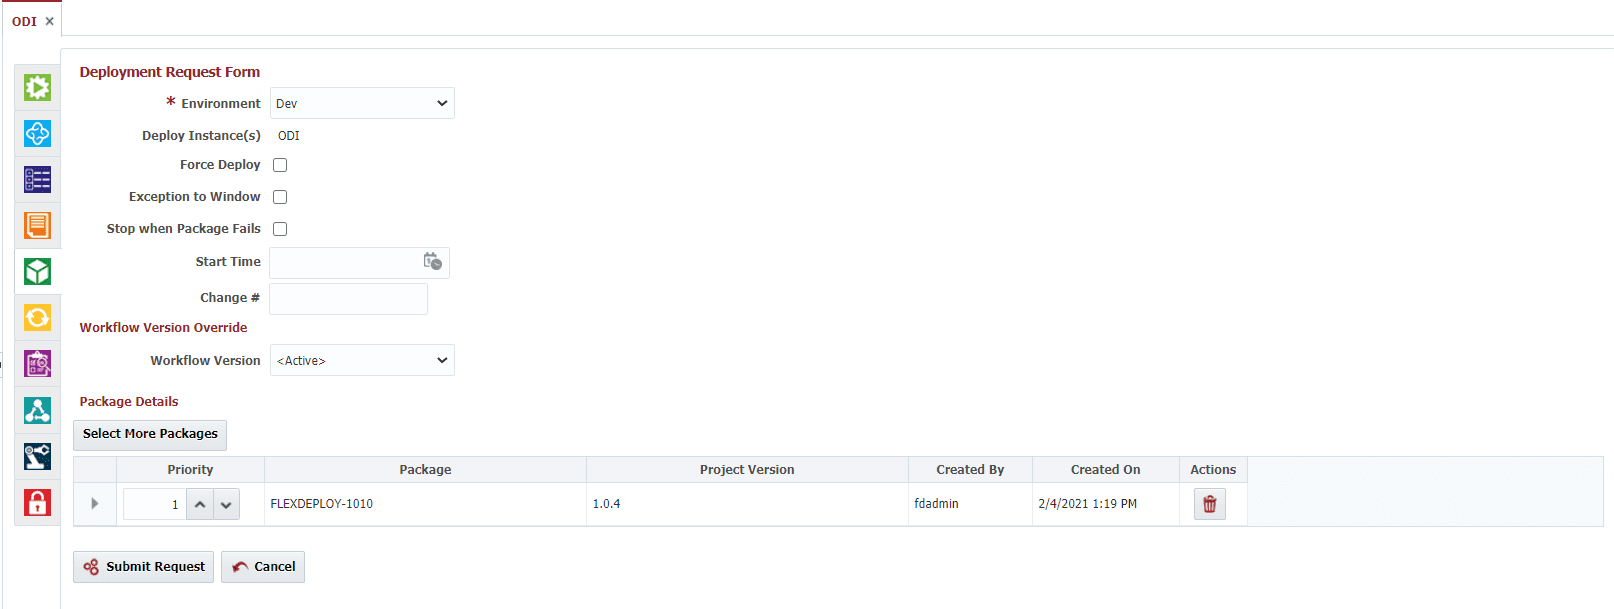
After adding the files, click ‘Apply’ and build the package by clicking ‘Build’. This build execution will pull the XML files from the git repository and create zip artifact which will be used in the deploy workflow. To execute the deployment, click on the ‘Deploy’ button on package and select the desired environment.
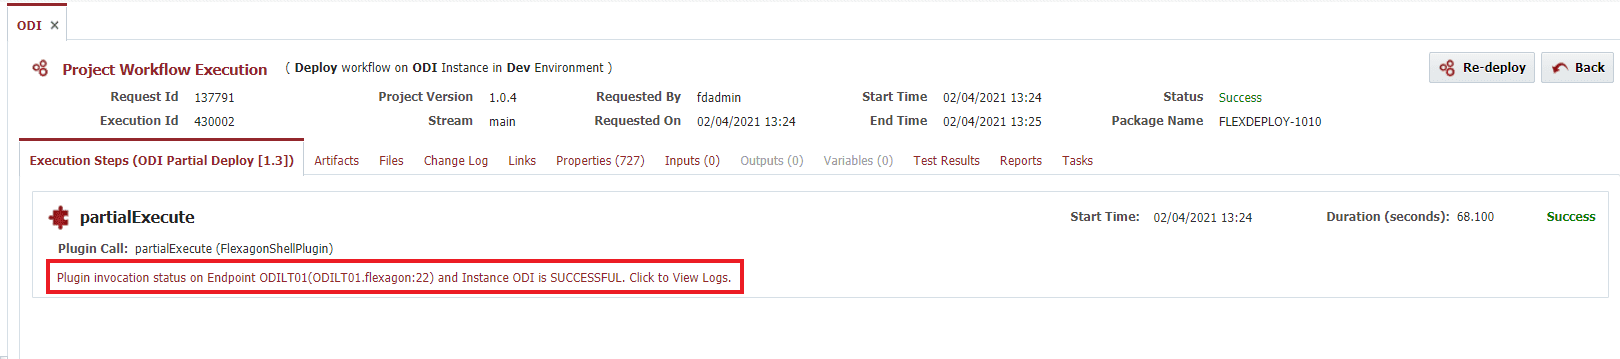
This will execute our deploy workflow which runs the OdiImportObject command. Once complete, we can view the execution data by clicking on the execution ID for the corresponding deployment request from the executions tab. From there we can see the execution steps as well as view the logs by clicking on the plugin invocation status link for the paritalExecute step.
We now have our ODI project configured with custom build and deploy workflows for all ODI object types. This approach takes advantage of agile approaches to improve the speed and quality or your ODI deployments. You can also use FlexDeploy Release orchestration to utilize continuous integration principles to your benefit.