As the DevOps world strives to get more and more automated, approvals are one aspect that still require a button push. However, this doesn’t mean we cannot make the process easier. With the Release of FlexDeploy 5.4 it is easier than ever to configure FlexDeploy Approvals with Slack, or any messaging service for that matter. To implement this, we make use of Incoming and Outgoing Webhooks with FlexDeploy. Let’s get started.
Configuring Slack Integration
Creating a Slack App
The very core of FlexDeploy’s integration with Slack relies on the use of a Slack Application. For those unfamiliar with Slack Apps, Slack’s documentation can tell you more than I ever could.
Whether you are creating a brand new Slack App or using an existing one, there are a few things to note:
- Add the following bot scopes to your App
- chat:write – Required
- files:write – Optional
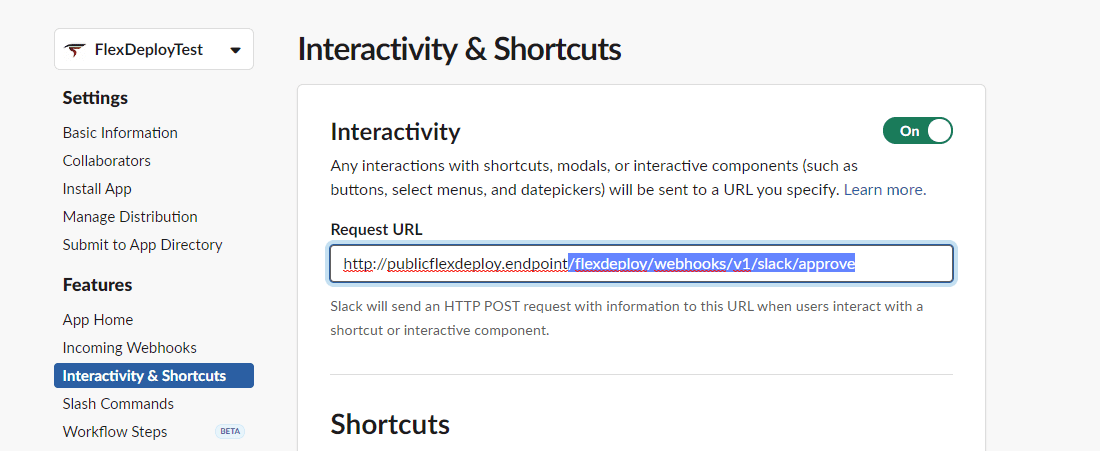
- Add an interactivity request url
- This will be embellished later on
Be sure to copy the Bot OAuth Token as it will be used in the next step!
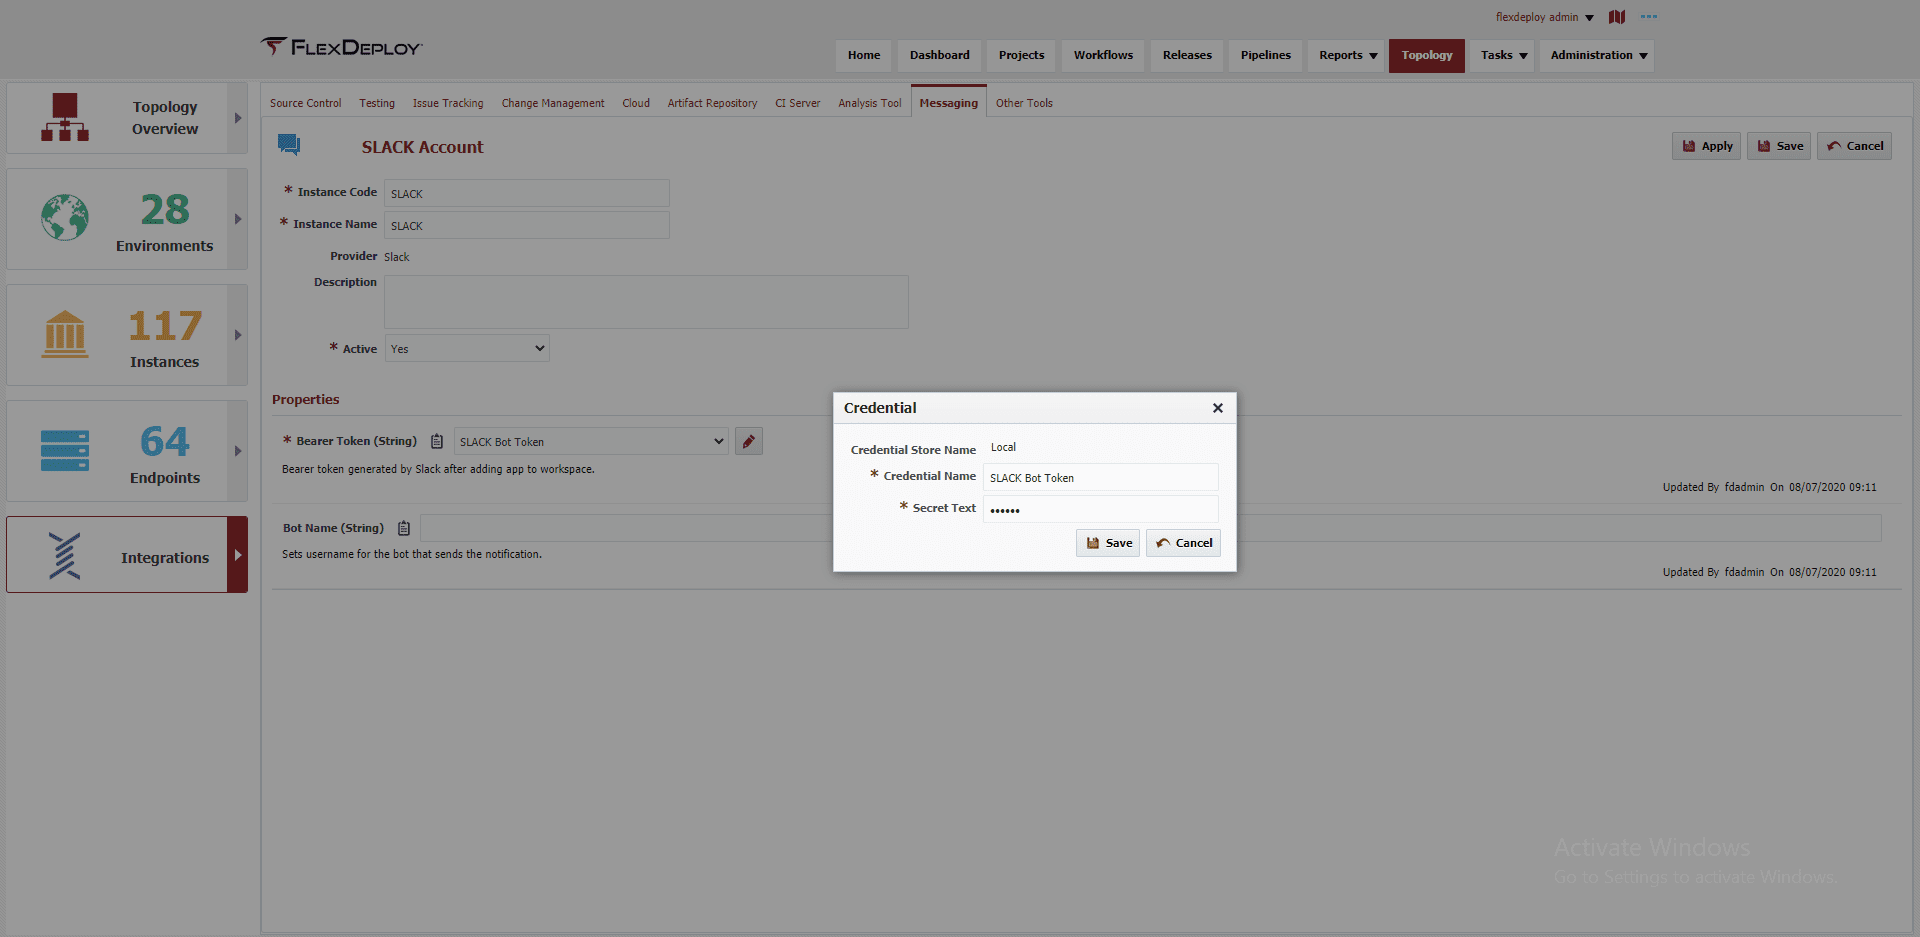
Creating a FlexDeploy Messaging Account
After creating and installing the App in your Slack Workspace it is time to launch FlexDeploy. Once opened, navigate to Topology->Integrations->Messaging. On this screen create a new Slack Messaging Account and fill in the Bot Token from earlier.
Sending the Slack Message
The final piece of the puzzle before we can start posting messages is to create a new Webhook Listener. This listener will be in charge of listening for Task Created Events and posting the message to Slack.
Create the Listener
Still in FlexDeploy, navigate to Administration->Integrations->Outgoing Webhooks. Next, click the Create Listener button and use the following configuration:
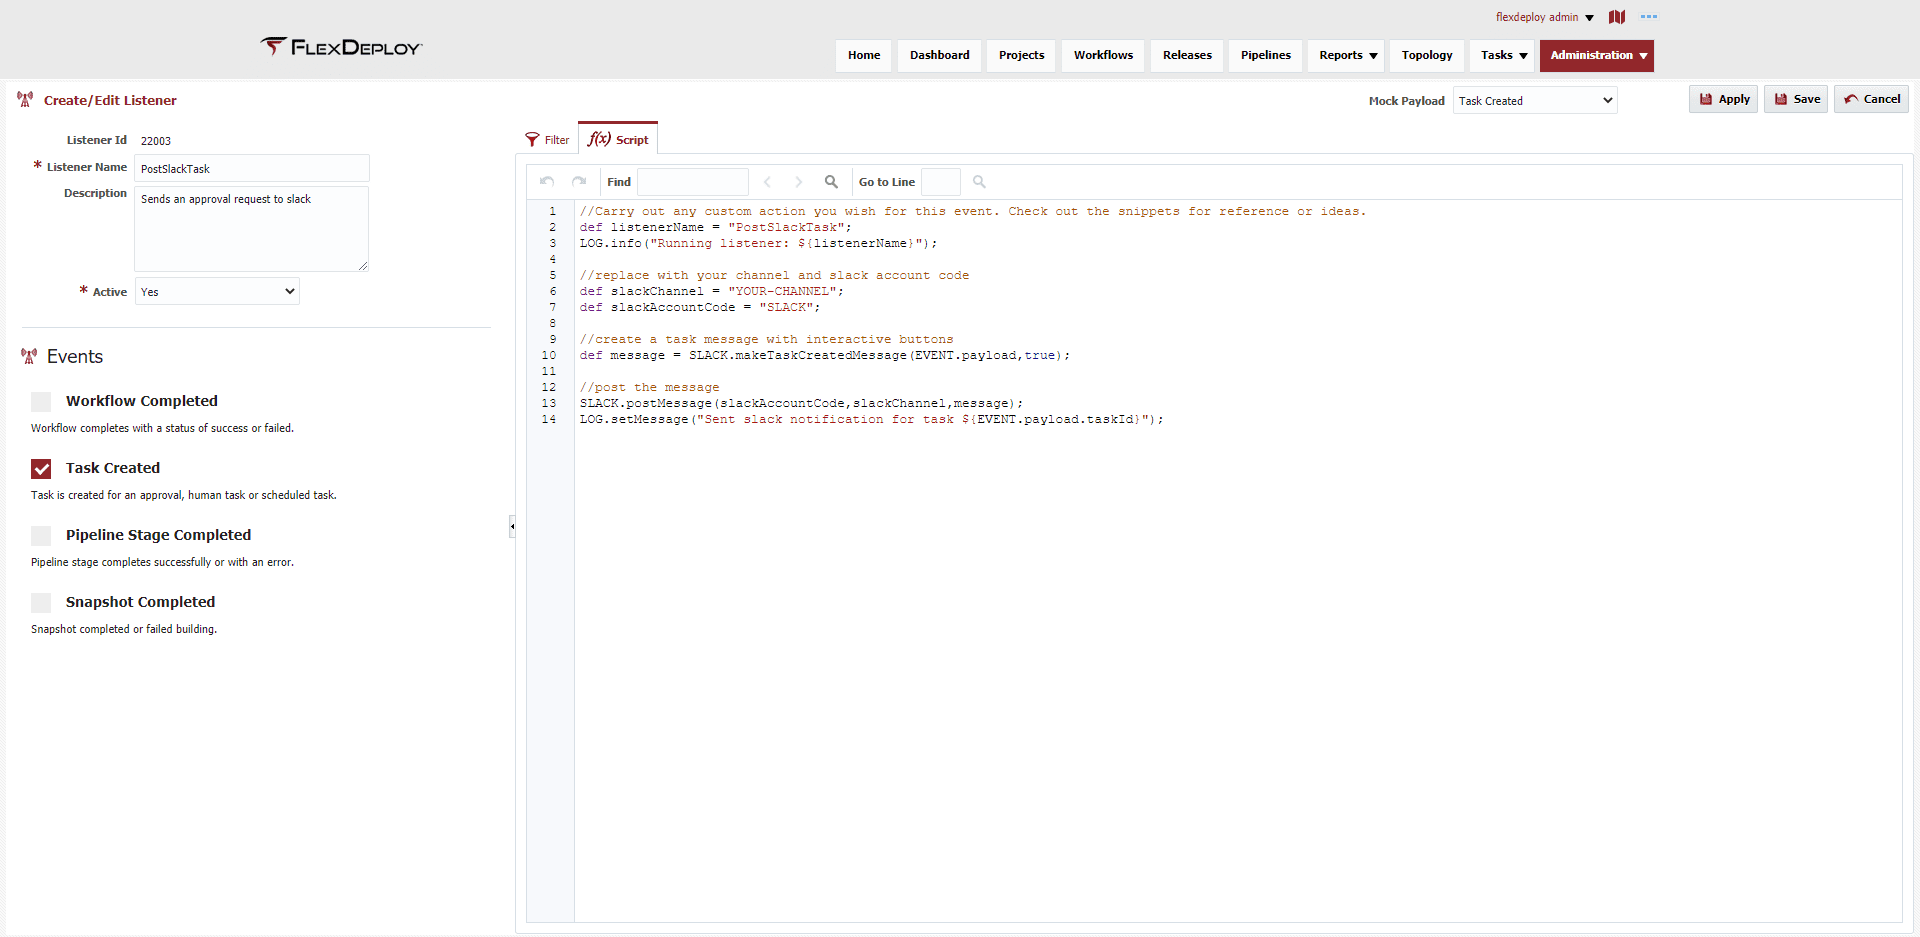
//Carry out any custom action you wish for this event. Check out the snippets for reference or ideas.
def listenerName = "PostSlackTask";
LOG.info("Running listener: ${listenerName}");

//replace with your channel and slack account code
def slackChannel = "YOUR-CHANNEL";
def slackAccountCode = "SLACK";

//create a task message with interactive buttons
def message = SLACK.makeTaskCreatedMessage(EVENT.payload,true);

//post the message
SLACK.postMessage(slackAccountCode,slackChannel,message);
LOG.setMessage("Sent slack notification for task ${EVENT.payload.taskId}");
Sending a Message
Finally we can post messages to Slack. To validate, deploy a Release or standalone Project that requires approval.
Ultimately we see a new message posted to the channel with options to approve or reject the deployment.

Voila! Don’t get too excited though. At this point the buttons aren’t doing anything but we will take care of that next.
Responding to Slack Interaction
The buttons seen above are part of Slack’s Interactive Framework. This means Slack ends up sending a webhook when the buttons are clicked. In order to receive and process this webhook we need to create a Webhook Provider and Webhook Function.
Webhook Provider
Navigate to Administration->Integrations->Incoming Webhooks and then Manage Providers in order to create a new Slack Provider.
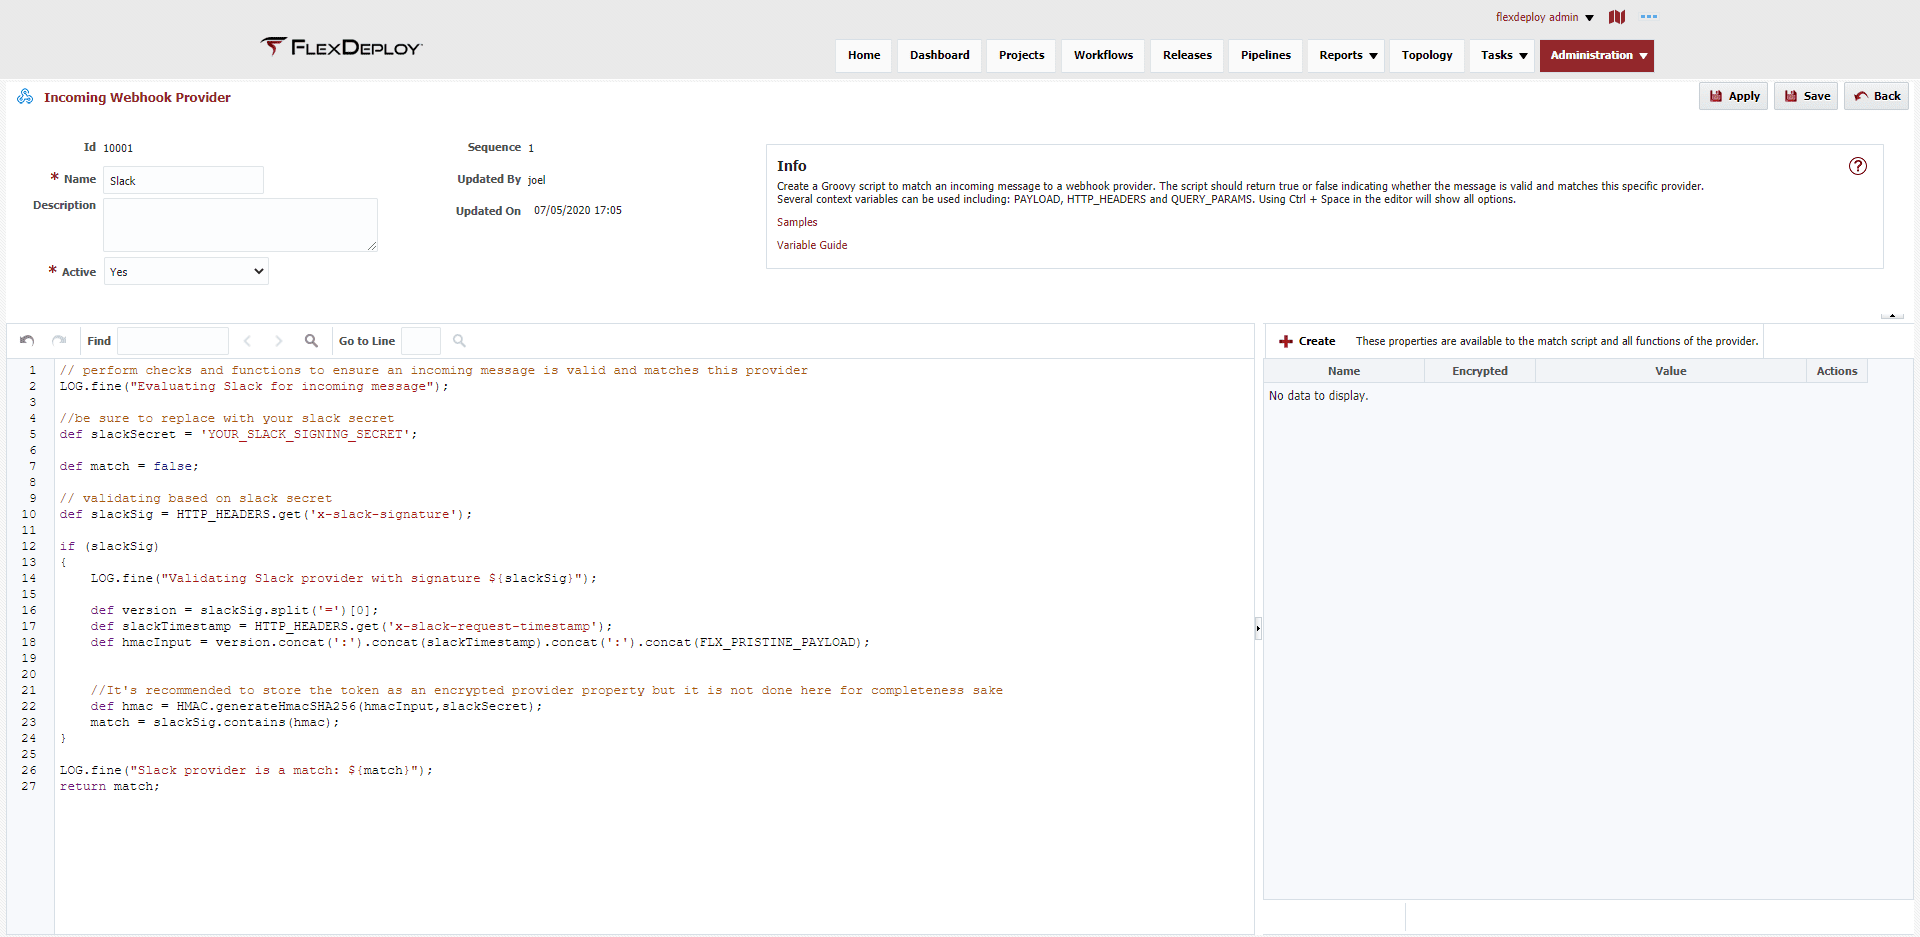
// perform checks and functions to ensure an incoming message is valid and matches this provider
LOG.fine("Evaluating Slack for incoming message");

//be sure to replace with your slack secret
def slackSecret = 'YOUR_SLACK_SIGNING_SECRET';

def match = false;

// validating based on slack secret
def slackSig = HTTP_HEADERS.get('x-slack-signature');

if (slackSig)
{
    LOG.fine("Validating Slack provider with signature ${slackSig}");

    def version = slackSig.split('=')[0];
    def slackTimestamp = HTTP_HEADERS.get('x-slack-request-timestamp');
    def hmacInput = version.concat(':').concat(slackTimestamp).concat(':').concat(FLX_PRISTINE_PAYLOAD);


    //It's recommended to store the token as an encrypted provider property but it is not done here for completeness sake
    def hmac = HMAC.generateHmacSHA256(hmacInput,slackSecret);
    match = slackSig.contains(hmac);
}

LOG.fine("Slack provider is a match: ${match}");
return match;
The above script uses your Slack Signing Secret to validate the incoming message is indeed coming from Slack. Once validated, it needs some function to execute.
Approve Task Function
Navigate back to the functions screen and click Create Function. On the subsequent page, use the following script:
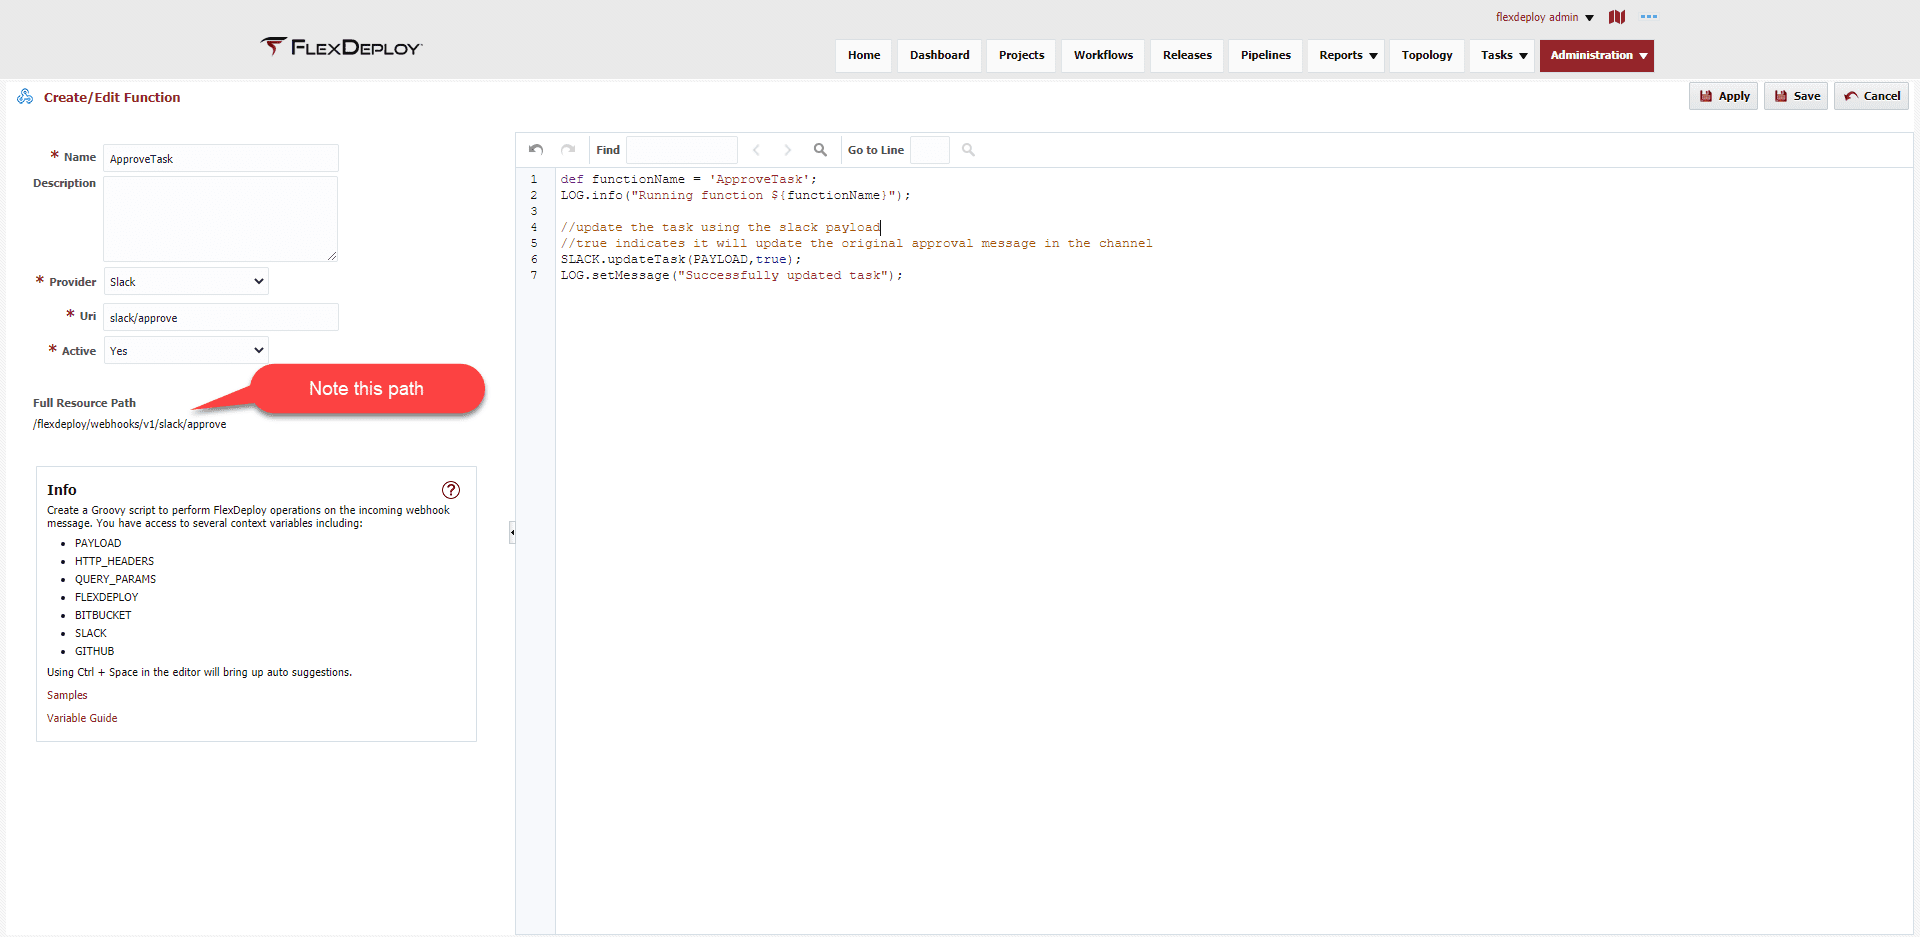
def functionName = 'ApproveTask';
LOG.info("Running function ${functionName}");

//update the task using the slack payload
//true indicates it will update the original approval message in the channel
SLACK.updateTask(PAYLOAD,true);
LOG.setMessage("Successfully updated task");
Note the path specified above when compared with our interactivity URL in the Slack App. It is key that these resource paths match.
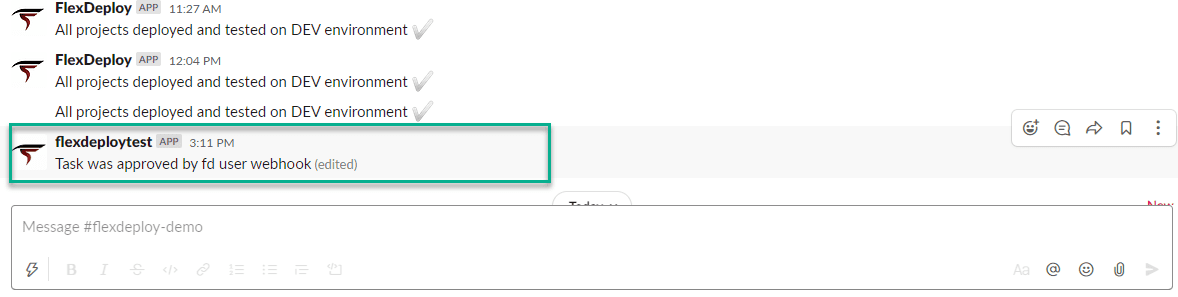
Finally Approving
With all of that done, we can click the approve (or reject) button on the Slack Message! Notice that the original message is updated in place with the response.
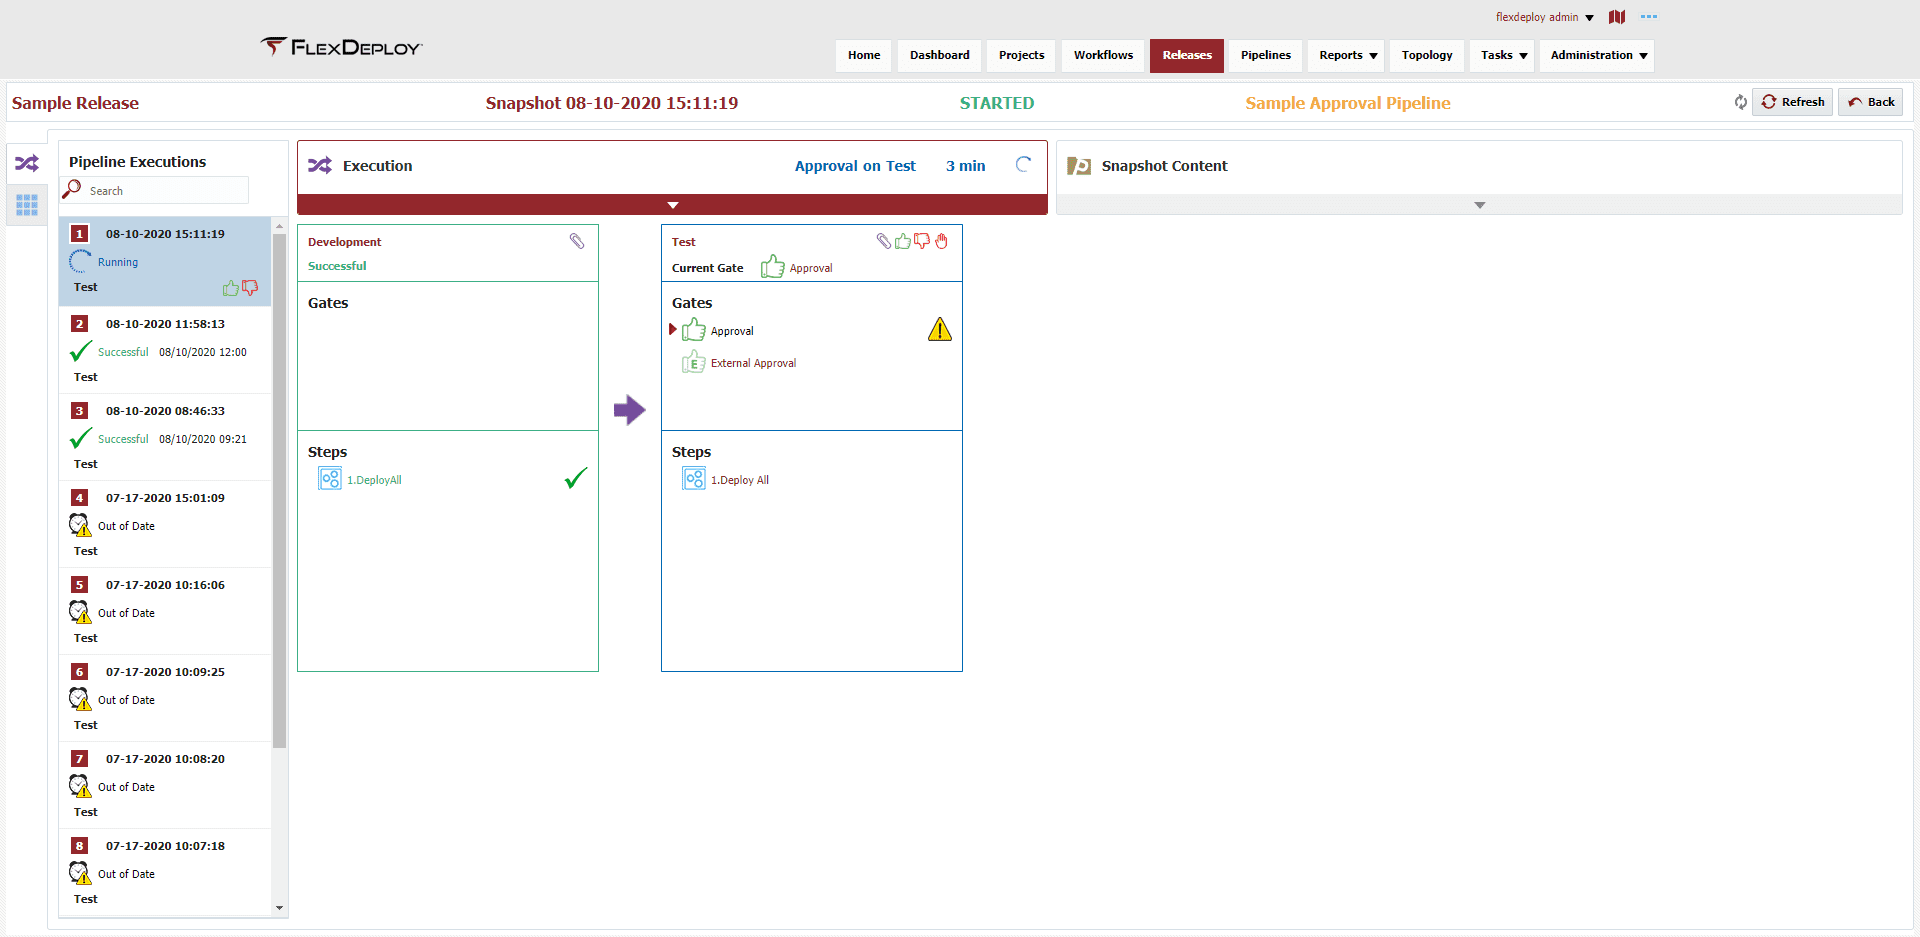
And finally, the Release with the newly approved Gate.

If at any point things are going as expected, open up the Webhook Messages page to view incoming and outgoing webhooks.
Wrap Up
There you have it. In a few simple steps we are able to move our FlexDeploy Approvals to Slack. The icing on the cake is that it is completely customizable. A couple of pre-built helper functions were used but we are by no means limited to those functions. Check out the official documentation for more examples or how to leverage webhooks with Jira and GitLab.
Leave any comments below for future use cases you would like to see.
Additional Webhooks Resources
- Webhooks Part 1: Continuous Integration with Source Control
- Webhooks Part 2: Managing Releases with Issue Tracking
- Outgoing Webhooks: Create a ServiceNow Incident when a Workflow Fails
- Instant Communication with FlexDeploy
- Outgoing Webhooks Documentation
- Webhook Context Variables and Methods Reference