Have you ever been in the middle of development and had to open FlexDeploy to manually initiate a project build, slowing down your process? There’s a new solution to automate this and prevent some of the back and forth between applications that might be needed today. Flexagon offers a browser extension for sending webhooks to your FlexDeploy instance from any URL. This allows developers to send content to FlexDeploy without having to leave their development environment, enabling powerful use cases like initiating a build, creating a snapshot, updating a package, and committing to source control.
In this article, I’ll go through a common action with Oracle APEX. The same could also be accomplished just as easily for technologies like Oracle RESTful Data Services (ORDS), Oracle Integration Cloud, Oracle Business Intelligence, or other tools with browser-based development. The extension will send a webhook for initiating an APEX application build and execute a utility to export the application and commit it to git. This is only going to include high-level steps. Check out the browser extension documentation for more details and for examples with other technologies.
Setup in FlexDeploy
We will configure incoming webhooks in FlexDeploy to process the webhook sent from our extension popup window and perform the desired action(s). The following steps are a one-time setup in FlexDeploy which need to be completed prior to using the browser extension.
Creating a Webhook Provider
The first step is to create a new webhook provider for the FlexDeploy Browser Extension. The provider match script shown below validates the sender by the extension id sent in the headers, a query parameter sent in the URL, and the fromURL attribute in the payload.
def tokenQueryParam = QUERY_PARAMS.get('token');
def originHeader = HTTP_HEADERS.get('origin');
def fromURL = PAYLOAD.get('fromURL');

return 'chrome-extension://paacbpidhiiepifmicloidcimomkkhlh'.equals(HTTP_HEADERS.get('origin')) && 'tokenValue'.equals(tokenQueryParam) && fromURL.contains('apex/f');
Creating a Webhook Function
Next, we will create a webhook function for the new FlexDeploy extension provider. This is a simple groovy script, with a number of context variables and methods available, giving you complete control over what happens when each webhook is received. For my function, I will initiate a build of my APEX application, followed by a utility execution to export the application and commit it to git for historical reference.
import flexagon.fd.model.pojos.workflowrequest.ExecuteOptions;
import flexagon.fd.model.pojos.workflowexecution.WFInput;

def functionName = "Build/Commit APEX Application";
LOG.info("Running function: ${functionName}");

if ("Build/Commit Application(s)".equals(PAYLOAD.actionName))
{
  def appNames = PAYLOAD.properties["Application Names"].findAll()[0];
  for (def application in appNames)
  {
    def projectId = FLEXDEPLOY.findProjectId(application);
    def streamId = FLEXDEPLOY.findStreamId(projectId, "trunk");
    FLEXDEPLOY.buildProject(streamId, projectId);

    ExecuteOptions eo = new ExecuteOptions();
    def commitMessageInput = new WFInput("Commit Message", PAYLOAD.properties["Commit message"].findAll()[0]);
    def appNameInput = new WFInput("APEX Application Name", application);
    def workspaceInput = new WFInput("Workspace Name", PAYLOAD.properties["Workspace"].findAll()[0]);

    eo.setWorkflowInputs([commitMessageInput, appNameInput, workspaceInput]);
    FLEXDEPLOY.executeUtility(815329, "DEV", eo);
  }
}
Using the FlexDeploy Browser Extension
Now we’re ready to configure the browser extension in preparation to send something to FlexDeploy. If you haven’t already, you will first need to download the extension for either Edge, Chrome or Firefox. Any FlexDeploy version supporting incoming webhooks (since 5.3.0.0) is compatible with the extension.
Creating an Action
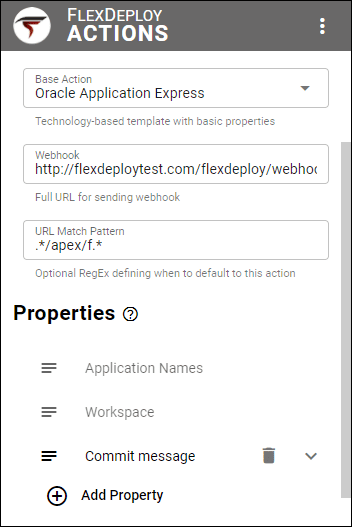
Each webhook you send from the extension popup window will use a defined action. We will start by creating an action and giving details about what context to send to our FlexDeploy instance.
Base action support is currently available for APEX, Oracle Integration Cloud, ORDS, and Oracle Business Intelligence. This allows for an easier setup, and custom actions can be created for other technologies with browser-based development, such as Oracle Transactional Business Intelligence (OTBI). I’ll choose APEX as my base action, which automatically adds the properties Application Names and Workspace. The value of these properties will be derived from page content while in App Builder.
I’m also going to add a property for the commit message, which will be sent as an input for the utility execution. You could add properties for things like the webhook message, release name, or package name. These properties will then be available to use in your webhook function. Property values can be auto-determined based on page content with a CSS selector or Javascript, or defaulted with some value.
Sending a Webhook
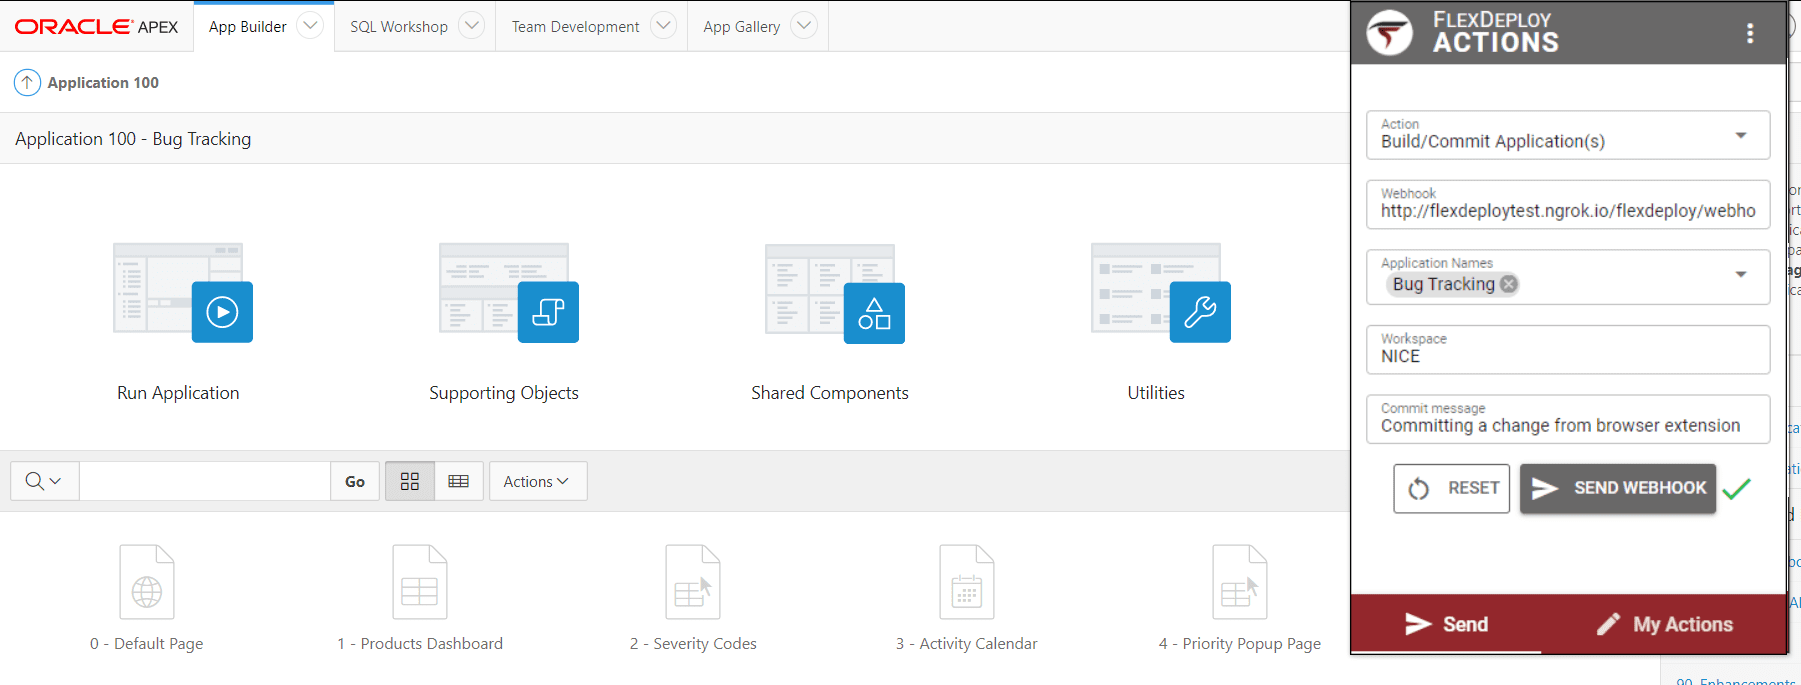
From here, we can navigate to the send tab and fill in the details to send the webhook. Since I’m already in App Builder within my Bug Tracking application, the extension was able to auto-set the Application Names and Workspace. I can now fill in the commit message and send the webhook.
Viewing the Results in FlexDeploy
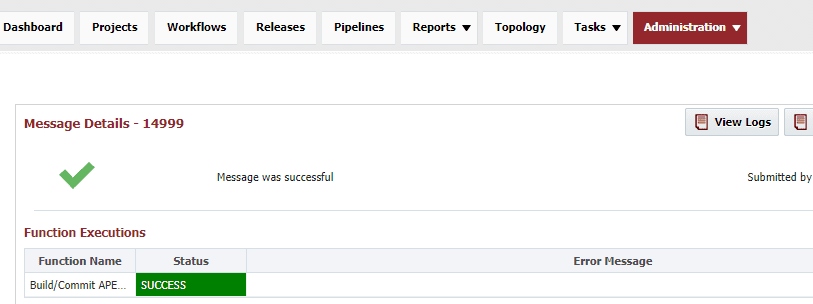
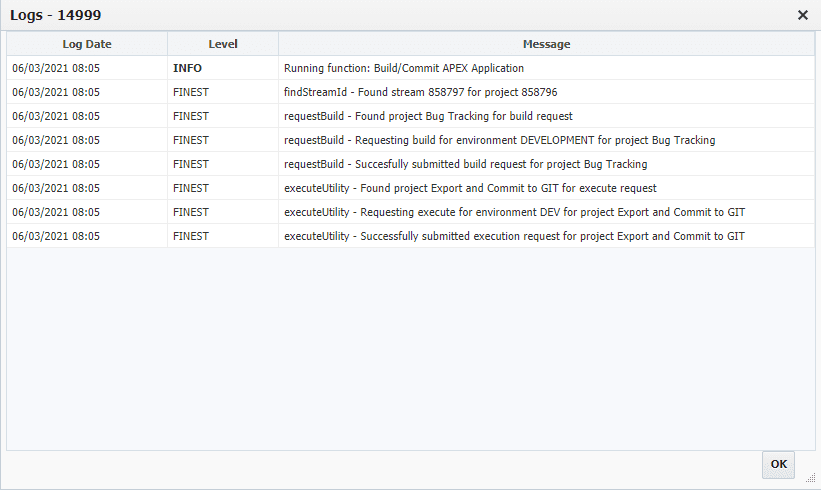
After sending, when I go back to my FlexDeploy instance and view the webhook message, we can see the webhook was received and triggered the build with a commit to git. It’s that easy!
Conclusion and Further Reading
In this blog article, we went through how to initiate an APEX application build and commit to source control utility from App Builder utilizing the new FlexDeploy browser extension.
Hopefully this example gave you an idea of how you can use this to automate one more piece of your day-to-day process. This was one of many potential use cases for the browser extension. Check out the resources below for more ideas.


