This is the second article in our series on what makes FlexDeploy a perfect fit for PeopleSoft. Now that you have an overview of FlexDeploy as a platform, we can dive into the specifics of FlexDeploy’s support for PeopleSoft in more detail.
- FlexDeploy Loves Oracle PeopleSoft: DevOps for PeopleSoft
- FlexDeploy Loves Oracle PeopleSoft: Migrate PeopleSoft Projects
- FlexDeploy Loves Oracle PeopleSoft: Deploy SQR and Other Files
- FlexDeploy Loves Oracle PeopleSoft: PeopleSoft Release Automation with Approvals and Notifications
In this blog article, we’ll walk through the core components of FlexDeploy that enable the basics of build and deployment automation for PeopleSoft. I will demonstrate how to build and deploy customizations and migrate PeopleSoft Projects across any number of environments.
FlexDeploy’s PeopleSoft blueprint automates and accelerates the setup and configuration of FlexDeploy. Throughout this blog, you’ll see all of the configuration details that the PeopleSoft blueprint created automatically.
Plugin
FlexDeploy plugins provide operations to do all the heavy lifting needed to manage various technologies. The PeopleSoft plugin includes the following operations to build and deploy PeopleSoft Application Designer projects:
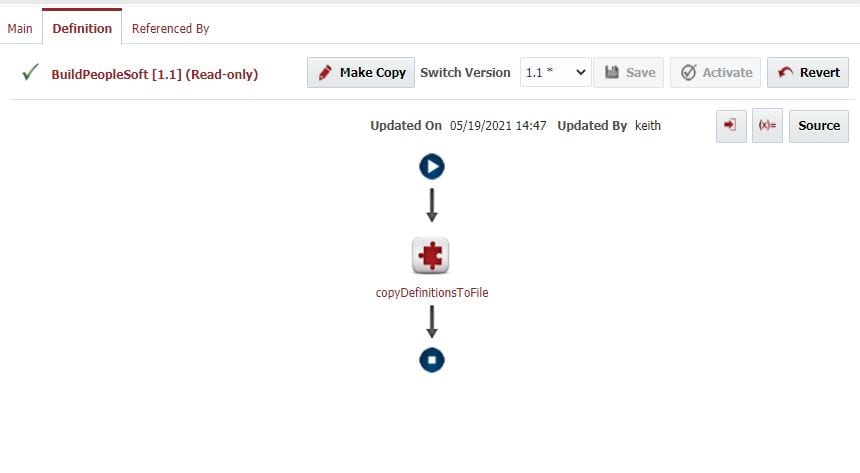
Copy Definitions to File: This operation enables a way to export the objects from a PeopleSoft Application Designer project to an XML file. This operation can be used to extract the objects after the development has completed in the Application Designer (Development) environment.
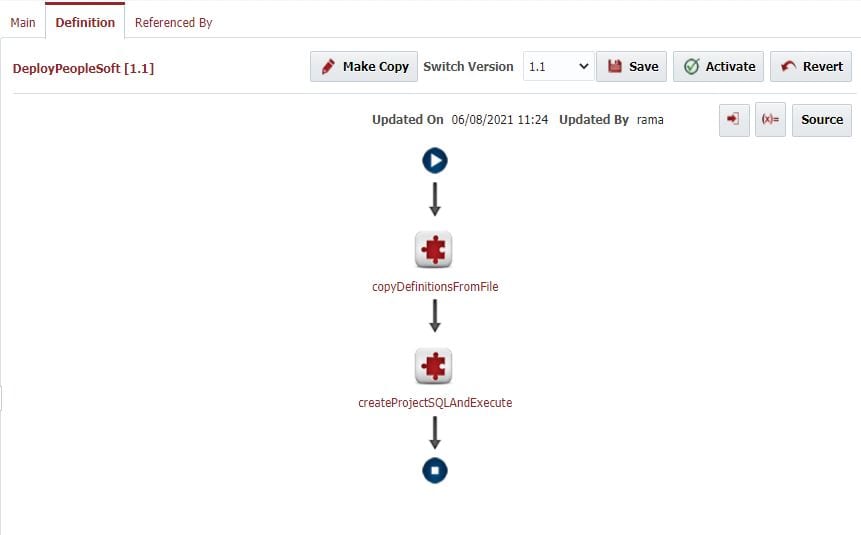
Copy Definitions from File: This operation enables you to import the objects from a file (previously exported using the above operation) to a target PeopleSoft environment. It provides an option to copy just the definition. This allows you to copy the definition first, back up the objects using the copy definitions to file operation, and then copy from the file again with the changes.
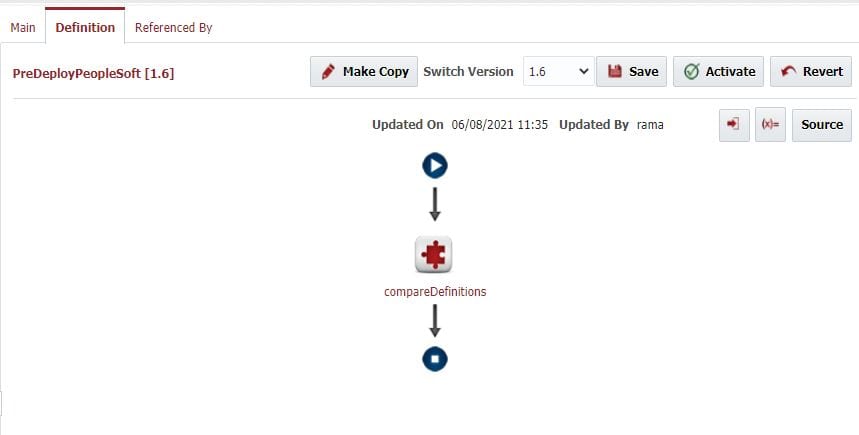
Compare Definitions: This operation allows you to compare the definitions between the exported file and database, making it easy to compare and review changes before migrating to the target environment.
Build Project SQLs: This operation creates the file with SQL statements that need to be executed on a target environment. This has the option to execute the SQL file after generating it.
Workflows
FlexDeploy workflows are a sequence of steps to implement the build or deployment for a technology into a single environment. There are several types of workflows, but here we’ll focus on the build workflow and the deploy workflow.
There is typically one build workflow and one deploy workflow for a technology. Since they are parameterized and executed in the context of a project and a target environment, they are reusable. In other words, the deploy workflow is aware of the context it is being executed in and utilizes project and environment properties defined and managed externally.
Workflows, while powerful, are generally very simple since they are task oriented and make use of FlexDeploy plugins, which understand the underlying technologies and provide functions to perform the heavy lifting. The PeopleSoft build and deploy workflow are both composed of a single step.
The build workflow is responsible for collecting the project and its objects from the Application Designer and packaging it into an artifact, which is then versioned in FlexDeploy’s internal artifact repository. The build workflow uses the copyDefinitonsToFile operation from the PeopleSoft plugin.
The pre-deploy workflow is an optional step and can be executed to do any pre work. In this case, we’ll make use of this to compare the project objects against the target environment and add the report to FlexDeploy’s report tab, so that we can review before approving the deployment.
The deploy workflow is responsible for taking a versioned artifact and “installing” it into the target server. This workflow uses copyDefinitonsFromFile to copy the project and objects to the target environment. After that, we will create the SQL file using the plugin operation and execute it. You can optionally add a step to take the backup of the objects before copying.
Unless we later want to add logic to implement specific use cases, we would never need to change these workflows for PeopleSoft. It is a one-time setup. However, do not confuse a workflow with the orchestration of deploying across a series of environments. To do that we’ll use what is called a pipeline in FlexDeploy, which will be covered in a future blog article.
Topology
The topology defines the physical and logical architecture, environment-specific properties, and connections to other tools.
The logical architecture is defined by environments and instances. Examples of environments would be Development, Test, QA, and Production. These are logical in that they are not directly bound to any technology. An instance is specific to a technology, but not any specific environment. For example, if you have a single PeopleSoft HCM, which has physical installations in many environments, this is represented by a single logical FlexDeploy instance. Alternatively, if you have separate PeopleSoft installation stacks for North America and Europe, these would be represented by two instances.
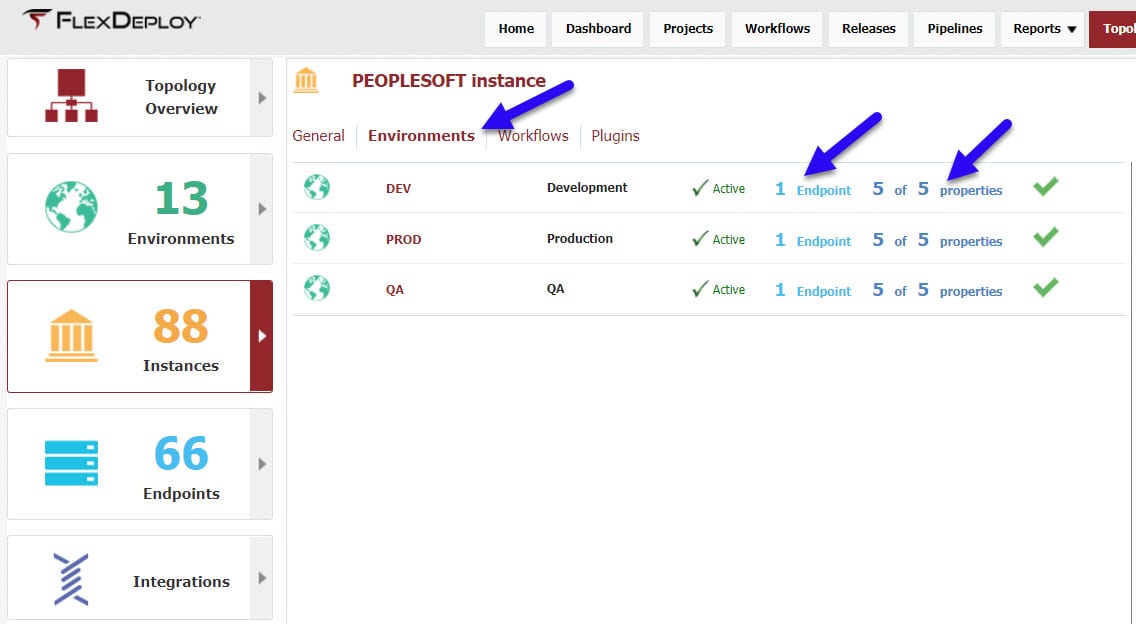
For this blog article I’ve created three logical environments. The environments are simply a name without any additional configuration, other than to indicate builds will be performed in Development, and the other environments (QA and Production) are for deployments only.
I have also created one logical instance, simply called PeopleSoft.
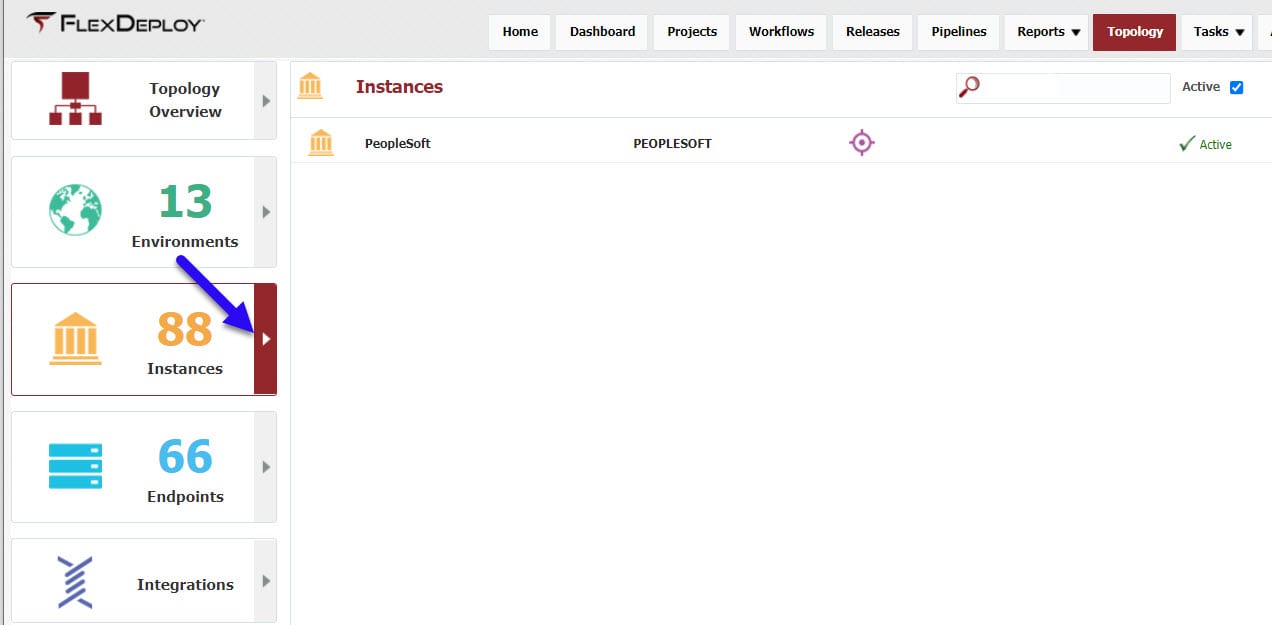
This instance is associated with the three environments where I have PeopleSoft installations.
Now we will define the physical architecture, which is represented by what are called Endpoints. An Endpoint is an SSH connection to a physical server. The definition of the endpoint, in addition to a name, includes the host address, credentials (password, or SSH keys), a directory that resides on the host which can be used by FlexDeploy at runtime, and the location of the Java Developer Kit (JDK) installed on that server.
Last, we will map our logical architecture to our physical architecture. Here, in the PeopleSoft instance, we can map Endpoints and configure the details for that environment.
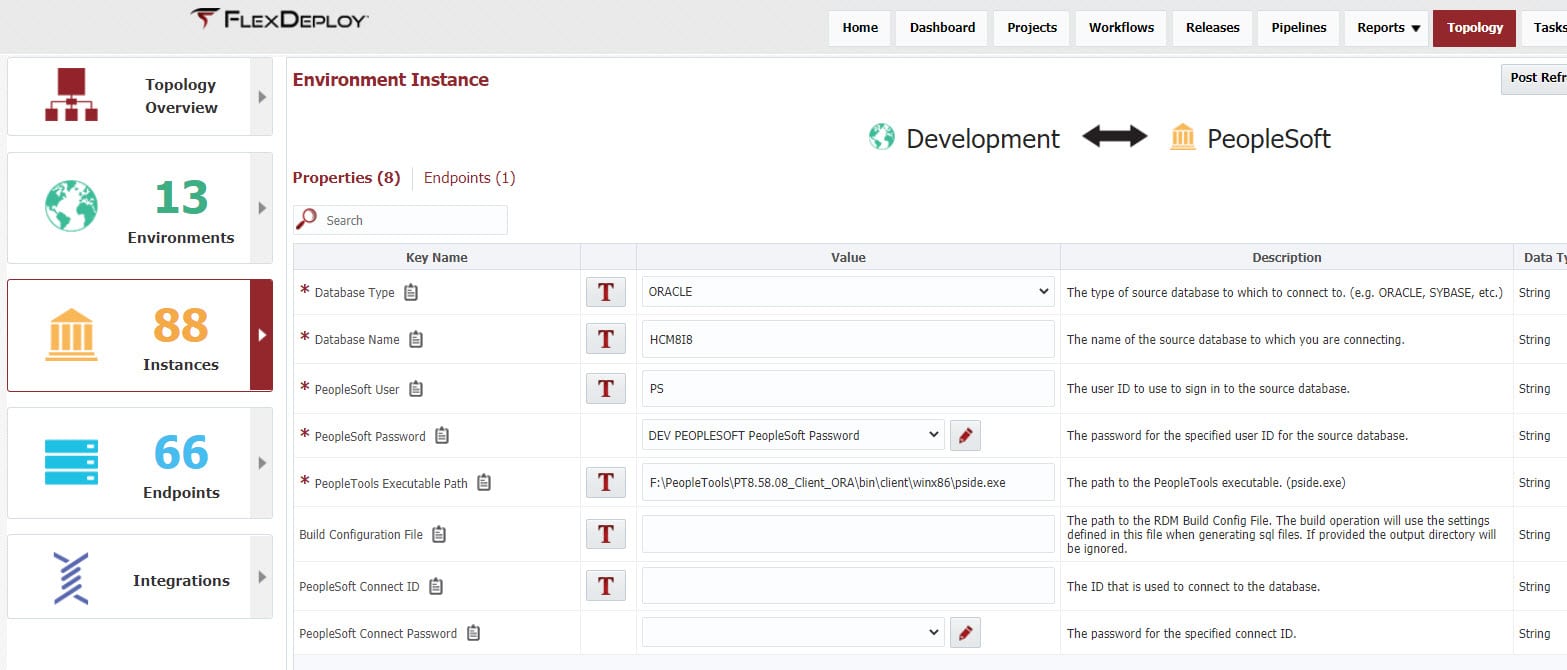
Since I mapped the PeopleSoft instance to the build and deploy workflows we created, the required and optional environment-specific properties appear by clicking on the Properties. I provide the values for these properties, as applicable for my Development PeopleSoft installation. There are 5 mandatory properties and 3 optional properties, including database type, database name, username and password to connect. I’ve completed the same endpoint mappings and property value configuration for the PeopleSoft instance for QA, and Production.
That concludes the topology configuration.
Projects
The next step in the configuration is to define one or more projects, which will be bound to the workflows and instances. We’ll create a project in FlexDeploy for each project in the Application Designer. Once we create the first project, we can simply copy the project and add configurations to make additional projects.
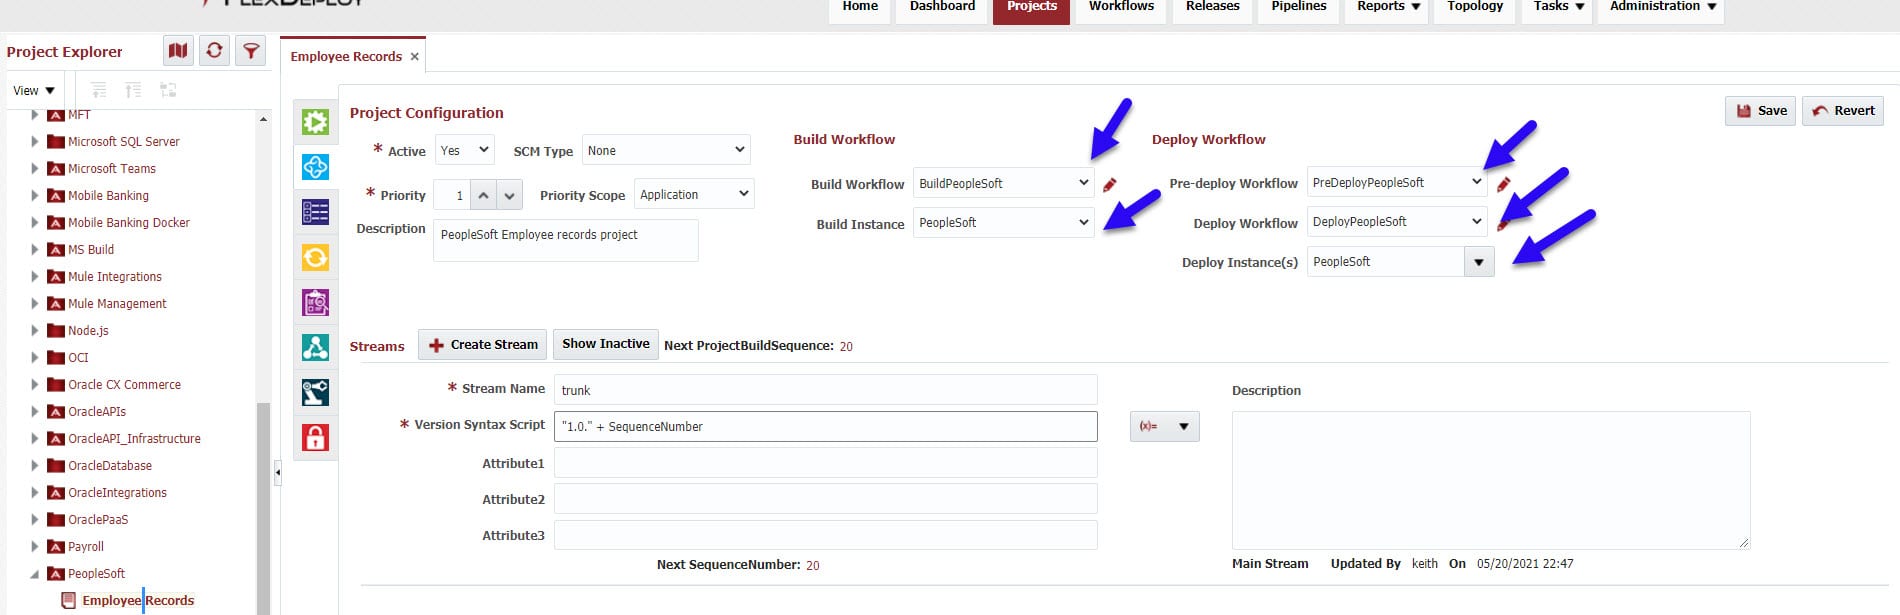
For this blog article, I’ve created one project called Employee Records.
In the Projects screen, right click on the Application under the Project Explorer to create a Project. This is a Standard project and you can leave all other defaults.

After creating the project, I’ve set the following configuration on the Configuration tab.
- Build, Pre-Deploy, and Deploy workflows as we created.
- Build and Deploy instances as we created in the Topology section.
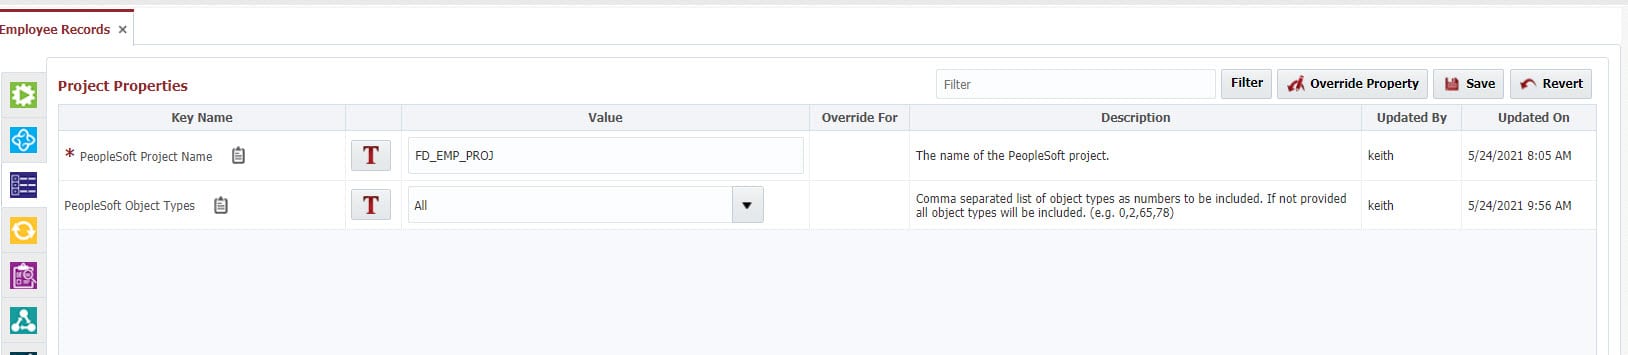
Now let’s switch over to the Properties tab. The only required property at the project level is the Project Name in the PeopleSoft Application designer. We can set a groovy script to use the FlexDeploy Project name if the FlexDeploy and App Designer Project names match.
That completes the project configuration.
If you use FlexDeploy’s blueprint functionality, all the configurations we’ve covered up to now would be created and configured for you.
By using FlexDeploy, organizations establish an automated and repeatable process for building, packaging, and safely deploying code, APIs, meta-data changes, and data migrations from development through test to production environments.
Build Project
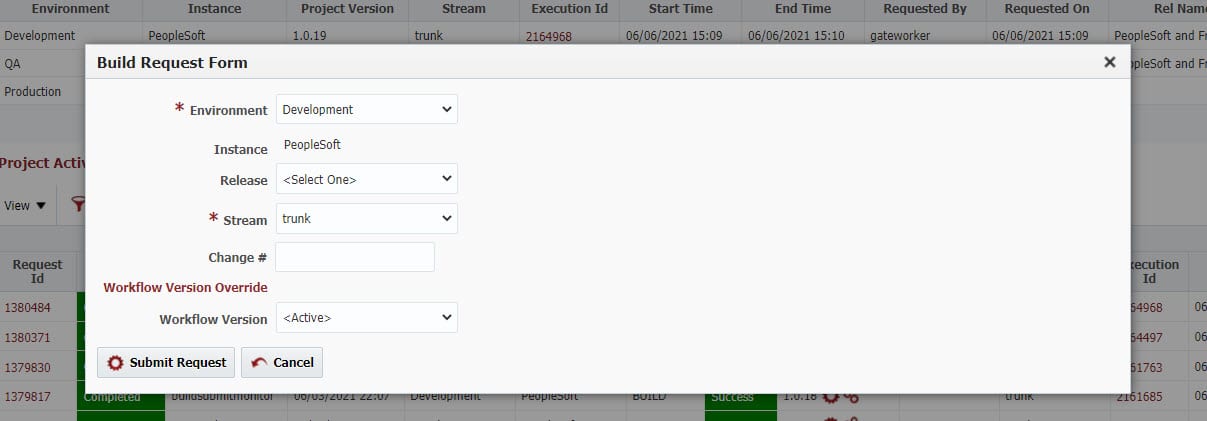
Now that we have completed the configuration, we are ready to execute builds and deployments. To do this, we switch to the green Execution tab, and click on the Build button. Normally, most of the deployments happen automatically using a Release Pipeline, which will be covered in a later blog. In this case, we’ll run ad hoc executions.
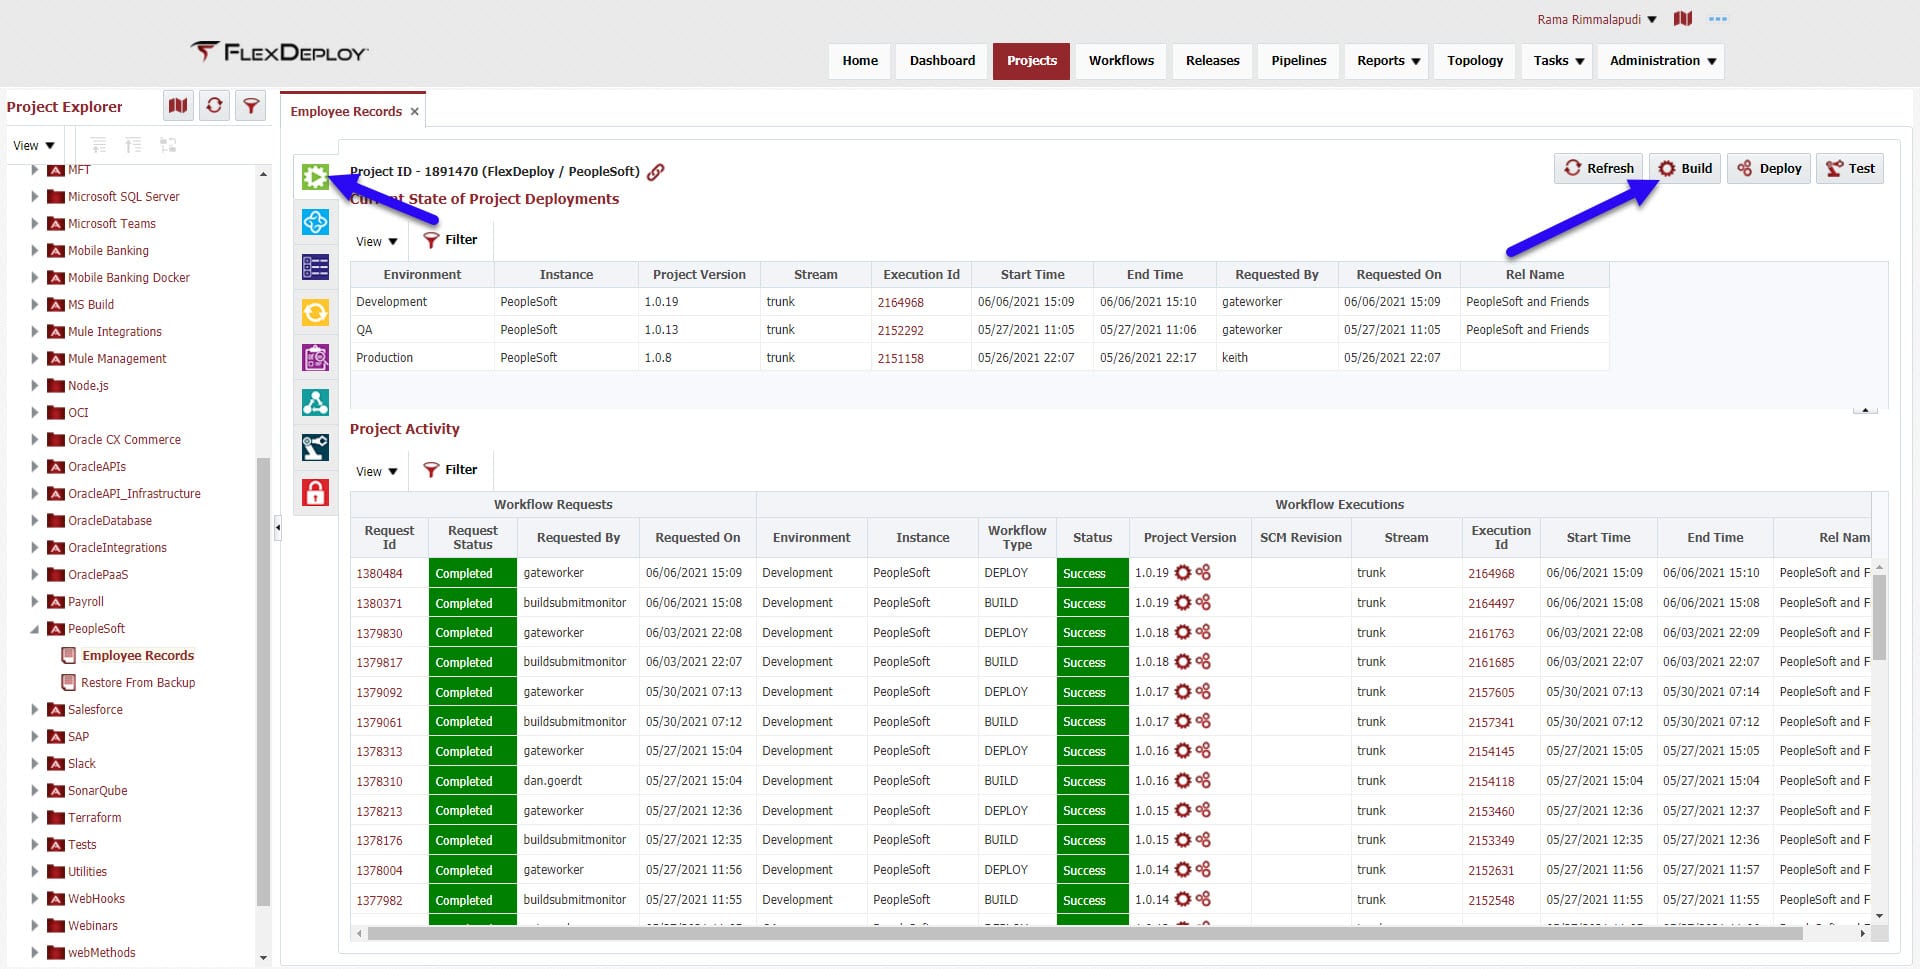
Once we initiate the build request we can see the execution being processed.
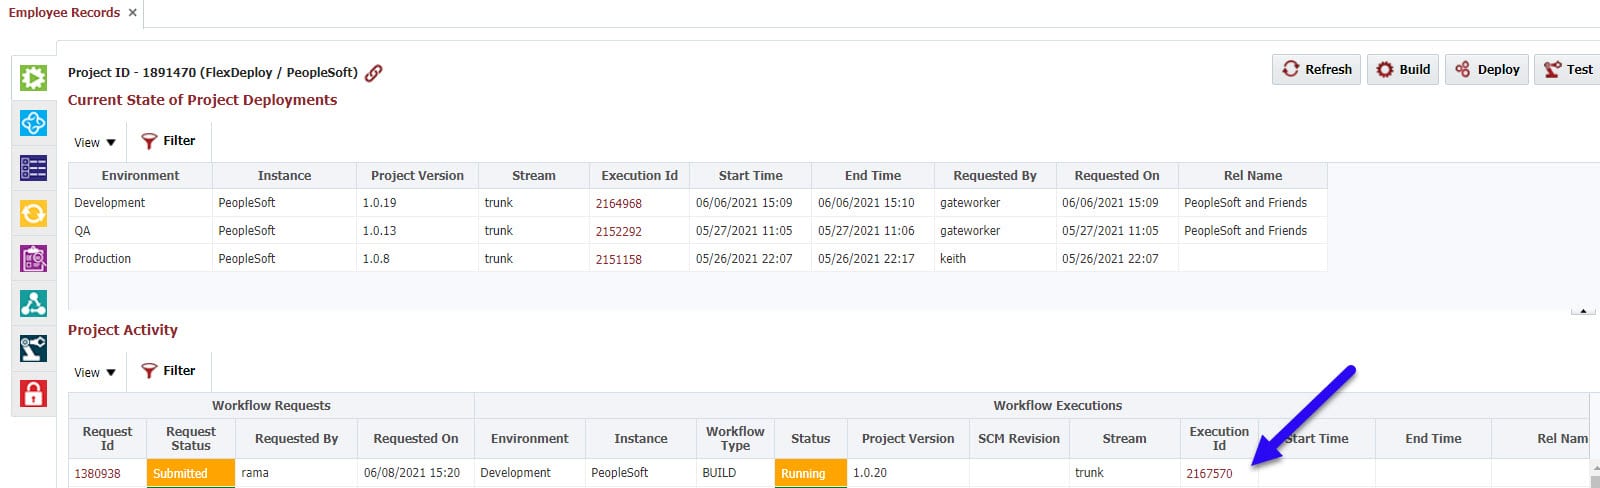
By clicking on the execution id, I can view the execution of the build workflow.
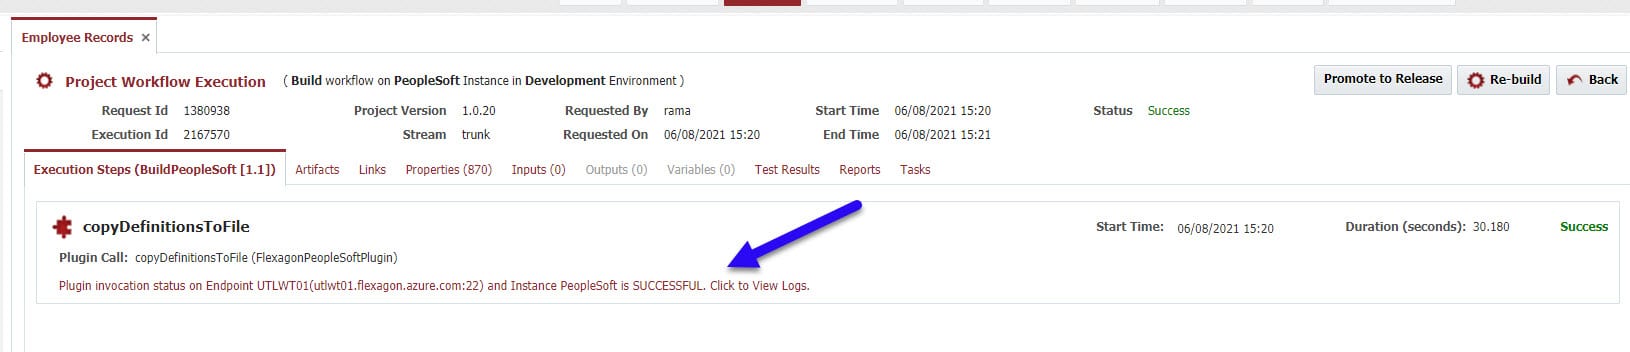
The workflow step copies the source for the project from the Application Designer database. This has a single step for the build workflow, which executes on the endpoint mapped to the PeopleSoft instance in Development. This step adds the artifact to FlexDeploy’s artifact server and stamps the version.
Once the build is complete you will see the generated artifact on the Artifacts tab. The resulting artifact is versioned in the artifact repository using the generated Project Version number.

Deployments
If I go back to the main execution screen, I can submit deployment requests to deploy the project version into one or more environments. I click on the “three gear” icon next to the project version number of the completed build request that I want to deploy. This will launch the deployment request form for the project.

Here I select the target environment and submit the request. I can select the Pre-deploy checkbox to do the comparison we previously defined and view the report.

When drilling into the execution we see the steps of the deployment workflow. We can drill into the logs for the deployment to see the command that was executed and the resulting output. The first step in the Deploy is to copy the project objects from the file to the target PeopleSoft instance. The second step is to generate the needed SQLs and execute them on the target database.
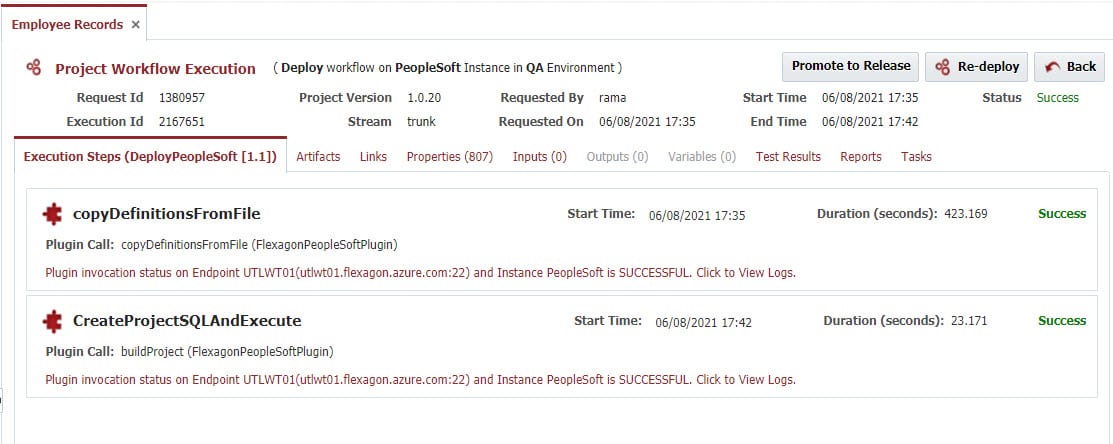
We can further customize by adding a step to take a backup before starting the deployment. This would allow us to rollback if needed.
Conclusion
In this blog article I have shown the steps to configure FlexDeploy as an automation solution for building and deploying Oracle PeopleSoft Application customizations so you can easily migrate PeopleSoft projects across various environments. Configuration included one time setup for workflows, topology, and projects. This core setup positions us for making ad-hoc requests to assemble source changes from the PeopleSoft Application into any environment.
In the next two blog articles we will build on this solution to deploy SQR and other files and then transform the ad hoc process into a continuous delivery machine, enabling faster delivery with efficiency using FlexDeploy’s release automation.