In this blog article, we will be looking at how the release management of Oracle Data Integrator Deployment Archives has been simplified by FlexDeploy. ODI 12.2.1 introduced a new concept called Deployment Archives, which acts as a vehicle to promote various objects from one environment to another. While the introduction of Deployment Archives gives users an opportunity to incorporate CI/CD best practices into their development process, the implementation of an automation solution is left to the end user.
ODI users can set up a custom automation solution leveraging these Deployment Archives but there is so much more to managing these deployments across an enterprise topology than meets the eye.
A comprehensive solution must provide full visibility into what is deployed where, and by whom. It supports a lifecycle which incorporates approvals and scheduling. It provides a platform for build and deployment of diverse technologies which are used across enterprises, large and small. With over 100 plugins and integrations to applications, middleware platforms, and other tools, FlexDeploy provides just that.
We will be using the partialBuild operation from the FlexDeploy File plugin to package the Design and Runtime counterparts of a Deployment Archive into a single artifact, and the applyPatchArchive operation from the FlexDeploy Oracle Data Integrator plugin to apply the correct archive type (Design or Runtime) to a target environment.
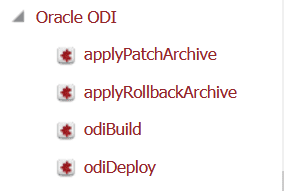
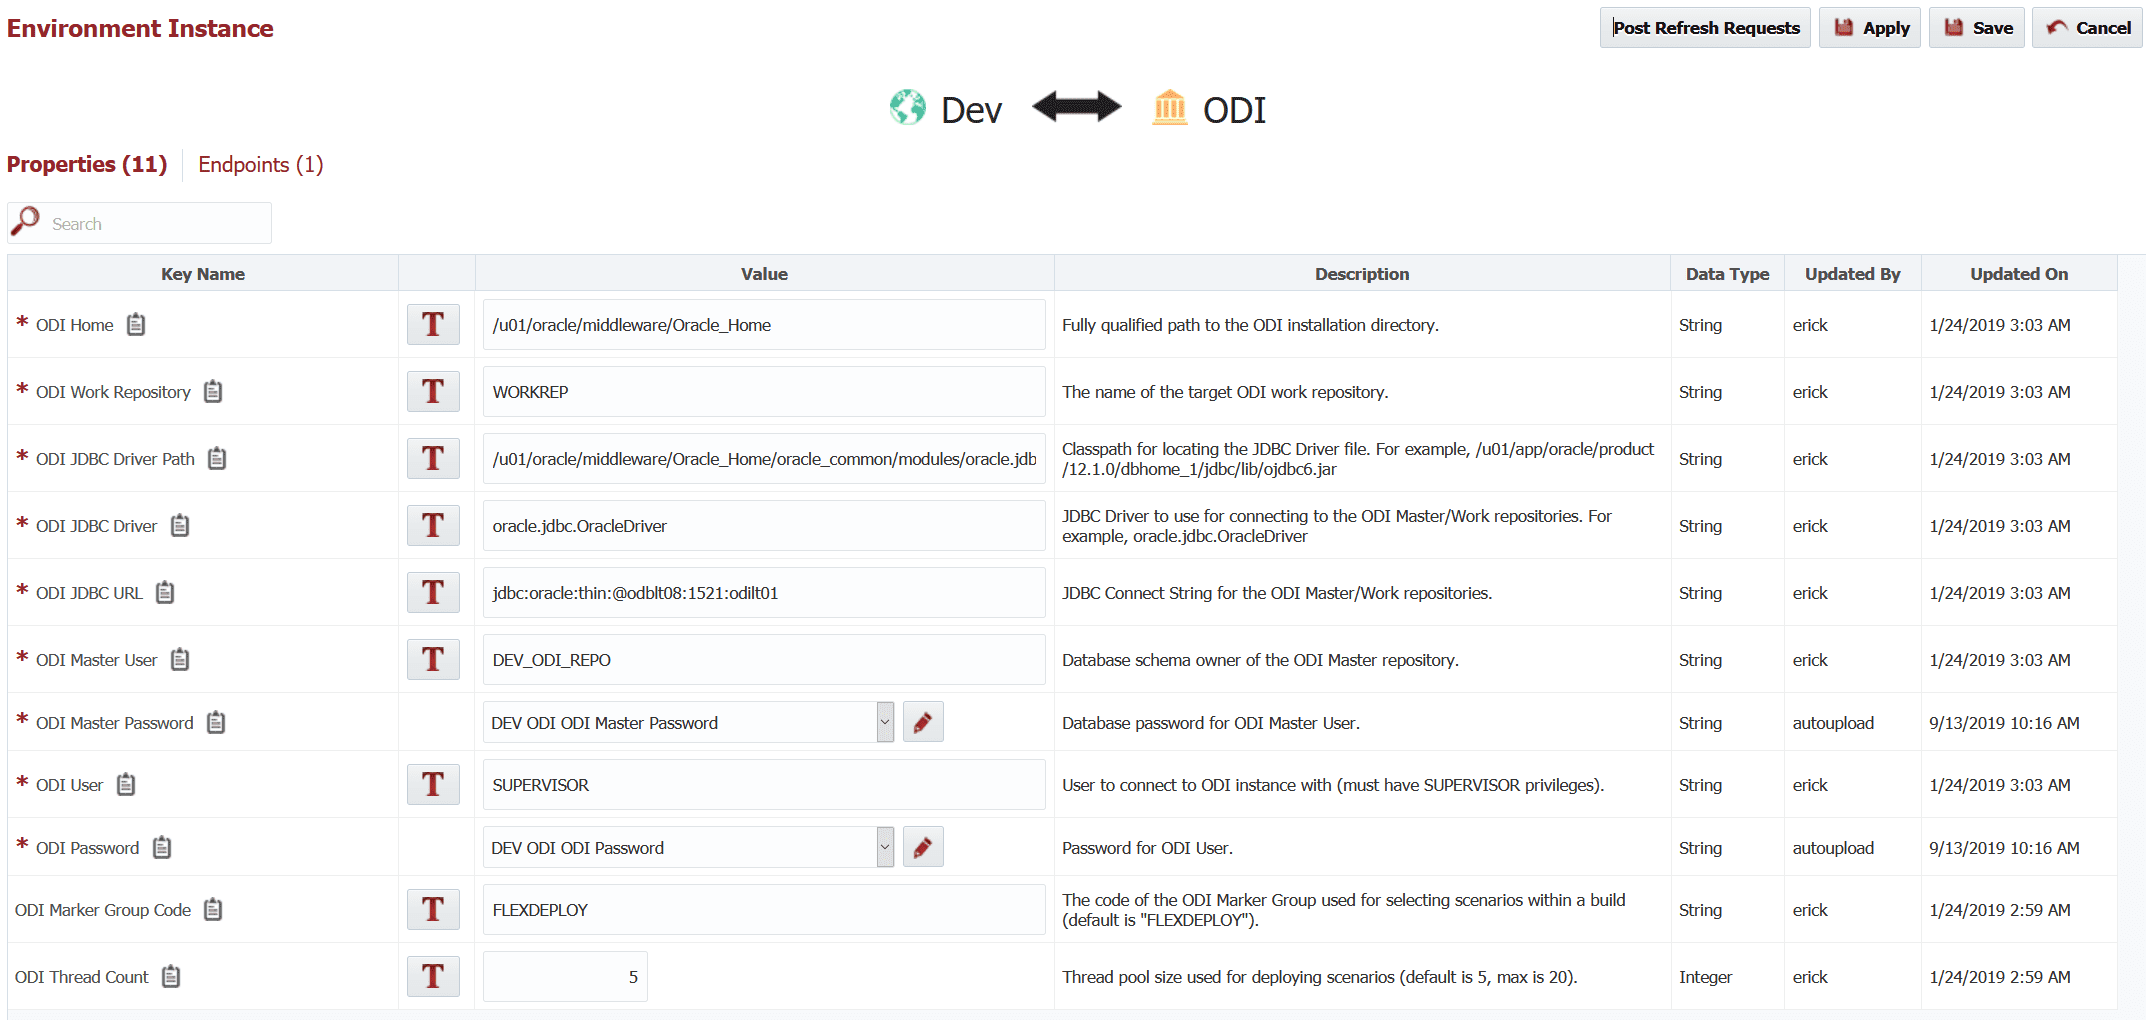
The FlexDeploy Oracle Data Integrator plugin provides properties for each environment instance, which will provide FlexDeploy with the details required to connect to the repositories. These properties include values like ODI Home Directory, the JDBC Driver path, etc.
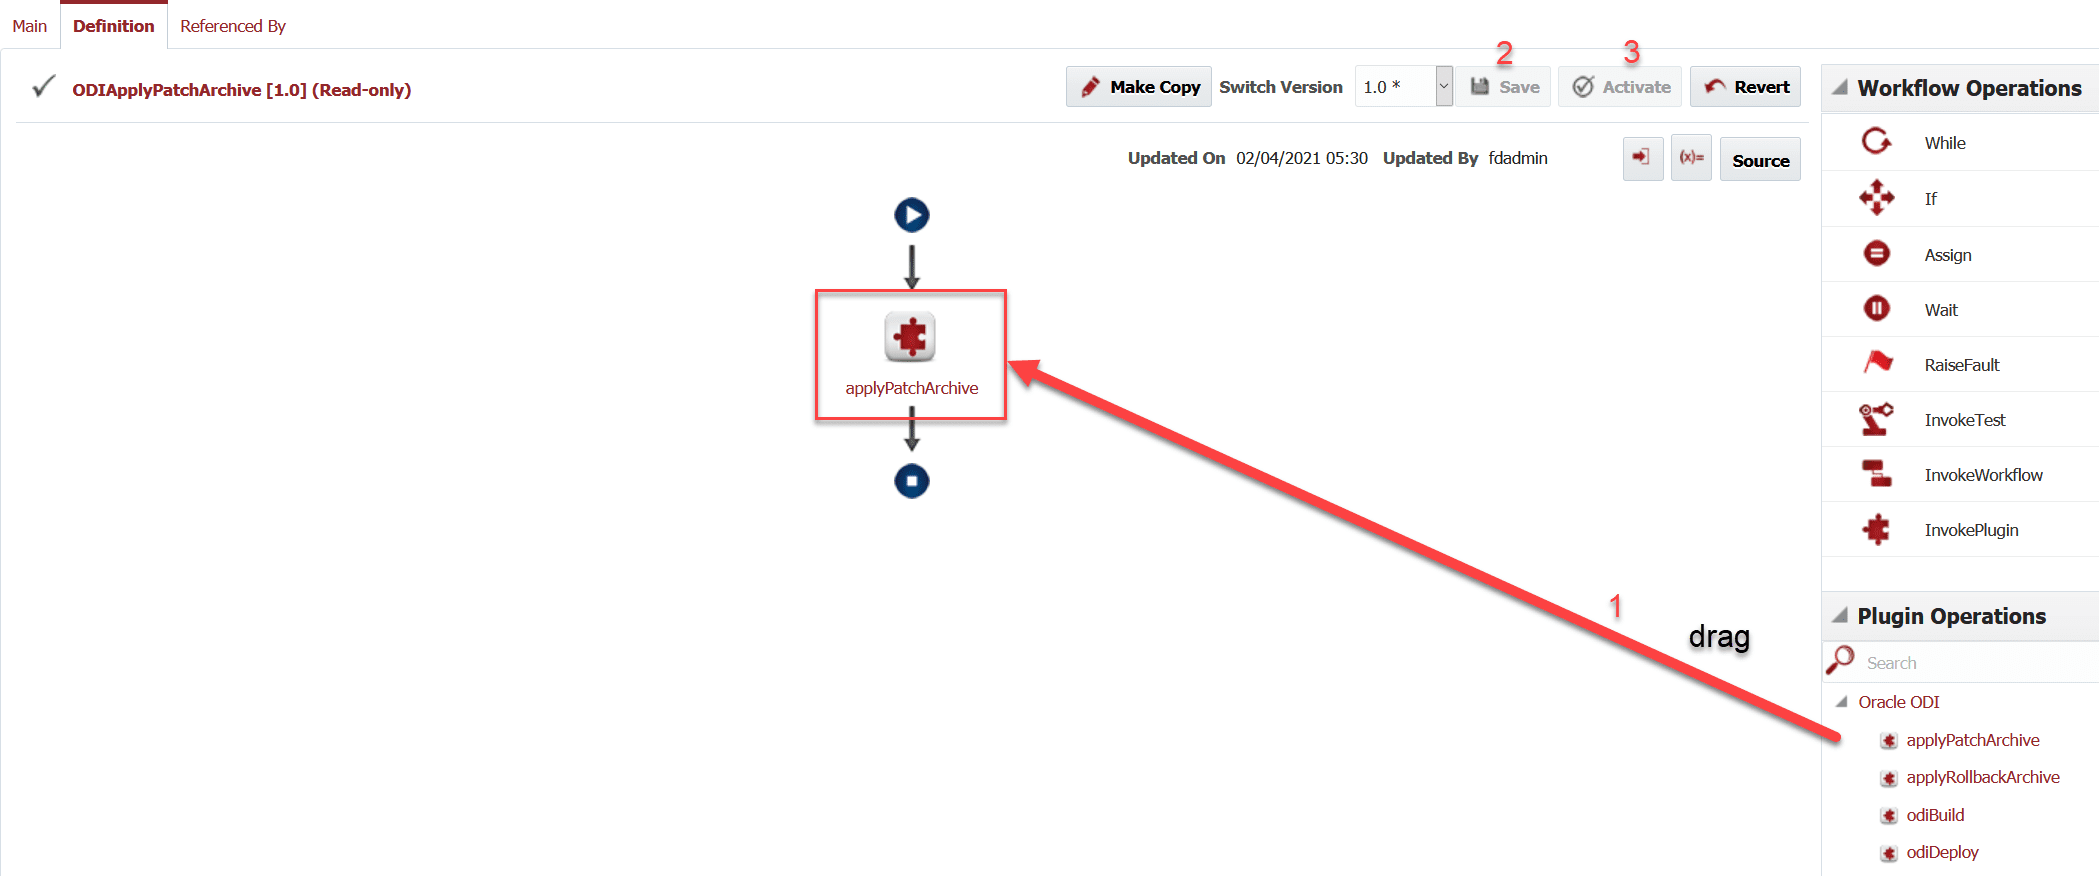
The first step within FlexDeploy is to create the simple Build and Deploy workflows invoking the plugin operations described earlier. First, we will create a workflow called SavePatchesAsArtifact and drag in the partialBuild operation from the File plugin. Next, click Save and then Activate.
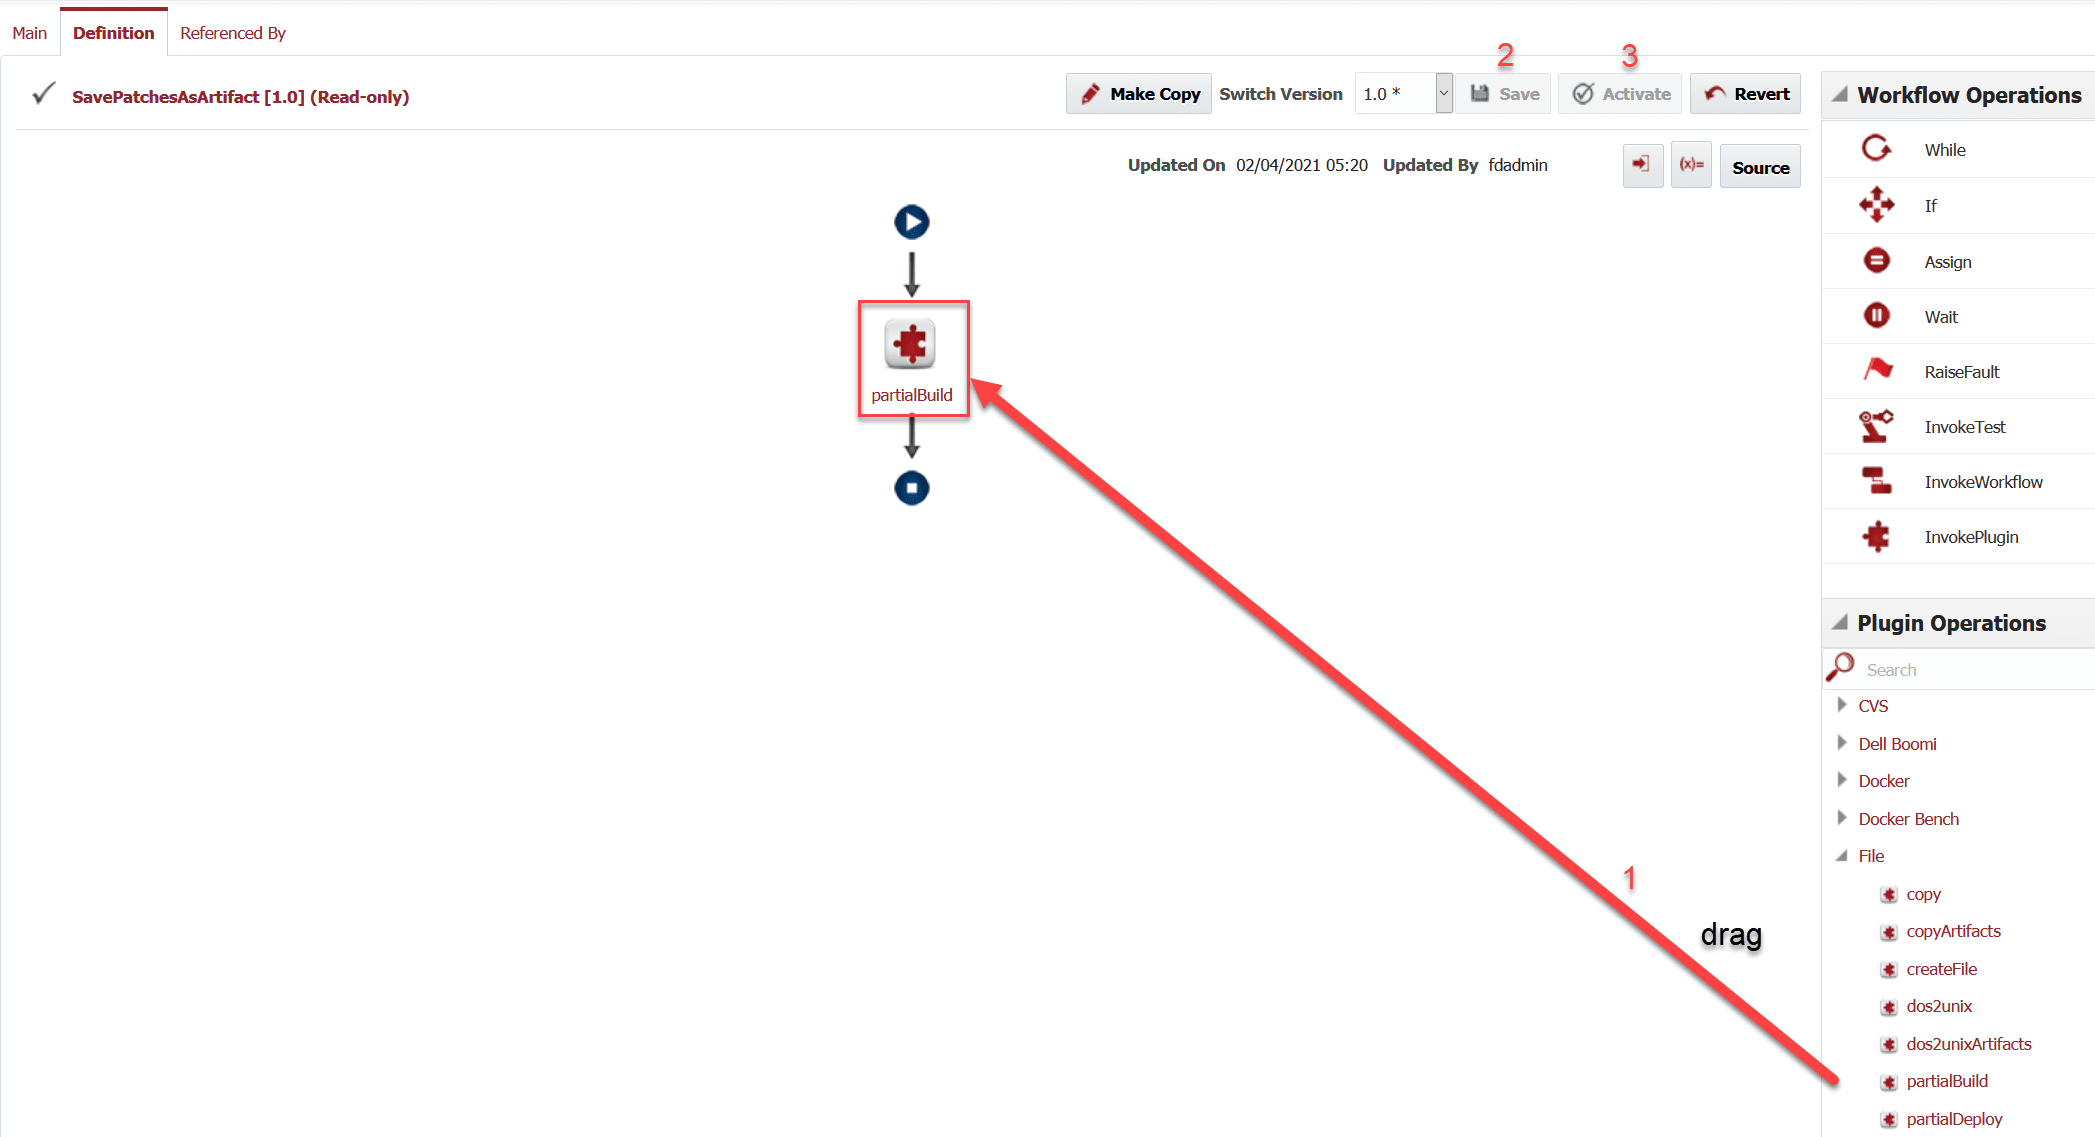
The same steps will be repeated to create the ODIApplyPatchArchive workflow.
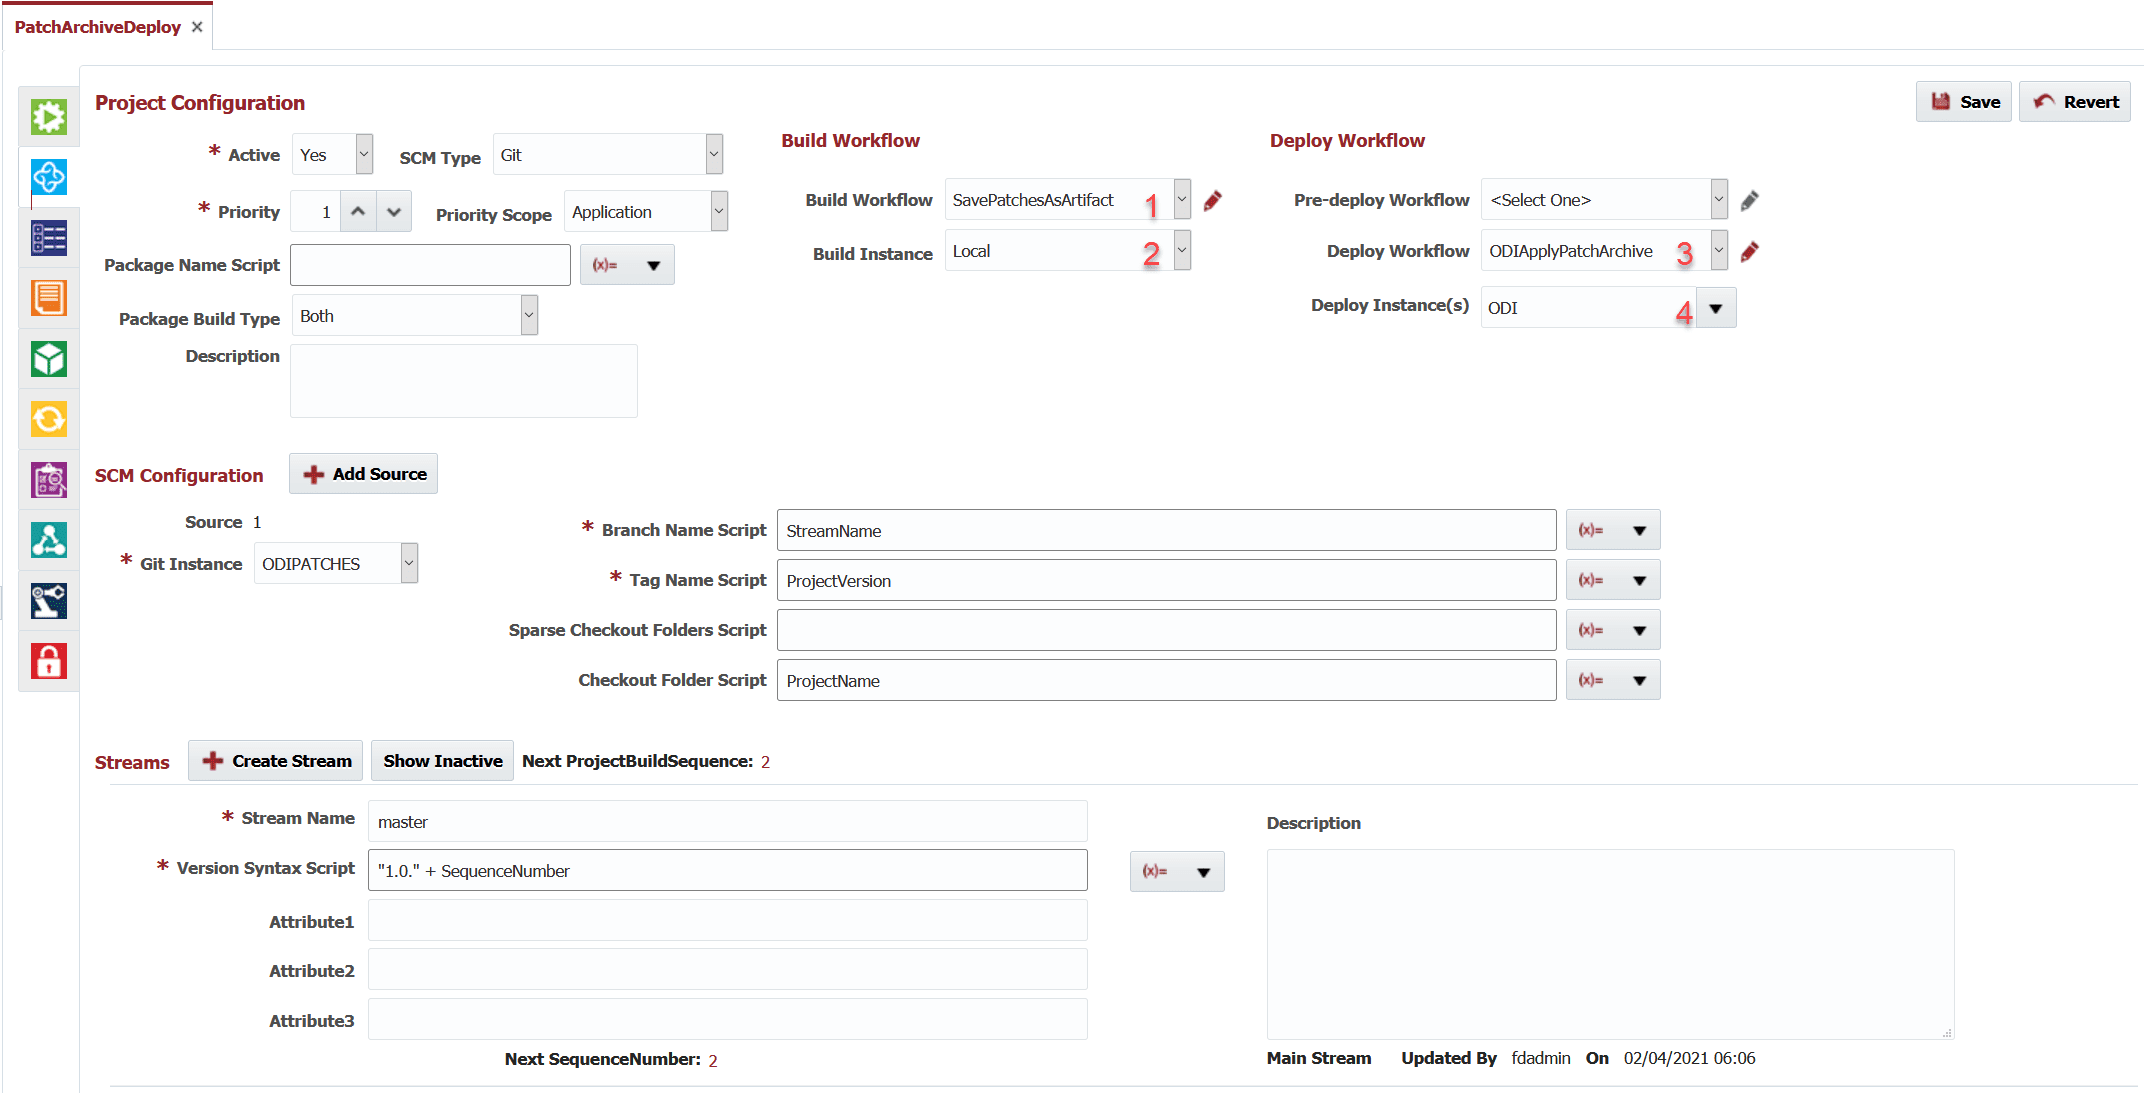
The next step is to associate the workflows created to the build and deploy instances that will be used. For this example, we will associate the SavePatchesAsArtifact workflow to the Local instance.

And associate the ODIApplyPatchArchive workflow to the ODI instance.
The next step is to configure the necessary properties on the instances for each environment they are mapped to. In our case the Local instance is mapped to the Build environment and the ODI instance is mapped to the Development environment. We enter the configuration values to connect to our ODI repository.
We must also map each environment/instance combination to an endpoint, which in this case defines the physical server hosting the ODI Software.

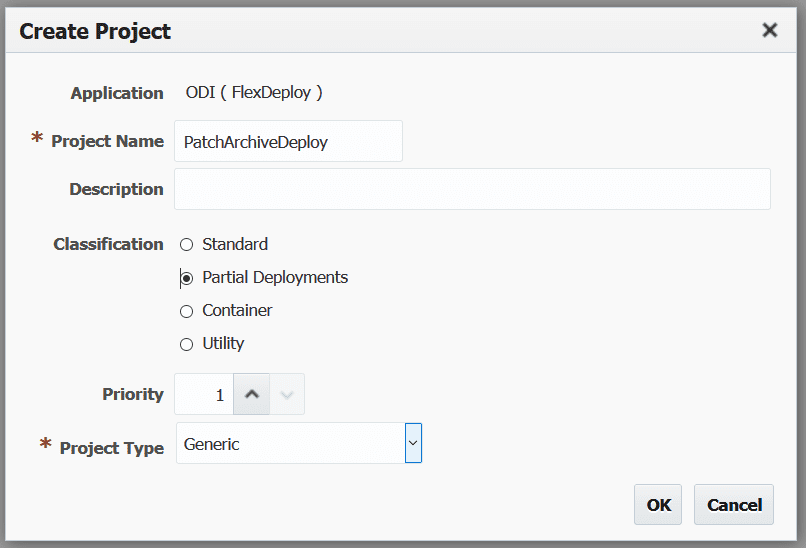
We can now create and configure a partial deployment FlexDeploy project of the Generic type. It is important to first understand the difference between Standard (otherwise known as “full deployment”) and Partial Deployment projects. The main difference for a Partial Deployment project is the ability to select a subset of files for build and deploy operations. This enables the user to select only the desired files from a remote source for build and deployment.
The last step in the configuration is to point the project to the workflows and instances created above.
It should be noted that the environment, instance, endpoint, and workflow configuration is a one-time setup. Many projects can be created utilizing the same workflows created above.
Navigate to the Project Files tab and click on the Populate from GIT button to pull the list of Deployment Archive files available in our git repository.
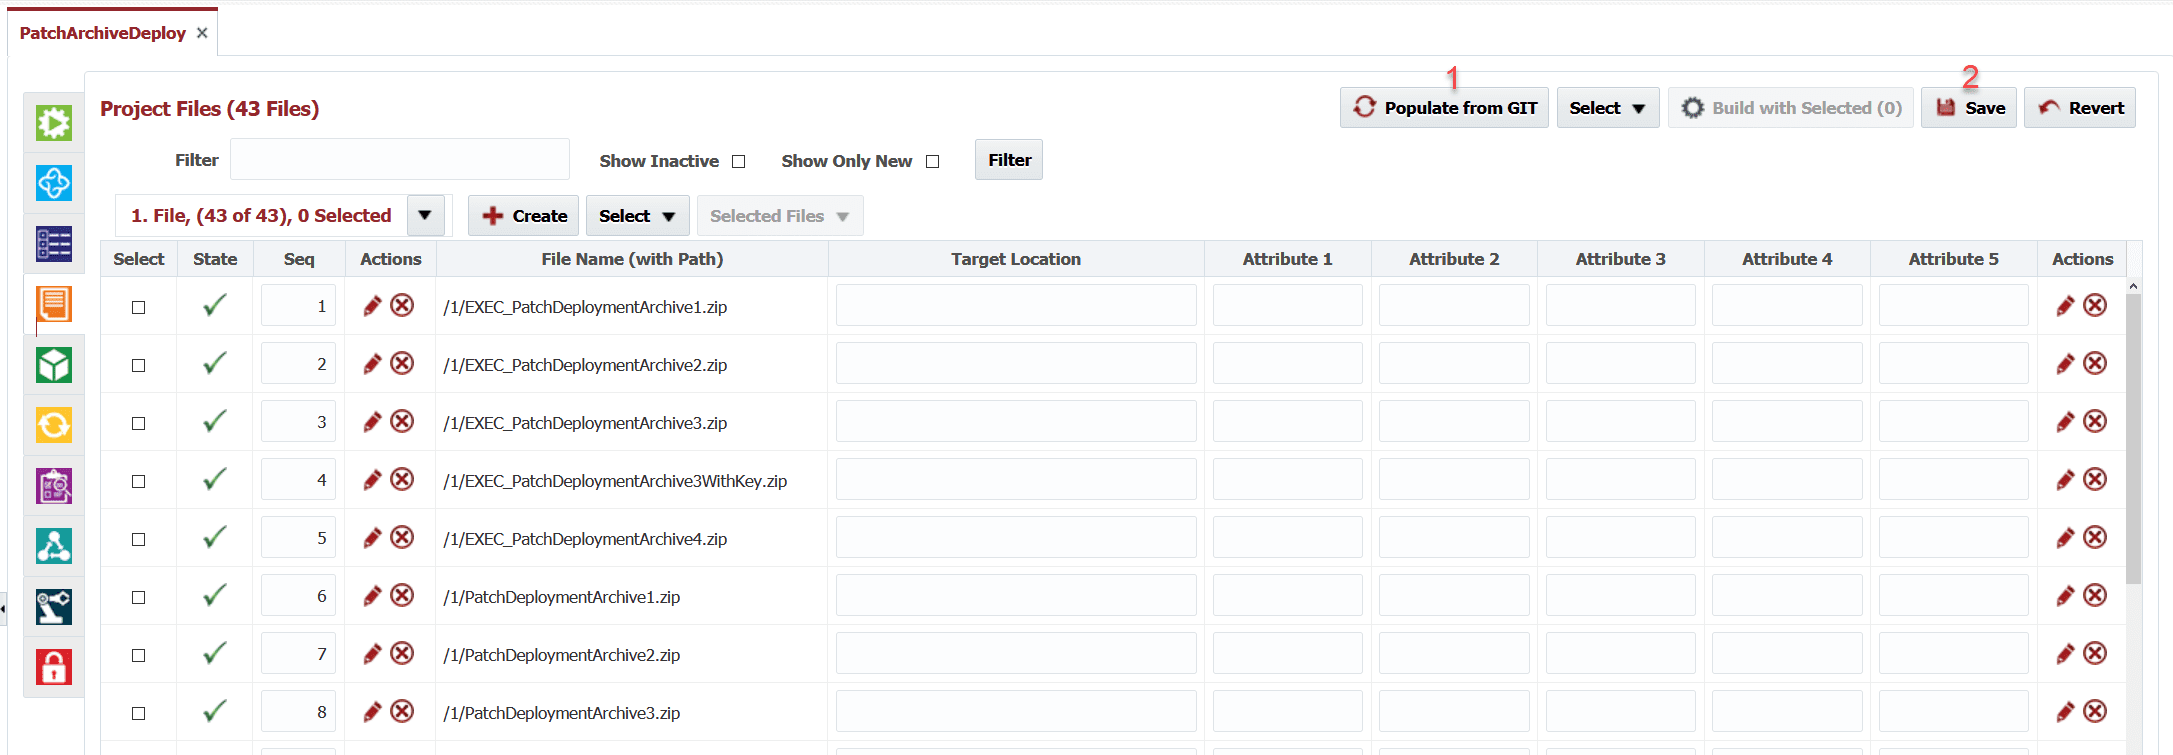
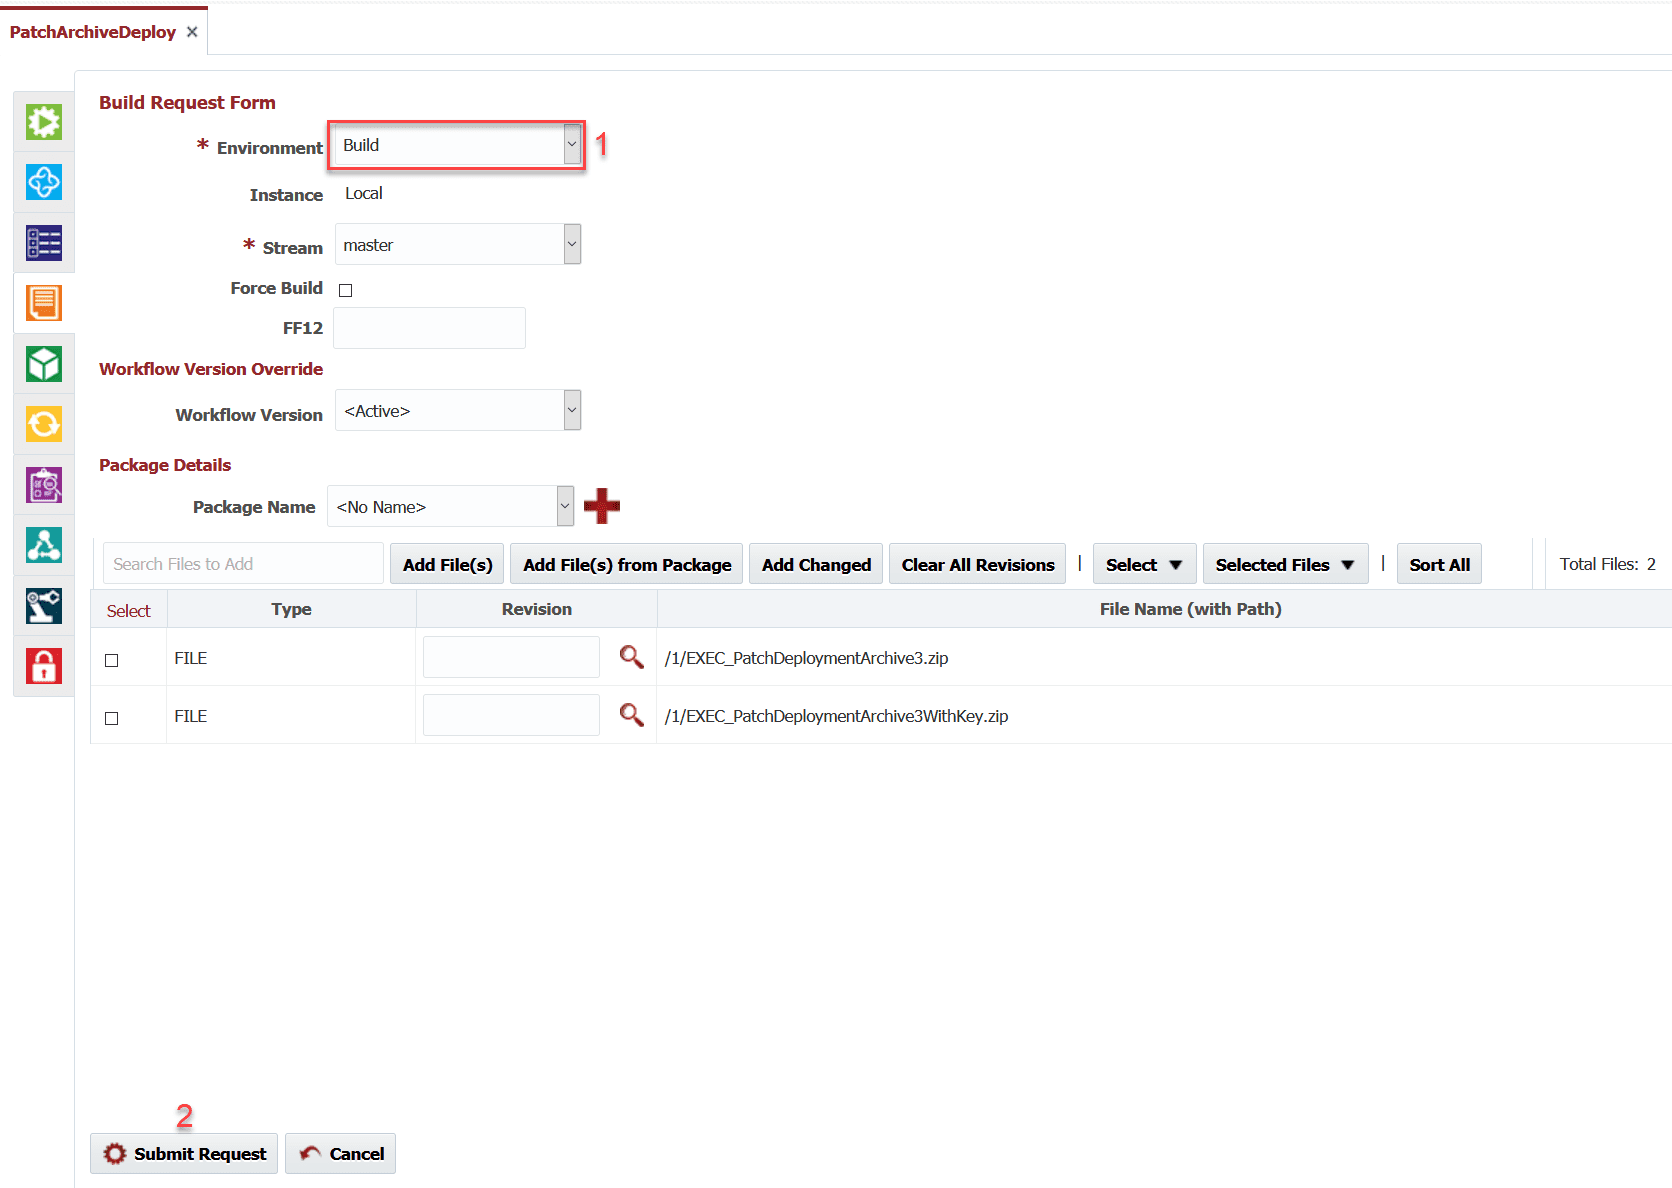
Now, select both the Design and the Runtime counterparts of the Deployment Archives from the list files and click on the Build with Selected button to go to the Build Request Form. Select the build environment and click Submit Request. A new request will be created with a status of Submitted. Once complete, the status will change to Completed.
By using FlexDeploy, organizations establish an automated and repeatable process for building, packaging, and safely deploying code, APIs, meta-data changes, and data migrations from development through test to production environments.
Click on the Execution Id of the Build to see more details of the request.

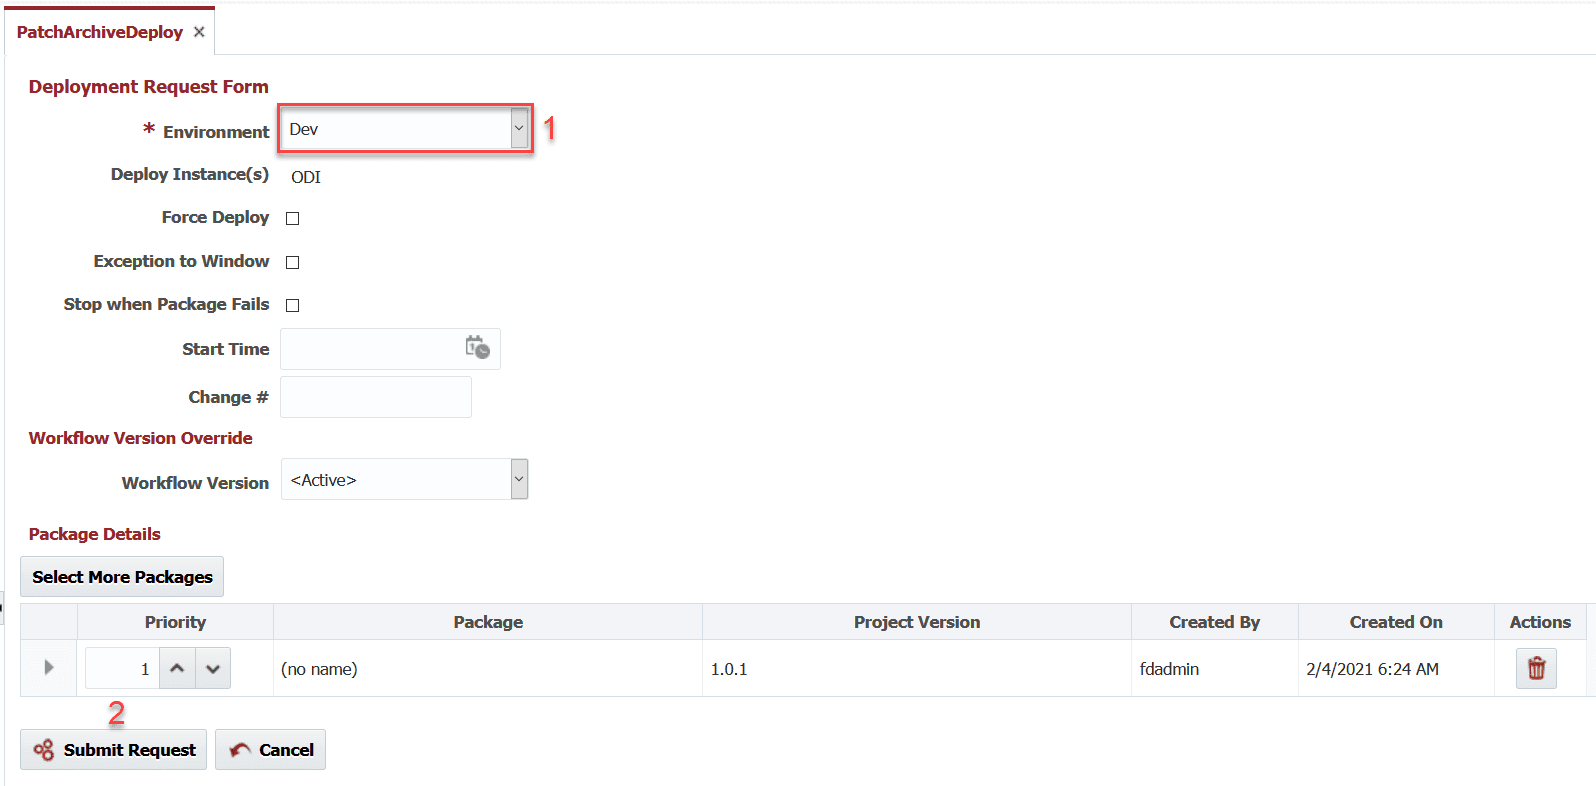
Now that we have a successful build, we can request to deploy it to the Development environment. On the deployment request form, select the project version (produced by the build) to deploy, and the environment to deploy it to. Just like for the build you can click on the Execution Id to view execution details.
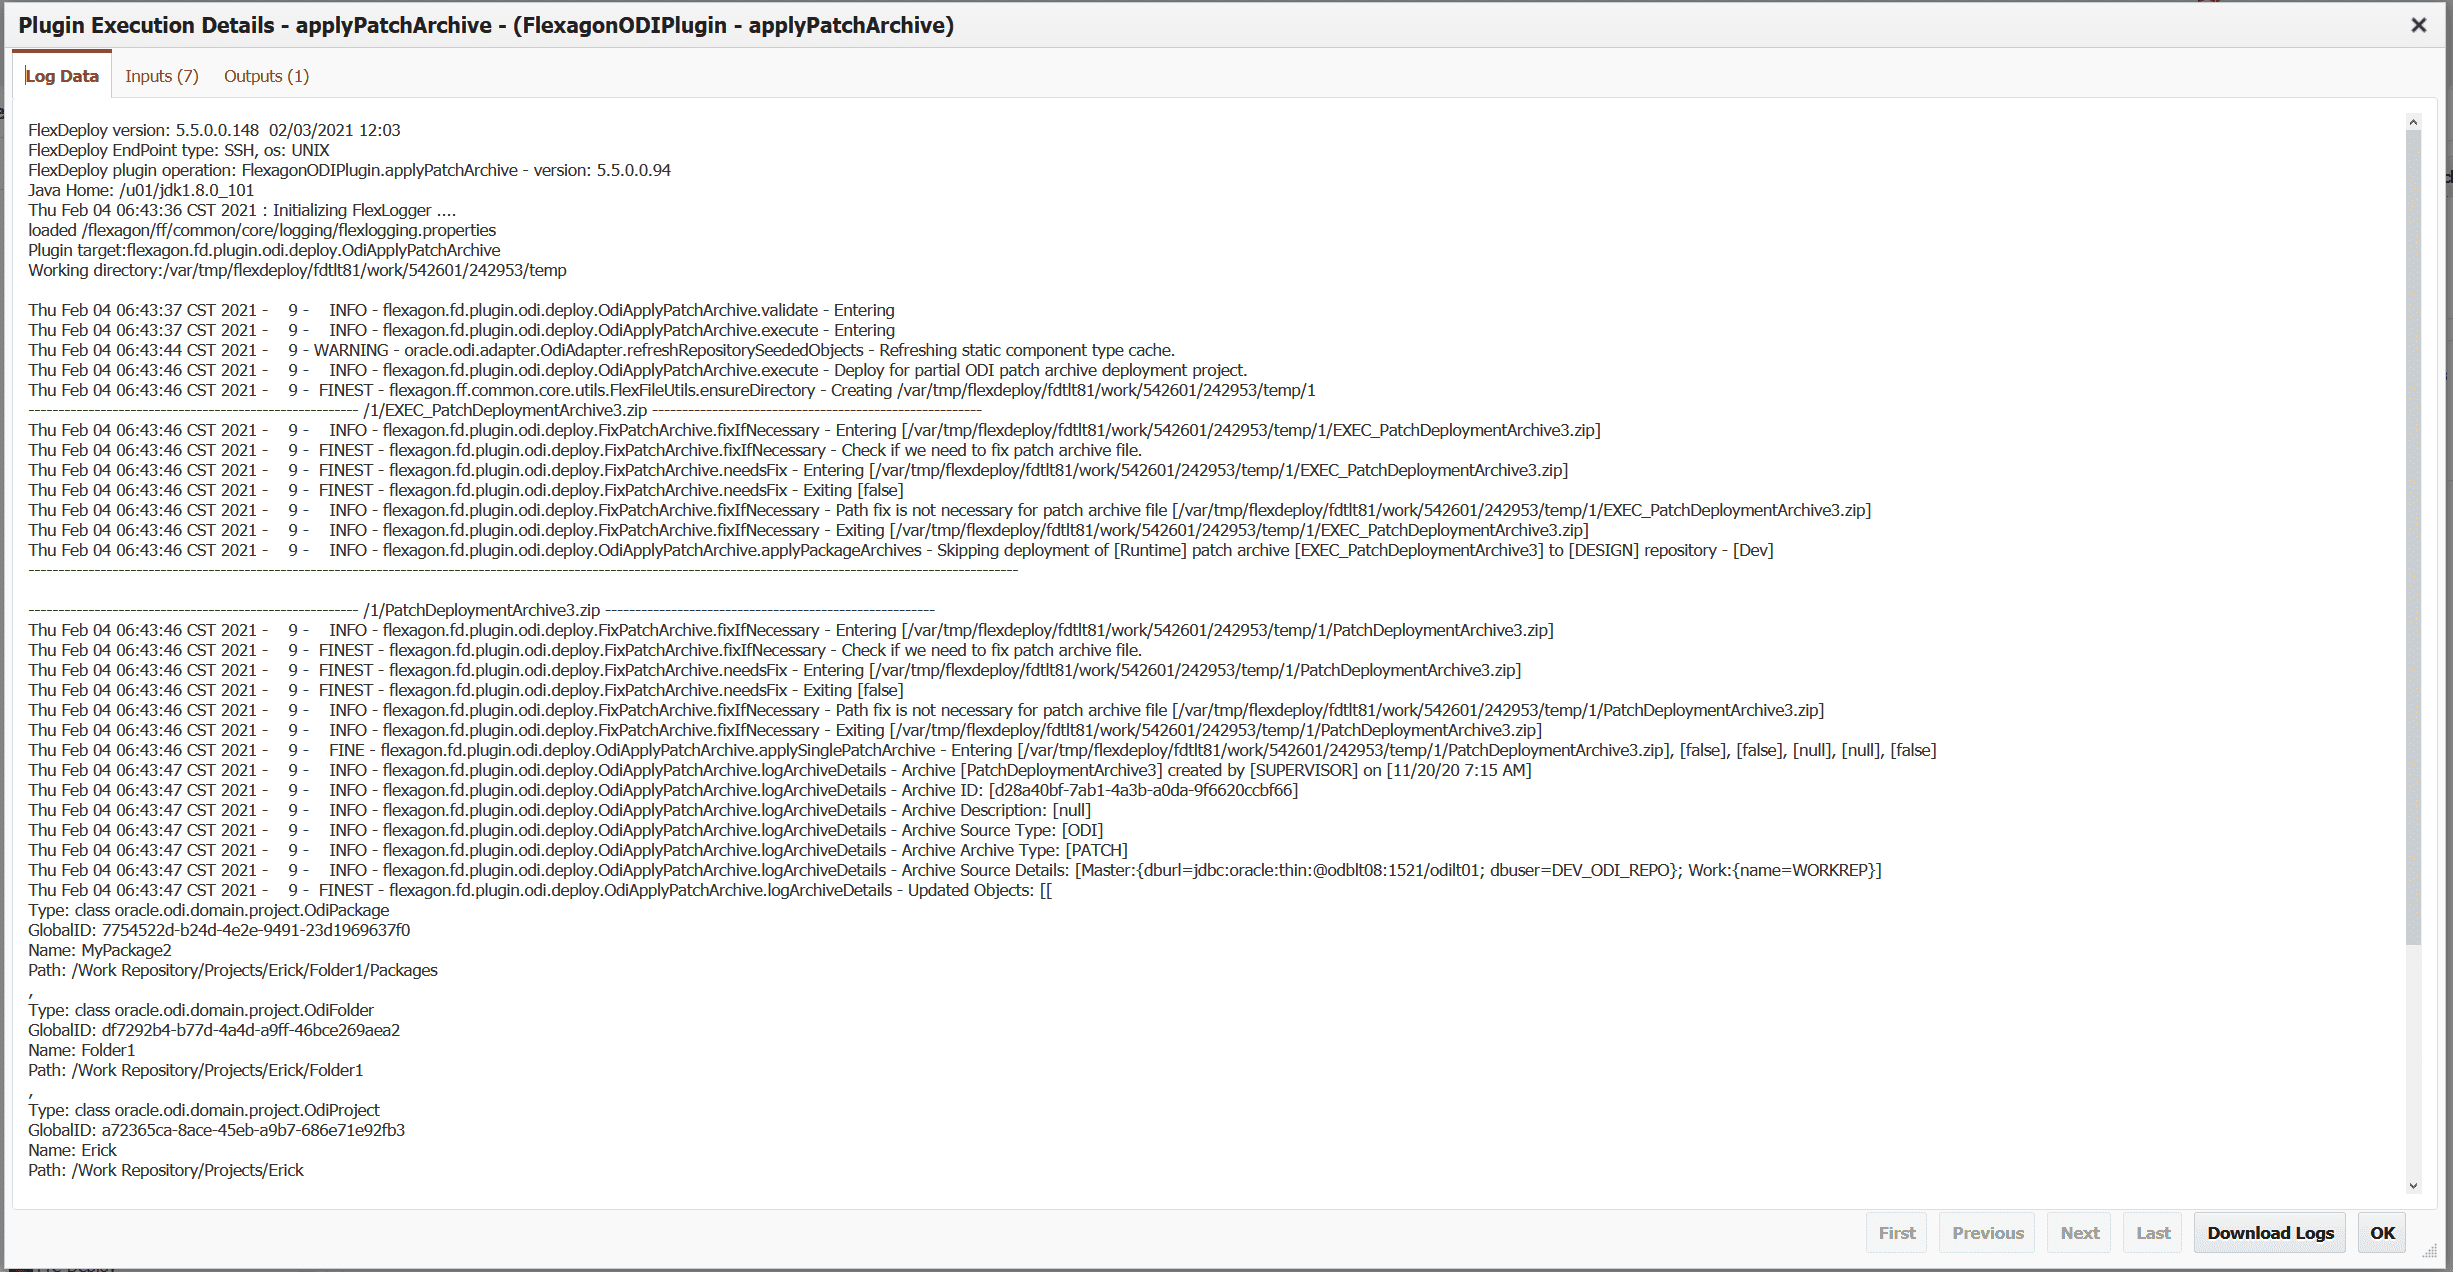
Note that the plugin has the intelligence to select the Design of Runtime patch to be deployed according to the type of environment as can be seen in the plugin operation logs below. This greatly enhances the performance when deploying the same archive set to multiple environments.

In this blog article, we were able to show the configuration of an Oracle Data Integrator project and FlexDeploy’s use as a tool for organizing and deploying your Patch Archives to various environments according to their type.


