

Do your developers have to manually deploy every time they finish a task? Is manually starting tests when tasks are ready wasting your developers precious time? Do your developers have to do tedious, manual tasks every time something changes in another system? You can solve these problems and more with custom gates!
FlexDeploy 5.2.0.3 added support for Custom Gates. Custom Gates use a Groovy script to determine the status of a gate. This allows for nearly endless possibilities including custom integration with any third-party tool that has an API. Today we are going to be looking at an example using the status of a Jira ticket to determine the outcome of a gate.
Begin configuring the pipeline
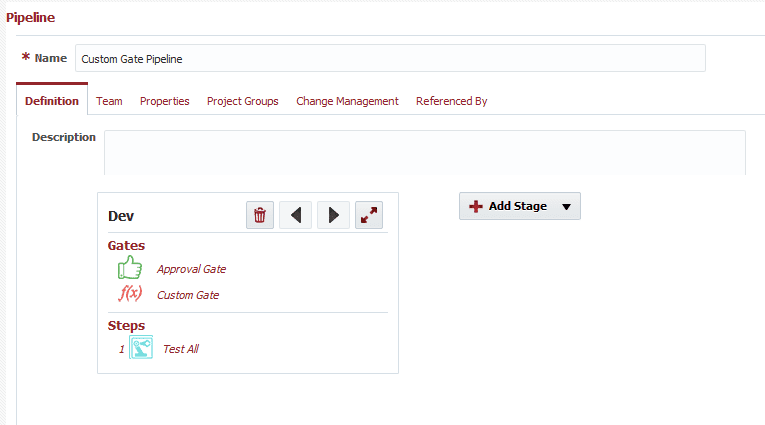
First we are going to create a new pipeline. Call it whatever you like. Then we can add a stage, i.e. choose an appropriate environment.
 Next we’ll need to add a pipeline role for our approval gate. Click teams and add a role. I’ll call it Custom Gate Role and add FD Administrators to it. You can give them all 4 permissions.

Now head over to the definition tab and expand the stage so we can add the approval gate. The reason we need to have an approval gate is to give us time to set the issue number on the stage. Set the role as the one we just created. Next add the custom gate. Choose a name. Now we are ready to configure the gate.
Customize the gate
To get started input the following script into your custom gate:
def approvedStatus = "<status-to-approve-on>";
def closedStatus = "<status-to-fail-on>";
def instanceCode = "<jira-instance-code>";

def issue = stgexecinfo.getRelatedTicket();

def instance = topology.getInstanceProperties(instanceCode); // All of the instance properties

def url = instance.get("JIRA_URL") + "/rest/api/2/issue/" + issue; // Jira URL from instance
def username = instance.get("JIRA_USER_NAME"); // Jira Username
def password = instance.get("JIRA_PASSWORD"); // Jira Password
def auth = (username + ":" + password).bytes.encodeBase64();

def get = new URL(url).openConnection();
get.setRequestMethod("GET");
get.setDoOutput(true);
get.setRequestProperty("Content-Type", "application/json");
get.setRequestProperty("Authorization", "Basic " + auth);

// Throw exception if not OK response
responseCode=get.getResponseCode();

if (responseCode != 200)
{
  throw new Exception("Expected response code 200 was instead: " + responseCode + " From Username: " + username + " URL: " + url);
}

def body = get.inputStream.text;

//parse json
def json = new groovy.json.JsonSlurper().parseText(body);

// from here you can just use dot notation to query the json def
def status = json.fields.status.name;

if (status.equalsIgnoreCase(approvedStatus))
{
  return "SUCCESSFUL";
}
else if (status.equalsIgnoreCase(closedStatus))
{
  return "FAILED";
}
else
{
  return "RUNNING";
}
Now let’s customize it to your needs. In these first few lines you need change a few things. The first is the status you want to approve the gate on. For my example I’m going to use the Test status.
def approvedStatus="TEST";
Next is the closed status, or the status you want to fail the gate for. In my case I’m going to choose Done.
def closedStatus = "DONE";
The last thing that needs to be configured is the instance code for the Jira Instance you would like to use. In my case this is simply JIRA. You can find this under Topology -> Integrations -> Issue Tracking. Then click on the instance you want to use.
def instanceCode = "JIRA";
How the script works
Now let’s go over how the script works. This first section is just getting all the information we will need to make the request to Jira. It will get a lot of the information directly from the instance in FlexDeploy which means it will update if changed. If you wanted to use this with a different tool you could get the information you need from any instance, you’ll just need the code for those properties. Of course every API is different so you’ll need to make adjustments.
def approvedStatus = "<status-to-approve-on>";
def closedStatus = "<status-to-fail-on>";
def instanceCode = "<jira-instance-code>";

def issue = stgexecinfo.getRelatedTicket();

def instance = topology.getInstanceProperties(instanceCode); // All of the instance properties

def url = instance.get("JIRA_URL") + "/rest/api/2/issue/" + issue; // Jira URL from instance
def username = instance.get("JIRA_USER_NAME"); // Jira Username
def password = instance.get("JIRA_PASSWORD"); // Jira Password
def auth = (username + ":" + password).bytes.encodeBase64();
In this next section we’ll setup and make the request to Jira’s API. This should be similar for most API’s.
def get = new URL(url).openConnection();
get.setRequestMethod("GET");
get.setDoOutput(true);
get.setRequestProperty("Content-Type", "application/json");
get.setRequestProperty("Authorization", "Basic " + auth);

// Throw exception if not OK response
responseCode=get.getResponseCode();
Next we throw an exception if there was an error in the request.
if (responseCode != 200)
{
  throw new Exception("Expected response code 200 was instead: " + responseCode + " From Username: " + username + " URL: " + url);
}
Then we read in the response and parse the JSON.
def body = get.inputStream.text;

//parse json
def json = new groovy.json.JsonSlurper().parseText(body);
Last we decide what to do with the status. You could change this to allow different statuses in Jira to cause the gate to be successful, or maybe use some other info from Jira such as a label. The possibilities are endless.
// from here you can just use dot notation to query the json def
def status = json.fields.status.name;

if (status.equalsIgnoreCase(approvedStatus))
{
  return "SUCCESSFUL";
}
else if (status.equalsIgnoreCase(closedStatus))
{
  return "FAILED";
}
else
{
  return "RUNNING";
}
Finish configuring the pipeline
Now you can add any steps you want to happen after approval. In this case I’m going to test all.
Make sure you make the pipeline active and save it. Now you’re ready to test the pipeline and the custom gate.
Test the gate
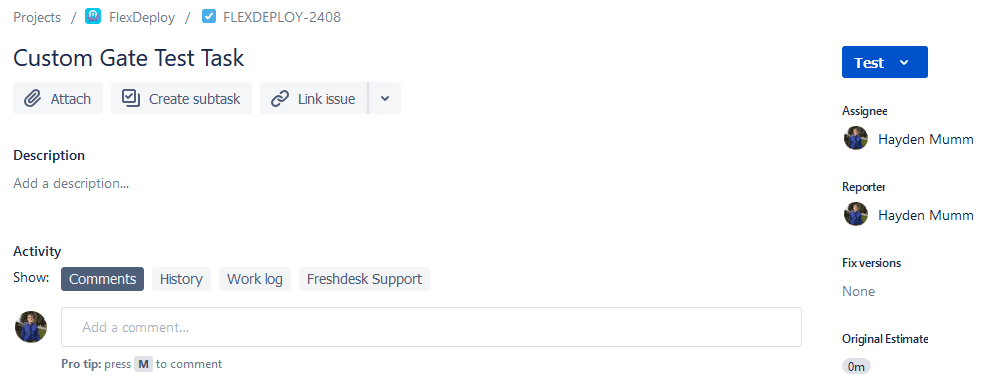
Some important things before we get to testing. You’ll need to add a release with some projects and configure it to use the pipeline we just made. You will also need to make sure your Jira instance is correctly configured to work with the API. This means that the password is actually an API Token. Instructions for getting an API Token for Jira can be found here. Next, set the ticket number by clicking the paperclip icon on a stage in an executing pipeline. Make sure to set it every time it’s run. Now it should ready to go! Let’s test it.
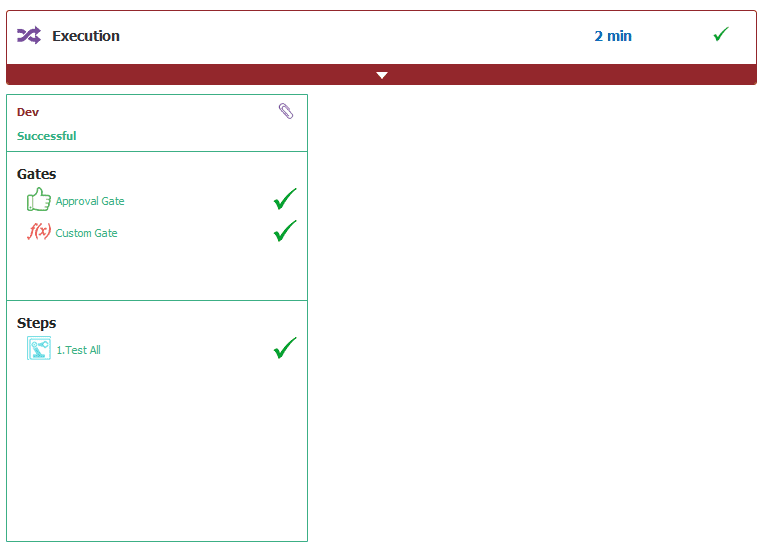
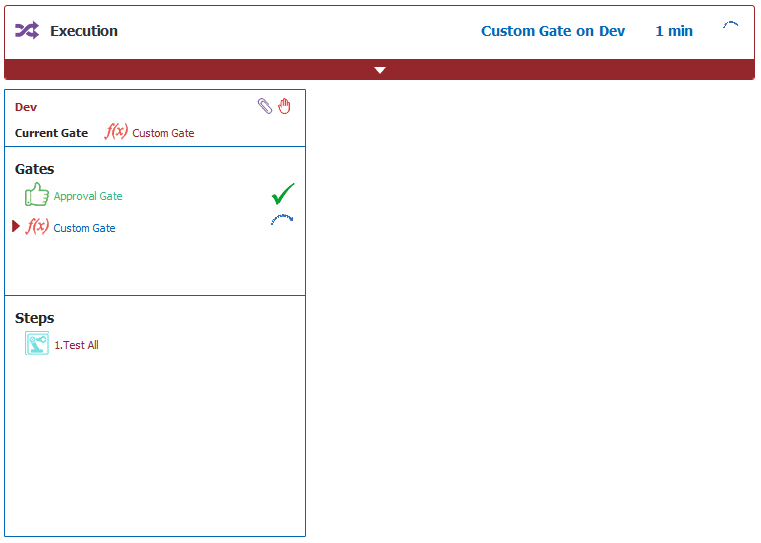
As you can see here when the issue is in test, the gate passes.
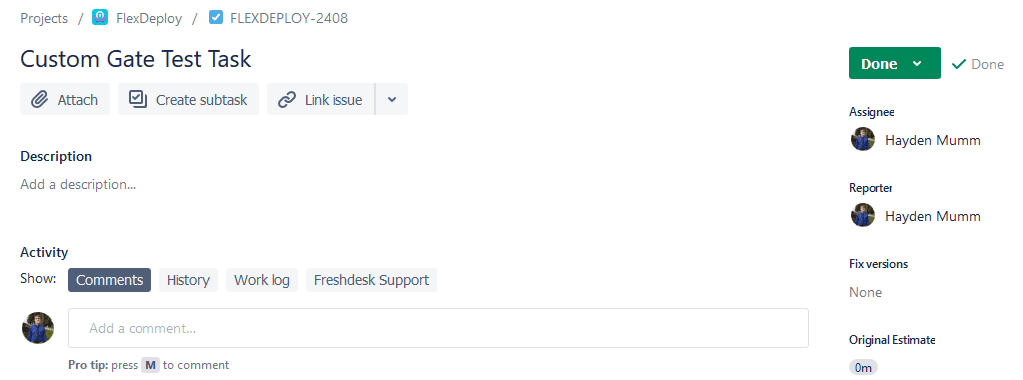
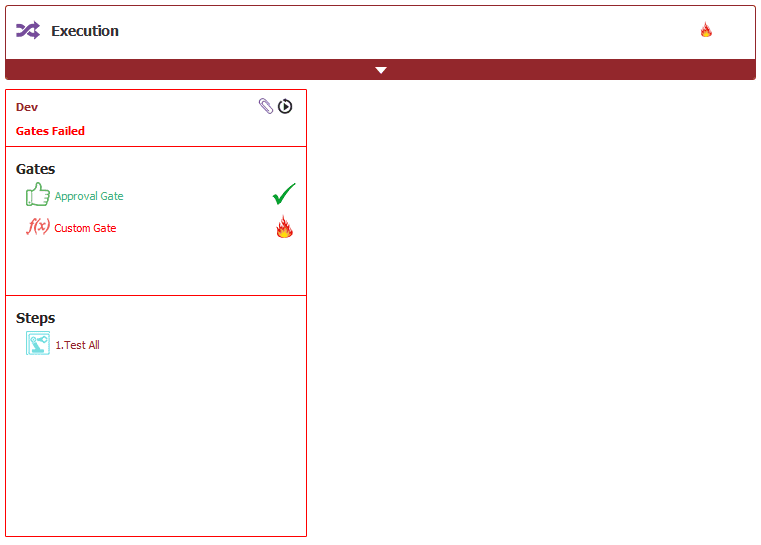
When it’s Done it fails.
And lastly when it’s in any other status it continues running.
As you can see Custom Gates are a great tool to help automate your processes. They can be configured perfectly to integrate with your current workflows. These can allow your team to stop wasting valuable time on mundane tasks.