In this blog article, we will discuss FlexDeploy’s integration with Selenium for Salesforce test automation. Selenium is one of the most popular tools to achieve automated testing for major SaaS Products like Salesforce. With frequent releases, evolving business use cases, and interactive lightning user interfaces, Selenium helps perform various types of test automation for Salesforce implementations. Test Automation is an important step in the CI/CD journey of any organization facilitating the process of delivering high-quality software development with speed and agility.
Configuring the Test Automation Framework
FlexDeploy’s recently updated Test Automation framework is based on YAML configuration files. Instead of traversing menus to set things up, you can just type a few lines. You can also version control that YAML configuration file in source control and it will automatically be picked up and executed by FlexDeploy.
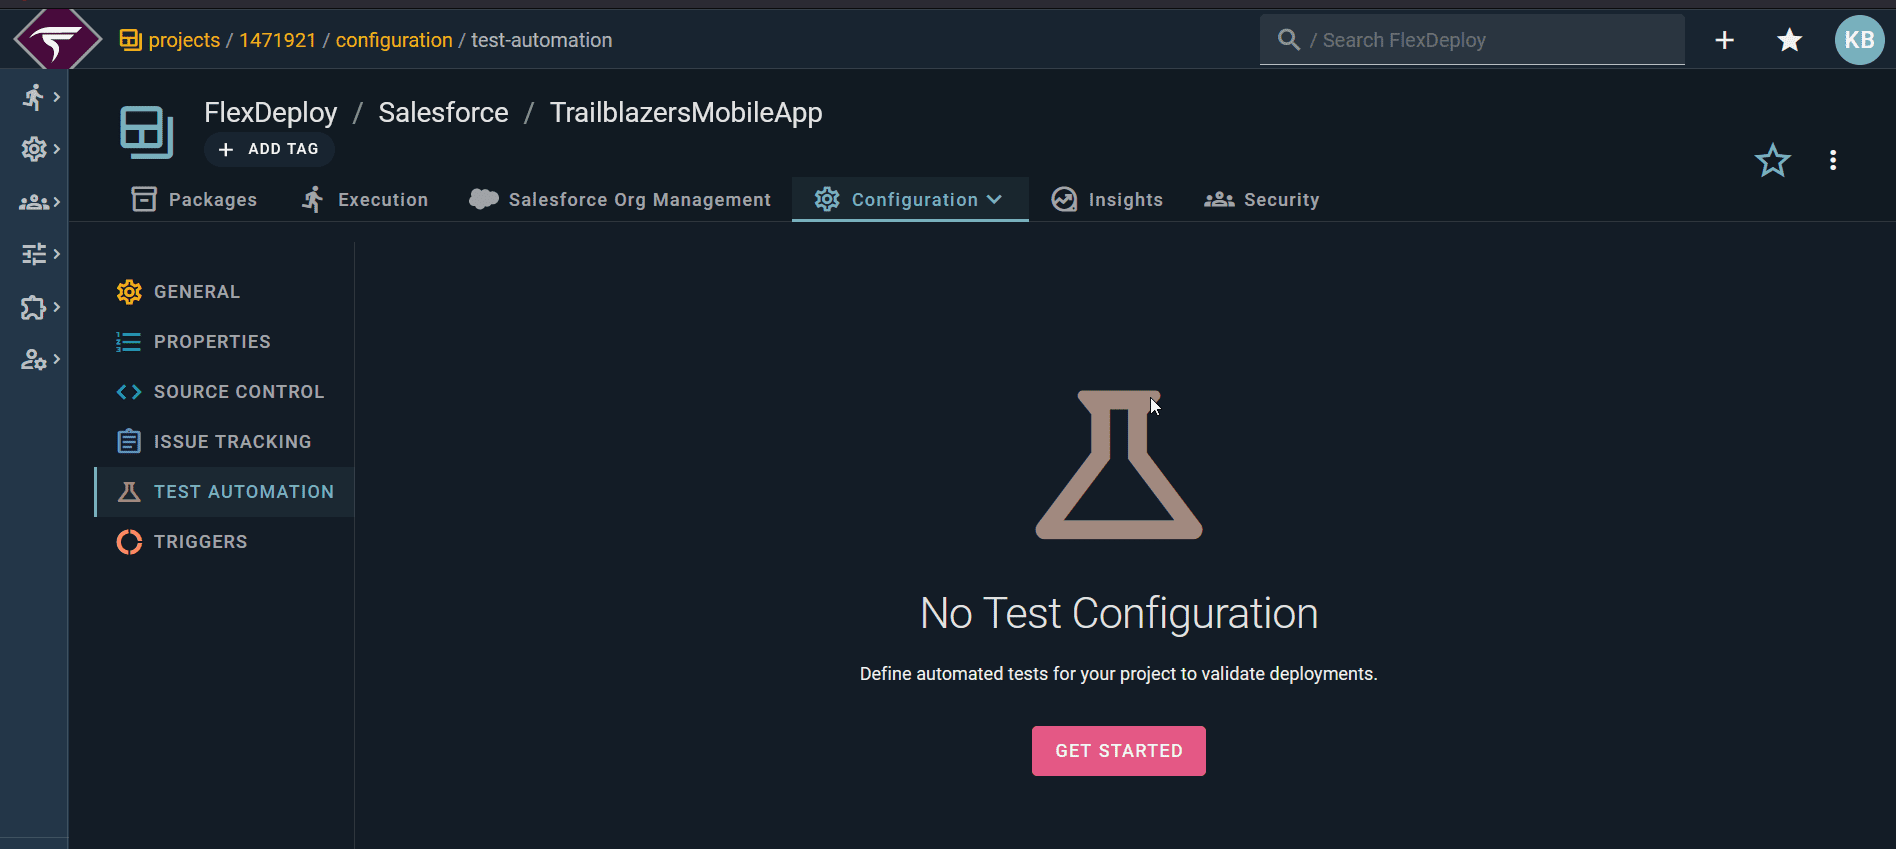
When you first arrive at the test automation screen for your project, click Get Started. You will also see a tooltip on your first visit with a link to the documentation.
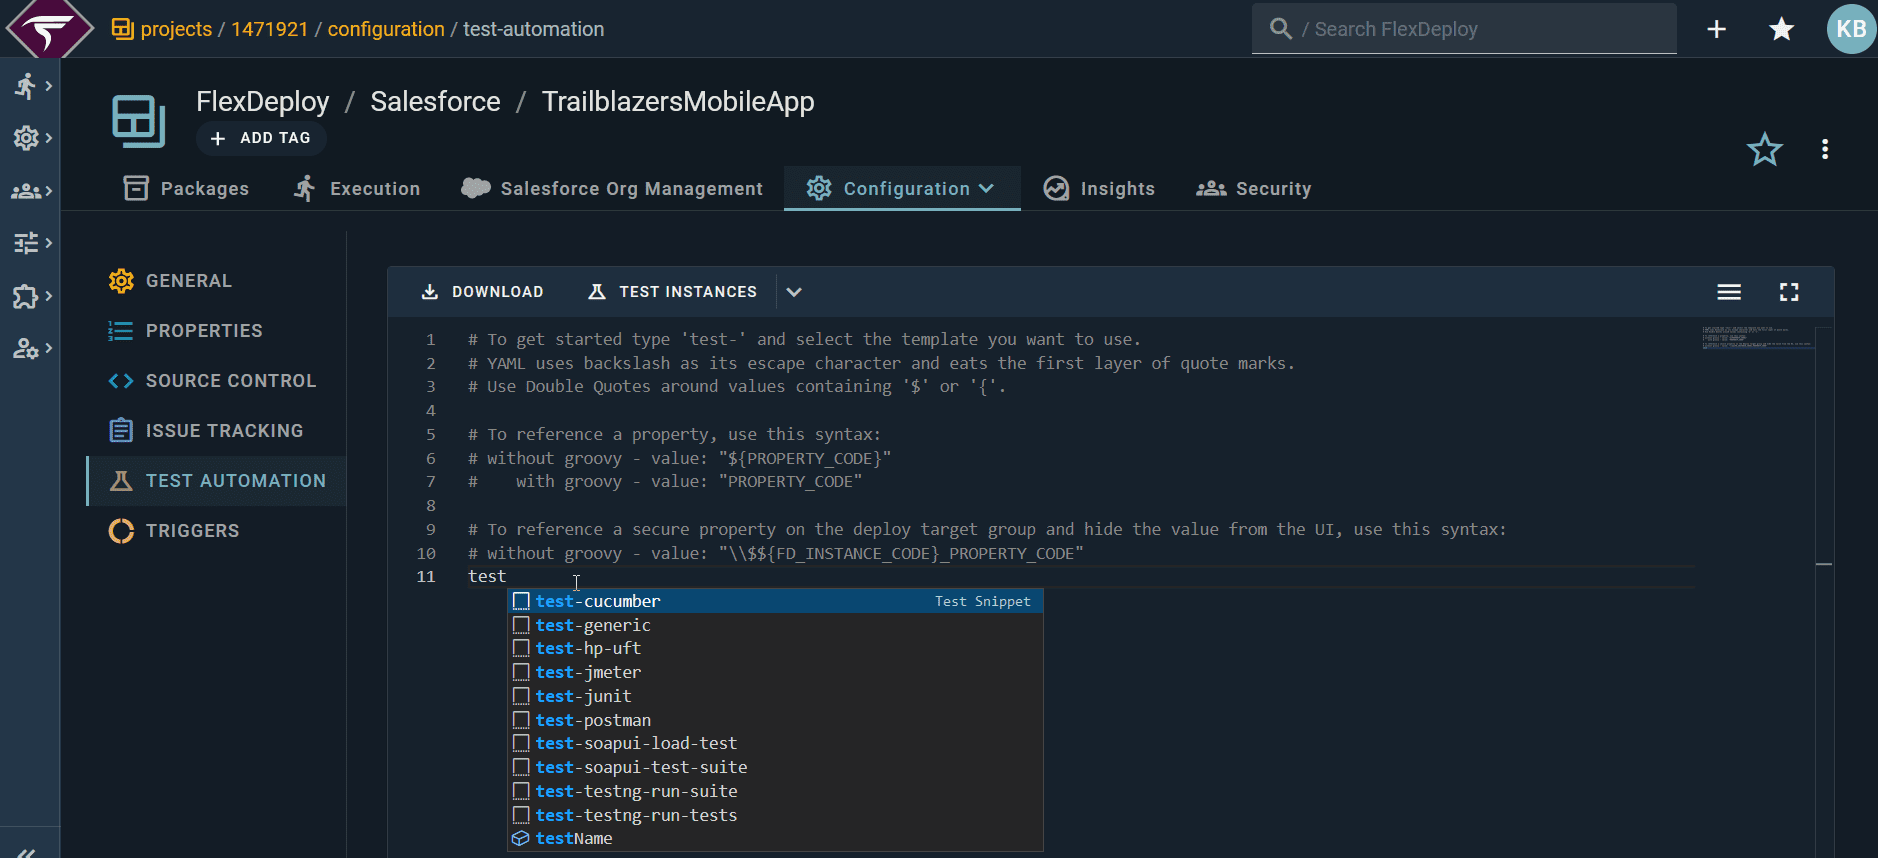
A helpful guide explaining how to write your first post-deployment test will appear. Type “test” or Ctrl + Space to see the auto-suggestions for built-in test configurations of some popular testing tools. Several test types are provided out-of-the-box, and you can also build your own.
Let’s add a Selenium test. We need to add the test instance, which indicates where Selinum is installed and where the test will execute. I have already created a test instance, so I just click on the TEST_INSTANCE value and press Ctrl + Space. If you don’t have an instance created, no options will appear. In that case, click the drop-down and create a new test instance. After reviewing the name and description, you may need to also define workflow inputs depending on your Selenium scripts and what is in your environment files.
Setting up the Selenium Environment
Setting up the Selenium environment on FlexDeploy is a one-time setup for all your FlexDeploy projects.
You can create an Endpoint with a windows server for the Selenium test in Endpoint editor in the Topology setup screen. Simply click the + button to create a new Endpoint.
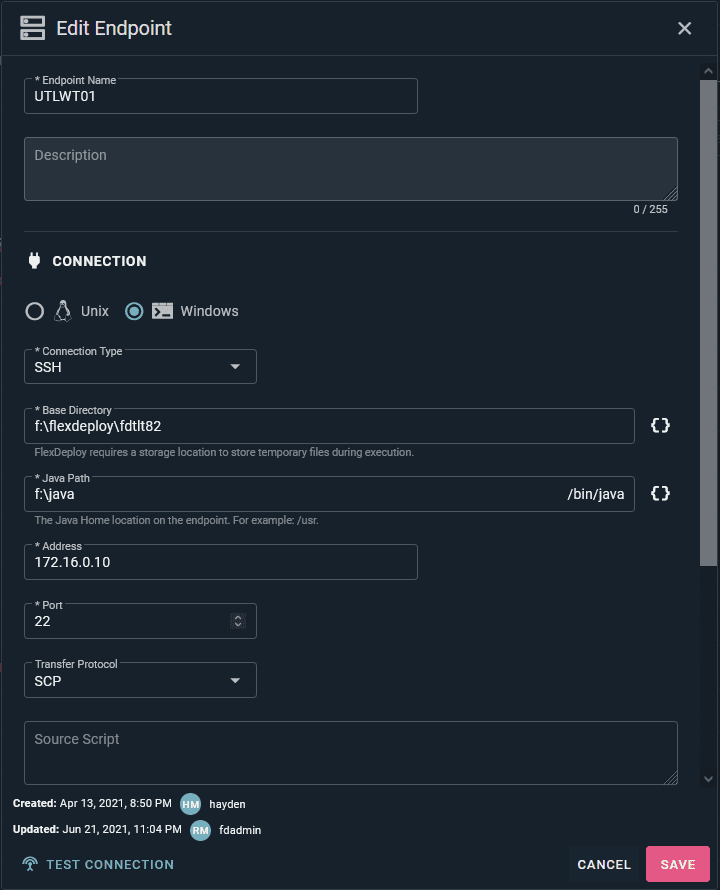
After completing the endpoint configuration, click “Test Connection” on the Endpoint to verify the connection.
Test Instance Configuration:
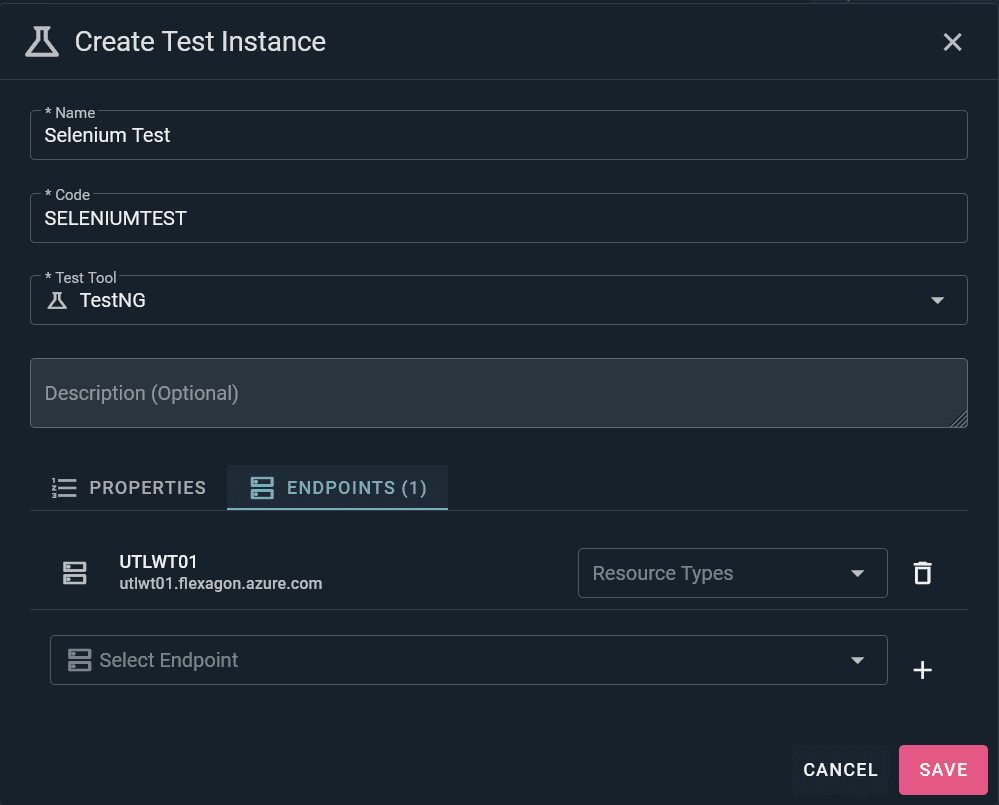
Click New Test Instance to create a new testing instance and associate the appropriate Endpoint where Selenium is installed.
Enter the requested values and select the Selenium Endpoint.
The final Test configuration looks like this.
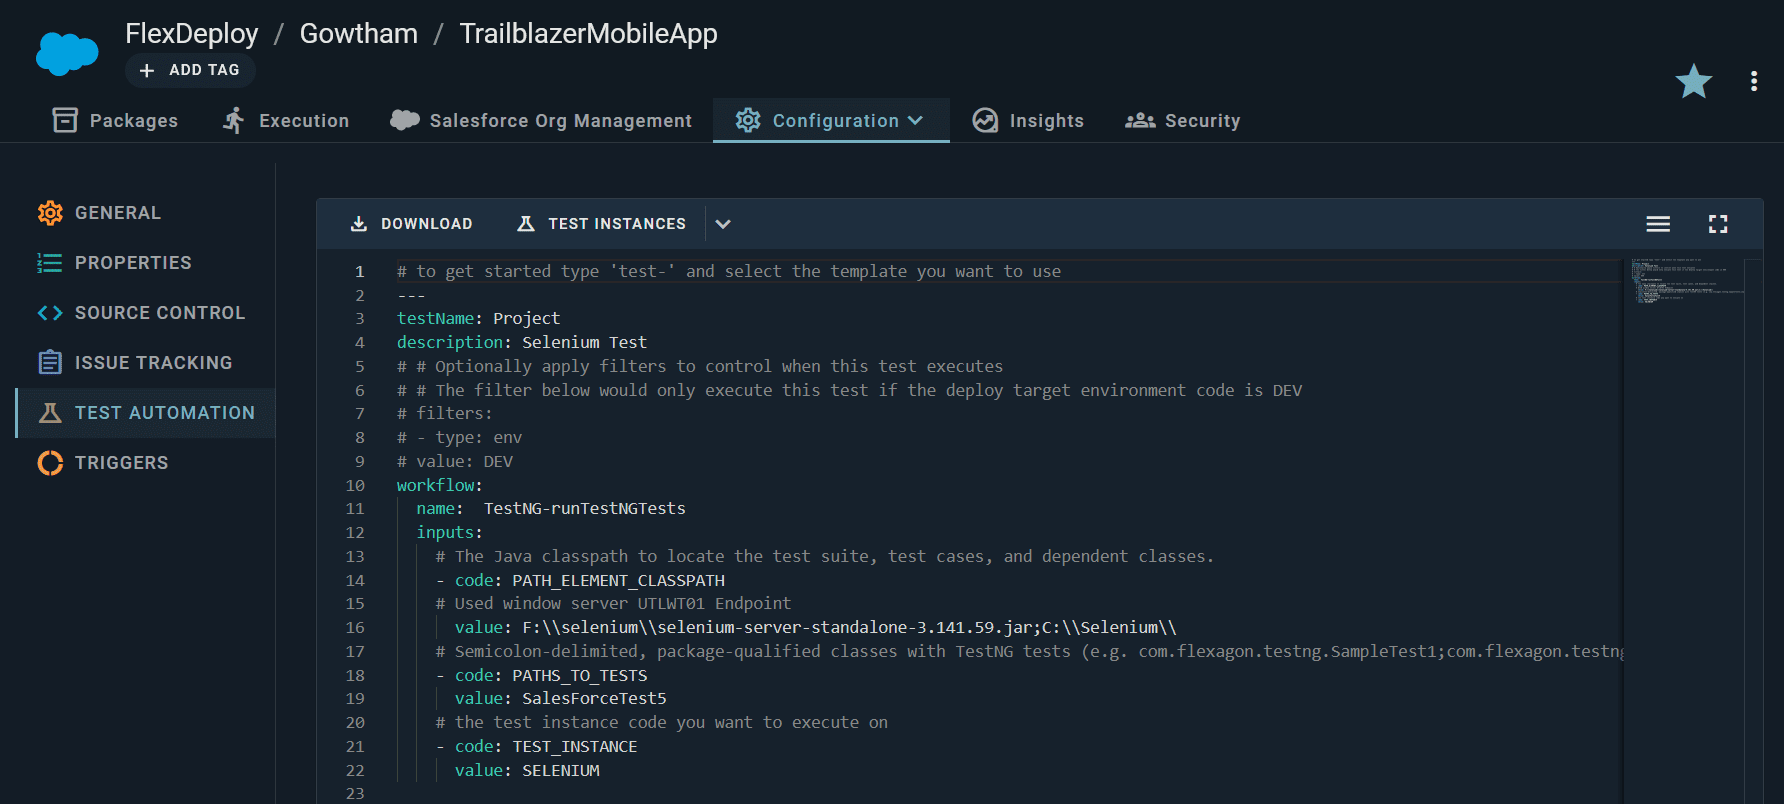
Click Save to complete your configuration. This configuration is a one-time setup in your FlexDeploy Project. For detailed instructions, please see the Test Automation section of the User Guide.
Executing Automated Tests
Now we’re ready to execute these configured tests. We can execute automated tests in FlexDeploy in the following ways:
- for every post-deployment
- as part of a release pipeline
- initiated manually whenever needed
- scheduled to execute at a certain time
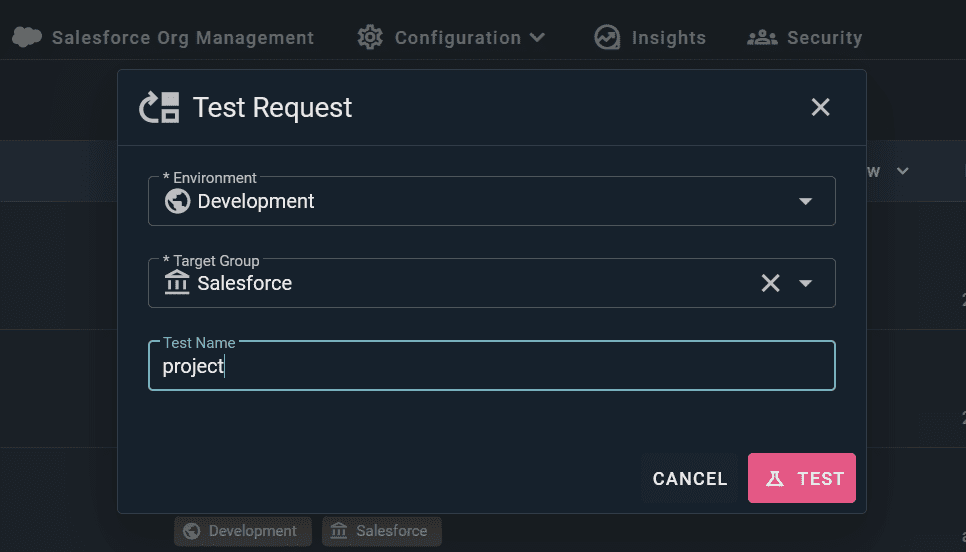
First, let’s test our configuration before we check it in. It’s faster to catch a typo and change the code in the UI than to check it in while we are getting things figured out. Go to the execution screen and execute a build, deploy, and test on your project. When you run the test, you can leave the test name field blank to run all of the tests you set up.
To submit the Test, click the Test button, enter fields and click Test Request.
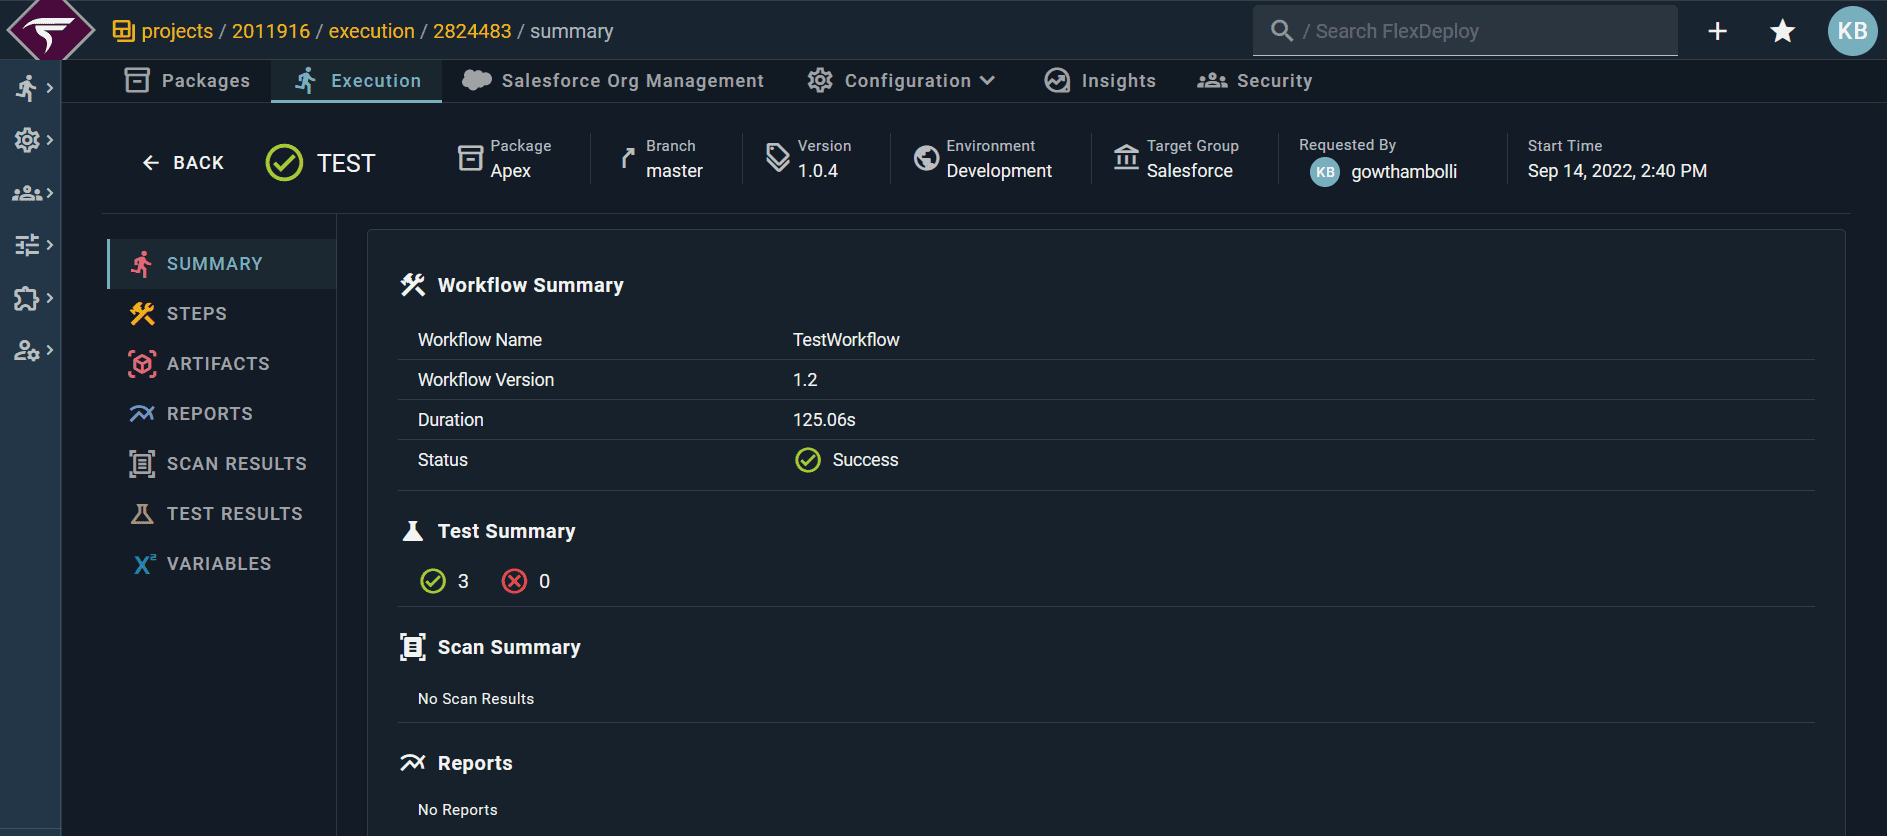
The overall test execution status can be checked from the project execution screen by selecting the execution id link for the test.
Review the Test execution and you should see something like this.
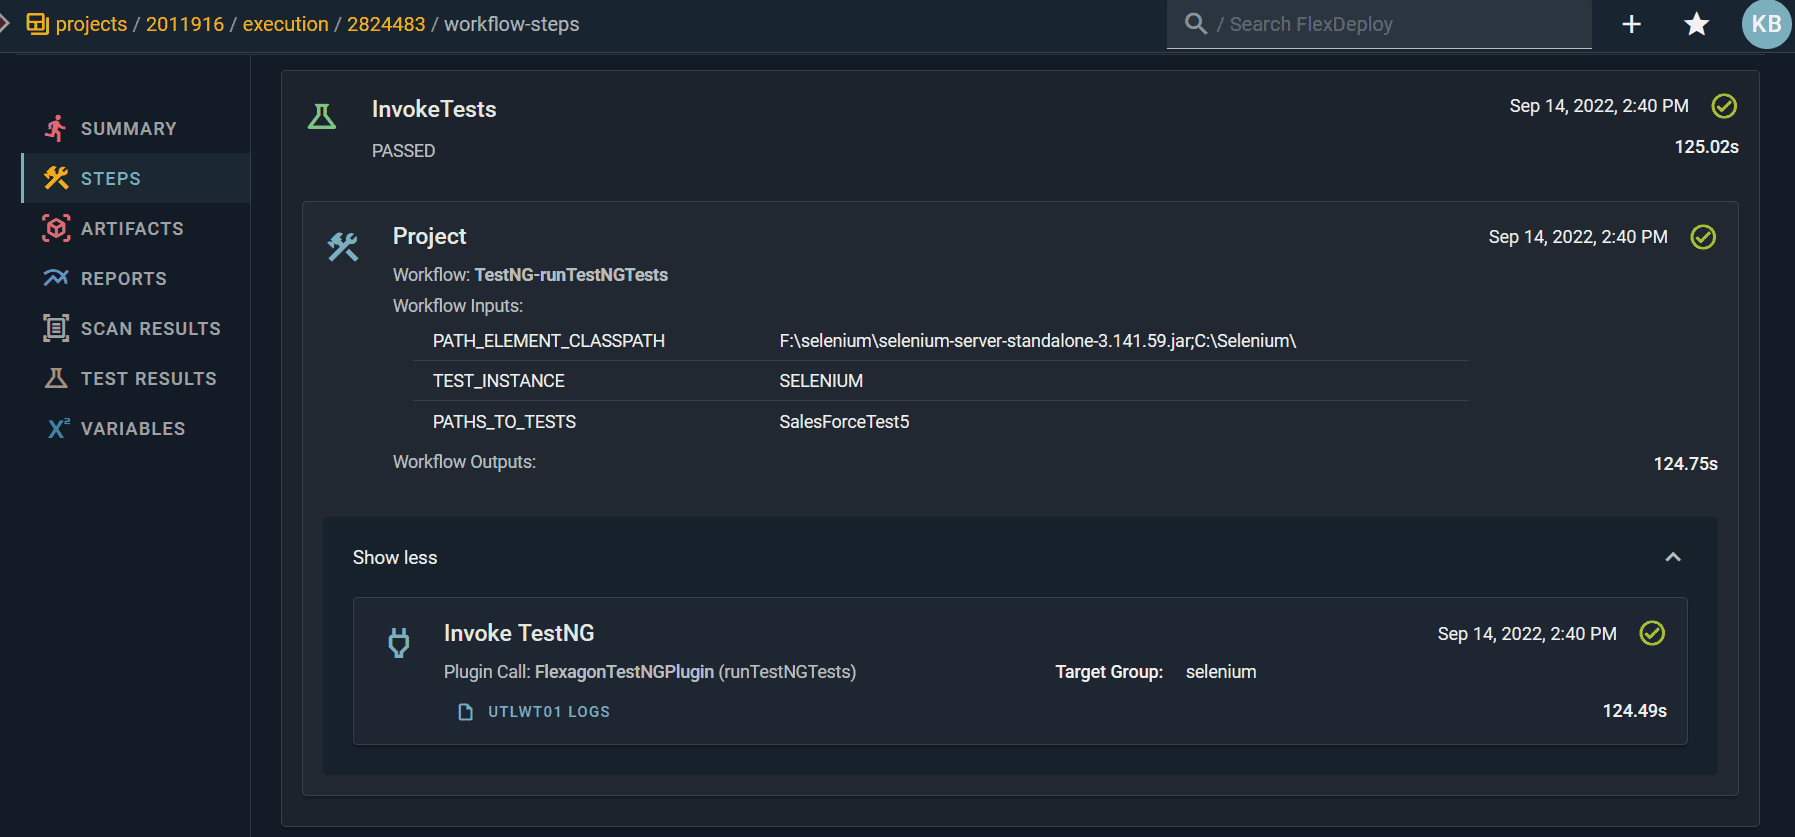
This shows that 3 tests were executed and that they passed. You can click the Steps tab to see what steps were taken.
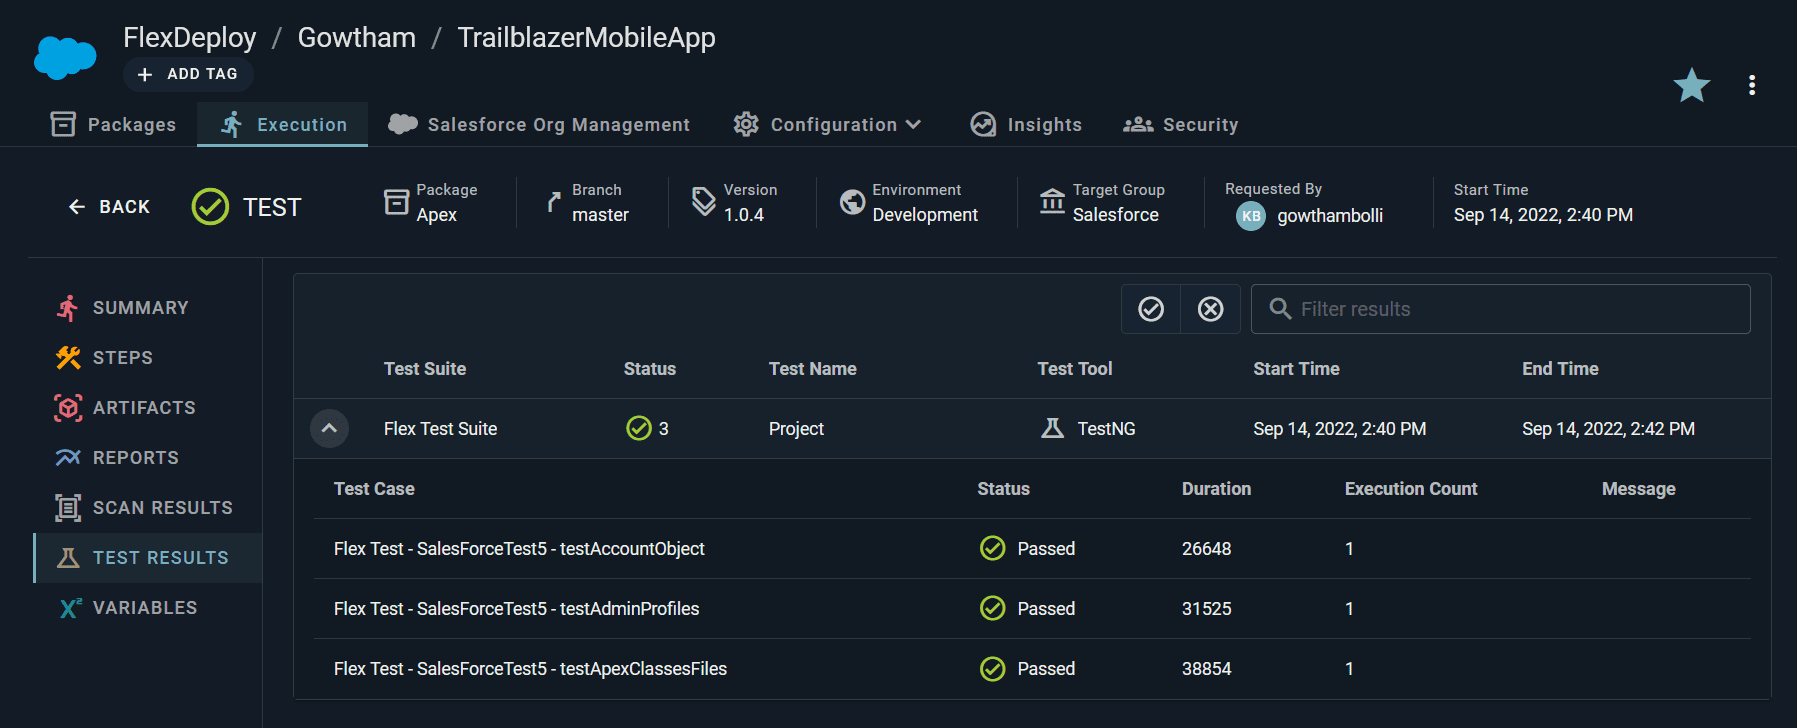
Selecting the Test Results link will show the overall test set status. In addition, you can drill down into the test cases to see the actual results of each test case.
Test results can also be referenced from Pipeline Gates, which can prevent unstable builds from propagating to higher environments. We can build a pipeline that prevents bad from getting deployed past our development environment, protecting our QA validation team’s time.
FlexDeploy provides Test Automation reports and powerful customizable dashboards to track Test Results.
Conclusion
You just saw the power and flexibility that FlexDeploy offers with post-deployment test automation framework. You can use it to design and run tests, validate the results, and filter builds as they progress through environments. FlexDeploy offers integrations beyond just Selenium with automated testing tools like Cucumber, Tosca, Automation Anywhere, UFT for UI and functional testing, Postman, Soap UI for API testing, and JMeter for performance testing can be integrated with FlexDeploy.
Give FlexDeploy 6.0 a try and enjoy the new Test Automation features.

