Issue tracking is a crucial piece in managing changes through the software delivery process. They provide an efficient way to manage changes and track incidents in a collaborative, organized, and auditable way.
FlexDeploy has long had support for extensive integrations with some of the most popular providers in this space like Jira, Redmine, and Azure Boards. This integration provides a seamless integration, creating a rich and powerful user experience for both agile and traditional software delivery methodologies. FlexDeploy’s support is bi-directional, providing flexibility to meet many different use cases.
NEW! FlexDeploy now offers native integrations with GitLab and GitHub for issue tracking as of version 5.6.0.1.
Issue Tracking Framework
There are 4 key features as part of FlexDeploy’s built-in issue tracking framework:
- Link issues to builds and deployments, so you can easily see how executions in FlexDeploy relate to specific issues and filter for particular issues or projects across FlexDeploy.
- Add comments to your related issues for added visibility to related FlexDeploy actions in your issue tracking system. You have complete control over the content of the comments, and dynamic details such as the build version, project, package, and release are all available.
- Update the status of linked issues automatically based on the deployment status in FlexDeploy, so your developers don’t have to.
- Approve deployment requests directly from your issue tracking application.
Bonus! Are there any features not mentioned above that would be helpful for you? Countless other use cases can be enabled by leveraging FlexDeploy’s incoming or outgoing webhooks functionality. To name a few, you could create a package, start a release, or update a ticket based on events in either FlexDeploy or your issue tracking application. See the webhooks documentation for more ideas.
Setting Up the Integration
In this blog, I’ll explain the high-level steps needed to integrate with GitLab. Keep in mind that these steps are nearly identical regardless of which issue tracking provider you would like to integrate with. For more detailed instructions on setting up this integration, see the Issue Tracking Systems documentation.
Configure Global Settings
The first step in setting up an integration with GitLab issues is configuring the global Issue Tracking System. You can access these settings from Administration > Integrations > Issue Tracking Systems.
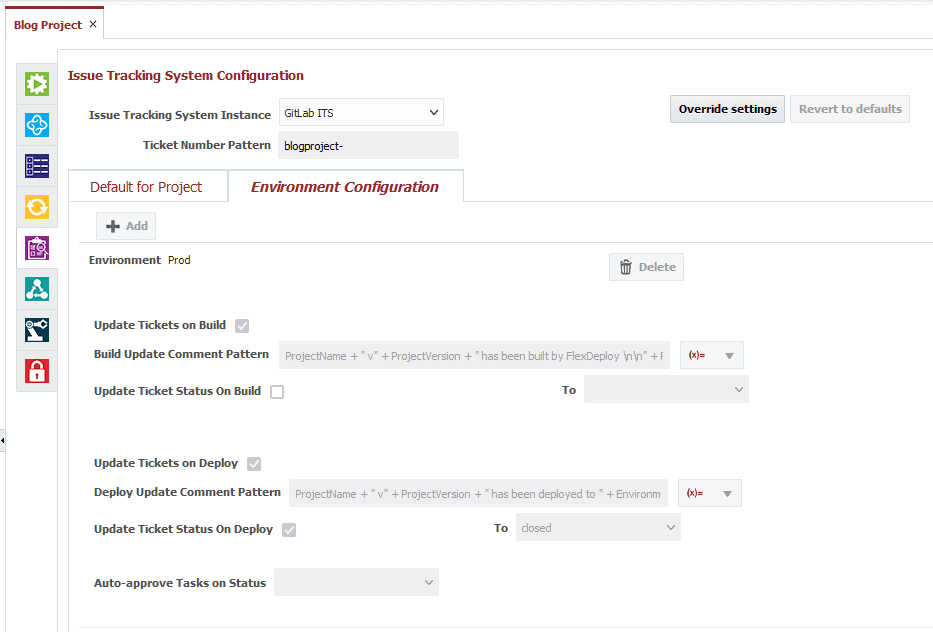
- Define the default configuration, which will apply to all environments and all projects in your FlexDeploy instance. For my example, I will add comments on each successful build and deployment.
- Build comment pattern: ProjectName + ” v” + ProjectVersion + ” has been built by FlexDeploy \n\n” + ReleaseLink
- Deploy comment pattern: ProjectName + ” v” + ProjectVersion + ” has been deployed to ” + EnvironmentName + “\n\n” + ReleaseLink
- Add environment-level configurations. In addition to the comments for every environment, I’ll update the linked ticket status to closed for production deployments.
- Fill in statuses. GitLab currently only supports open and closed statuses.
- Optionally set the ticket number pattern. If entered, FlexDeploy will parse the change logs during each build, and link tickets automatically if a ticket number is found in the commit message. In this example, I can enter blogproject-<ticket number> to link a ticket.
GitLab Integration Instance
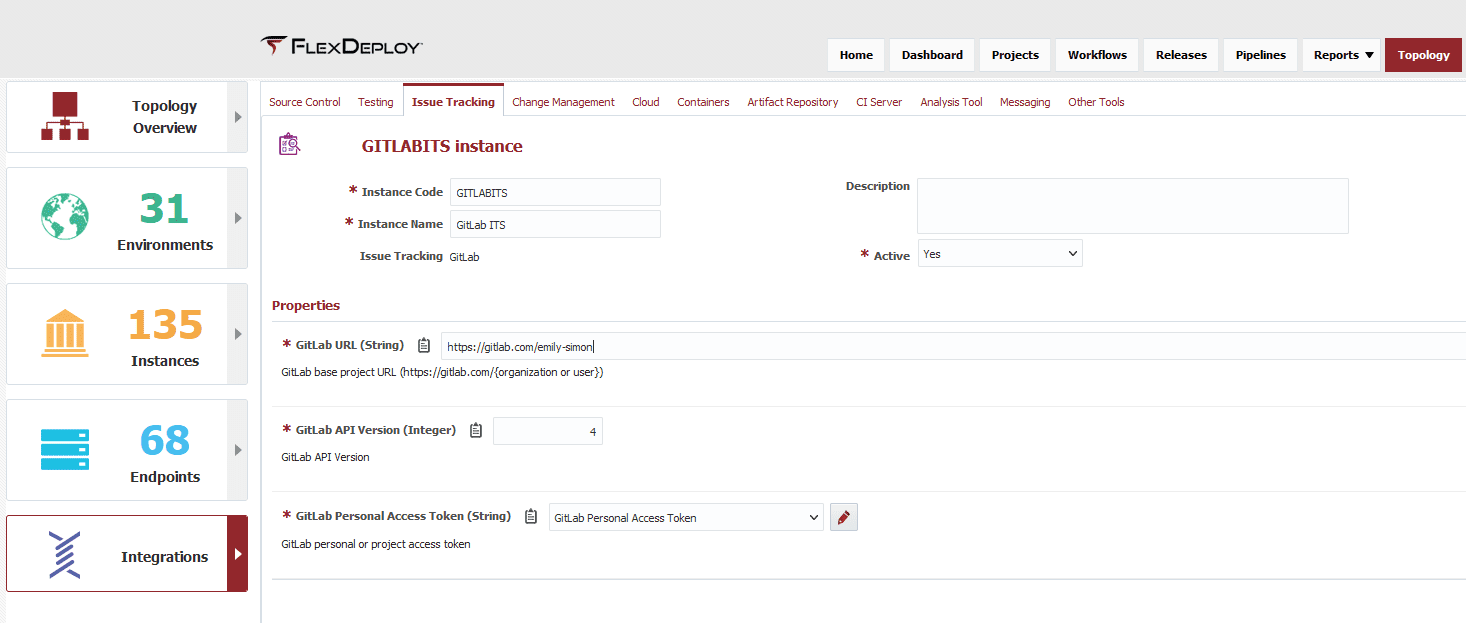
Next, we will create an issue tracking instance that defines the connection details for GitLab. Start by navigating to Topology > Integrations > Issue Tracking. Then, create a new instance and fill in the required properties.
Add Issue Tracking to the Project
Finally, add issue tracking settings to each project you would like to integrate with. For my Blog Project, I will simply associate my GitLab instance to the project. We have the option of using the global settings defined earlier or overriding those settings by project.
Trying Out the Integration
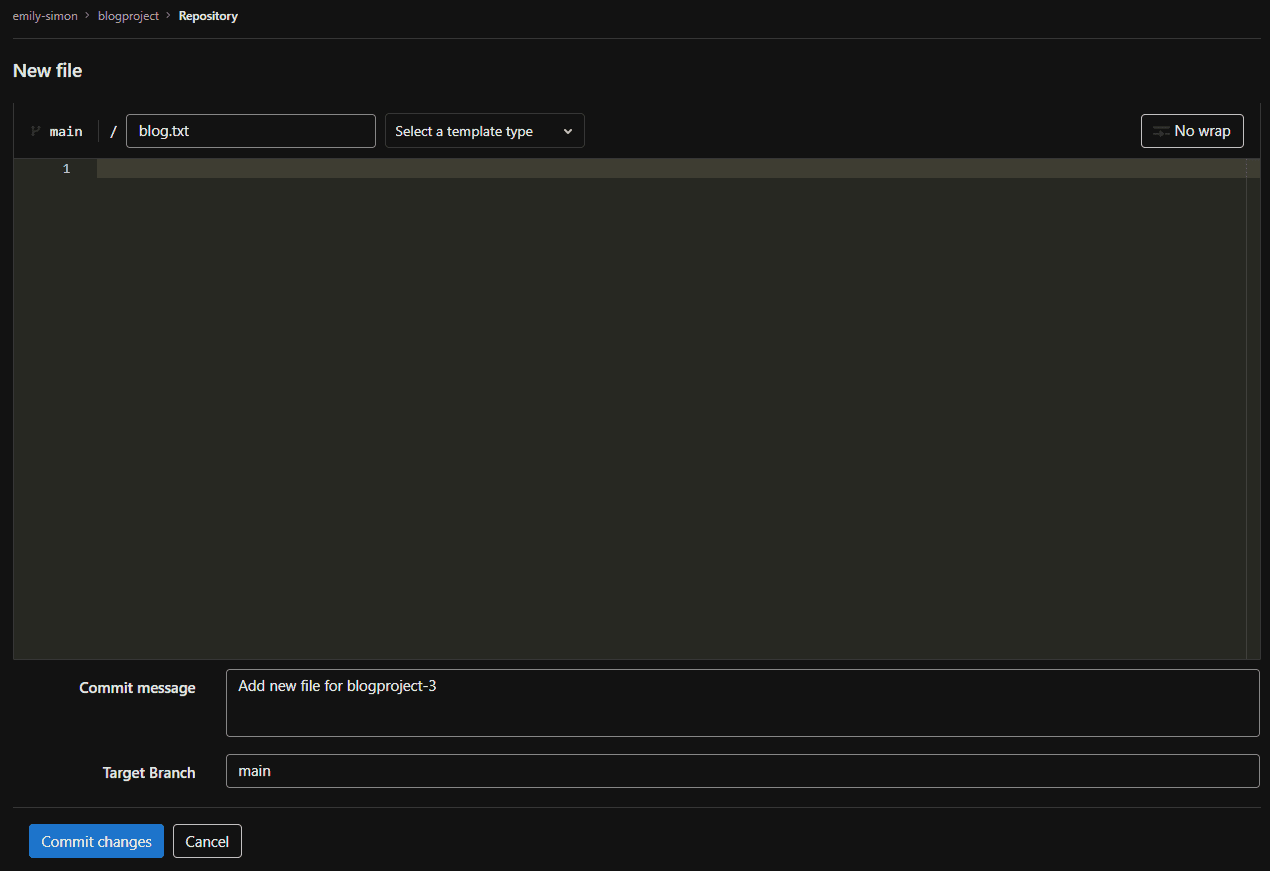
Now, we’re ready to test the integration. I will start by adding a new file to my GitLab repository.
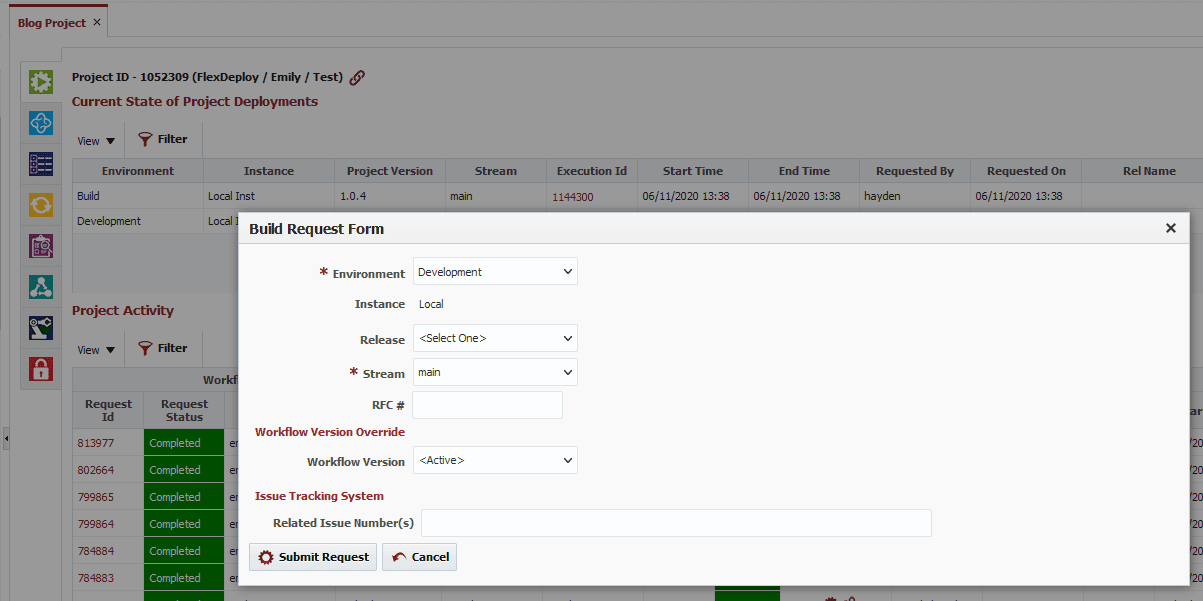
After committing changes to GitLab, we can build the changes in FlexDeploy.
Reminder: By referencing my ticket number in the commit message, FlexDeploy will link the ticket automatically to the build and any subsequent deployments of that build. Another option is explicitly mentioning the ticket number here.
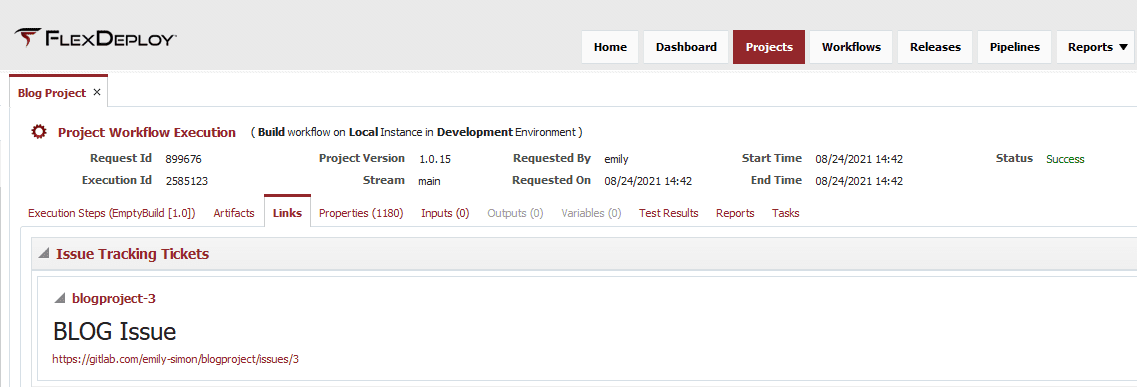
Subsequently, we can see the associated ticket in the Links section under the build execution.
By using FlexDeploy, organizations establish an automated and repeatable process for building, packaging, and safely deploying code, APIs, meta-data changes, and data migrations from development through test to production environments.
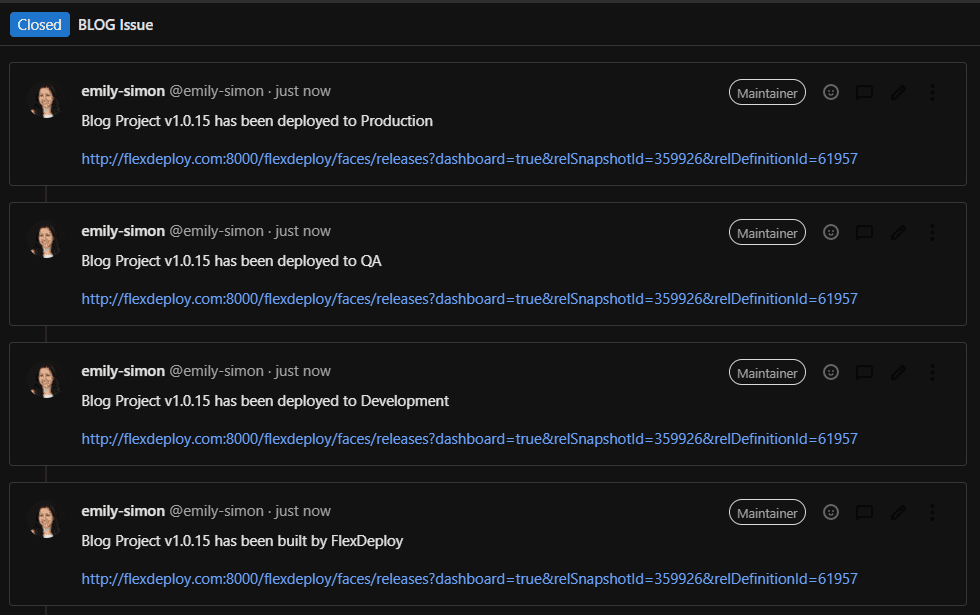
Next, we will deploy this build artifact through the environments in our software delivery lifecycle like development, quality assurance, and production. Once the production deployment completes, we can go back to GitLab and see the updated ticket has the comments and closed status, as we have configured.
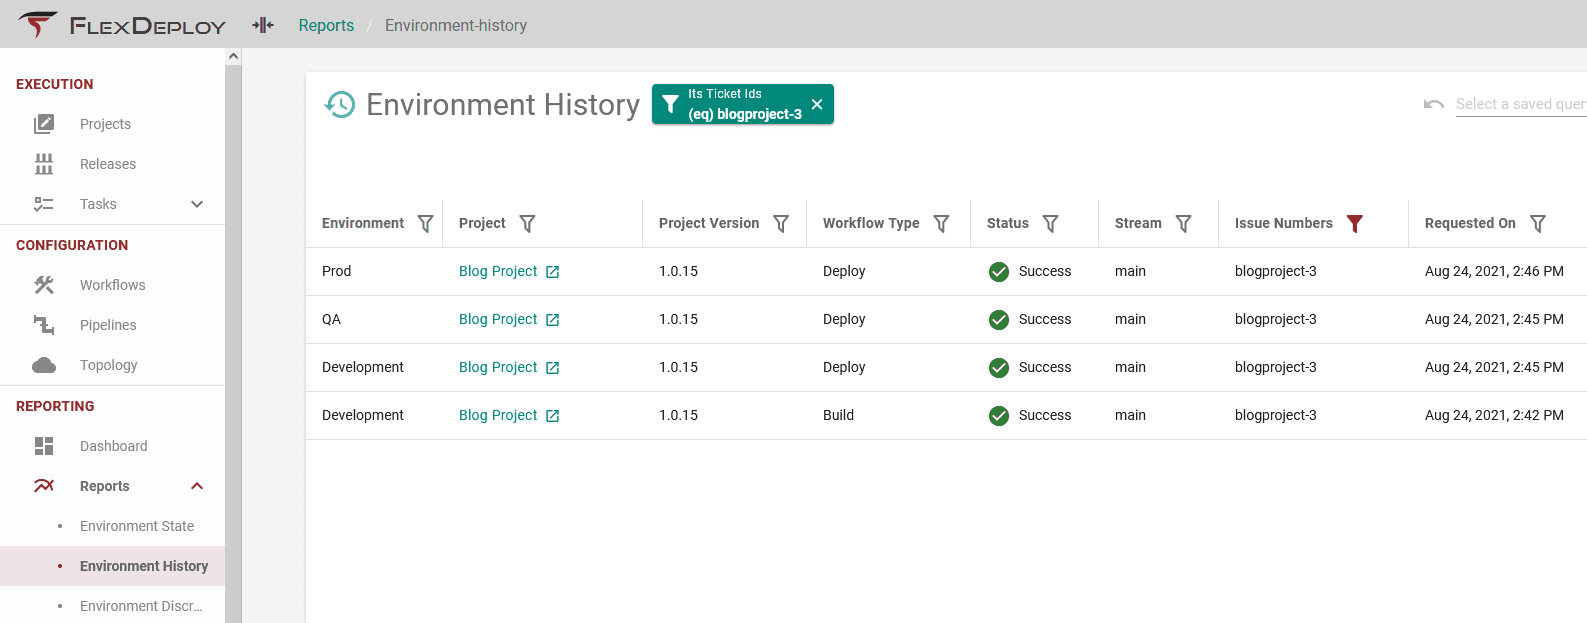
Additionally, we can filter for the ticket number in the Environment History Report to view more details about all executions linked to the ticket.
Conclusion and Further Reading
In this article, we went through configuring an integration with FlexDeploy and GitLab issues. You can follow a similar process for natively-supported providers like Jira, Redmine, Azure Boards, and GitHub, or create your own custom provider. This integration enhances the visibility between FlexDeploy and your issue tracking application, provides more detailed reporting, and reduces the number of manual tasks and back-and-forth between applications.

