Oracle ADF Essentials is powerful framework to develop web applications and is free to use. FlexDeploy is built using ADF Essentials 12.1.3 and is now available to run on Tomcat 8 and Java 1.8. See FlexDeploy Installation for Tomcat for more details.
Here are some high level steps to run your ADF Essentials applications on Tomcat 8. Deploying to Tomcat can be tricky at first, these steps are for ADF Essentials 12.1.3 and Tomcat 8, so if you are running different version, you may have some challenges. Once your Tomcat environment is configured, you can use FlexDeploy JDeveloper and Tomcat plugin to automate Build/Deploy process.
Prepare Tomcat Environment
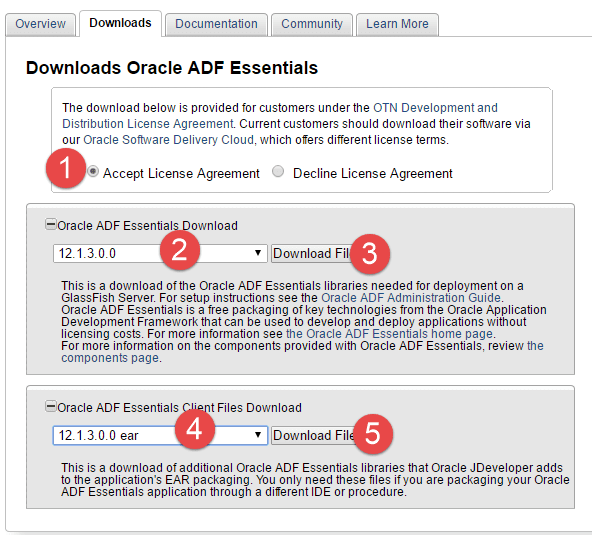
First step is to prepare Tomcat 8 environment with ADF Essentials library files. Download 12.1.3 Oracle ADF Essentials and Oracle ADF Essentials Client Files from http://www.oracle.com/technetwork/developer-tools/adf/downloads/adf-download-1649592.html. Save download files in temporary folder.
Extract both zip files in flat structure using unzip -j (works on Windows and UNIX)
- cd <tomcat lib folder>
- unzip -j <path to temp folder>/adf-essentials.zip
- unzip -j <path to temp folder>/adf-essentials-client-ear.zip
You can copy any additional Jars that may be necessary for your application. You may have to copy database drivers to Tomcat lib folder as well. For example, you can download Oracle JDBC drivers from http://www.oracle.com/technetwork/database/features/jdbc/default-2280470.html.
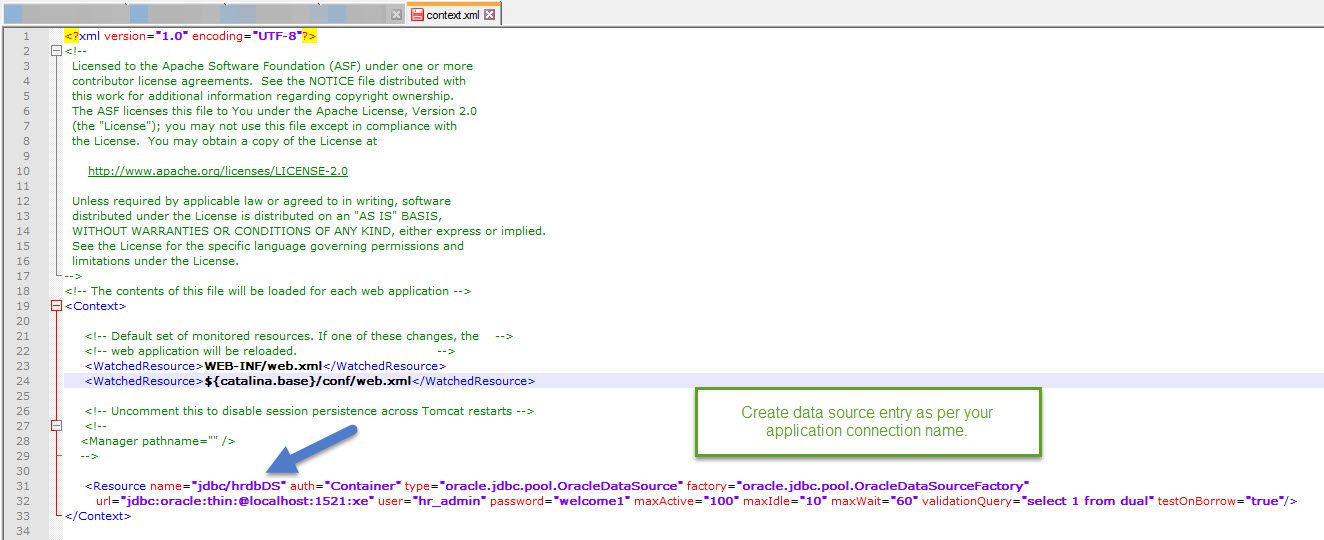
Now update context.xml as shown below to create Data Source for your application.
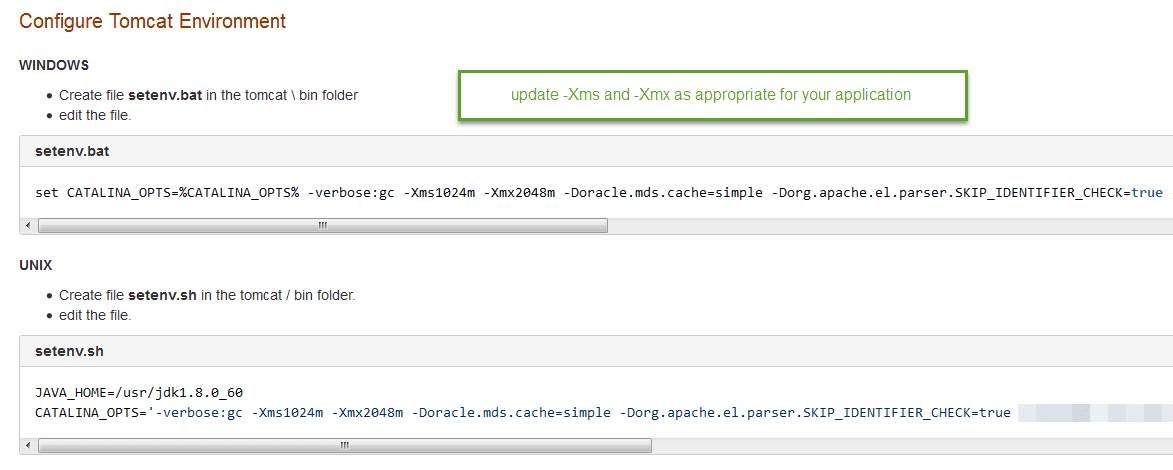
Now update setenv.sh or setenv.bat file in Tomcat/bin folder.
 Prepare Application for Tomcat deployment
Remove following listener classes from web.xml. This should be done in automated build process.
- oracle.bc4j.mbean.BC4JConfigLifeCycleCallBack
- oracle.adf.mbean.share.connection.ADFConnectionLifeCycleCallBack
- oracle.adf.mbean.share.config.ADFConfigLifeCycleCallBack
This paper compares FlexDeploy to other commercial and open-source DevOps and Application Release Automation solutions.
Build WAR and Deploy
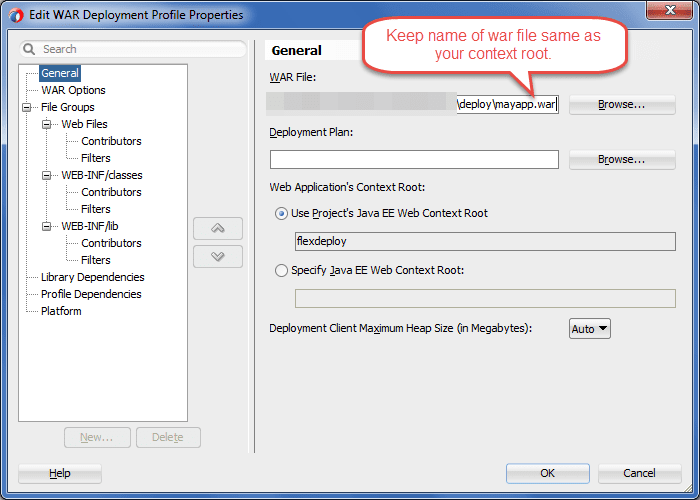
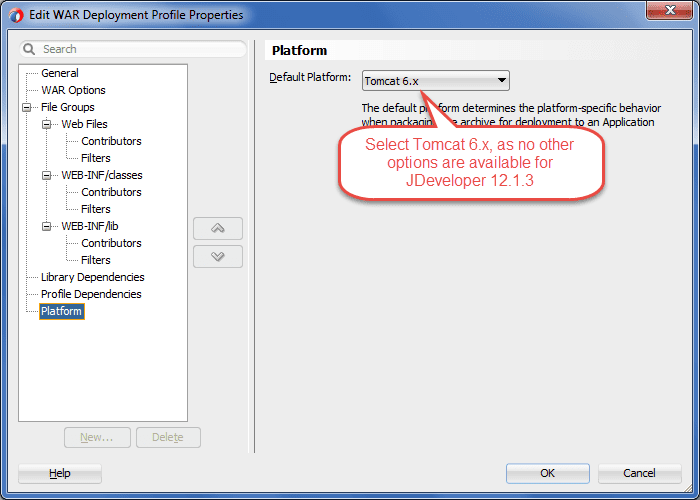
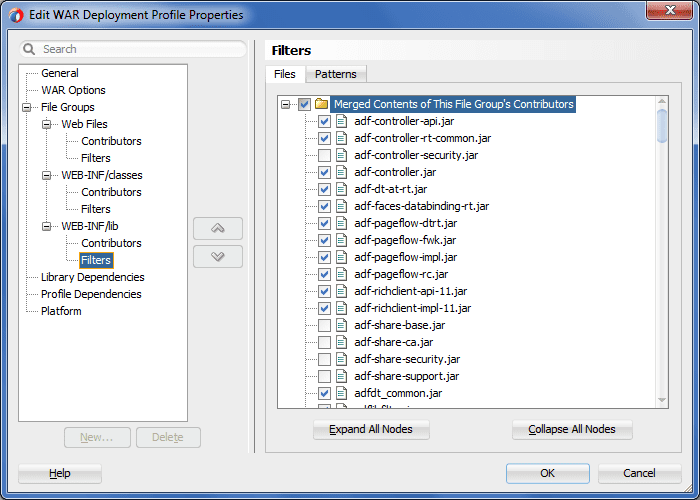
Now let’s build Deployment Profile in JDeveloper to build war file for deployment to Tomcat server. This process is same for any other Deployment Profile, but you will need to enable various jar files to be added to WAR file (see below)
There are various libraries (JSF 2.1, ADF PageFlow Runtime, ADF Controller Runtime, ADF Faces Runtime 11, ADF Faces Databinding Runtime, JSTL 1.2 Tags, Oracle Page Templates, ADF Model Runtime, BC4J Runtime) which are needed at Runtime, but are not included in downloads specified earlier. Hence make sure that following jar files are part of WAR file as shown in above image.
adf-controller-api.jar, adf-controller-rt-common.jar, adf-controller.jar, adf-dt-at-rt.jar, adf-faces-databinding-rt.jar, adf-pageflow-dtrt.jar, adf-pageflow-fwk.jar, adf-pageflow-impl.jar, adf-pageflow-rc.jar, adf-richclient-api-11.jar, adf-richclient-impl-11.jar, adfdt_common.jar, adflibfilter.jar, dvt-basemaps.jar, dvt-databindings.jar, dvt-faces.jar, dvt-facesbindings.jar, dvt-jclient.jar, dvt-shared-js.jar, dvt-trinidad.jar, dvt-utils.jar, oracle-page-templates.jar, trinidad-api.jar, trinidad-impl.jar
Now build WAR file using deployment profile, place it in webapps folder and restart Tomcat server. Look at log files for any errors and act accordingly. Most possible problem will be missing some Jar file and you will need to include in WAR file using Deployment Profile.

