This blog is the fifth in the FlexDeploy Loves OIC blog series, stay tuned for subsequent entries in the series.
- FlexDeploy Loves OIC: Series Overview
- FlexDeploy Loves OIC: Manage Integrations with Connections
- FlexDeploy Loves OIC: Manage Connection Property Replacement
- FlexDeploy Loves OIC: Continuous Integration
- FlexDeploy Loves OIC: Automated Testing
- FlexDeploy Loves OIC: Continuous Delivery with Pipelines and Releases
- FlexDeploy Loves OIC: Manage Connections, Lookups and Libraries
Oracle Integration Cloud (OIC) provides the ability to develop an integration in the cloud. The integration can connect cloud and/or on-premise applications; now that we have test automation setup along with Continuous Integration with OIC, it is time to bring this all together with Continuous Delivery through FlexDeploy’s release/pipeline capabilities.
I will walk you through setting up our OIC project in a release that provides software delivery of a collection of projects to enable new functionality to the user. We will also utilize a pipeline component with the release that orchestrates the continuous delivery of projects across environments.
FlexDeploy Configuration
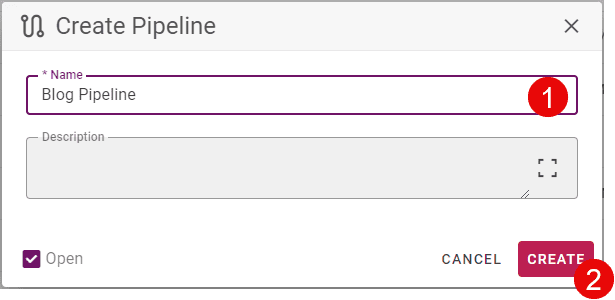
We will start by creating a pipeline that will be configured to execute gates and steps across multiple environments. Select the Pipelines Menu item and then click on the Create button.

Selecting the Project Groups tab allows the pipeline designer to create arbitrary group names that can help group like projects so they can be deployed together. Some examples could be Objects, Services and UI, which will allow deployments to be executed based on groups. Even though we only have one project, we will still create a project group to show how to set them up. Click the Create button in the upper-right corner of the page and create a Services group.

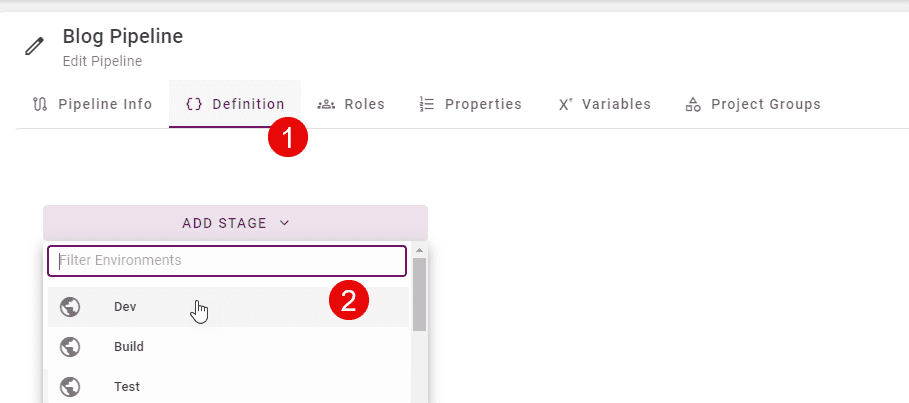
Now we will create the pipeline, which will be a series of stages (environments), that will represent the flow of execution. We will configure three stages that will represent Development, TEST and PROD. Stages include gates that determine whether the stage will continue to execute and steps that perform the work when the gates are successfully completed. Let’s start with adding the Development stage.
Clicking on the pencil in the Dev stage to setup the gates and steps that will be executed in that environment.
- No gates – nothing will hold up the step execution
- Deploy All Step – deploy all projects that match the configured Project Group
- Test All Step – run all tests configured on the deployed projects
After clicking Done, click on the check box in the upper-right hand corner to go back to the main pipeline page.
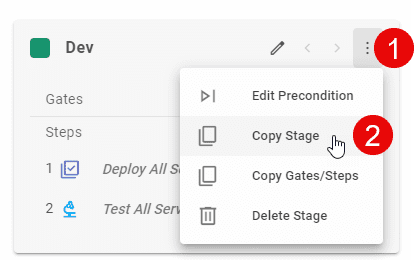
I like to start by copying the first stage to the future ones and modifying things as needed. Usually each stage has at least the same steps as what are in Dev.
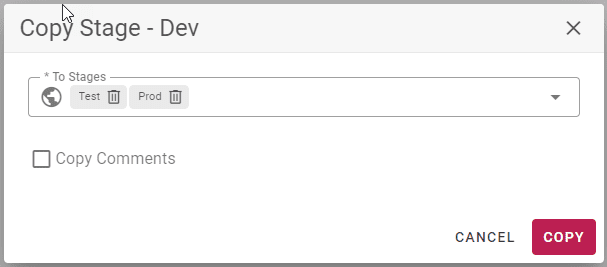
Click Save Draft to store our 3 stages.
In the Test environment, we will add some gates.
- Test Gate – only allow the stage to continue if the test in Development was successful
- Approval Gate – internal approval that will hold up the stage execution until the approval occurs
Now click the pencil in the Test stage and add the Test and Approval Gates.
After clicking OK, click on the check box in the upper-right hand corner to go back to the main pipeline page. Now we will add an external approval gate to the PROD stage.

After clicking OK, click on the checkbox in the upper-right hand corner to go back to the main pipeline page. The pipeline should look like the following with 3 stages. Click Activate to save and activate the entire pipeline configuration.

Now that we have a pipeline created, we can create a release by clicking the quick create button in the top right corner and choosing Create Release.
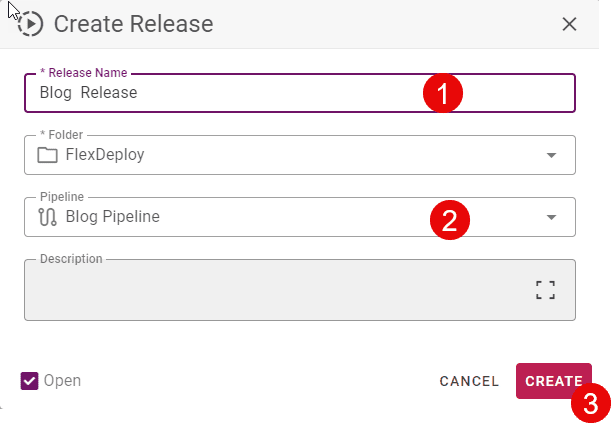
Once we have the release created; we will configure projects.
- Projects – just start typing the project name in the text box next to the Add Project button and the search will find the project(s). Once you find the project, click on the Add Project to add it to the release.
- Project Group – after a project is added to the release, then you can assign a Project Group that we created previously to each project. This will be used by the Deploy All steps.
Let’s add a snapshot schedule to the release so that it will make new snapshots that will go through the environments for us automatically.
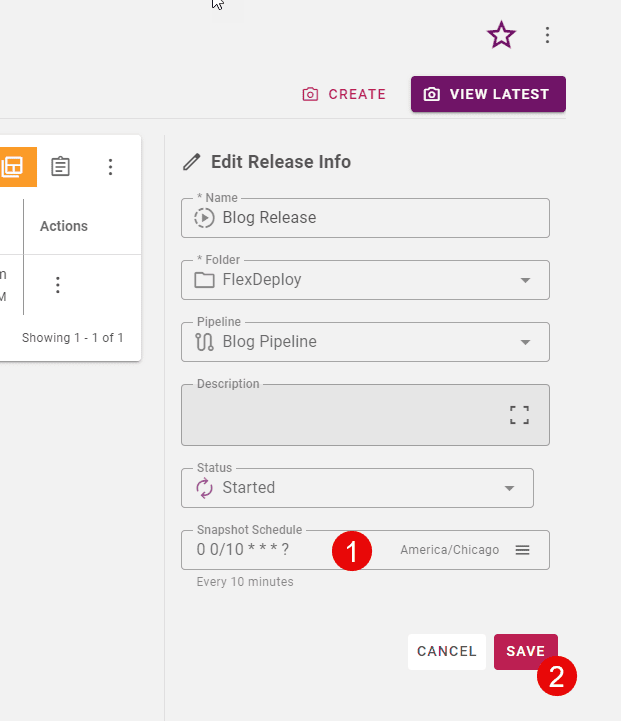
One last configuration change, we will delete the Poll SCM trigger we created on the project.

Execution
Now that we have everything configured we can run an end to end execution. Configuration built includes:
- Syncing OIC integrations to GIT
- Change detection on the project in GIT
- automated build of the artifacts
- automated testing of the integration
- automated deployment through Development, Test and Production environments
With no gates on the development stage, the deployment will be automatically deployed to the Development environment and the configured tests will be executed.

After that test completes, we can see that the Development stage has been executed successfully and we are waiting on the Approval gate in the Test stage. Once we approve the change, the Test stage will execute.

Clicking on the green hand will approve the change for the Test stage and start the deployment of the changes. Once complete, the execution will move onto the Production stage.

Final deployment to Production requires an external approval through ServiceNow. The ticket in ServiceNow needs to be entered on the release through the paperclip at the top of the stage. Once the ticket number is entered, the gate will periodically check the status of the ticket in ServiceNow and hold the gate execution until the ticket is approved. Once the ticket is approved, the gate will complete and the execution in the Production stage will begin.

After completion of the deployment to the Production server, the completed release will look like this.

Conclusion
This was the fifth blog for the FlexDeploy Loves OIC series and covered how to configure FlexDeploy for release automation of the OIC integration created in previous blogs in the series, building upon each one. With the completion of this blog, we have tied each of the blogs together to show an overall process of detecting changes to delivering that change to Production. In the final blog in the series, the management of shared OIC components (connections, libraries and lookups) will be covered.
Previous Post: FlexDeploy Loves OIC: Automated testing
Next Post: FlexDeploy Loves OIC: Manage Connections, Lookups and Libraries


