
In a time of heightened performance demand for businesses, Oracle’s Enterprise Performance Management (EPM) suite empowers users to strategize and shape their enterprise for optimal outcomes. This suite of tools facilitates intricate planning and dynamic modeling, fostering the bedrock for informed and impactful decisions.
As previously discussed, FlexDeploy’s EPM plugin seamlessly integrates with the EPM suite. This plugin revolutionizes the deployment process, enabling swift and efficient propagation of EPM changes across various environments within the FlexDeploy ecosystem.
In this blog, I’ll walk through how to set up a project in FlexDeploy to make deployment of EPM changes a breeze. We’ll use an example project for EPM’s Financial Consolidation and Close (FCC). However, FlexDeploy’s EPM support goes beyond just FCC into other Oracle EPM Applications including Planning, Tax Reporting, Account Reconciliation, Enterprise Data Management, Profitability and Cost Management.
This blog will walk through setting up the configuration required to successfully build/export and deploy EPM changes. In addition, we will check the changes into git to enable better visibility to the changes made with each build. We will set up FlexDeploy with three EPM environments: Development, QA and Production. Dev will be used to export files (from the build) and those files will be deployed to QA and Production.
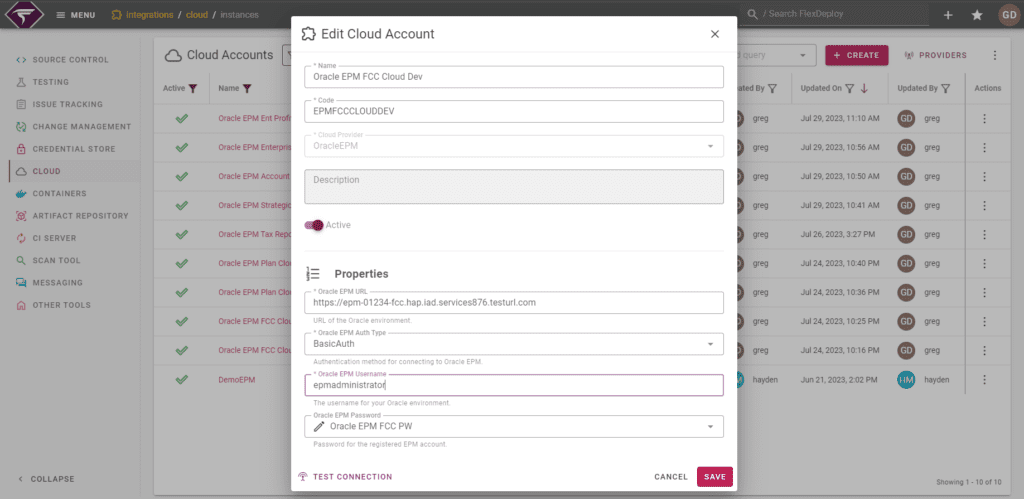
Set up Cloud Accounts
A cloud account is required for each EPM target. Create the account in the Cloud section of the Integrations Menu. The example below is for our EPM DEV account. We also set up accounts for QA and prod environments.
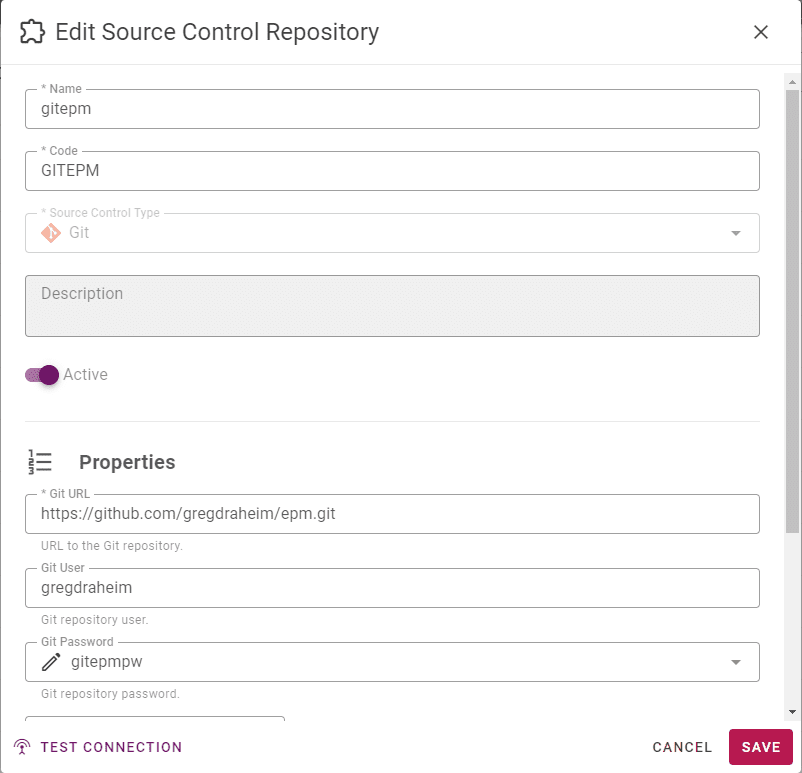
Add an Account for Git SCM
We are going to check the files into git during the build process for future reference. I added the git account as my Source Control Repository.
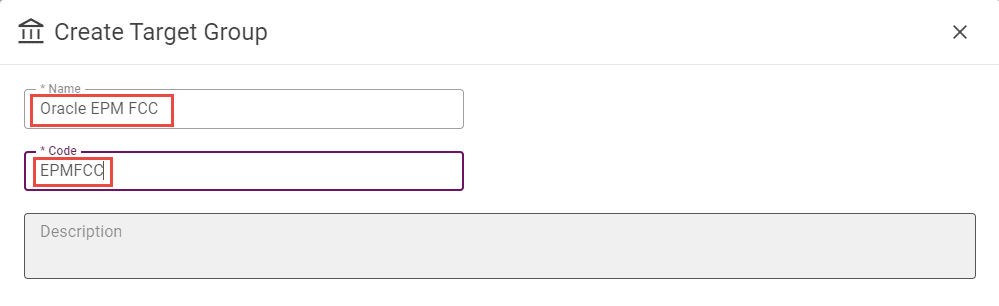
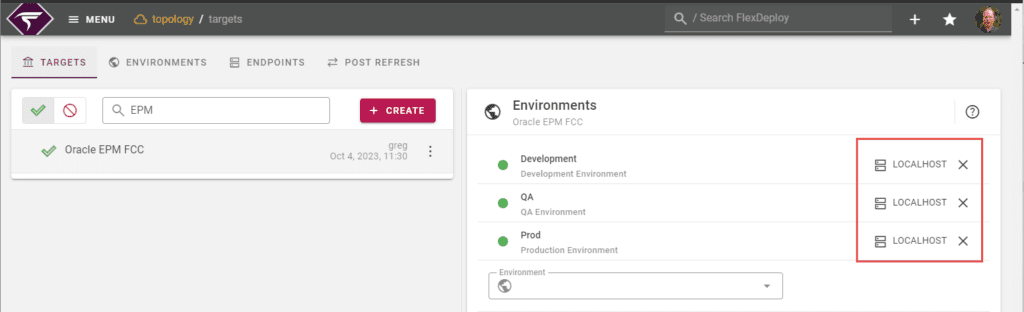
Add the Targets
Create the target Group with an appropriate name and code.
The targets are created as a localhost. We will fill in the properties later.
Create the Build Workflow
To export the files, only one step is required.

However, we also need to add steps to update git. The complete flow looks as follows:
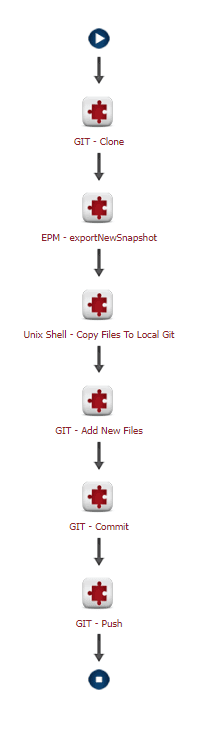
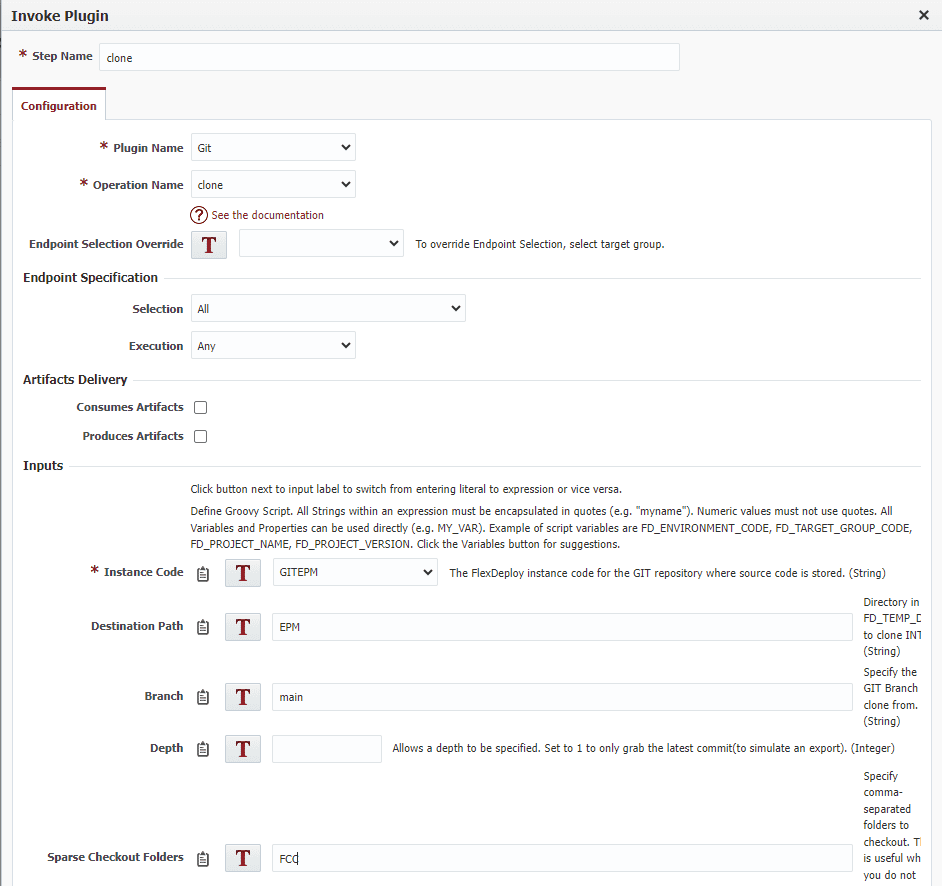
First, I added the git clone to get the current contents of the repository.
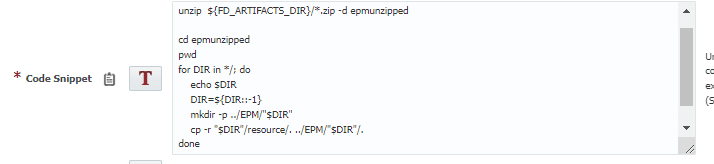
The Unix Shell step unzips the files from the snapshot and copies the EPM files, not the snapshot metadata, to the Git Repo.
The final steps in this workflow perform the git add/commit/push to update the remote repository.
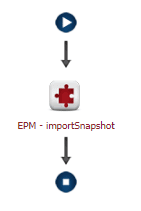
Create the Deploy Workflow
The deploy workflow is even simpler, with just a single step to import the snapshot into each target.
Create the Project
Now, we will create the project. Use a blank project to add your Oracle EPM details.
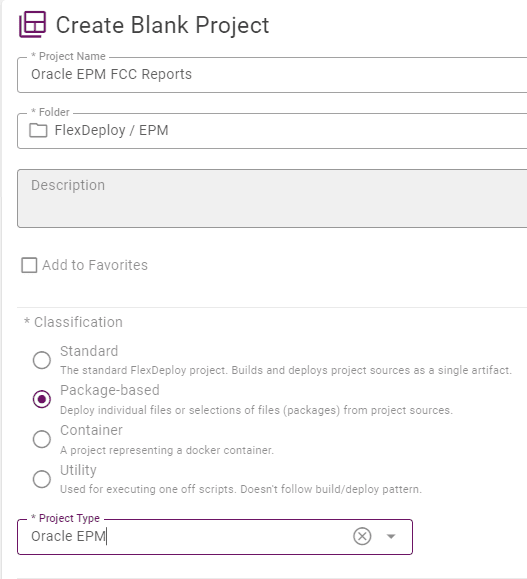
Configure the project with the build and deploy workflows and target groups previously created.
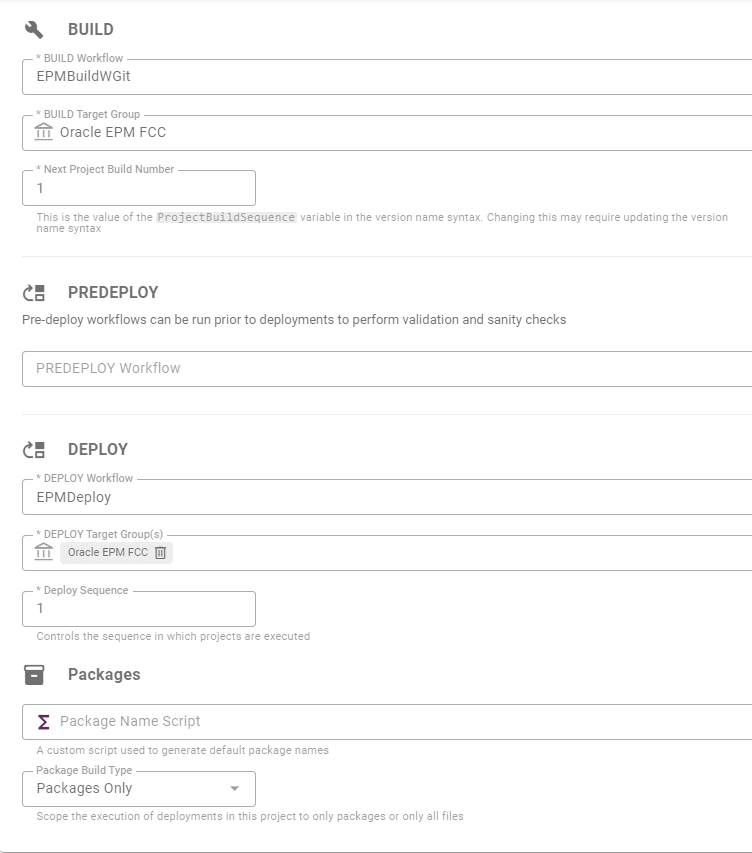
Finally, configure the project properties.

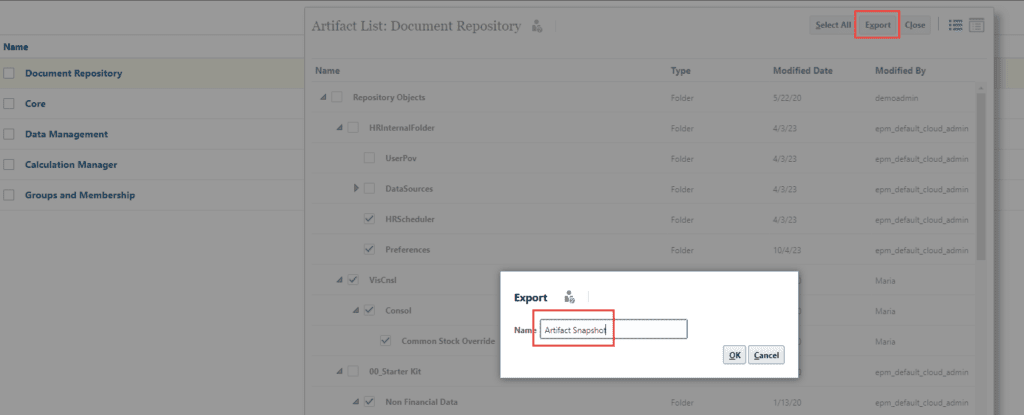
Create the Discovery Snapshot in EPM
Go to the migration capability, select the files to be available to deploy to EPM from this FlexDeploy project, and provide the name of the snapshot indicated in the property “Oracle EPM Discovery Snapshot.”
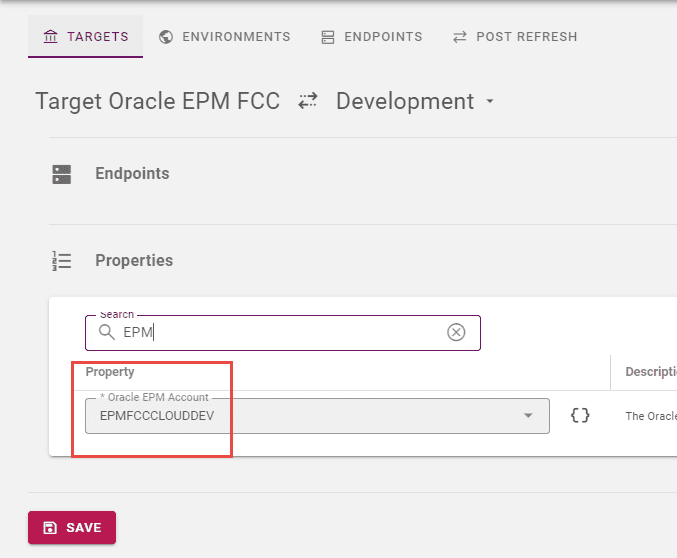
Update the Target Properties
Set the account on the target.
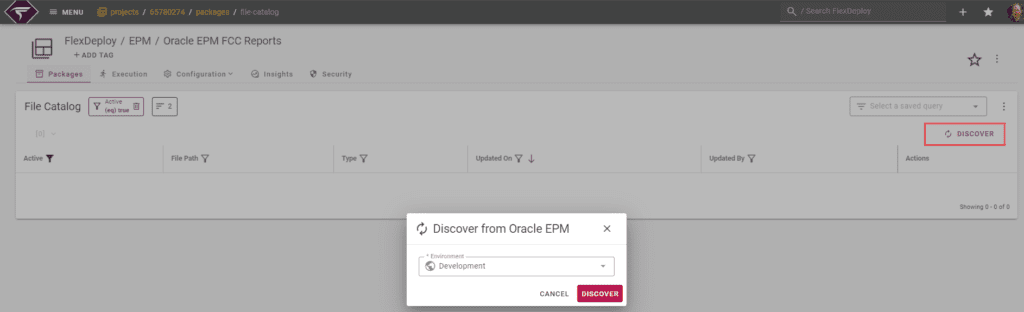
Populate the Files and Create a Package
From the File Catalogue click the Discover Link.
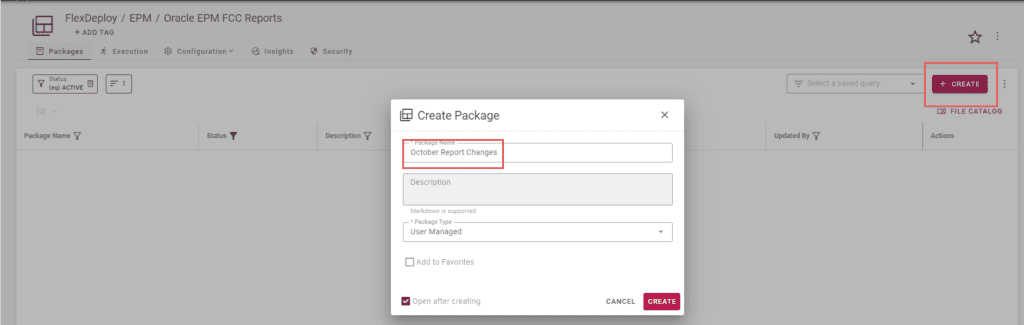
Create the package, providing a meaningful name.
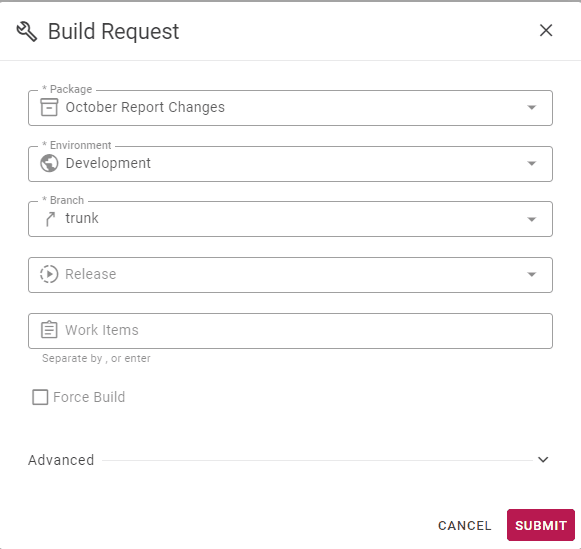
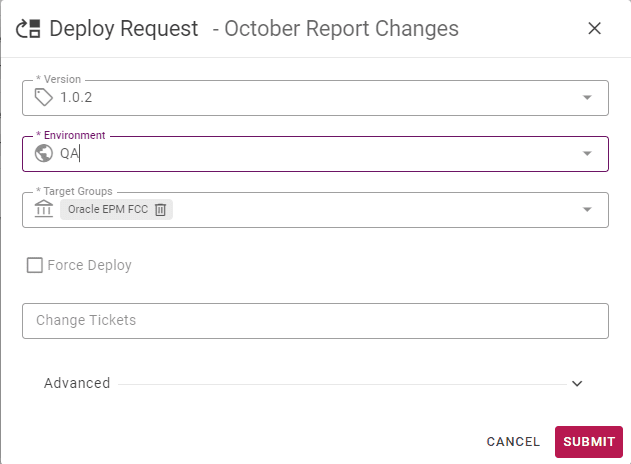
Build and Deploy
Finally, we can initiate the Build and Deploy.
And with that, you have your first EPM project set up and deploying with FlexDeploy. We started by setting up the configuration required to successfully build/export and deploy EPM changes. Next, we checked the changes into git to enable better visibility to the changes made with each build. We created three EPM environments: Development, QA and Production. Finally, we exported the files from Dev and deployed to QA and Production.
Now that the setup is complete. migrating EPM changes across environments is as easy as selecting files, a target environment, and pushing a button. Have any questions? Feel free to reach out to us in the comments.