For a long time software development processes have been using packages. A package, for all intents and purposes, is a container file. Much like a zip file, they contain other files such as binaries, source code, scripts, and also a manifest that tells users what this project package means. Some common usages of packages are to make it easier to reuse and share code or to deploy code dependencies to different projects. Often, having a formal system with packages can help expose bugs sooner, making it easier to deliver trustworthy software. FlexDeploy packages, along with other built-in continuous integration and delivery functionality, will allow for a significant increase in productivity for developers and release managers.
In this blog, we will explore the significance of package-based projects, how we can utilize project packages, and also integrating change management into the build and deployment of those packages.
Traditional vs. Package-Based Deployment Projects
In general, projects hold the artifacts that can be built and deployed as a unit. Artifacts can include anything from jar and zip files to SQL or other configurations.
It is important to first understand the difference between traditional (otherwise known as full deployment) and package-based deployment projects. The main difference for a package-based deployment project is the ability to select a subset of artifact files for build and deploy operations. Consider a technology such as Oracle EBS, Salesforce, or even a database as a use case. With these examples, we have a large system of related or unrelated files such as in EBS which can consist of hundreds or thousands of customizations, each containing dozens of object types. Similarly with a database we could have several tables, views, triggers, or scripts to manage. In either case, FlexDeploy will allow us to dynamically pick and choose which files to build and deploy and save them as packages. It is unlikely that a user would want to deploy all the files in an EBS server or a database to the production environment.
There is much more content with regards to package-based deployment projects but today we are diving into packages specifically.
Project Package
In FlexDeploy, packages simply represent a list of files. During package creation, we can define a name, description, status, and the list of files. We can name packages to describe some feature in a release or whatever makes sense for an organization. One way we could organize our packages is by a change ticket number, which we will implement later after setting up a change management system.
FlexDeploy provides a few ways to find and add files to a package:
- User can type a partial file name and click on the generated results to add a single file.
- Click the shopping cart icon which opens a popup where user can search, select and add multiple files. The user also has the option for selecting a source control revision and then it will add all files associated to that change.
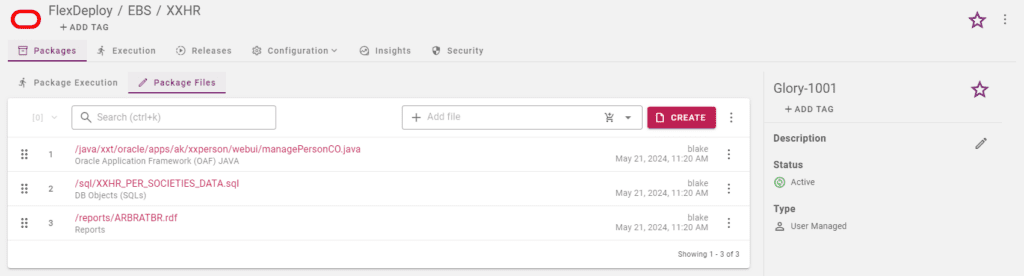
Each of these files have a type assigned to them which will determine how and where they will be deployed. In the case of our EBS project, this package contains an OAF Java, DB Object, and Report file. The logic for assigning file types and target locations are both customizable from the Project Types screen, which we cover in our blog about Custom Project Types.
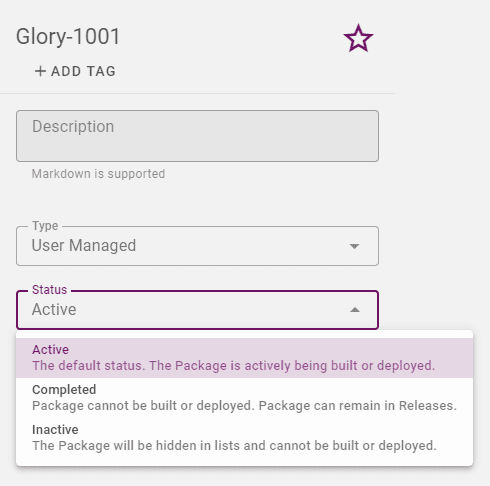
Package status is another useful functionality of which there are 3 options.
- Active – represent packages still in development and the files inside of the package are still up for change and can be built or deployed
- Inactive – represent an in between status for packages which are not of current interest but can be easily added back to development
- Completed – represent packages that cannot be changed, built, or deployed

Once a package is created we have access to one other feature related to build and deployments on the packages screen.
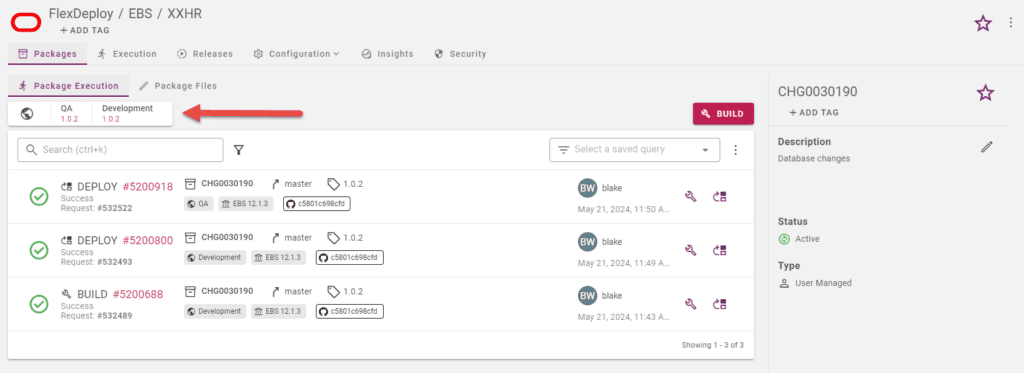
While viewing a package, the “Package Execution” tab shows all workflow executions associated with this package. Above the executions list is a box that will display the latest project version deployed to specific environments. For now it says “No Deployments” since we have not run anything yet.
Setting up Change Management
Let’s set up a change management system (CMS) with ServiceNow that will integrate with our packages. We will use change tickets generated by ServiceNow to define the manifest for our packages. First we need to define a ServiceNow instance.

The CMS instance we created can now be referenced by a folder in an approval, which can either inherit from its parent folder or be overridden. Keep in mind that approval configurations at the folder level will apply to all projects beneath it. We will create a new approval in the EBS folder which our project is located in.
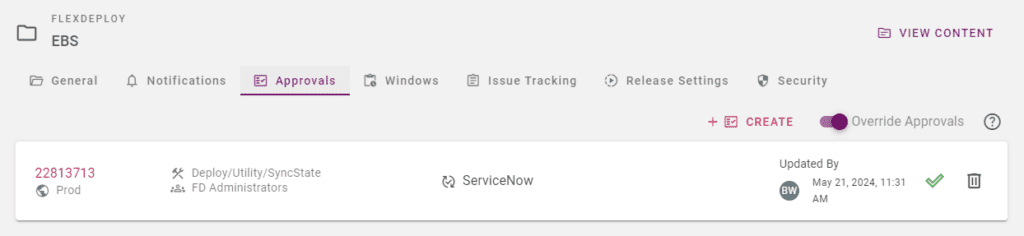
This approval is saying that whenever a project is deployed to the Production environment we need approval on our ServiceNow instance or we would need a user in the FD Administrators groups to override it in FlexDeploy. Now we are ready to submit a build and deployment with packages.
This paper compares FlexDeploy to other commercial and open-source DevOps and Application Release Automation solutions.
Packages by Change Ticket
At this point say a couple change tickets were created in our ServiceNow instance. We will skip the creation of those tickets in ServiceNow because we have an existing blog article that talks about Lifecycle management with ServiceNow.

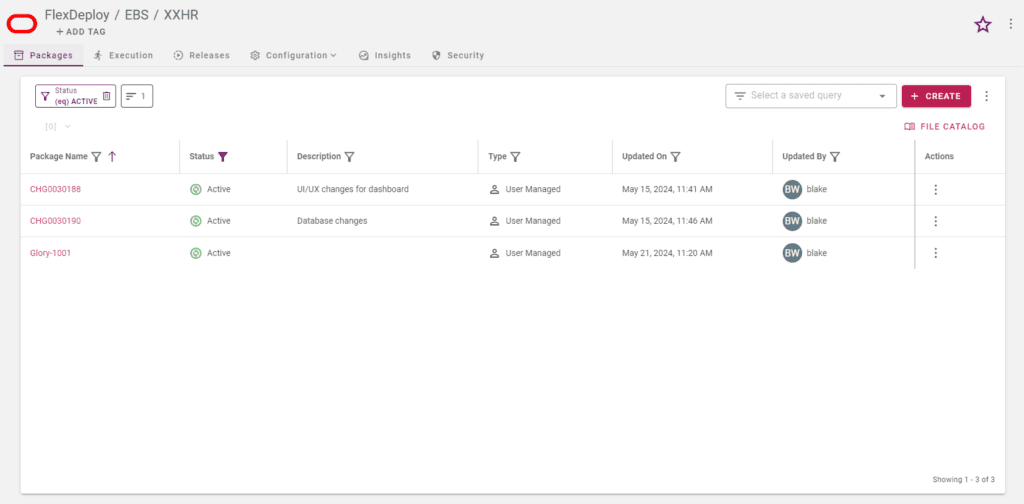
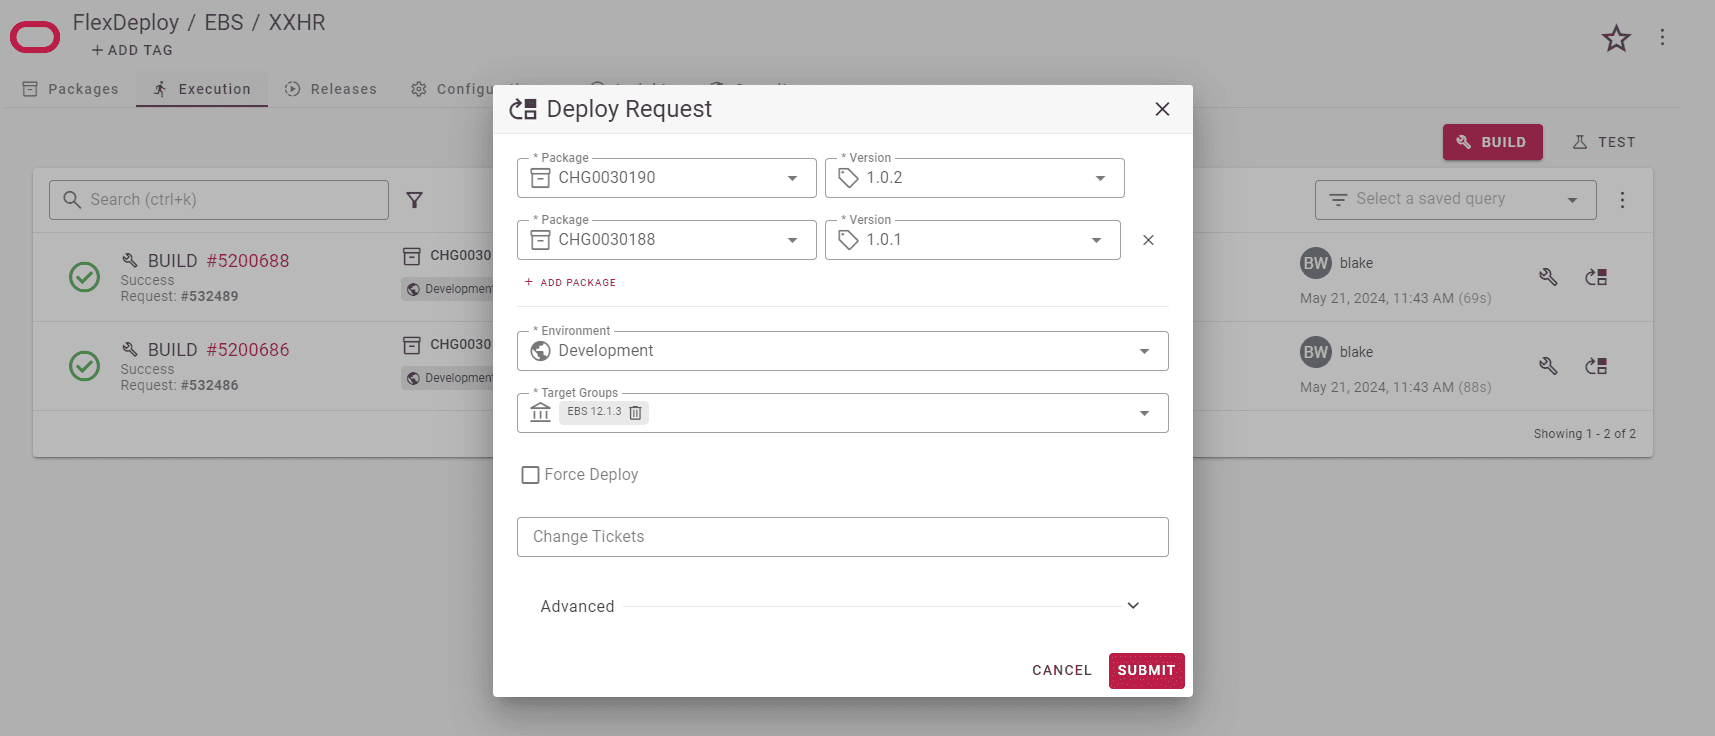
In our example, the change ticket numbers generated are CHG0030190 and CHG0030188. Notice that the second change is approved already because it is in an Implement state. Let’s go back to FlexDeploy and create packages to reflect the change ticket numbers. We’ll see why this is useful later.
Now by definition everything contained inside our packages will relate to the change request and we don’t need to drill into the details of the files to understand what the package is for. At this point, we can run builds on our packages by selecting the package name on the build request form. This will create a new project version for each package that we build.
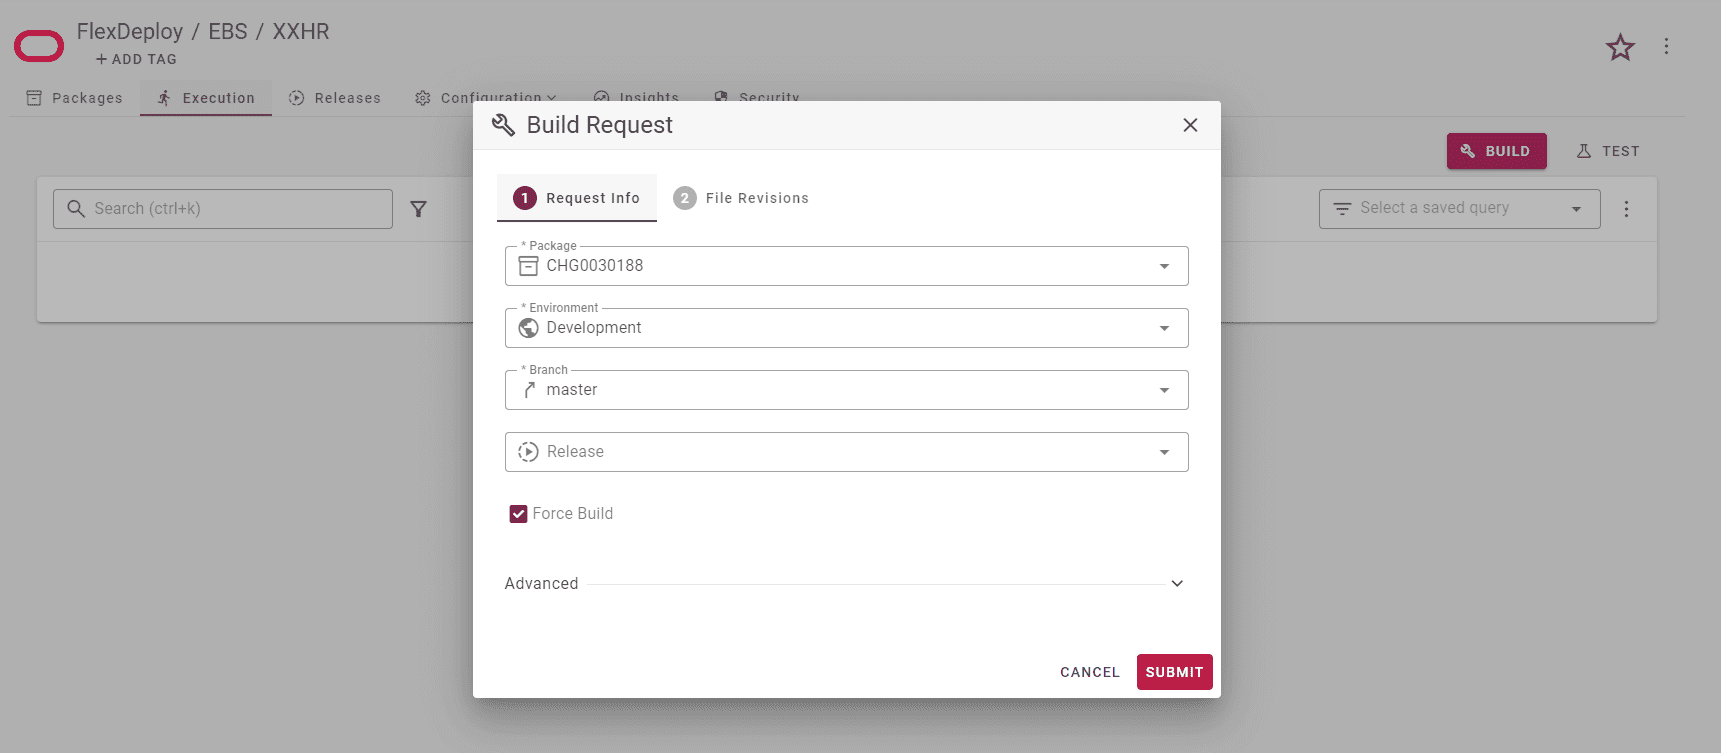
Let’s deploy both of these versions to the “Development” environment and then run a few more builds and deploy to some other environments except for Prod.
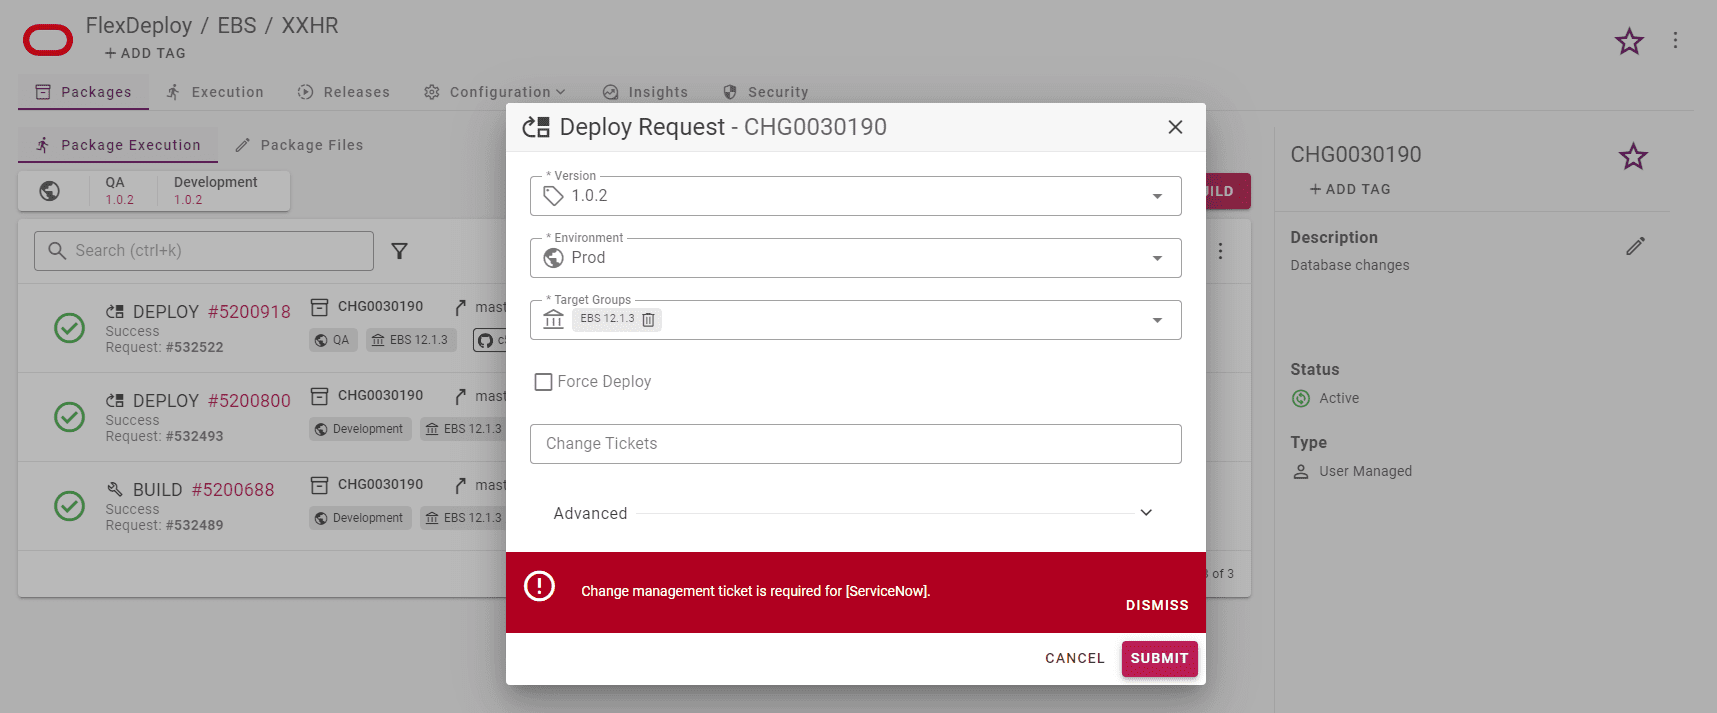
Now we can see that this package has been iterating new versions and those may be deployed to different environments at the same time. At this point, let say both our packages are ready to deploy to Production environment. Recall that we set an external approval on the Prod environment. Let’s go ahead and send deployment requests to Prod for both packages to see the implications of our approval. Notice that the “Change Tickets” field will now be required.
If we attempt to enter an invalid change ticket number then the deployment will fail with an appropriate error message.
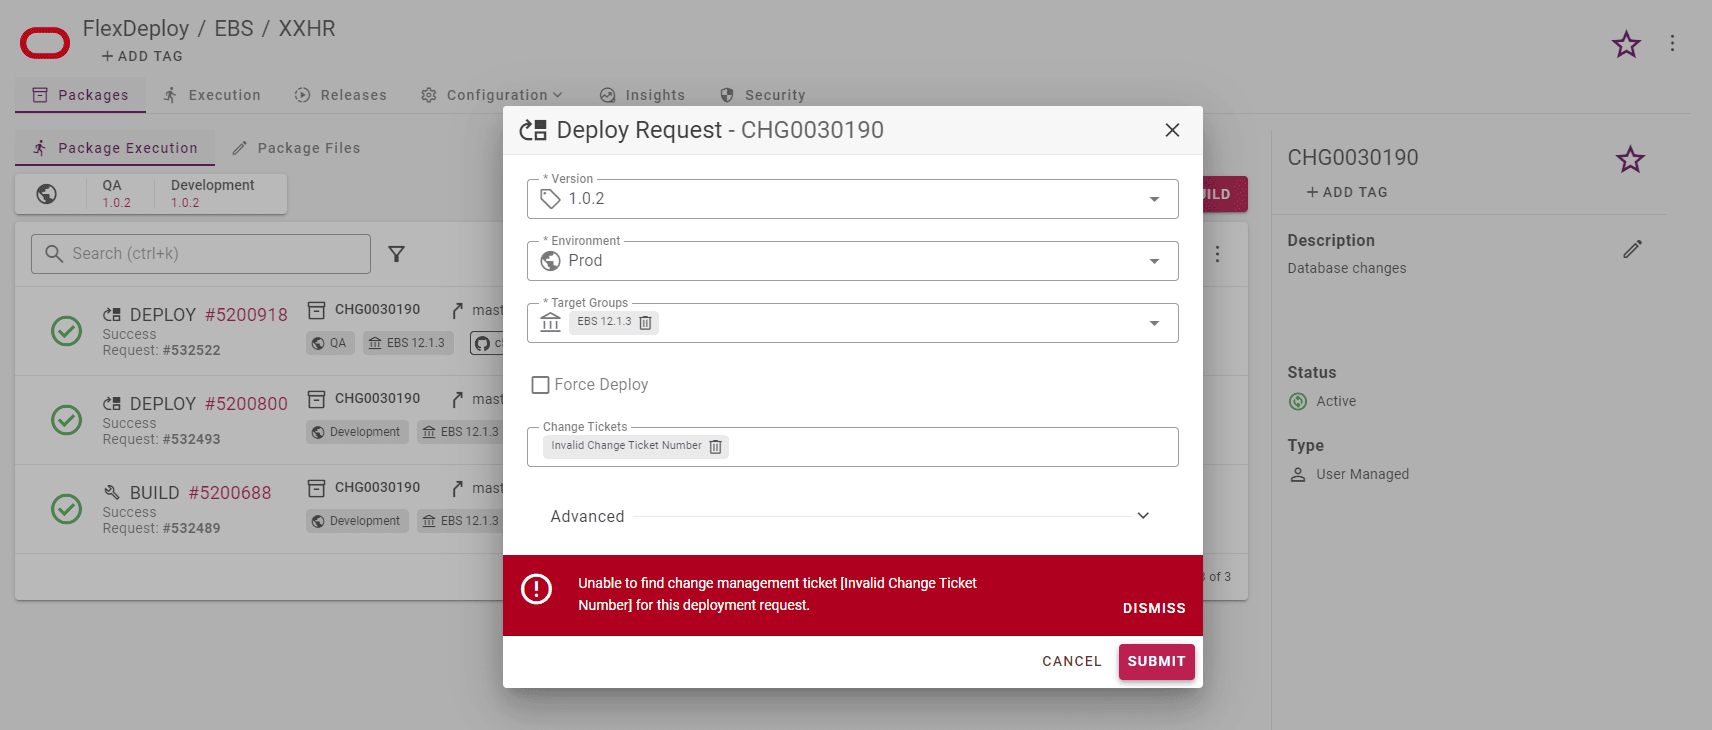
Luckily, due to the convention we followed for the package name we can simply copy and paste the correct change ticket number from the name displayed at the top of the request form. In the example above the correct related ticket would be “CHG0030190”. The same process would be repeated for “CHG0030188”.
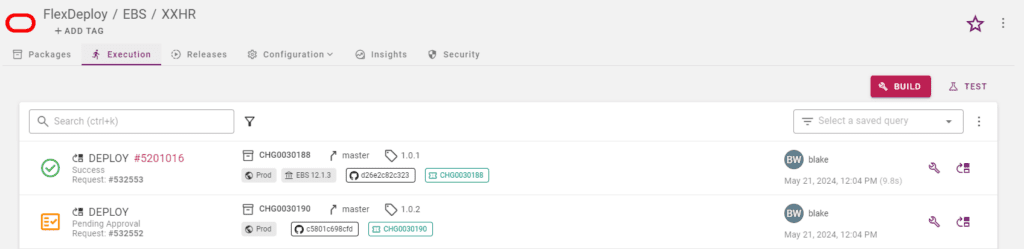
Deployment to Prod environment for CHG0030188 immediately went through because it was already approved in ServiceNow. On the other hand, CHG0030190 is waiting at a “Pending Approval” gate until it gets approved or rejected in ServiceNow. Or a member of the FD Administrator group can also approve or reject the pending approval.
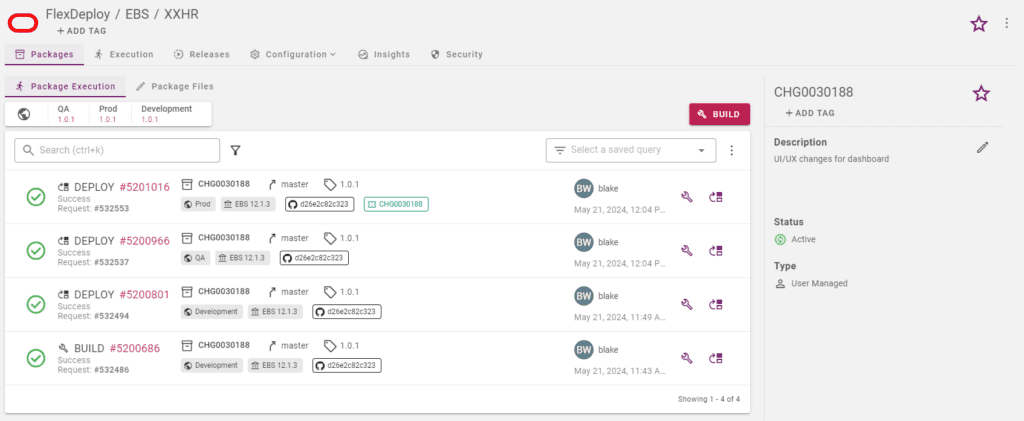
Here is one final look at the package screen to see the state of our builds and deployments at the project level. On a last note, if desired, we could set the status of the CHG0030188 package to “Completed” because the changes for that feature have been pushed to Production. That means no more files can be added or removed from the package and build or deployment requests are not possible for that package.
Conclusion
In this blog article, we were able to show FlexDeploy as tool for organizing your development into change ticket based packages. Configuration of change management system was a one-time action. The package screen gives us insight into most relevant build and deployment execution information without having to search through the full workflow execution list. In general, packages offer great flexibility when organizing your artifact files.